


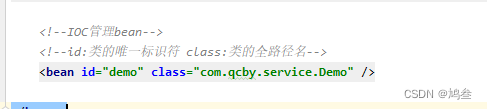
(1).什么是Bean个管理
bean管理指的是如下的两个操作。
1.创建对象
2.注入属性
(2).Bean管理操作的两种方式
1.基于xml配置文件的方式实现
2.基于注解方式实现
(3).基于xml配置文件的方式实现Bean管理和注入属性
1.基于xml方式创建对象
①:这个就是我们上边配置过
②:创建对象的时候,默认是执行无参构造方法完成对象
2.基于xml方式注入属性
依赖注入的概述
IOC和DI的概念
IOC:Inverse of Control,控制反转,将对象的创建权反转给Spring!!
DI:Dependency Injection,依赖注入,就是注入属性
属性的set方法注入值
编写属性,提供该属性对应的set方法,编写配置文件完成属性值的注入
public class User {
    // 编写成员属性,一定需要提供该属性的set方法
    //IOC容器底层就通过属性的set方法方式注入值
    private int age;
    private String name;
    private Demo demo;

    public void setAge(int age) {
        this.age = age;
    }

    public void setName(String name) {
        this.name = name;
    }

    public void setDemo(Demo demo) {
        this.demo = demo;
    }

    @Override
    public String toString() {
        return "User{" +
                "age=" + age +
                ", name='" + name + '\'' +
                ", demo=" + demo +
                '}';
    }
}
<!‐‐DI:依赖注入‐‐>
<bean id="user" class="com.qcby.service.User" >
    <!--使用property完成属性注入
        name:类里面属性名称
        value:向属性注入值
        ref:对象映射-->
    <property name="age" value="18"></property>
    <property name="name" value="张三"></property>
    <property name="demo" ref="demo"></property>
</bean>

<bean id="demo" class="com.qcby.service.Demo" />
@Test
public void run1(){
    //创建spring工厂,加载配置文件
    ApplicationContext ac = new ClassPathXmlApplicationContext("ApplicationContext.xml");
    //获取bean对象
    User user = ac.getBean("user", User.class);

    System.out.println(user.toString());

}
属性构造方法方式注入值
对于类成员变量,构造函数注入。
public class Car {
    // 名称
    private String cname;
    // 金额
    private Double money;

    public Car(String cname,Double money){
        this.cname = cname;
        this.money = money;
    }

    @Override
    public String toString() {
        return "Car{" +
                "cname='" + cname + '\'' +
                ", money=" + money +
                '}';
    }
}
<bean id="car" class="com.qcby.service.Car">
    <constructor-arg name="cname" value="奔驰"></constructor-arg>
    <constructor-arg name="money" value="35"></constructor-arg>
</bean>
@Test
public void run(){
    //创建spring工厂,加载配置文件
    ApplicationContext ac = new ClassPathXmlApplicationContext("ApplicationContext.xml");
    //获取bean对象
    Car car = ac.getBean("car", Car.class);
    System.out.println(car.toString());
}
数组,集合(List,Set,Map)等的注入
public class CollectionBean {

    private String [] strs;
    private List<String> list;
    private Map<String,String> map;

    public void setStrs(String[] strs) {
        this.strs = strs;
    }

    public void setList(List<String> list) {
        this.list = list;
    }

    public void setMap(Map<String, String> map) {
        this.map = map;
    }

    @Override
    public String toString() {
        return "CollectionBean{" +
                "strs=" + Arrays.toString(strs) +
                ", list=" + list +
                ", map=" + map +
                '}';
    }
}
<!‐‐给集合属性注入值‐‐>
<bean id="collectionBean" class="com.qcby.service.CollectionBean">
    <property name="strs">
        <array>
            <value>美美</value>
            <value>小凤</value>
        </array>
    </property>
    <property name="list">
        <list>
            <value>熊大</value>
            <value>熊二</value>
        </list>
    </property>
    <property name="map">
        <map>
            <entry key="aaa" value="老王"/>
            <entry key="bbb" value="小王"/>
        </map>
    </property>
</bean>
@Test
public void getValue(){
    ApplicationContext applicationContext = new ClassPathXmlApplicationContext("applicationContext.xml");
    Demo demo = (Demo) applicationContext.getBean("demo");
    System.out.println(demo.toString());
}
(4).基于注解的方式实现Bean管理和注入属性
1.什么是注解
①:注解是代码特殊标记,格式:@注解名称(属性名称=属性值,属性名称=属性值…)
②:使用注解,注解作用在类上面,方法上面,属性上边
③:使用注解的目的:简化XML配置
2.Spring针对Bean管理中创建对象提供的注解
@Component 普通的类
@Controller 表现层
@Service 业务层
@Repository 持久层
*上边四个功能一样,都可以用来创建bean实例
3.用注解的方式创建对象
①:编写接口和实现类
package com.qcby.testanno;

public interface UserService {
    public void hello();
}
②:在需要管理的类上添加@Component注解
package com.qcby.testanno;

import org.springframework.stereotype.Component;

/* <bean id="us" class="UserServiceImpl"/> */
/**
 * 组件,作用:把当前类使用IOC容器进行管理,如果没有指定名称,默认使用类名,首字母是小写。
 * userServiceImpl。或者自己指定名称
 **/
@Controller(value="us")
public class UserServiceImpl implements UserService {
    public void hello() {
        System.out.println("使用注解,方便吧!");
    }
}
③:编写配置文件,重点是开启注解扫描。
<?xml version="1.0" encoding="UTF-8"?>
<beans xmlns="http://www.springframework.org/schema/beans"
       xmlns:xsi="http://www.w3.org/2001/XMLSchema-instance"
       xmlns:context="http://www.springframework.org/schema/context" xsi:schemaLocation="
http://www.springframework.org/schema/beans
http://www.springframework.org/schema/beans/spring-beans.xsd
http://www.springframework.org/schema/context
http://www.springframework.org/schema/context/spring-context.xsd">

    <!--开启注解扫描 com.qcby所有的包中的所有的类-->
    <context:component-scan base-package="com.qcby"/>
</beans>
编写测试方法
import com.qcby.testanno.UserService;
import org.junit.Test;
import org.springframework.context.support.ClassPathXmlApplicationContext;

public class Demo2 {
    @Test
    public void run1(){
        ClassPathXmlApplicationContext ac = new ClassPathXmlApplicationContext("ApplicationContextanno.xml");
        UserService us = (UserService) ac.getBean("us");
        us.hello();
    }
}
4.用注解的方实现属性注入
@Value 用于注入普通类型(String,int,double等类型)
@Autowired 默认按类型进行自动装配(引用类型)
@Qualifier 不能单独使用必须和@Autowired一起使用,强制使用名称注入
@Resource Java提供的注解,也被支持。使用name属性,按名称注入
具体的代码如下
// 默认当前类名就是ID名称,首字母小写
@Component(value = "c")
// @Controller
// @Service(value = "c")
// @Repository(valu = "c")
public class Car {
    // 注解注入值,属性set方法是可以省略不写的。
    // 只有一个属性,属性的名称是value,value是可以省略不写的
    @Value("大奔2")
    private String cname;
    @Value(value = "400000")
    private Double money;
    // 也不用提供set方法
    // 按类型自动装配的注解,和id名称没有关系

    @Autowired
    // 按id的名称注入,Qualifier不能单独使用,需要Autowired一起使用。
    // @Qualifier(value = "person")
    // @Resource Java提供的注解,按名称注入对象,属性名称是name
    // @Resource(name = "person")
    private Person person;


    @Override
    public String toString() {
        return "Car{" +
                "cname='" + cname + '\'' +
                ", money=" + money +
                ", person=" + person +
                '}';
    }

}
@Controller
//@Component(value = "person")
public class Person {

    @Value("张三")
    private String pname;
    @Override
    public String toString() {
        return "Person{" +
                "pname='" + pname + '\'' +
                '}';
    }

}
@Test
public void run1(){
    // 工厂
    ApplicationContext ac = new
            ClassPathXmlApplicationContext("applicationContext.xml");
    // 获取对象
    Car car = (Car) ac.getBean("c");
    System.out.println(car);
}
(5). IOC纯注解的方式
纯注解的方式是微服务架构开发的主要方式,所以也是非常的重要。纯注解的目的是替换掉所有的配置文件。但是需要编写配置类。
常用的注解总结
@Configuration 声明是配置类
@ComponentScan 扫描具体包结构的
编写实体类
@Component
public class Order {
    @Value("北京")
    private String address;
    @Override
    public String toString() {
        return "Order{" +
                "address='" + address + '\'' +
                '}';
    }
}
编写配置类,替换掉applicationContext.xml配置文件
@Configuration
// 扫描指定的包结构
@ComponentScan(value = "com.qcby")
public class SpringConfig {
}
测试方法的编写
import com.qcby.demo4.Order;
import com.qcby.demo4.SpringConfig;
import org.junit.Test;
import org.springframework.context.ApplicationContext;
import org.springframework.context.annotation.AnnotationConfigApplicationContext;

public class Demo4 {
    @Test
    public void run(){
        // 创建工厂,加载配置类
        ApplicationContext ac = new AnnotationConfigApplicationContext(SpringConfig.class);
        // 获取到对象
        Order order = (Order) ac.getBean("order");
        System.out.println(order);
    }
}


 2245
2245


 被折叠的 条评论
为什么被折叠?
被折叠的 条评论
为什么被折叠?
 到【灌水乐园】发言


