


搭建vue项目 + 各种安装包详解
前期准备及基础实现
使用webStorm软件新建项目前的准备工作及基础实现,详情戳 ==> :用webstorm搭建vue项目
注意的点: 项目名中不能包含大写字母。
后期完善
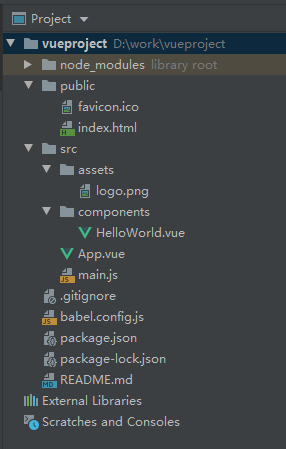
按照上述教程搭建的项目是最基础的一个项目框架,包含的内容如下图所示:
但是一个真正的项目所需的基础内容远不止那些,

1. 主要文件内容:
1.1 main.js文件:
import Vue from 'vue'
import store from './store' // vuex
import VueBus from 'vue-bus'; // vue-bus
import App from './App.vue'
import ElementUI from 'element-ui'// element
import 'element-ui/lib/theme-chalk/index.css'//element样式文件
import Antd from 'ant-design-vue';
import 'ant-design-vue/dist/antd.css';

import router from './router' // 路由
import './apiWay' // axios的提交方式(get、post、file.......)
import "./assets/iconfont/iconfont.css" // iconfont图标样式
import vueCropper from 'vue-cropper'// 图片剪裁
import "./assets/css/common.scss" // 自定义公共样式
import utils from "./assets/js/utils" //引入公用方法
import validation from "./assets/js/validation" // 引入自定义验证
import './mock' // mock数据

Vue.config.productionTip = false;
Vue.use(ElementUI);
Vue.use(Antd);
Vue.use(utils);
Vue.use(validation);
Vue.use(VueBus);
Vue.use(vueCropper);

new Vue({
  router,
  store,
  render: h => h(App),
}).$mount('#app');
需要注意的是ant-design-vue最好单独引入,否则会导致项目运行很慢,电脑很卡!!!
import { Table } from 'ant-design-vue'//ant-design-vue
import 'ant-design-vue/lib/table/style/css' // 加载 ant-design table CSS

Vue.use(Table);
1.2 vue.config.js文件:
// vue.config.js  定制主题使用
const hostUrl = "106.52.186.37"; //服务器
// nginx映射的文件路径 http://106.52.186.37:8083/
const HOST = {
	'anyu': 'http://' + hostUrl + ':10010',
	'file': 'http://106.52.186.37:8083/'
}

module.exports = {
	devServer: {
		port: 8080,
		proxy: {
			'/api/anyu': {
				target: HOST['anyu'] + '/api/',
				pathRewrite: {
					'^/api': ''
				},
				ws: false,
				logLevel: "debug",
				changeOrigin: true
			}
		}
	},
	// 配置自定义环境变量
	chainWebpack: config => {
		config.plugin('define').tap(args => {
			args[0]["process.env"].VUE_APP_HOST = JSON.stringify(HOST);
			return args
		})
	},
	// 配置地图
	configureWebpack:{
		externals:{
			'BMap': 'BMap',
			'BMap_Symbol_SHAPE_POINT':'BMap_Symbol_SHAPE_POINT'
		}
	}
}
1.3 ./router/index.js文件:
import Vue from 'vue'
import VueRouter from 'vue-router'

Vue.use(VueRouter);

const routes = [{
        path: '/',
        name: 'Login',
        component: () => import('@/views/Login.vue')
    },
    {
        path: '/login',
        name: 'Login1',
        component: () => import('../views/Login.vue')
    },
    // 父级路由
    {
        path: "/index",
        // name: "pageSet.md",
        component: () => import("@/views/Index.vue"),
        children: [
            // 默认欢迎页面
            {
                path: "/",
                name: "welcome",
                component: () => import("@/views/Welcome.vue"),
            },
            // 欢迎页面
            {
                path: "welcome",
                name: "welcome1",
                component: () => import("@/views/Welcome.vue"),
            },
        ]
    }
]

const router = new VueRouter({
    routes
})
/* 避免到当前位置的冗余导航 */
const originalPush = VueRouter.prototype.push;
VueRouter.prototype.push = function push(location) {
    return originalPush.call(this, location).catch(err => err)
}

export default router
1.4 ./mock/index.js
import Mock from 'mockjs'

// 仅用于配置 Ajax 请求
Mock.setup({
  timeout: '300-600'
})

// 登录拦截
Mock.mock('login', 'post', function () {
    return{
        "httpStatus":200,
        "message":"登录成功"
    }
});

export default Mock
1.5 ./apiWay/index.js
import Vue from 'vue'
import axios from 'axios'
import router from "../router"

const instance = axios.create();

instance.interceptors.response.use(
    (res) => {
        // !res.data.hasOwnProperty("httpStatus") 头像接口
        // 200正常接口
        if (res.data.httpStatus == 200 || !Object.prototype.hasOwnProperty.call(res.data, 'httpStatus')) {
            return res
        }
        res.data.message && Vue.prototype.$message.error(res.data.message)
        return Promise.reject(res)
    },
    (err) => {
        if (err.response.status && err.response.status == 403) {
            window.localStorage.removeItem("rtoken")
            router.push("/login")
        }
        return Promise.reject(err.response)
    }
);

/* 请求mock数据 */
const mock = (url, data = {}) => {
    let method = data.method || "post";
    delete data.method;

    return instance({
        // url: "/api/" + url,
        url: url,
        data: data,
        method: method,
        headers: {
            "rtoken": localStorage.getItem("rtoken"),
            "client": "managerAy",
            "Content-Type": "application/json;charset=UTF-8",
        }
    })
};

Vue.prototype.$api = {
    mock,
};
需要注意的是: 要是想走mock数据接口,需要将请求参数中的url: "/api/" + url,变为url: url,;之所以写url: "/api/" + url,是因为请求后台数据接口要求需要在接口前带/api/。
2. 安装包。
由上述文件内容可知:
2.1 安装element-ui 和 ant-design-vue
推荐使用 npm 的方式安装,它能更好地和 webpack 打包工具配合使用。
npm i element-ui -S
npm install --save ant-design-vue
2.2 安装vue-router
npm install vue-router --save
更详细的讲解请戳:vue-router的安装和使用
2.3 安装axios和mockjs
npm install axios --save
npm install mockjs --save-dev
更详细的讲解请戳:在vue-lic脚手架中安装mockjs,实现前后端分离开发
2.4 安装vuex
npm install vuex --save
更详细的讲解请戳:Vuex官方文档
2.5 安装less 和 less-loader
npm install less less-loader --save-dev
完成less安装后,代码一运行就报错
原因:vue版本过低导致报错;解决方法:尝试将less和less-loader的版本降低。
npm install less@3.9.0 -s
npm install less-loader@5.0.0 -s
再次运行,成功!
2.6 安装sass 和 sass-loader
npm install sass sass-loader --save-dev
安装完成后,运行时出现了如下的错误:
Modele build failed: TypeError: this.getResolve is not a function at Object.loader...
原因:
因为当前sass的版本太高,webpack编译时出现了错误,这个时候只需要换成低版本的就行。
解决方法:
方法一:
找到package.json文件,里面的 "sass-loader"的版本更换掉 就行了。
将 "sass-loader": "^8.0.0",更换成了 "sass-loader": "^7.3.1",
这时候重新跑项目,就运行成功了。
方法二:
也可以先卸载当前版本,然后安装指定的版本
npm uninstall sass-loader  //卸载当前版本
npm install sass-loader@7.3.1 --save-dev   //安装
更详细的讲解请戳:Module build failed: TypeError: this.getResolve is not a function at Object.loader 安装node-sass运行报错
2.7 安装vue-bus
yarn add vue-bus
npm install vue-bus --save
2.8 安装vue-cropper
npm install vue-cropper --save
需要注意的是:加 --save 就可以让项目中的其他人不用再使用此命令安装一次了,即其他人在拉取项目的时候就将安装包自动保存了。


 1万+
1万+


 被折叠的 条评论
为什么被折叠?
被折叠的 条评论
为什么被折叠?
 到【灌水乐园】发言


