


- 下载相关软件
Eclipse下载地址:http://www.eclipse.org/downloads/
JRE下载地址:http://www.java.com/zh_CN/download/manual.jsp
PyDev下载地址: http://sourceforge.net/projects/pydev/
Python下载地址:http://www.python.org/getit/
PyQt4下载地址:http://www.riverbankcomputing.co.uk/software/pyqt/download
- 安装jre、Python、PyQt,安装采用默认设置,一路点Next即可
操作系统为:Windows 7 旗舰版 64bit
软件版本如下:
jre-8u101-windows-x64.exe
python-3.4.1.amd64.msi
PyQt4-4.11.4-gpl-Py3.4-Qt4.8.7-x64.exe
- 解压缩Eclipse以及PyDev压缩包
3.1 将Eclipse压缩包(eclipse-jee-indigo-SR1-win32-x86_64.zip)解压至某个文件夹(c:\eclipse)
3.2 pyDev安装:通过update site安装
Installing with the update site
Note: Instructions are targeted at Eclipse 3.5 onwards
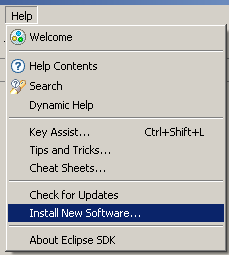
To install PyDev and PyDev Extensions using the Eclipse Update Manager, you need to use the Help > Install New Software… menu (note that in older versions, this would be the ‘Find and Install’ menu).
In the next screen, add the update site(s) you want to work with ( See below for a list with the available update sites).
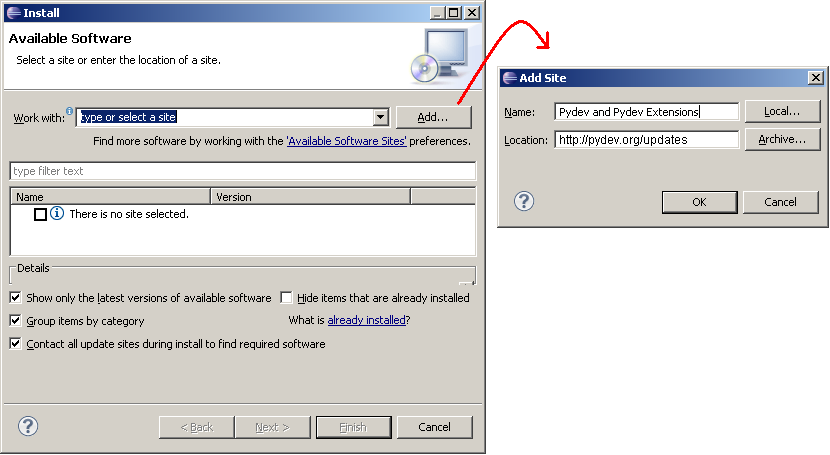
Available update sites
Main:
http://pydev.org/updates
Nightly builds:
http://pydev.org/nightly
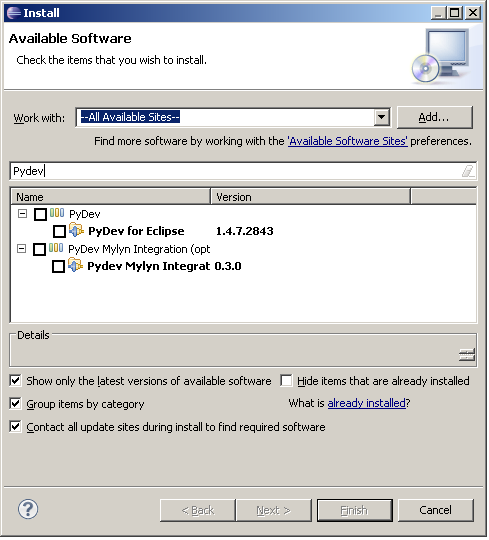
After entering the update sites, select the update site you entered or select “All available sites” and add a filter for PyDev, so that it shows the contents of all the update sites that have PyDev, then select what you want to install and click ‘Next’.
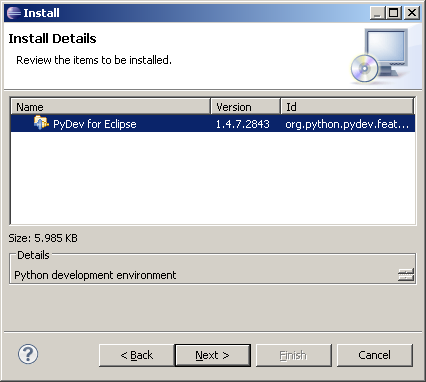
Then, UNCHECK the ‘Contact all update sites during install to find required software’ and press ‘Next’ again to confirm your selection.
And finally, read the license agreement and if you accept, select the accept radio button and click ‘Finish’.

At that point, Eclipse should automatically download the plugin contents and present you to a dialog asking if you want to restart (to which you should say yes).
- 配置Eclipse
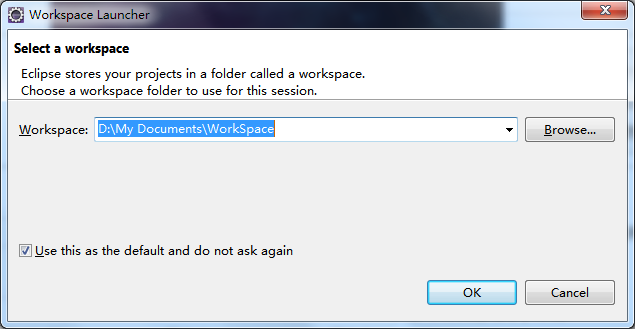
4.1 打开eclipse.exe,第一次需配置workspace路径
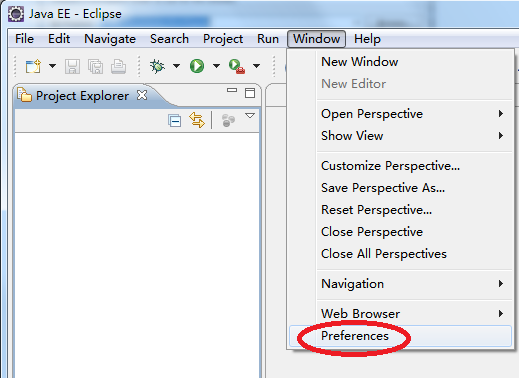
4.2 选择window –> Preferences
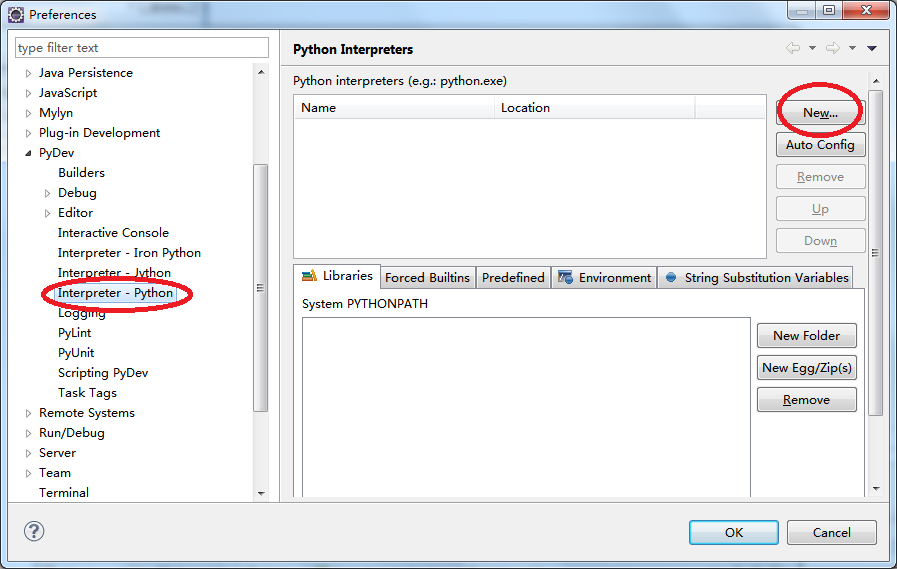
4.3 在弹出的对话框中选择PyDev –> Interpreter - Python,点击按钮”New…“
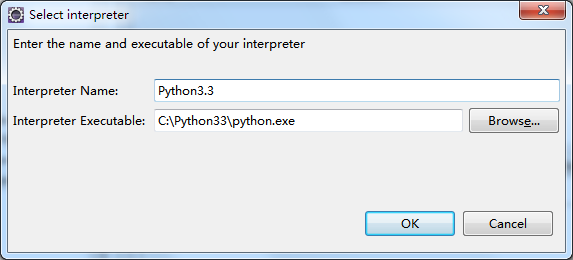
4.4 输入Python解释器的名称与python.exe地址,点OK确定
4.5 选择”Select All”, 点OK确认
4.6 点击”Forced Builtins“,选择”New…“
4.7 输入”PyQt4”,点确定
4.8 确定Forced Builtins里有PyQt4后,点OK
- 新建一个PyDev Project
5.1 鼠标右键选择New –> Project
5.2 选择PyDev –> PyDev Project, 点Next
5.3 填入Project Name,选择Grammar Version –> 3.0,选择Interpreter –> Python3.3,点Finish
- 编写测试代码
6.1 在src文件夹右键New –> PyDev Module新建一个Python Module
6.2 输入module名字,点Finish
6.3 测试Python
测试代码:
print(“hello world”)
点击绿色run按钮执行
Console栏输出正常即OK
6.4 测试PyQt4
测试代码:
from PyQt4 import QtGui
import sys
app = QtGui.QApplication(sys.argv)
button = QtGui.QPushButton(‘button’)
button.show()
sys.exit(app.exec_())
点击绿色run按钮执行
有button窗口弹出即OK


 521
521

 被折叠的 条评论
为什么被折叠?
被折叠的 条评论
为什么被折叠?
 到【灌水乐园】发言


