


自定义组件,为了实现一些基本组件无法满足的需求效果。
标题栏是所有应用中必备的,常见形式有多种,但总体来说左右中基本满足大部分情况,所谓的左右中指的是标题栏左右中三个部位各有一个组件。
// 继承相对布局
public class TopTitleBarView extends RelativeLayout {}
继承之后是报错的,需要写构造函数,我遇到两种情况,如下图
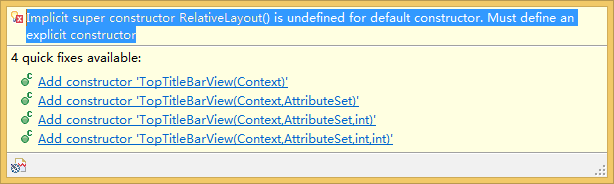
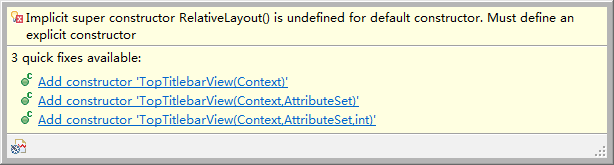
一种提示四个,一种提示三个为什么呢?求指点。小插曲,继续主题。
// 相对布局源码
public RelativeLayout(Context context) {
    this(context, null);
}

public RelativeLayout(Context context, AttributeSet attrs) {
    this(context, attrs, 0);
}

public RelativeLayout(Context context, AttributeSet attrs, int defStyleAttr) {
    this(context, attrs, defStyleAttr, 0);
}

public RelativeLayout(Context context, AttributeSet attrs, int defStyleAttr, int defStyleRes) {
    super(context, attrs, defStyleAttr, defStyleRes);
    initFromAttributes(context, attrs, defStyleAttr, defStyleRes);
    queryCompatibilityModes(context);
}
看看这些参数都是什么意思
  // View 对这几个参数的解释
  @param context The Context the view is running in, through which it canaccess the current theme, resources, etc.
  @param attrs The attributes of the XML tag that is inflating the view.
  @param defStyleAttr An attribute in the current theme that contains a reference to a style resource that supplies default values for the view. Can be 0 to not look for defaults.
  @param defStyleRes A resource identifier of a style resource that supplies default values for the view, used only if defStyleAttr is 0 or can not be found in the theme. Can be 0 to not look for defaults.
context 上下文兑现,上下文容易理解,经常碰到。
attrs 自定义属性,我刚接触到,在values文件夹下新建xml一个文件,名字随意,因为我知道的是android 系统是别的是文件的内容而不是文件名字,至于这里面是怎么个流程我还不清楚,希望路过的大牛能指点一下。
defStyleAttr 默认的样式,”Can be 0 to not look for defaults.“ 对于这句话,我的理解是 设置为0 就没有默认样式或者设置为0的默认样式就是透明。
defStyleRes 默认的资源,大概意思是说在默认样式为0 或者 没有主题的时候,默认资源才会起作用。同样的设置为0 就没有默认资源 或者设置为0的默认资源呈现透明。
// 继承相对布局
public class TopTitleBarView extends RelativeLayout {
    public TopTitleBarView(Context context, AttributeSet attrs, int defStyleAttr) {
    super(context, attrs, defStyleAttr);
    }
}
这里我写了一个三个参数的构造函数,我这么写的主要原因是因为我看到的大部分都是这么写的,我的理解是默认资源可以使用系统本身的设置,然后对这个构造函数进行一些操作实现我们的目的。
为我的布局添加控件
首先添加三个TextView 左右中位置上各一个,
// 声明三个TextView
private TextView leftTextView;  //左边文本
private TextView titleTextView; //中间文本
private TextView rightTextView; //右边文本

// 写一个方法

    private void createView(Context context) {
    defaultTitleTextSize = 18;

    leftTextView = new TextView(context);
    leftTextView.setTextColor(Color.WHITE);
    // 内容居中显示
    leftTextView.setGravity(Gravity.CENTER);
    // 背景透明  也可不设置
    leftTextView.setBackgroundColor(Color.TRANSPARENT);

    titleTextView = new TextView(context);
    titleTextView.setTextColor(Color.WHITE);
    // TypedValue android.util.TypedValue 系统提供的一个工具类,
    // 系统对这个类的解释
    // "Container for a dynamically typed data value.Primarily used with Resources for holding resource values. "
    // 设置中间文本的默认大小为18sp,顺便一提,不设置字体大小,默认的为15sp(源码).
    titleTextView.setTextSize(TypedValue.COMPLEX_UNIT_SP,
            defaultTitleTextSize);
    titleTextView.setGravity(Gravity.CENTER);
    titleTextView.setBackgroundColor(Color.TRANSPARENT);

    rightTextView = new TextView(context);
    rightTextView.setTextColor(Color.WHITE);
    rightTextView.setGravity(Gravity.CENTER);
    rightTextView.setBackgroundColor(Color.TRANSPARENT);

    // 记得实现 OnClickListener
    leftTextView.setOnClickListener(this);
    titleTextView.setOnClickListener(this);
    rightTextView.setOnClickListener(this);

}

// 转换dip为px 引用 http://blog.csdn.net/lzhang616/article/details/8945729
// 可以封装到一个单独的工具类里
public static int convertDipOrPx(Context context, int dip) {
    float scale = context.getResources().getDisplayMetrics().density;
    return (int) (dip * scale + 0.5f * (dip >= 0 ? 1 : -1));
}
看着比较满意,左右中都有但是为了满足大部分需求,还需要改进一下,怎么改呢?添加imageview,为了显示图片的需要,以及更好的操作,往下看,添加三个imageview。
private Imageview leftImageview;   //左边
private Imageview titleImageview;  //中间
private Imageview rightImageview;  //右边

// 需要在createView 方法里对他们初始化
leftImageview  = new ImageView(content);
titleImageview = new ImageView(content);
rightImageview = new ImageView(content);

// 并设置监听
leftImageview.setOnClickListener(this);
titleImageview.setOnClickListener(this);
rightImageview.setOnClickListener(this);
自定义属性,在values下新建一个xml,就命名为attrs 吧。
<!-- TopTitleBarView 是不是有点熟悉?  对,就是自定义的控件的名字必须一致,不然会出错 -->
 <declare-styleable name="TopTitleBarView">
     <!-- format 的用法网上可以找到 reference 表示可以是一个资源值,如R.string.xxxx   string 表示可以是字符串,比如 "xxxx" -->
    <attr name="text_left" format="reference|string" />
    <attr name="text_right" format="reference|string" />
    <attr name="text_title" format="reference|string" />
    <attr name="background" format="reference|color" />
    <attr name="background_left" format="reference|color" />
    <attr name="background_right" format="reference|color" />
    <attr name="background_title" format="reference|color" />
    <attr name="function">
        <flag name="text_left" value="10" />
        <flag name="text_title" value="20" />
        <flag name="text_right" value="30" />
        <flag name="image_left" value="100" />
        <flag name="image_title" value="200" />
        <flag name="image_right" value="300" />
    </attr>

</declare-styleable>
自定义属性结束,上面那几个文字、背景可能好理解,下面的功能可能不好理解,先放一下,一会解释。
通过attrs.xml 给TopTitleBarView 设置这些属性。
  // 通过 attrs.xml 给TopTitleBarView 设定属性
    TypedArray typedArray = context.obtainStyledAttributes(attrs,
            R.styleable.SoTopView);

    // 初始化自定义控件的背景
    Drawable background = typedArray
            .getDrawable(R.styleable.SoTopView_background);
    if (background == null) {
        background = new ColorDrawable(Color.RED);
    }
    this.setBackground(background);

    // 设置功能
    int function = typedArray.getInt(R.styleable.SoTopView_function,
            this.curremtFunction);
    setFunction(context, function);


    setTitleText(typedArray.getString(R.styleable.SoTopView_text_title));
    setLeftText(typedArray.getString(R.styleable.SoTopView_text_left));
    setRightText(typedArray.getString(R.styleable.SoTopView_text_right));

    setLeftBackground(typedArray
            .getDrawable(R.styleable.SoTopView_background_left));
    setRightBackground(typedArray
            .getDrawable(R.styleable.SoTopView_background_right));
    setTitleBackground(typedArray
            .getDrawable(R.styleable.SoTopView_background_title));
    // 回收资源
    typedArray.recycle();
setTitleText(typedArray.getString(R.styleable.SoTopView_text_title));
我对这句的理解是给文本TextView 指定文本资源的存储位置,让textview 去指定的位置找。
看看上面出现的几个方法
private boolean defaultFunction = 0;//默认打开的功能,设置为0
// 这里要用到自定义属性的功能,设置成对应的值,开启对应的功能
public static final int FUNCTION_TEXT_LEFT = 10;
public static final int FUNCTION_TEXT_TITLE = 20;
public static final int FUNCTION_TEXT_RIGHT = 30;

public static final int FUNCTION_IMAGE_LEFT = 100;
public static final int FUNCTION_IMAGE_TITLE = 200;
public static final int FUNCTION_IMAGE_RIGHT = 300;

public boolean isAddFunction(int function) {
    return (this.defaultFunction & function) == function;
}

public void setFunction(Context context, int function) {
    if (this.defaultFunction == function) {
        return;
    }

    this.defaultFunction = function;
    // 移除所有的控件
    this.removeAllViews();

    // 添加title
    if (isAddFunction(FUNCTION_TEXT_TITLE)) {
        LayoutParams params = new LayoutParams(LayoutParams.WRAP_CONTENT,
                LayoutParams.MATCH_PARENT);
        // 相对于父控件居中
        // addRule, 这里解释的还不错 http://zhidao.baidu.com/link?url=n-iiOCSjWH_ZpDpoHc5dVPzMjCTPrQ_YEmAtAah3k4BFBVIPVGF8c45I_QnICVK8a4XENMZQBwJFzP_iWFrKHbYiRl3JjrJeHyqs4tSmnKW
        params.addRule(RelativeLayout.CENTER_IN_PARENT, RelativeLayout.TRUE);
        addView(titleTextView, params);
    }

    // 添加leftTextView
    if (isAddFunction(FUNCTION_TEXT_LEFT)) {
        LayoutParams params = new LayoutParams(LayoutParams.WRAP_CONTENT,
                LayoutParams.MATCH_PARENT);
        params.addRule(RelativeLayout.ALIGN_PARENT_LEFT,
                RelativeLayout.TRUE);
        params.leftMargin = convertDipOrPx(context, 10);
        addView(leftTextView, params);
    }

    // 添加rightTextView
    if (isAddFunction(FUNCTION_TEXT_RIGHT)) {
        LayoutParams params = new LayoutParams(LayoutParams.WRAP_CONTENT,
                LayoutParams.MATCH_PARENT)
        params.rightMargin = convertDipOrPx(context, 10);
        params.addRule(RelativeLayout.ALIGN_PARENT_RIGHT,
                RelativeLayout.TRUE);
        addView(mRightTextView, params);
    }

    // 添加titleImageView
    if (isAddFunction(FUNCTION_IMAGE_TITLE)) {
        LayoutParams params = new LayoutParams(LayoutParams.WRAP_CONTENT,
                LayoutParams.WRAP_CONTENT);
        params.addRule(RelativeLayout.CENTER_IN_PARENT, RelativeLayout.TRUE);
        addView(titleImageView, params);
    }

    // 添加leftImageView
    if (isAddFunction(FUNCTION_IMAGE_LEFT)) {
        LayoutParams params = new LayoutParams(LayoutParams.WRAP_CONTENT,
                LayoutParams.WRAP_CONTENT);
        params.leftMargin = convertDipOrPx(context, 10);
        params.addRule(RelativeLayout.ALIGN_PARENT_LEFT,
                RelativeLayout.TRUE);
        params.addRule(RelativeLayout.CENTER_VERTICAL, RelativeLayout.TRUE);
        addView(LeftImageView, params);
    }

    // 添加RightImageView
    if (isAddFunction(FUNCTION_IMAGE_RIGHT)) {
        LayoutParams params = new LayoutParams(LayoutParams.WRAP_CONTENT,
                LayoutParams.WRAP_CONTENT);
        params.rightMargin = convertDipOrPx(context, 10);
        params.addRule(RelativeLayout.ALIGN_PARENT_RIGHT,
                RelativeLayout.TRUE);
        params.addRule(RelativeLayout.CENTER_VERTICAL, RelativeLayout.TRUE);
        addView(rightImageView, params);
    }
}
写到还没有对监听事件进行处理吧?去看看监听。
监听事件
private onTitleBarClickListerner onTitleBarClickListerner ;
@Override
public void onClick(View v) {
    int function = 0;
    if (v == leftImageView) {
        function = FUNCTION_IMAGE_LEFT;
    } else if (v == leftTextView) {
        function = FUNCTION_TEXT_LEFT;
    } else if (v == rightImageView) {
        function = FUNCTION_IMAGE_RIGHT;
    } else if (v == rightTextView) {
        function = FUNCTION_TEXT_RIGHT;
    } else if (v == titleImageView) {
        function = FUNCTION_IMAGE_TITLE;
    } else if (v == titleTextView) {
        function = FUNCTION_TEXT_TITLE;
    }

    // 根据控件ID处理点击事件
    if (isAddFunction(function) && function != 0) {
        boolean result = true;
        if (onTitleBarClickListerner != null) {
            result = onTitleBarClickListerner
                    .onTitleBarClickListener(function);
        }
        if (result && (function == FUNCTION_IMAGE_LEFT)) {
            // 处理返回事件
            Context context = getContext();
            if (context instanceof Activity) {
                ((Activity) context).finish();
            }
        }
    }
}

public void setOnActionBarClickListerner(
        OnActionBarClickListerner onActionBarClickListerner) {
    this.onActionBarClickListerner = onActionBarClickListerner;
}
监听事件看完了,还有什么呢?看看对TextView、ImageView的一些操作方法吧。
对TextView、ImageView 的一些操作
// 设置标题文本
public void setTitleText(String titleString) {
    titleTextView.setText(titleString);
}
public void setTitleText(int resId) {
    setTitleText(getResources().getString(resId));
}
// 设置标题文本颜色
public void setTitleTextColor(int resId) {
    titleTextView.setTextColor(getResources().getColor(resId));
}
// 设置标题文本字体大小
public void setTitleTextSize(int resId) {
    titleTextView.setTextSize(getResources().getDimension(resId));
}
// 左文本
public void setLeftText(String titleString) {
    leftTextView.setText(titleString);
}
public void setLeftText(int resId) {
    setLeftText(getResources().getString(resId));
}
public void setLeftTextColor(int resId) {
    leftTextView.setTextColor(getResources().getColor(resId));
}
public void setLeftTextSize(int resId) {
    leftTextView.setTextSize(getResources().getDimension(resId));
}
public void setLeftTextMargin(int left, int top, int right, int bottom) {
    LayoutParams params = new LayoutParams(LayoutParams.WRAP_CONTENT,
            LayoutParams.MATCH_PARENT);
    params.addRule(RelativeLayout.ALIGN_PARENT_LEFT, RelativeLayout.TRUE);
    params.setMargins(left, top, right, bottom);
    leftTextView.setLayoutParams(params);
}
……. 此处省略其他TextView、ImageView的操作,自定义标题栏终。
欢迎各位大牛指点,谢谢。


 1617
1617

 被折叠的 条评论
为什么被折叠?
被折叠的 条评论
为什么被折叠?
 到【灌水乐园】发言


