


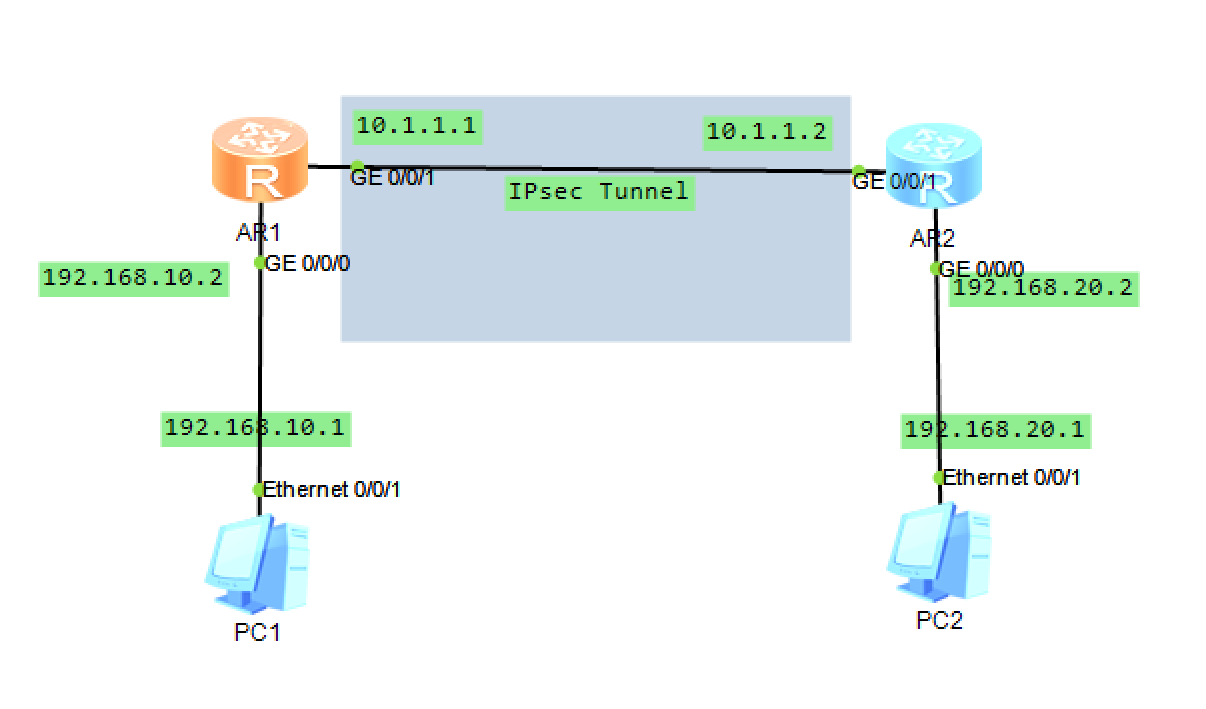
- 分别配置AR1和AR2的地址
[Huawei]sysname AR1
[AR1]int g0/0/1
[AR1-GigabitEthernet0/0/1]ip ad 10.1.1.1 24
[AR1-GigabitEthernet0/0/1]int g0/0/0
[AR1-GigabitEthernet0/0/0]ip ad 192.168.10.2 24
###				AR2配置				###
<Huawei>system-view
[Huawei]sysn
[Huawei]sysname AR2
[AR2]int g0/0/1
[AR2-GigabitEthernet0/0/1]ip add 10.1.1.2 24
[AR2-GigabitEthernet0/0/1]int g0/0/0
[AR2-GigabitEthernet0/0/0]ip add 192.168.20.2 24
[AR2-GigabitEthernet0/0/0]
在路由器AR1上配置IPSec安全提议,AR2也做相同的配置
<AR1>system-view
[AR1]ipsec proposal ipsec1	#添加IPSec安全建议
[AR1-ipsec-proposal-ipsec1]esp authentication-algorithm md5		#设置封装安全负荷(esp)认证算法
[AR1-ipsec-proposal-ipsec1]esp encryption-algorithm des	#设置封装安全负荷(esp)加密算法
[AR1-ipsec-proposal-ipsec1]quit
在路由器AR1上配置ike提议,AR2也做相同的配置
[AR1]ike proposal 1
[AR1-ike-proposal-1]authentication-algorithm md5
[AR1-ike-proposal-1]encryption-algorithm des-cbc
[AR1-ike-proposal-1]dh group14
[AR1-ike-proposal-1]quit
路由器AR1配置ike对等实体
[AR1]ike peer ar2
[AR1-ike-peer-ar2]ike-proposal 1	#配置使用ike提议1
[AR1-ike-peer-ar2]pre-shared-key cipher Huawei@123		##配置ike密码用户建立sa
[AR1-ike-peer-ar2quit
路由器AR2配置ike对等实体
[AR2]ike peer ar1
[AR2-ike-peer-ar1]ike-proposal 5	#配置使用ike提议5
[AR2-ike-peer-ar1]pre-shared-key cipher Huawei@123		##配置ike密码用户建立sa
[AR1-ike-peer-ar1]quit
路由器AR1配置IPSec Profile框架
[AR1]ipsec profile profile1
[AR1-ipsec-profile-profile1]proposal ipsec1	#设置该框架的IPSec安全提议为ipsec1
[AR1-ipsec-profile-profile1]ike-peer ar2	#设置该框架的ike对等实体为ar2
[AR1-ipsec-profile-profile1]quit
在路由器AR1的接口上使用IPSec框架
[AR1]int Tunnel 0/0/0
[AR1-Tunnel0/0/0]ip add
[AR1-Tunnel0/0/0]ip address 172.16.1.1 24
[AR1-Tunnel0/0/0]tunnel-protocol ipsec
[AR1-Tunnel0/0/0]source 10.1.1.1
[AR1-Tunnel0/0/0]destination 10.1.1.2
[AR1-Tunnel0/0/0]ipsec profile profile1
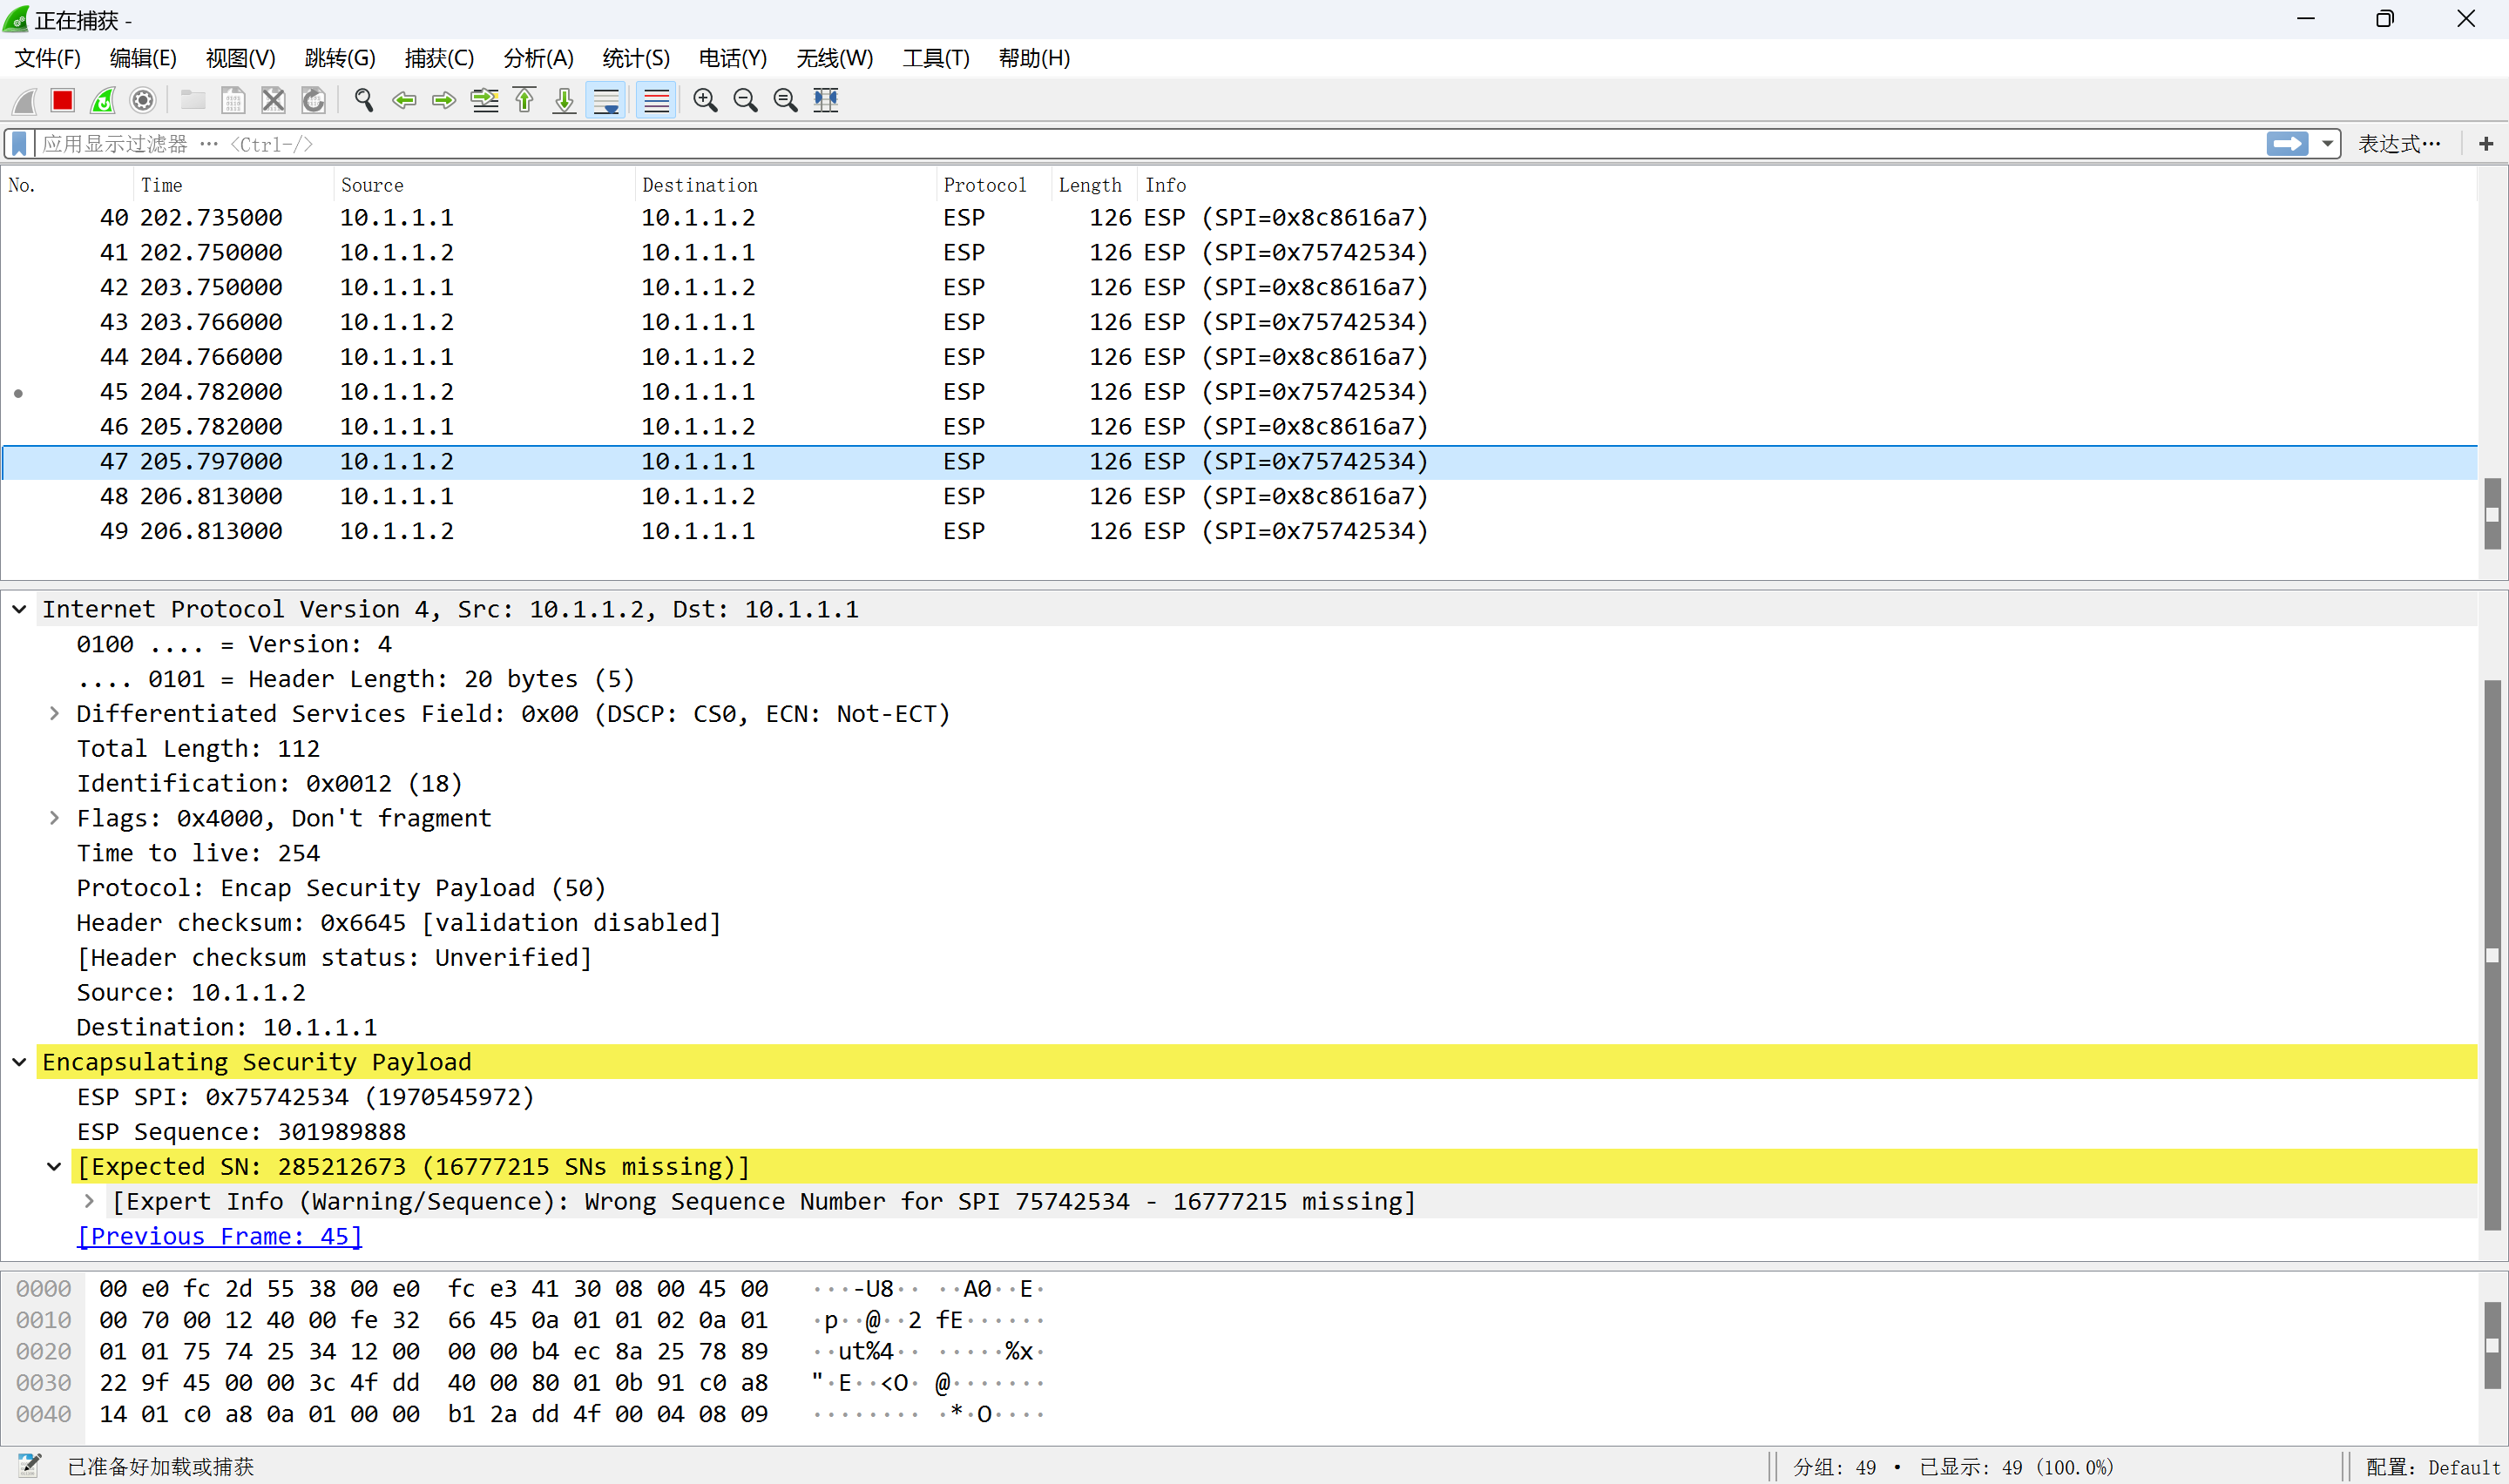
在PC1上使用ping命令测试到PC2的ICMP数据包,使用WireShar在AR2接口上抓包


 4018
4018

 被折叠的 条评论
为什么被折叠?
被折叠的 条评论
为什么被折叠?
 到【灌水乐园】发言


