


DSP 开发例程(1): led_flash
此例程实现在 EVM6678L 开发板控制 LED 闪烁. 使用了 SYS/BIOS 和 MCSDK PDK TMS320CC6678 两个组件. 例程源码可从我的 gitee.com 仓库上克隆或下载. 点击 DSP 开发教程(0): 汇总查看其他例程说明.
创建工程
-
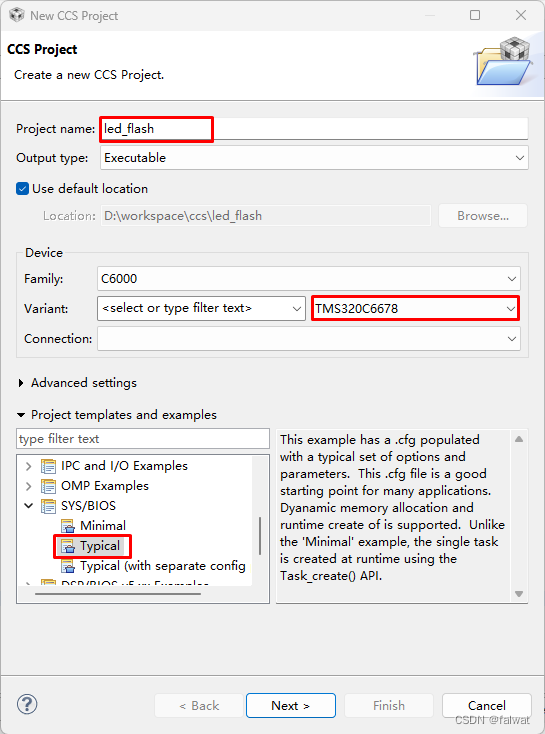
点击菜单: File | New | CCS Project, 打开 New CCS Project 向导.
-
输入工程名, 选择器件型号为: TMS320C6678, 模板选择: SYS/BIOS | Typical, 点击 Next.
-
在 RTSC 配置设置 页, 勾选 MCSDK PDK TMS320C6678 和 SYS/BIOS(默认已勾选), 点击 Finish.

源码编辑
main.c
修改 main.c, 在其中加入函数 EVM_init() 用于平台初始化.
void EVM_init()
{
	platform_init_flags init_flags;
	platform_init_config init_config;

	// plaform initialize
	memset(&init_flags, 1, sizeof(platform_init_flags));
	init_flags.phy = 0;
	memset(&init_config, 0, sizeof(platform_init_config));
	if (platform_init(&init_flags, &init_config) != Platform_EOK)
	{
		printf("Platform failed to initialize, errno = 0x%x \n", platform_errno);
		while(1);
	}
}
- 添加函数
task_ledFlash(), 实现 LED0 的闪烁.
Void task_ledFlash(UArg a0, UArg a1)
{
    System_printf("enter task_ledFlash()\n");

    while(1)
    {
    	platform_led(0, PLATFORM_LED_ON, PLATFORM_USER_LED_CLASS);
    	Task_sleep(500);
    	platform_led(0, PLATFORM_LED_OFF, PLATFORM_USER_LED_CLASS);
    	Task_sleep(500);
    }
}
修改后的 main.c 内容如下:
/*
 *  ======== main.c ========
 */
#include <stdio.h>
#include <string.h>

#include <xdc/std.h>

#include <xdc/runtime/Error.h>
#include <xdc/runtime/System.h>

#include <ti/sysbios/BIOS.h>

#include <ti/sysbios/knl/Task.h>

#include <ti/platform/platform.h>

/*
 *  ======== task_ledFlash ========
 */
Void task_ledFlash(UArg a0, UArg a1)
{
    System_printf("enter task_ledFlash()\n");

    while(1)
    {
    	platform_led(0, PLATFORM_LED_ON, PLATFORM_USER_LED_CLASS);
    	Task_sleep(500);
    	platform_led(0, PLATFORM_LED_OFF, PLATFORM_USER_LED_CLASS);
    	Task_sleep(500);
    }
}

/**
 * 平台初始化
 */
void EVM_init()
{
	platform_init_flags init_flags;
	platform_init_config init_config;

	// plaform initialize
	memset(&init_flags, 1, sizeof(platform_init_flags));
	init_flags.phy = 0;
	memset(&init_config, 0, sizeof(platform_init_config));
	if (platform_init(&init_flags, &init_config) != Platform_EOK)
	{
		printf("Platform failed to initialize, errno = 0x%x \n", platform_errno);
		while(1);
	}
}

/*
 *  ======== main ========
 */
Int main()
{
    Task_Handle task;
    Error_Block eb;

    System_printf("enter main()\n");

    Error_init(&eb);
    task = Task_create(task_ledFlash, NULL, &eb);
    if (task == NULL) {
        System_printf("Task_create() failed!\n");
        BIOS_exit(0);
    }

    BIOS_start();    /* does not return */
    return(0);
}
platform_osal.c
新建 platform_osal.c, 在此文件中实现 Osal_platformMalloc(), Osal_platformFree(), Osal_platformSpiCsEnter() 和 Osal_platformSpiCsExit() 这几个系统抽象层函数.
/*
 * platform_osal.c
 */

/* Platform utilities include */
#include "ti/platform/platform.h"

/* Resource manager for QMSS, PA, CPPI */
#include "ti/platform/resource_mgr.h"

/* OSAL functions for Platform Library */
uint8_t *Osal_platformMalloc (uint32_t num_bytes, uint32_t alignment)
{
	return (uint8_t *)malloc(num_bytes);
}

void Osal_platformFree (uint8_t *dataPtr, uint32_t num_bytes)
{
    /* Free up the memory */
    if (dataPtr)
    {
        free(dataPtr);
    }
}

void Osal_platformSpiCsEnter(void)
{
    /* Get the hardware semaphore.
     *
     * Acquire Multi core CPPI synchronization lock
     */
    while ((CSL_semAcquireDirect (PLATFORM_SPI_HW_SEM)) == 0);

    return;
}

void Osal_platformSpiCsExit (void)
{
    /* Release the hardware semaphore
     *
     * Release multi-core lock.
     */
    CSL_semReleaseSemaphore (PLATFORM_SPI_HW_SEM);

    return;
}
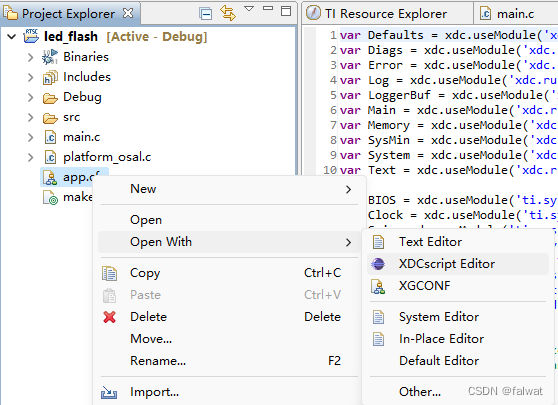
app.cfg
- 将 ti.platform.evmc6678l 添加到配置中.

或者直接在用 XDCscript Editor 打开 app.cfg 添加:
var Settings = xdc.useModule('ti.platform.evmc6678l.Settings');
- 添加
platform_lib段
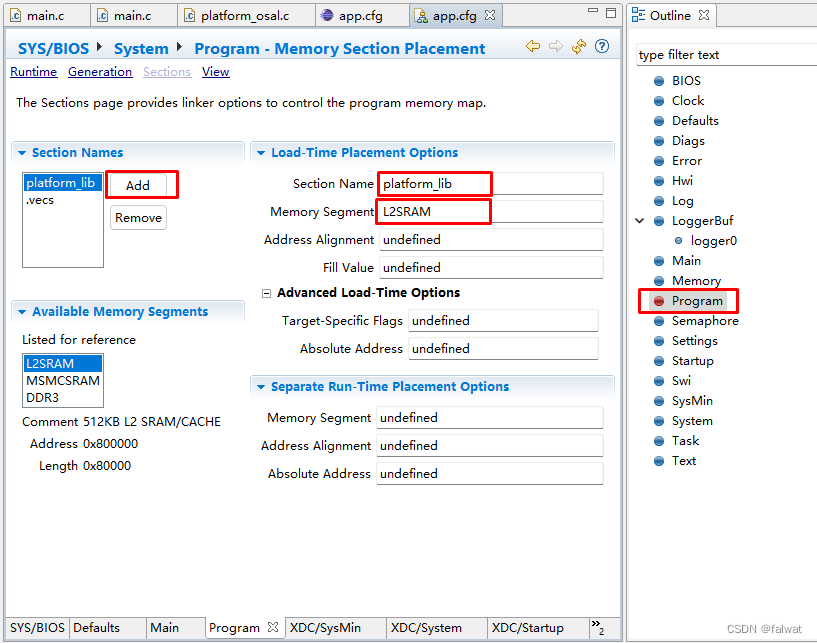
或者直接在用 XDCscript Editor 打开 app.cfg 添加:
Program.sectMap["platform_lib"] = new Program.SectionSpec();
Program.sectMap["platform_lib"].loadSegment = "L2SRAM";
- 启用 Startup 模块, 将
EVM_init()函数添加到Startup.lastFxns中.
var Startup = xdc.useModule('xdc.runtime.Startup');

Startup.lastFxns.$add('&EVM_init');
也可直接在
main()函数中 调用EVM_init(), 实现平台初始化.
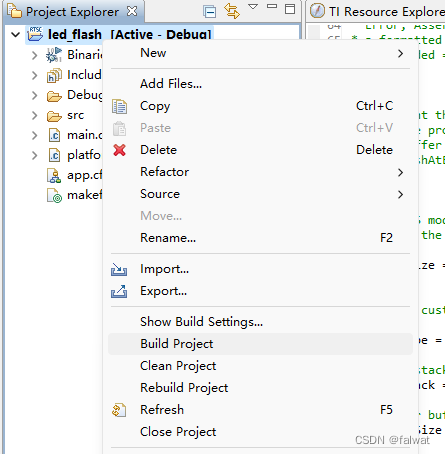
编译
选中工程, 右键选择 Build Project, 等待编译完成.
调试
使用 板载仿真器
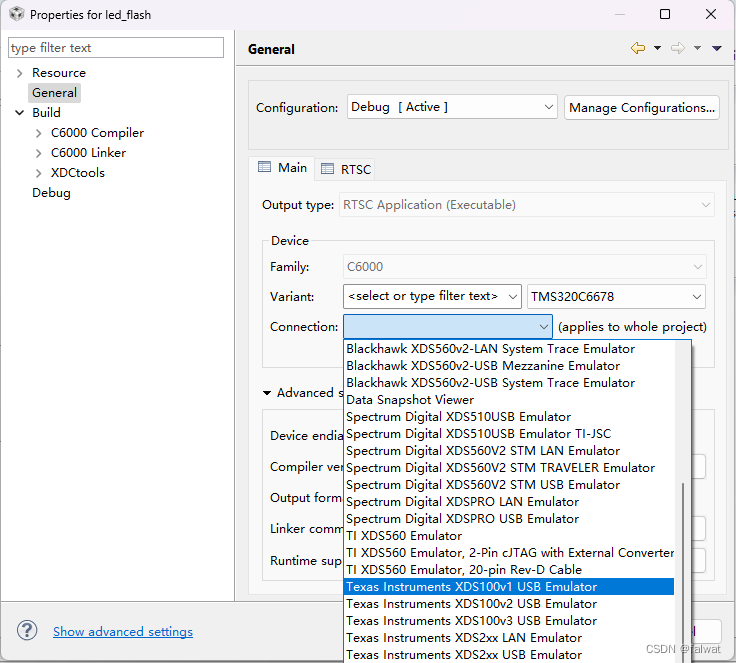
在工程上右键选择 Properties.
- 选择 General 页, 连接 选择 XDS100v1 USB Emulator. 点击 OK.
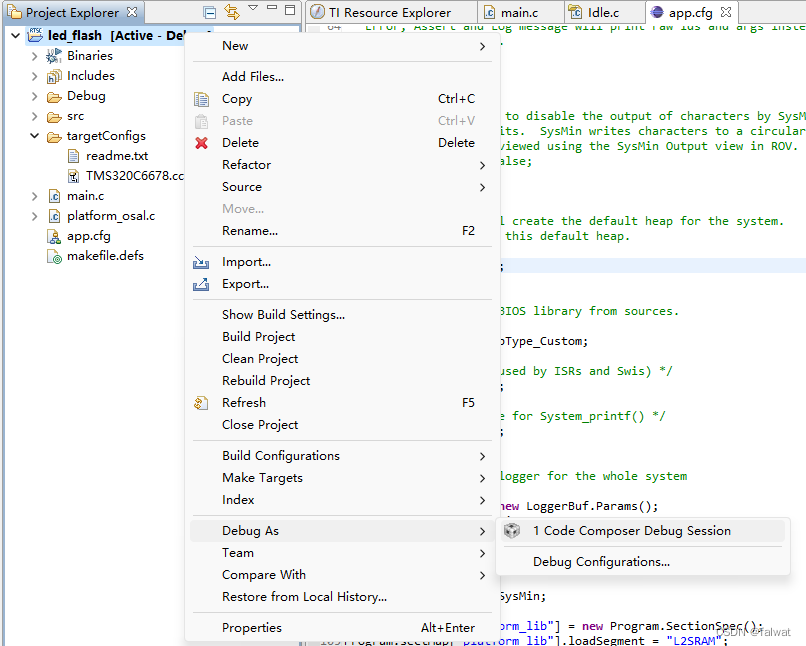
- 选中 工程, 右键选择 Debug As | Code Composer Debug Session.
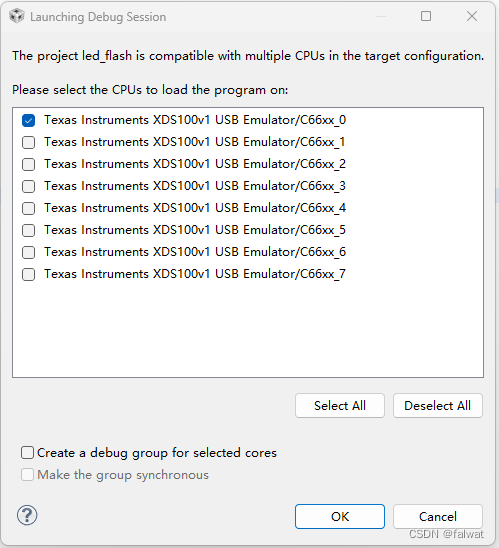
- 只勾选 C66xx_0, 点击 OK.
- 点击 resume
 按钮, 运行程序. 此时应该能看到 板卡上的 LED(D0) 开始闪烁.

使用 外部仿真器
使用外部仿真器同使用板载仿真器的操作流程类似, 这里不再赘述.


 1626
1626


 被折叠的 条评论
为什么被折叠?
被折叠的 条评论
为什么被折叠?
 到【灌水乐园】发言


