


这里修改core1来实现mysql的数据导入(所需jar第一篇文章已经加过了),这里只是示例具体请根据自己的需要稍微改一下
PS:如果修改core1库的名字 换为 test,需要把solrconfig.xml里面的${solr.core1.data.dir:} 全部改为${solr.test.data.dir:}
1、修改solrconfig.xml

添加如下:
<requestHandler name="/dataimport" class="org.apache.solr.handler.dataimport.DataImportHandler">
          <lst name="defaults">
               <str name="config">data-config.xml</str>
          </lst>
  </requestHandler>
在同一目录下新建一个data-config.xml
<dataConfig>
    <dataSource name="companyDump" type="JdbcDataSource" driver="com.mysql.jdbc.Driver"
                url="jdbc:mysql://localhost:3306/test?useUnicode=true&characterEncoding=UTF-8" user="root"
                password="root"/>
    <document>
        <entity name="company"
        	query="select id,slogan,companyName,categoryId,categoryName,xcategoryName,xcategoryId,regtime,invest,shopNum,url,brandName,product,managementMode,level,logo,createDate from company_basicinfo where isDelete=0 and isActive=1"
        	deltaImportQuery="select id,slogan,companyName,categoryId,categoryName,xcategoryName,xcategoryId,regtime,invest,shopNum,url,brandName,product,managementMode,level,logo,createDate from company_basicinfo where isDelete=0 and isActive=1 and id='${dataimporter.delta.id}'"
          deltaQuery="select id from company_basicinfo where isDelete=0 and isActive=1 and updateDate > '${dataimporter.last_index_time}'">

		  <field column="slogan" name="slogan"/>
		  <field column="companyName" name="companyName"/>
		  <field column="categoryId" name="categoryId"/>
		  <field column="categoryName" name="categoryName"/>
		  <field column="xcategoryId" name="xcategoryId"/>
		  <field column="xcategoryName" name="xcategoryName"/>
		  <field column="regtime" name="regtime"/>
		  <field column="invest" name="invest"/>
		  <field column="shopNum" name="shopNum"/>
		  <field column="url" name="url"/>
		  <field column="brandName" name="brandName"/>
		  <field column="product" name="product"/>
		  <field column="managementMode" name="managementMode"/>
		  <field column="level" name="level"/>
		  <field column="logo" name="logo"/>
		  <field column="createDate" name="createDate"/>

	    </entity>
    </document>
</dataConfig>
修改schema.xml
<?xml version="1.0" ?>
<schema name="companySchema" version="1.1">
  <types>
   <fieldType name="string" class="solr.StrField" sortMissingLast="true"/>
	<fieldType name="tint" class="solr.TrieIntField" precisionStep="8" positionIncrementGap="0"/>
	<fieldType name="tfloat" class="solr.TrieFloatField" precisionStep="8" positionIncrementGap="0"/>
	<fieldType name="tlong" class="solr.TrieLongField" precisionStep="8" positionIncrementGap="0"/>
	<fieldType name="tdouble" class="solr.TrieDoubleField" precisionStep="8" positionIncrementGap="0"/>
	<fieldType name="tdate" class="solr.TrieDateField" precisionStep="8" positionIncrementGap="0"/>
	<fieldType name="textMaxWord" class="solr.TextField" >
      <analyzer>
        <tokenizer class="com.chenlb.mmseg4j.solr.MMSegTokenizerFactory" mode="max-word"/>
      </analyzer>
   </fieldType>
  </types>

 <fields>
	<field name="id" type="tint" indexed="true" stored="true" required="true"/>
    <field name="companyName" type="textMaxWord" indexed="true" stored="true"/>
    <field name="slogan" type="string" indexed="true" stored="false"/>
	<field name="categoryId" type="tint" indexed="true" stored="true"/>
    <field name="categoryName" type="string" indexed="false" stored="true"/>
	<field name="xcategoryId" type="tint" indexed="true" stored="true"/>
    <field name="xcategoryName" type="string" indexed="false" stored="true"/>
	<field name="regtime" type="string" indexed="false" stored="true"/>
	<field name="invest" type="tint" indexed="true" stored="true"/>
	<field name="shopNum" type="string" indexed="true" stored="true"/>
	<field name="url" type="string" indexed="false" stored="true"/>
	<field name="brandName" type="textMaxWord" indexed="true" stored="false"/>
	<field name="product" type="textMaxWord" indexed="true" stored="false"/>
	<field name="managementMode" type="string" indexed="false" stored="true"/>
	<field name="level" type="tint" indexed="true" stored="true"/>
	<field name="logo" type="string" indexed="false" stored="true"/>
    <field name="createDate" type="tdate" indexed="true" stored='true'/>
	<field name="_version_" type="tlong" indexed="true"  stored="true"/>
 </fields>
 <uniqueKey>id</uniqueKey>
 <defaultSearchField>companyName</defaultSearchField>
 <solrQueryParser defaultOperator="OR"/>
</schema>
重启solr使配置生效
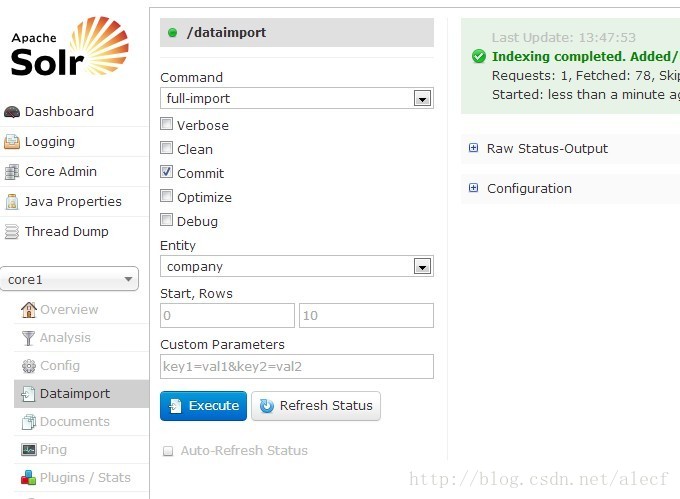
打开
导入数据可以看到 跟data-config.xml的配置是对应的
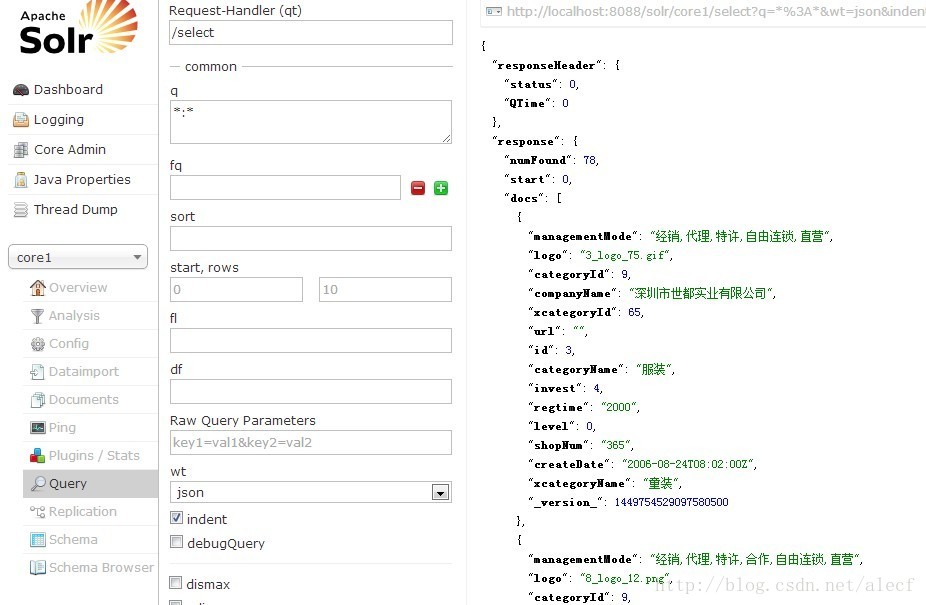
导入完成后查看一下数据 和是否分词
查看分词结果 在schema.xml配置文件中 只指定了companyName、brandName、product进行分词(type指定)所以只看这几个词的分词结果


到此导入mysql数据已经结束
http://www.iteye.com/topic/759148
下一篇记录定时跟新索引文件


 109
109


 被折叠的 条评论
为什么被折叠?
被折叠的 条评论
为什么被折叠?
 到【灌水乐园】发言


