


前面的教程已经在docker镜像 软件 层面上初步安装了企业常用的插件,但目前还没有写任何代码。本教程带你初始化yaf框架,并基于yar框架和hprose跨语言微服务框架打包两个微服务代码,在容器间调用。
yaf是一个用c语言写的,用于php项目mvc分离的框架。yar同样是c语言写的,支持php微服务之间基于tcp协议相互调用。hprose则是php的一个composer包,支持php语言和其他语言之间相互调用。
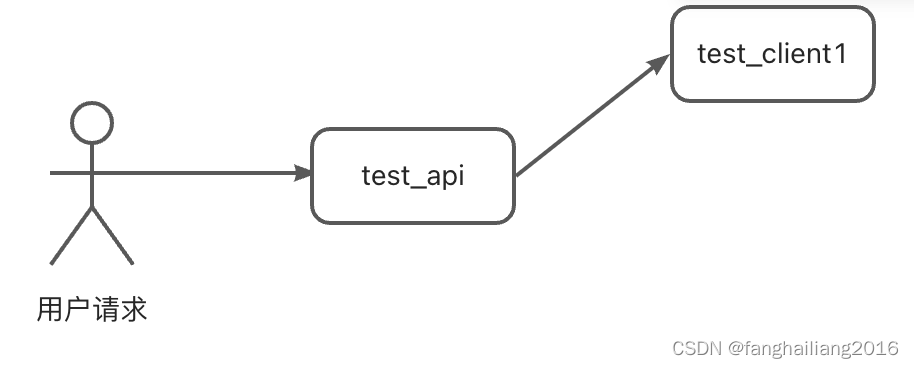
用户访问流程图:
我们先把之前那个lnmp文件夹拷贝两份,一份文件夹为 test_api,另一份文件夹为 test_client1
cp -r lnmp test_api

cp -r lnmp test_client1
yaf
php yaf框架的配置文件内容为
extension = yaf.so
yaf.environ = ${APP_ENV}
yaf.use_namespace = Off
yaf.use_spl_autoload = On
对这两个文件夹下的项目统一做以下操作
修改nginx配置文件
由于yaf框架要求隐藏入口index.php文件,需要修改conf/default.conf文件,在 location / 下增加 try_files $uri $uri/ /index.php$is_args$args;
    location / {
        root   /src;
        index  index.html index.htm index.php;
        try_files $uri $uri/ /index.php$is_args$args;
    }
使用yaf脚手架初始化项目
克隆yaf项目源码,使用源码中的脚手架工具初始化项目
git clone https://ghproxy.com/https://github.com/laruence/yaf.git /tmp/yaf/tmp/yaf/tools/cg/yaf_cg -d test_api/www -a test_api
/tmp/yaf/tools/cg/yaf_cg -d test_client1/www -a test_client1yar
php yar框架的配置文件内容为
extension = yar.so
yar.debug = off
yar.allow_persistent = Off
yar.connect_timeout = 1500
yar.content_type = application/octet-stream
yar.expose_info = On
yar.packager = php
yar.timeout = 5000
yar.transport = curl
创建yar server
在 test_client1 项目中创建一个yar server
application/models/Tserver.php 文件,定义yar server的服务内容
<?php

class TserverModel {

    public function fun1()
    {
        return "haha";
    }

    protected function __auth($provider, $token) {

        if($provider == 'testprovider'){
            if($token == 'testtoken'){
                return true;
            }
        }

        return false;
    }

}
其中 __auth 函数是用来做微服务接口鉴权的,返回true代码鉴权通过
application/controllers/Tserver.php 文件,定义 yar server 的入口
<?php

class TserverController extends Yaf_Controller_Abstract {

  public function indexAction() {
    $service = new Yar_Server(new TserverModel());
    $service->handle();

    return false;
  }

}
使用yar client 调用 test_client1 微服务
我们在 test_api 项目中创建一个yar client,调用在 test_client1 项目中创建的微服务
application/controllers/Tclient.php 文件,作为yar client 客户端调用 yar server中的服务
<?php

class TclientController extends Yaf_Controller_Abstract {

    public function indexAction() {
        $client = new Yar_Client("http://test_client1/tserver/");
        $client->SetOpt(YAR_OPT_CONNECT_TIMEOUT, 1000);
        $client->setOpt(YAR_OPT_PROVIDER, "testprovider");
        $client->setOpt(YAR_OPT_TOKEN, "testtoken");
        $ret = $client->fun1();
        echo $ret;
        return false;
    }

}
这段代码中使用了微服务调用的token,设置了微服务调用的超时时间
hprose
创建hprose server
在 test_client1 项目中创建一个hprose server
application/controllers/Tserver.php 文件,定义 hprose server 的入口
<?php

class TserverController extends Yaf_Controller_Abstract
{
    public function indexAction()
    {
        $model = new TserverModel();
        $service = new \Hprose\Http\Server();
        $service->addInstanceMethods($model);
        $service->handle();

        return false;
    }
}
使用hprose client 调用 test_client1 微服务
我们在 test_api 项目中创建一个hprose client,调用在 test_client1 项目中创建的微服务
application/controllers/Tclient.php 文件,作为hprose client 客户端调用 hprose server中的服务
<?php

class TclientController extends Yaf_Controller_Abstract
{
    public function indexAction()
    {
        $client = new Hprose\Http\Client('http:/test-client1/tserver/', false);
        $proxy = $client->useService('');
        try {
            $ret = $proxy->fun1();
        } catch (Exception $e) {
            print_r($e);
            exit;
        }

        echo $ret;
        return false;
    }
}
打包镜像
分别进入两个项目文件夹,打包项目代码到镜像中
cd test_api && sudo docker build -t php-fpm:test_api .

cd test_client1 && sudo docker build -t php-fpm:test_client1 .
启动test_client1
sudo docker run --name test_client1 -d php-fpm:test_client1启动test_api,把test_client1容器关联到test_api容器中
sudo docker run --name test_api \
--link test_client1:test_client1 \
-p 8083:80 -d php-fpm:test_api
浏览器输入 http://127.0.0.1:8083/tclient 测试
相关链接
常用开发工具:php_codesniffer代码规范检查&修复、phpstan语法检查、phpunit单元测试
.gitlab-ci.yaml自动镜像打包&&互联网企业规范化上线流程(上)


 945
945


 被折叠的 条评论
为什么被折叠?
被折叠的 条评论
为什么被折叠?
 到【灌水乐园】发言


