


方法一
心急的童鞋按照老操作完成后再按照如下操作即可
/**
 弃用storboard
 1、info.plist去除
 <key>UIApplicationSceneManifest</key>
 <dict>
     <key>UIApplicationSupportsMultipleScenes</key>
     <false/>
     <key>UISceneConfigurations</key>
     <dict>
         <key>UIWindowSceneSessionRoleApplication</key>
         <array>
             <dict>
                 <key>UISceneConfigurationName</key>
                 <string>Default Configuration</string>
                 <key>UISceneDelegateClassName</key>
                 <string>SceneDelegate</string>
                 <key>UISceneStoryboardFile</key>
                 <string>Main</string>
             </dict>
         </array>
     </dict>
 </dict>
 2、启动页注释
- (UISceneConfiguration *)application:(UIApplication *)application configurationForConnectingSceneSession:(UISceneSession *)connectingSceneSession options:(UISceneConnectionOptions *)options {
    // Called when a new scene session is being created.
    // Use this method to select a configuration to create the new scene with.
    return [[UISceneConfiguration alloc] initWithName:@"Default Configuration" sessionRole:connectingSceneSession.role];
}


- (void)application:(UIApplication *)application didDiscardSceneSessions:(NSSet<UISceneSession *> *)sceneSessions {
    // Called when the user discards a scene session.
    // If any sessions were discarded while the application was not running, this will be called shortly after application:didFinishLaunchingWithOptions.
    // Use this method to release any resources that were specific to the discarded scenes, as they will not return.
}
 */

具体如下:
用xcode11新建iOS项目后,想要删除默认的main.storyboard,使用自定义的window和controller的坑。
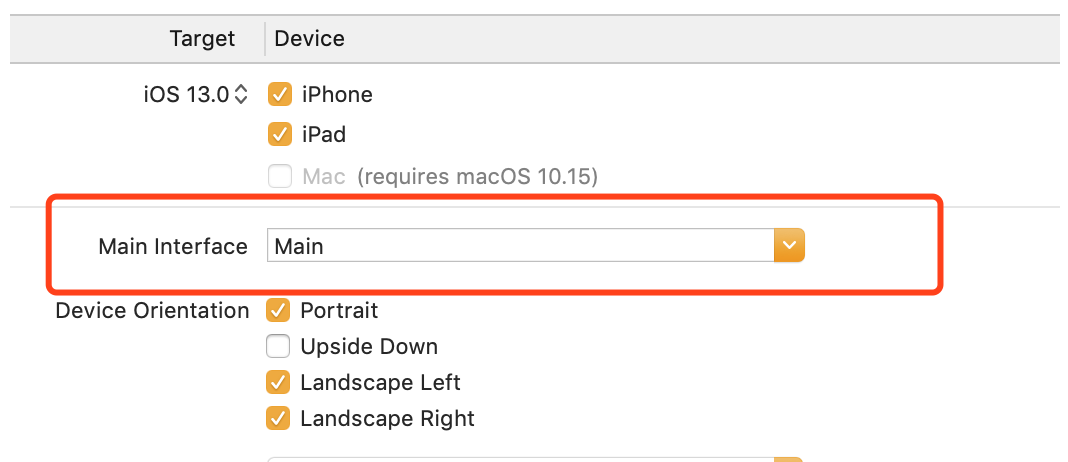
具有一定经验的人想必都知道Xcode11之前,想要达到上面的目的步骤吧。首先就是选中工程文件选项,之后删除Main Interface选项里的Main,如下图:
之后在Appdelegate的didFinishLaunchingWithOptions方法中自定义window并设置为keyWindow和让它显示,如下图:
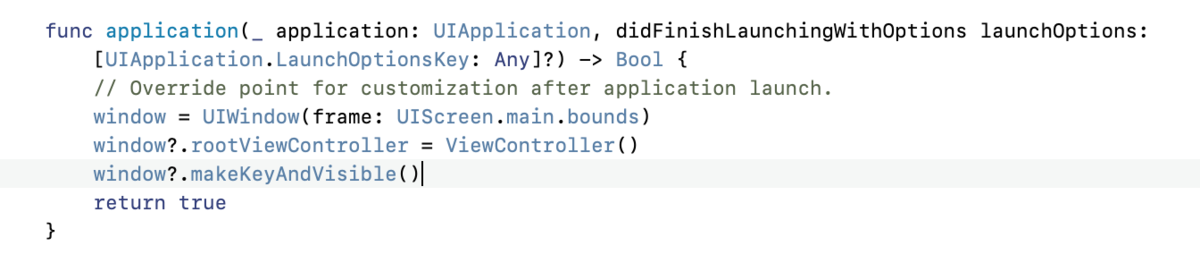
就这么简单的实现了。
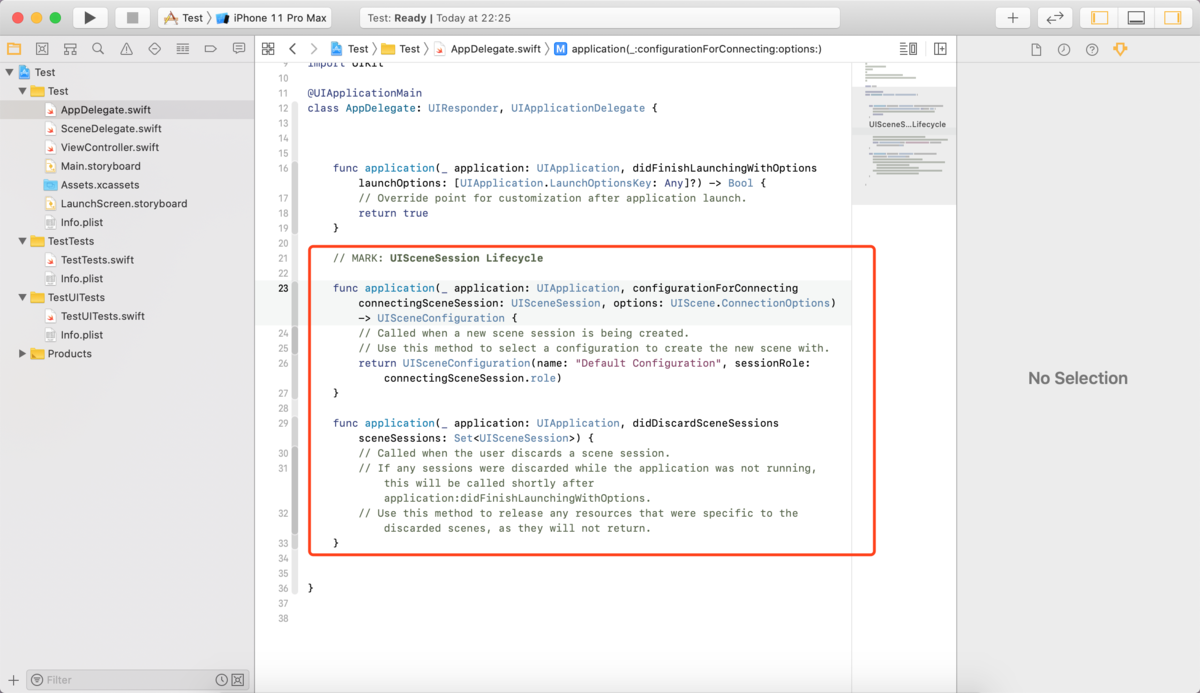
然鹅随着iOS13的推出,在之前AppDelegate的基础上多出了一个SceneDelegate,会将AppDelegate里的lifecycle的那些代理方法转交给SceneDelegate,就是通过AppDelegate里以下两个方法实现的
以下的内容是摘自苹果官方文档:
Overview
A UISceneSession object manages a unique runtime instance of your scene. When the user adds a new scene to your app, or when you request one programmatically, the system creates a session object to track that scene. The session contains a unique identifier and the configuration details of the scene. UIKit maintains the session information for the lifetime of the scene itself, destroying the session in response to the user closing the scene in the app switcher.
You do not create session objects directly. UIKit creates sessions in response to user interactions with your app. You can also ask UIKit to create a new scene and session programmatically by calling the requestSceneSessionActivation:userActivity:options:errorHandler: method of UIApplication. UIKit initializes the session with default configuration data based on the contents of your app's Info.plist file.
大概意思就是,一个UISceneSession不用你直接去创建对象,你可以用UIApplication里的requestSceneSessionActivation:userActivity:options:errorHandler:方法,这个方法会帮你初始化一个基于info.plist文件里的默认configuration的session对象。
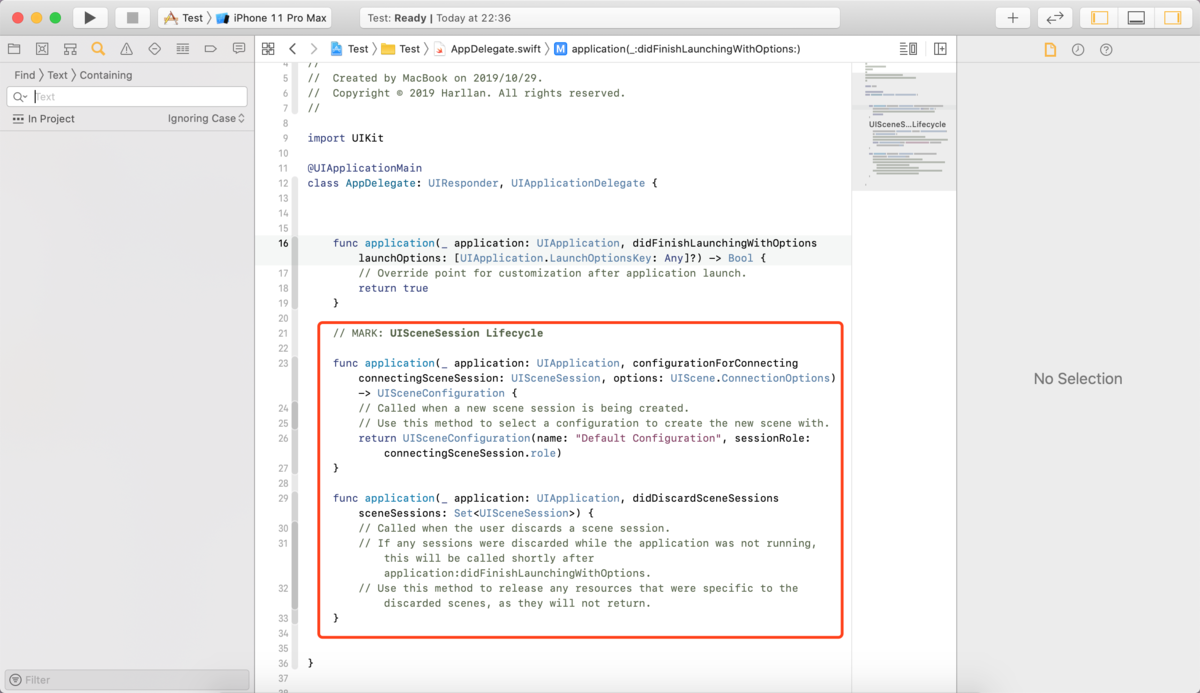
因此xcode11中要实现自己的没有默认main.storyboard的项目,就得将SceneDelegate里的lifecycle转交给AppDelegate,按照上面所说,这一步操作就是,删除或注释一下截图里的两个方法
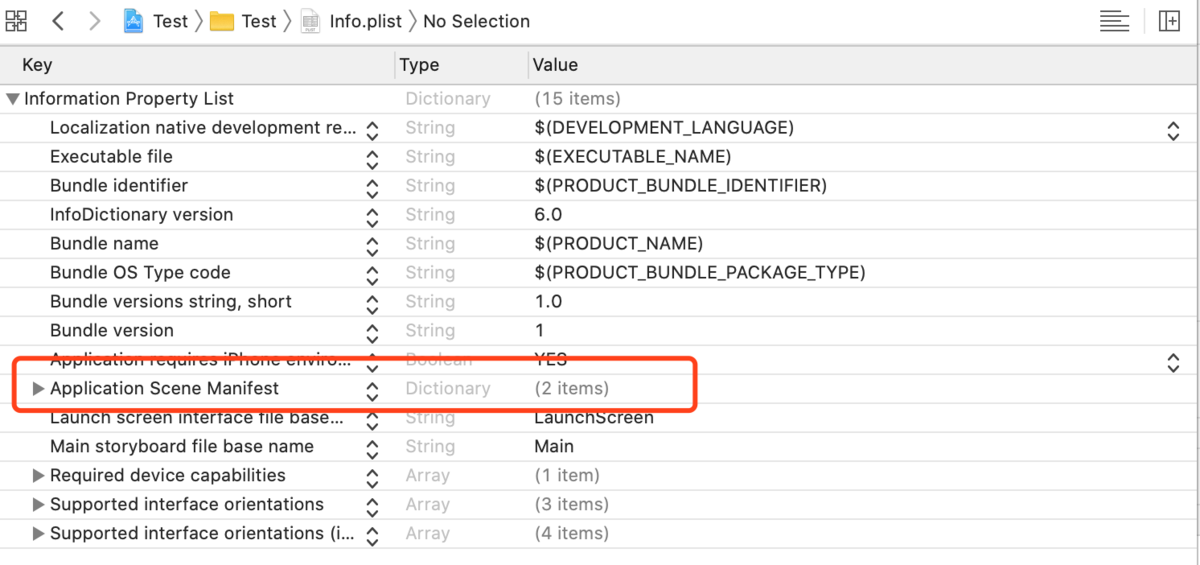
接近着删除在info.plist里的Application Scene Manifest条目
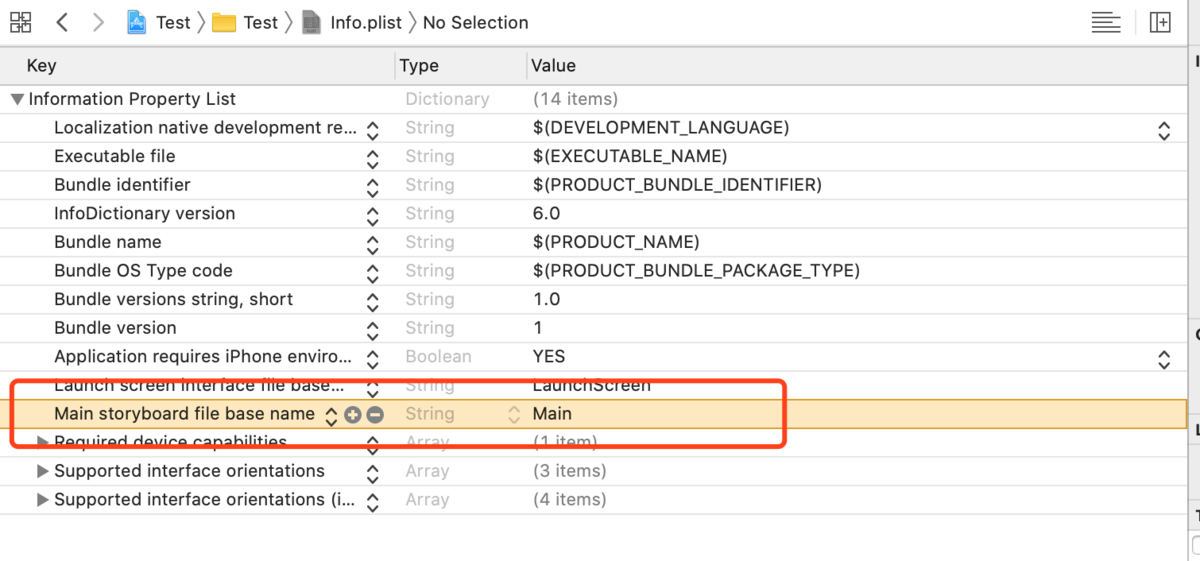
之后就是xcode11以前的常规操作了,首先,删除info.plist里的Main storyboard file base name条目
之后在AppDelegate.swift里添加window属性,因为xcode默认删除了这个属性,现在你需要将它重新添加回来才行,如果是OC写的话,就在AppDelegate.h里添加这个window属性。

之后就在didFinishLaunch方法里初始化self.window,并设置为keywindow和让它显示,并初始化默认控制器即可。
方法二
Xcode自动新增了一个SceneDelegate文件, 也就是说在iOS13中Appdelegate的作用发生了改变: iOS13之前,Appdelegate的作用是全权处理App生命周期和UI生命周期; iOS13之后,Appdelegate的作用是只处理 App 生命周期, 而UI的生命周期将全权由新增的SceneDelegate来处理.
SceneDelegate.m中的方法只有iOS13之后才能使用, 如果新建的项目要兼容之前的版本, 就需要自己在SceneDelegate和Appdelegate中做判断
首先, UI相关的已经不能只放在Appdelegate中, 而是区分系统放在SceneDelegate中处理.
其次, 要在Info.plist中删除对应的路径.

最后, 在SceneDelegate.m中添加根控制器
- (void)scene:(UIScene *)scene willConnectToSession:(UISceneSession *)session options:(UISceneConnectionOptions *)connectionOptions {
    // Use this method to optionally configure and attach the UIWindow `window` to the provided UIWindowScene `scene`.
    // If using a storyboard, the `window` property will automatically be initialized and attached to the scene.
    // This delegate does not imply the connecting scene or session are new (see `application:configurationForConnectingSceneSession` instead).

    self.window = [[UIWindow alloc] initWithWindowScene:(UIWindowScene *)scene];
    self.window = [[UIWindow alloc] initWithFrame:[UIScreen mainScreen].bounds];
    UIViewController *rootVc = [[UIViewController alloc]init];
    rootVc.view.backgroundColor = [UIColor purpleColor];
    UINavigationController *rootNav = [[UINavigationController alloc]initWithRootViewController:rootVc];
    [self.window setRootViewController:rootNav];
    [self.window makeKeyAndVisible];
}
签 名:被别人嫉妒,说明你卓越;你嫉妒别人,说明你无能。 座右铭:抓紧一切时间睡觉。


 被折叠的 条评论
为什么被折叠?
被折叠的 条评论
为什么被折叠?
 到【灌水乐园】发言


