


我们介绍过了浏览器和服务器之间的交互过程,接下来介绍Asp.net处理动态请求。
写自己的Asp.Net框架,我们不会引用System.Web这个程序集,我们只需要创建要给自己的类库,所以在接下来的程序中,我们所用到的Web组件都是我们自己定义的。
首先创建一个程序集名为MyWebApplication,定义了如下一个HttpContext类型,它封装了上下文对象。
一、HttpContext定义了三个属性:
表示当前服务器请求——HttpRequest
服务器响应——HttpResponse
一个"工具类"——HttpServerUtility
public class HttpContext
{
public HttpContext(string strRequest);
public HttpRequest Request { get; }
public HttpResponse Response { get; }
public HttpServerUtility Server { get; set; }
}
与真实的底层有些差别,真实的底层,上下文封装比较繁琐,当然它足够强大。
在这里,我们就简单的讲请求报文进行分类,把分类的数据结果交给HttpRequest来保管:
HttpRequest的构造函数,接受一个请求报文,对请求报文进行截取分类,
我们在这里就只挑拣两个必须的用到的数据url和httpMethod。
NameValueCollection是一个字典类型的集合,它对Get请求的数据进行了封装,以供我们可以根据不同的参数获取不同的响应数据 Request.QueryString[]嘛,很熟悉吧。
public class HttpRequest
{
public HttpRequest(string strRequest);
public string HttpMethod { get; set; }
public NameValueCollection QueryString { get; set; }
public string Url { get; set; }
}
HttpResponse里提供了Write方法,最后输出都要转换为byte字节的,Write(stringresponseStr)的方法是对输出的文本进行累加,输出的时候统一转为了byte字节。 CreateResponseContent这个方法就是在输出的时候对响应报文(ResponseBody和ResponseHead)进行了整合。
public class HttpResponse
{
public HttpResponse(HttpRequest request);
public HttpRequest Request { get; set; }
public byte[] ResponseBody { get; }
public byte[] ResponseHeader { get; set; }
public void CreateResponseContent();
public void Write(byte[] b);
public void Write(string responseStr);
}
HttpServerUtility就提供了一个方法,为了替换Html模板,对虚拟路径与程序集下的物理路径进行了映射:
public class HttpServerUtility : MarshalByRefObject
{
public HttpServerUtility();
public string MapPath(string path);
}
二、HttpApplication对象
这个对象是构成Asp.Net管道的核心对象,实际的HttpApplication是通过反射的方式来创建的,而且此方法要抽象很多,我们在下一篇文章会介绍实际的HttpApplication是怎么回事。
我们的HttpApplication里面定义了19个事件,HttpModule就是对这些事件进行注册。
InitInternal方法是HttpApplication的初始化方法,它在ProcessRequest方法里会被执行;InitInteranl方法中,调用了一个InitModules方法初始化所有的HttpModele。
ProcessRequest方法是绑定并开始执行所有HttpModule里注册的事件,并在第7-8个事件根据请求的url路径,
通过反射的方式创建了HttpHandler,在第11-12个时间中执行了HttpHandler的ProcessRequest方法。
public class HttpApplication : IHttpHandler
{
public HttpApplication();
public HttpContext Context { get; set; }
public event EventHandler AcquireRequestState;
public event EventHandler AunthorizeRequest;
public event EventHandler AuthenticateRequest;
public event EventHandler BeginRequest;
public event EventHandler EndRequest;
public event EventHandler LogRequest;
public event EventHandler PostAcquireRequestState;
public event EventHandler PostAuthenticateRequest;
public event EventHandler PostAuthorizeRequest;
public event EventHandler PostLogRequest;
public event EventHandler PostMapRequestHandler;
public event EventHandler PostReleaseRequestState;
public event EventHandler PostRequestHandlerExecute;
public event EventHandler PostResolveRequestCache;
public event EventHandler PostUpdateRequestCache;
public event EventHandler PreRequestHandlerExecute;
public event EventHandler ReleaseRequestState;
public event EventHandler ResolveRequestCache;
public event EventHandler UpdateRequestCache;
private void InitModules();
public void InitInternal();
public void ProcessRequest(HttpContext context);
}
HttpModule:
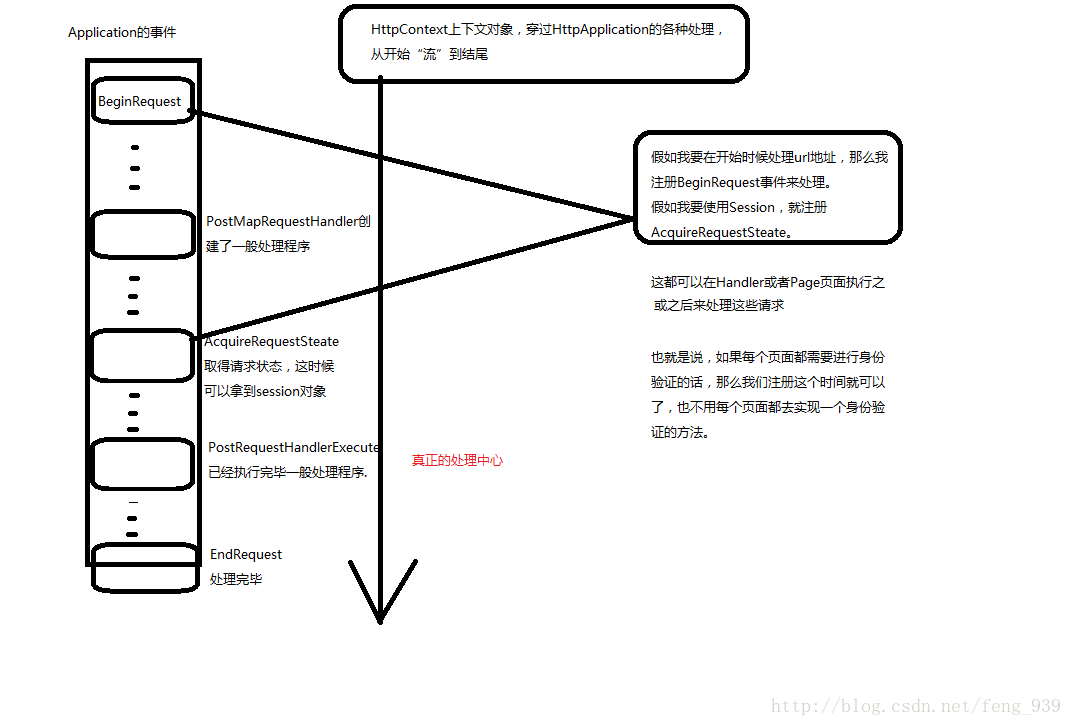
HttpApplication里的事件是按顺序执行的,HttpContext就是从HttpApplication的开始 "流" 到结束,这过程中就是这一些列事件来对HttpContext的请求进行处理的,有些事件在到达真正的处理中心(一般处理程序处理)之前就可以执行,或之后执行。比如:AuthenticateRequest是验证请求,用在获取用户信息的时候;PostAcquireRequestState这里以获取到了Session,这这个事件之后才能获取的session。
所以我们可以在不同的时间注册不同的事件来更好的扩展HttpApplication的请求处理.
在这里没有用配置文件去指定HttpModule,而是指定了一个HttpModules的文件夹,遍历这个文件夹下所有的cs文件,通过反射的方式创建成IHttpModule,执行其Init方法
private void InitModules()
{
HttpModuleCollection moduleCollection = new HttpModuleCollection();
if (Directory.Exists("Modules"))
{
string[] modulesPath = Directory.GetFiles("Modules");
foreach (string item in modulesPath)
{
if (File.Exists(item))
{
if (Path.GetExtension(item) == ".cs")
{
string moduleName = Assembly.GetEntryAssembly().GetName().Name
+ ".Modules." + Path.GetFileNameWithoutExtension(item);
IHttpModule module = Assembly.GetEntryAssembly()
.CreateInstance(moduleName) as IHttpModule;
moduleCollection.AddModule(moduleName, module);
module.Init(this);
}
}
}
}
}
在IHttpModule里面,就只有一个Init方法,这个方法通过HttpApplication类型,可以在这里注册HttpApplication的事件响应方法:
public interface IHttpModule
{
void Init(HttpApplication context);
}
IHttpHandler:这个就和我们的一般处理程序一样了,我们在一个类里继承这个接口,实现此ProcessRequest方法。
HttpHandler是Http请求真正的处理中心,在HttpApplication的事件管道中被创建执行。
public interface IHttpHandler
{
void ProcessRequest(HttpContext context);
}
大概就这些了,我们整理一下思路:
当一个http请求到达服务器,服务器通过监听socket请求,获取到http请求报文,HttpContext封装http请求,HttpApplication对象的ProcessRequest方法来处理这个请求,最后封装响应报文,响应给浏览器。
现在,我们来试验一下:
先把我们自己写的Asp.Net的程序集编译成一个dll文件;像上一篇文章一样,创建一个WinForm应用程序,引入我们的MyWebApplication程序集。
监听客户端请求可以这么改一下了
while (true)
{
Socket clientSocket = serverSocket.Accept();
byte[] data = new byte[1024 * 1024];
int len = clientSocket.Receive(data, 0, data.Length, SocketFlags.None);
if (len <= 0)
{
clientSocket.Shutdown(SocketShutdown.Both);
clientSocket.Close();
continue;
}
string strRequest = Encoding.UTF8.GetString(data, 0, len);
HttpContext context = new HttpContext(strRequest); //创建上下文对象
if (context.Request.Url.EndsWith(".aspx")
|| context.Request.Url.EndsWith(".ashx"))
{
HttpApplication application = new HttpApplication();
application.ProcessRequest(context); //创建Application,并执行PR方法
}
else //如果是静态文件,找到其路径,读取为byte字节放入输出流
{
string fileData = Path.Combine(AppDomain.CurrentDomain.BaseDirectory + context.Request.Url.TrimStart('/').Replace('/', '\\'));
if (!File.Exists(fileData))
{
context.Response.Write("不存在此路径");
}
else
{
context.Response.Write(File.ReadAllBytes(fileData));
}
}
clientSocket.Send(context.Response.ResponseHeader);
clientSocket.Send(context.Response.ResponseBody);
clientSocket.Shutdown(SocketShutdown.Both);
clientSocket.Close();
}
}, socket);
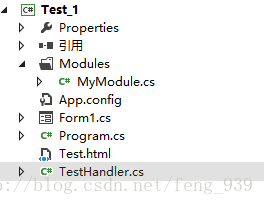
然后,我们创建一个Modules文件夹,用来放扩展HttpModule文件。 --MyHttpModule
创建一个继承自IHttpHandler的处理程序 --SimpleHandler
public class TestHandler : IHttpHandler
{
public void ProcessRequest(HttpContext context)
{
string id = context.Request.QueryString["id"];
string name = context.Request.QueryString["name"];
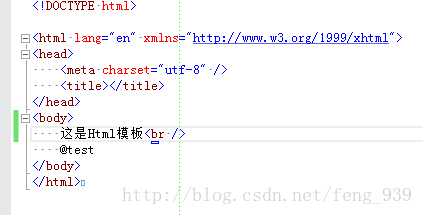
string path = context.Server.MapPath("Test.html");
string html = File.ReadAllText(path);
string replaceStr = string.Format("id:{0}<br />name:{1}", id, name);
html = html.Replace("@test", replaceStr);
context.Response.Write(html);
context.Response.Write("<br/>HttpHandler执行完毕!<br/>");
}
}
我们也试验一下HttpModule扩展:
public class MyModule : IHttpModule
{
public void Init(HttpApplication context)
{
context.BeginRequest += context_BeginRequest;
context.EndRequest += context_EndRequest;
}
//HttpApplication里最后一个事件
void context_EndRequest(object sender, EventArgs e)
{
HttpApplication app = sender as HttpApplication;
HttpContext context = app.Context;
context.Response.Write("<br />HttpModule---EndRequest执行了<br />");
}
//这是HttpApplication里的第一个事件
void context_BeginRequest(object sender, EventArgs e)
{
HttpApplication app = sender as HttpApplication;
HttpContext context = app.Context;
context.Response.Write("HttpModule---BeginRequest执行了<br />");
}
}
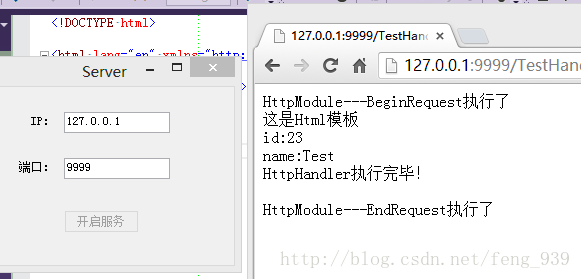
启动我们的服务器访问:
http://127.0.0.1:9999/TestHandler.aspx?id=23&name=Test
我们把这个.cs类就作为一个动态请求,后面加aspx或者ashx。
可以看到,我们的HttpModule在这里也生效了:
首选执行了HttpModule里注册的BeginRequest事件
然后输出了HttpHandler里面执行的结果,还有get请求的参数…HttpHandler执行完毕!
最后执行HttpModule里面注册的EndRequest事件


 2298
2298

 被折叠的 条评论
为什么被折叠?
被折叠的 条评论
为什么被折叠?
 到【灌水乐园】发言


