


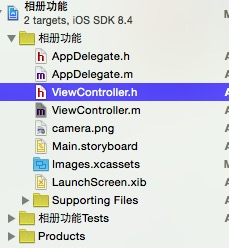
一、项目结构
二、代码实现
//
//  ViewController.m
//  相册功能
//
//  Created by 蜂蜜哦 on 06/11/15.
//  Copyright (c) 2015年 蜂蜜哦. All rights reserved.
//

#import "ViewController.h"

@interface ViewController ()<UITextViewDelegate,UIActionSheetDelegate,UIImagePickerControllerDelegate,UINavigationControllerDelegate>
{
    // 下拉选择弹框
    UIActionSheet *myActionSheet;
    // 图片2进制路径
    NSString *filePath;
}


@end

@implementation ViewController

- (void)viewDidLoad {
    [super viewDidLoad];

    //下方的图片按钮 点击后呼出菜单 打开摄像机 查找本地相册
    UIImage *image = [[UIImage alloc] initWithContentsOfFile:[[NSBundle mainBundle] pathForResource:@"camera" ofType:@"png"]];

    UIButton *button = [UIButton buttonWithType:UIButtonTypeCustom];
    button.frame = CGRectMake(0, 120, image.size.width, image.size.height);
    [button setImage:image forState:UIControlStateNormal];
    [button addTarget:self action:@selector(openMenu) forControlEvents:UIControlEventTouchUpInside];
    [self.view addSubview:button];

}


- (void)openMenu
{
    //在这里呼出下方菜单按钮项
    myActionSheet = [[UIActionSheet alloc]initWithTitle:nil delegate:self cancelButtonTitle:@"取消" destructiveButtonTitle:nil otherButtonTitles:@"打开照相机", @"从手机相册获取", nil];
    [myActionSheet showInView:self.view];

}

- (void)actionSheet:(UIActionSheet *)actionSheet clickedButtonAtIndex:(NSInteger)buttonIndex
{
    //呼出的菜单按钮点击后的响应
    if (buttonIndex == myActionSheet.cancelButtonIndex) {
        NSLog(@"取消");
    }
    switch (buttonIndex) {
        case 0:
            [self takePhoto]; //打开照相机拍照
            break;

        case 1:
            [self LocalPhoto]; //打开本地相册
            break;
    }
}

 // 开始拍照
- (void)takePhoto
{
    UIImagePickerControllerSourceType sourceType = UIImagePickerControllerSourceTypeCamera;

    if ([UIImagePickerController isSourceTypeAvailable:UIImagePickerControllerSourceTypeCamera]) {
        UIImagePickerController *picker = [[UIImagePickerController alloc] init];
        picker.delegate = self;
        //设置拍照后的图片可被编辑
        picker.allowsEditing = YES;
        picker.sourceType = sourceType;
        [self presentViewController:picker animated:YES completion:nil];
    } else {
        NSLog(@"模拟器中无法打开照相机,请在真机中使用");
    }

}


//打开本地相册
- (void)LocalPhoto
{
    UIImagePickerController *picker = [[UIImagePickerController alloc] init];

    picker.sourceType = UIImagePickerControllerSourceTypePhotoLibrary;
    picker.delegate = self;
    //设置选择后的图片可被编辑
    picker.allowsEditing = YES;
    [self presentViewController:picker animated:YES completion:nil];
}

//当选择一张图片后进入这里
- (void)imagePickerController:(UIImagePickerController *)picker didFinishPickingMediaWithInfo:(NSDictionary *)info
{
    NSString *type = [info objectForKey:UIImagePickerControllerMediaType];


    //当选择的类型是图片
    if ([type isEqualToString:@"public.image"])
    {
        //先把图片转成NSData
        UIImage* image = [info objectForKey:@"UIImagePickerControllerOriginalImage"];
        NSData *data;

        if (UIImagePNGRepresentation(image) == nil)
        {
            data = UIImageJPEGRepresentation(image, 1.0);
        } else {
            data = UIImagePNGRepresentation(image);
        }

        //图片保存的路径
        //这里将图片放在沙盒的documents文件夹中
        NSString * DocumentsPath = [NSHomeDirectory() stringByAppendingPathComponent:@"Documents"];

        //文件管理器
        NSFileManager *fileManager = [NSFileManager defaultManager];

        //把刚刚图片转换的data对象拷贝至沙盒中 并保存为image.png
        [fileManager createDirectoryAtPath:DocumentsPath withIntermediateDirectories:YES attributes:nil error:nil];
        [fileManager createFileAtPath:[DocumentsPath stringByAppendingString:@"/image.png"] contents:data attributes:nil];

        //得到选择后沙盒中图片的完整路径
        filePath = [[NSString alloc]initWithFormat:@"%@%@",DocumentsPath,  @"/image.png"];
        NSLog(@"图片的路径是:%@", filePath);
        //关闭相册界面
        [picker dismissViewControllerAnimated:YES completion:nil];

        //创建一个选择后图片的小图标放在下方
        //类似微薄选择图后的效果
        UIImageView *smallimage = [[UIImageView alloc] initWithFrame:
                                   CGRectMake(50, 120, 40, 40)];
        smallimage.image = image;
        //加在视图中
        [self.view addSubview:smallimage];
    }

}

- (void)imagePickerControllerDidCancel:(UIImagePickerController *)picker
{
    NSLog(@"您取消了选择图片");
    [picker dismissViewControllerAnimated:YES completion:nil];
}


- (void)didReceiveMemoryWarning {
    [super didReceiveMemoryWarning];
}

@end


 2170
2170


 被折叠的 条评论
为什么被折叠?
被折叠的 条评论
为什么被折叠?
 到【灌水乐园】发言


