


上一篇:https://blog.csdn.net/fengxianaa/article/details/124697362
1. 前后端分离
之前功能都是在前后端不分离的情况下,也就是前端的代码在我们后端的项目中

但实际工作中,大多数都是前后端分离的,这样的开发架构下,前后端的交互都是通过 JSON 来进行交互
准备,pom.xml中添加
<dependency>
  <groupId>com.alibaba</groupId>
  <artifactId>fastjson</artifactId>
  <version>1.2.60</version>
</dependency>
1. 登陆成功、失败,返回json
修改 SecurityConfig
@Override
protected void configure(HttpSecurity http) throws Exception {
http.authorizeRequests()
.antMatchers("/fail.html").permitAll()
.anyRequest().authenticated()
.and()
.formLogin()
.loginProcessingUrl("/user/login")
.usernameParameter("name")
.passwordParameter("pass")
// 登录成功后设置json格式的返回结果
.successHandler(new AuthenticationSuccessHandler() {
/**
*
* @param request
* @param response
* @param authentication 保存了登录成功的用户信息
* @throws IOException
*/
@Override
public void onAuthenticationSuccess(HttpServletRequest request, HttpServletResponse response,
Authentication authentication) throws IOException {
response.setContentType("application/json;charset=utf-8");
PrintWriter out = response.getWriter();
out.write(JSONObject.toJSONString(authentication));
out.flush();
out.close();
}
})
// 登录失败后设置json格式的返回结果
.failureHandler(new AuthenticationFailureHandler() {
@Override
public void onAuthenticationFailure(HttpServletRequest request, HttpServletResponse response,
AuthenticationException exception) throws IOException, ServletException {
response.setContentType("application/json;charset=utf-8");
PrintWriter out = response.getWriter();
Map<String,String> map = new HashMap<>();
map.put("errMsg", exception.getMessage());
out.write(JSONObject.toJSONString(map));
out.flush();
out.close();
}
})
.permitAll()
.and()
.csrf().disable();//关闭 csrf,后面讨论
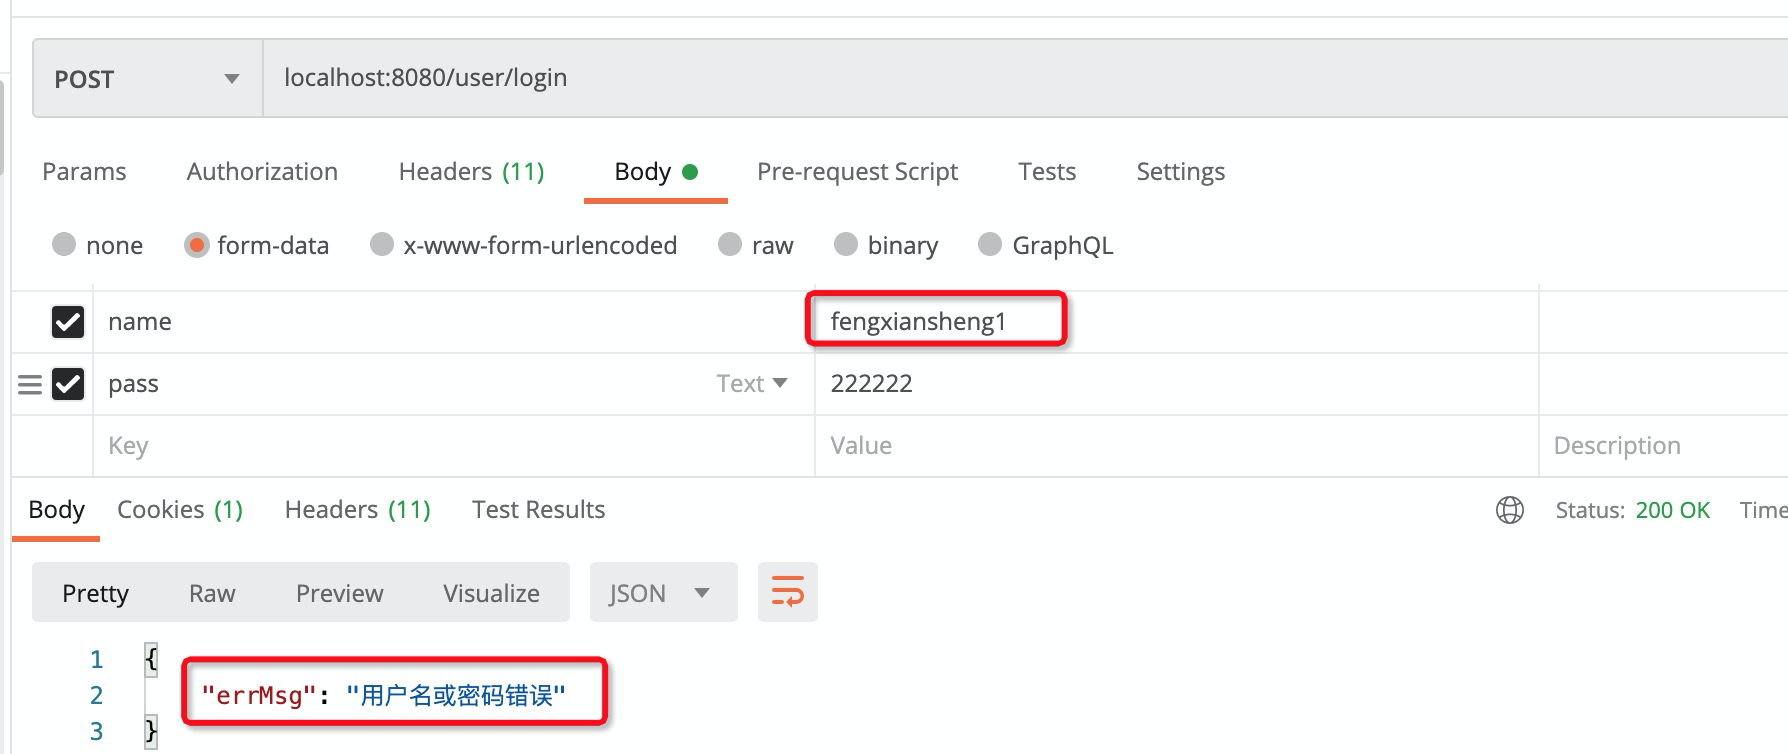
}用 postman 访问

登陆失败:
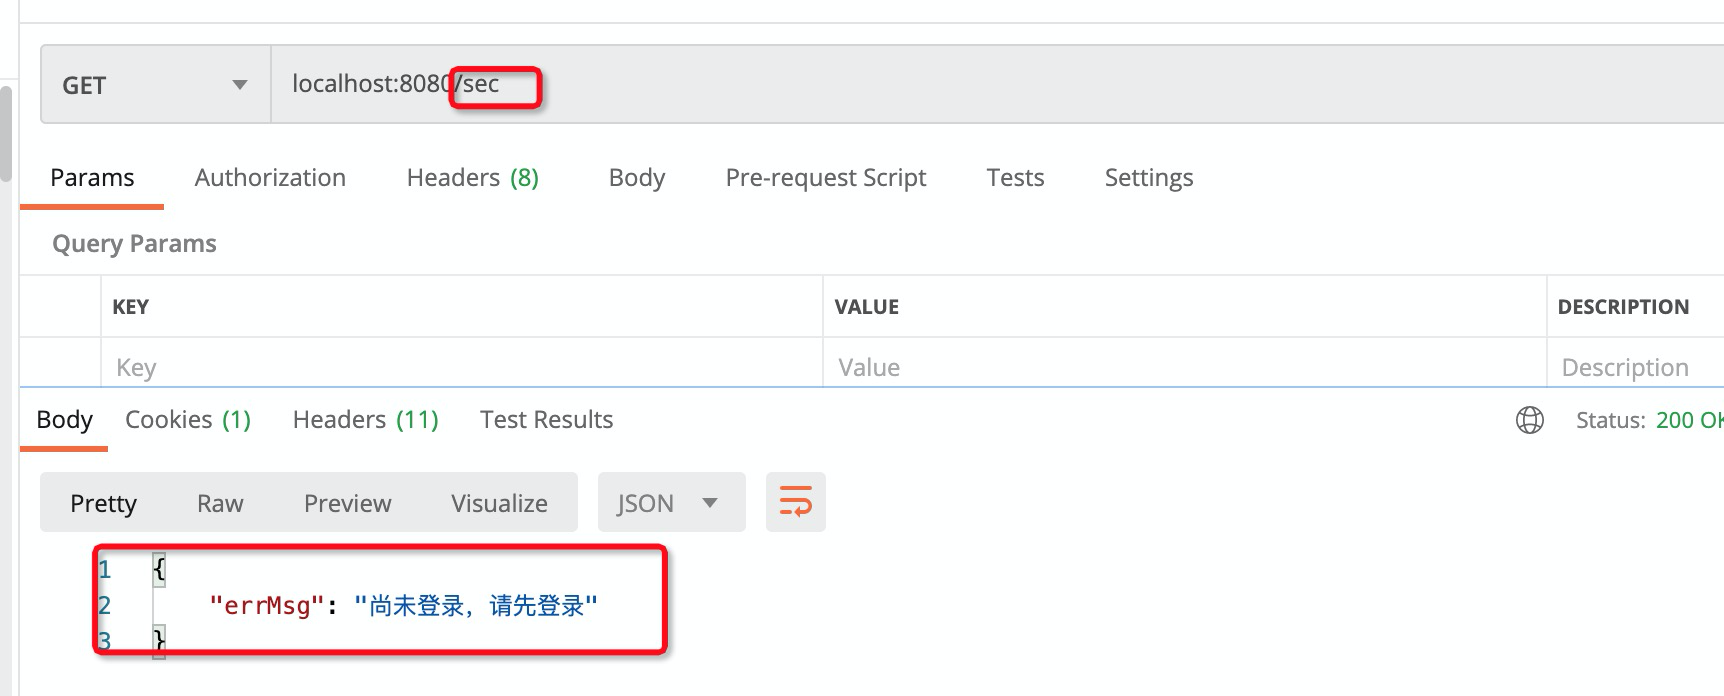
2. 未登陆返回json
目前用户没有登陆,访问:localhost:8080/sec,会跳转到登陆页面,
通过下面的设置,让它返回json
.csrf().disable()// 关闭 csrf,后面讨论
    .exceptionHandling().authenticationEntryPoint(new AuthenticationEntryPoint() {
    @Override
    public void commence(HttpServletRequest request, HttpServletResponse response,
                         AuthenticationException authException) throws IOException, ServletException {
        response.setContentType("application/json;charset=utf-8");
        PrintWriter out = response.getWriter();
        Map<String,String> map = new HashMap<>();
        map.put("errMsg", "尚未登录,请先登录");
        out.write(JSONObject.toJSONString(map));
        out.flush();
        out.close();
    }
});
重启后,访问:localhost:8080/sec
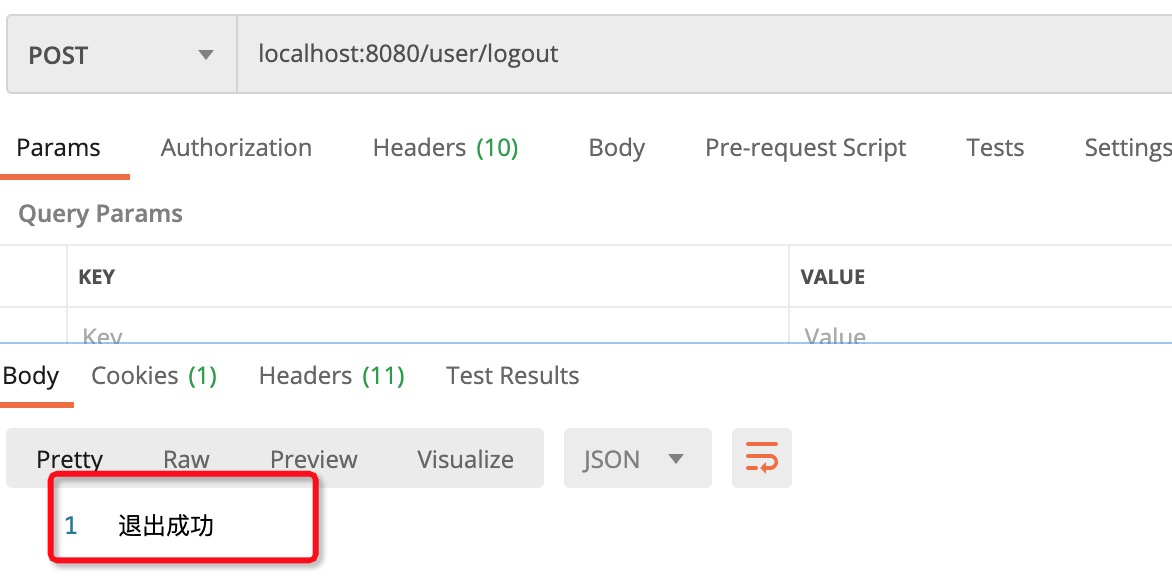
3. 退出登录
configure 方法中末尾新增:
http.logout().logoutUrl("/user/logout")
    .logoutSuccessHandler(new LogoutSuccessHandler() {
        @Override
        public void onLogoutSuccess(HttpServletRequest request, HttpServletResponse response, Authentication authentication) throws IOException, ServletException {
            response.setContentType("application/json;charset=utf-8");
            PrintWriter out = response.getWriter();
            out.write("退出成功");
            out.flush();
            out.close();
        }
    });
重启后,访问:localhost:8080/user/logout
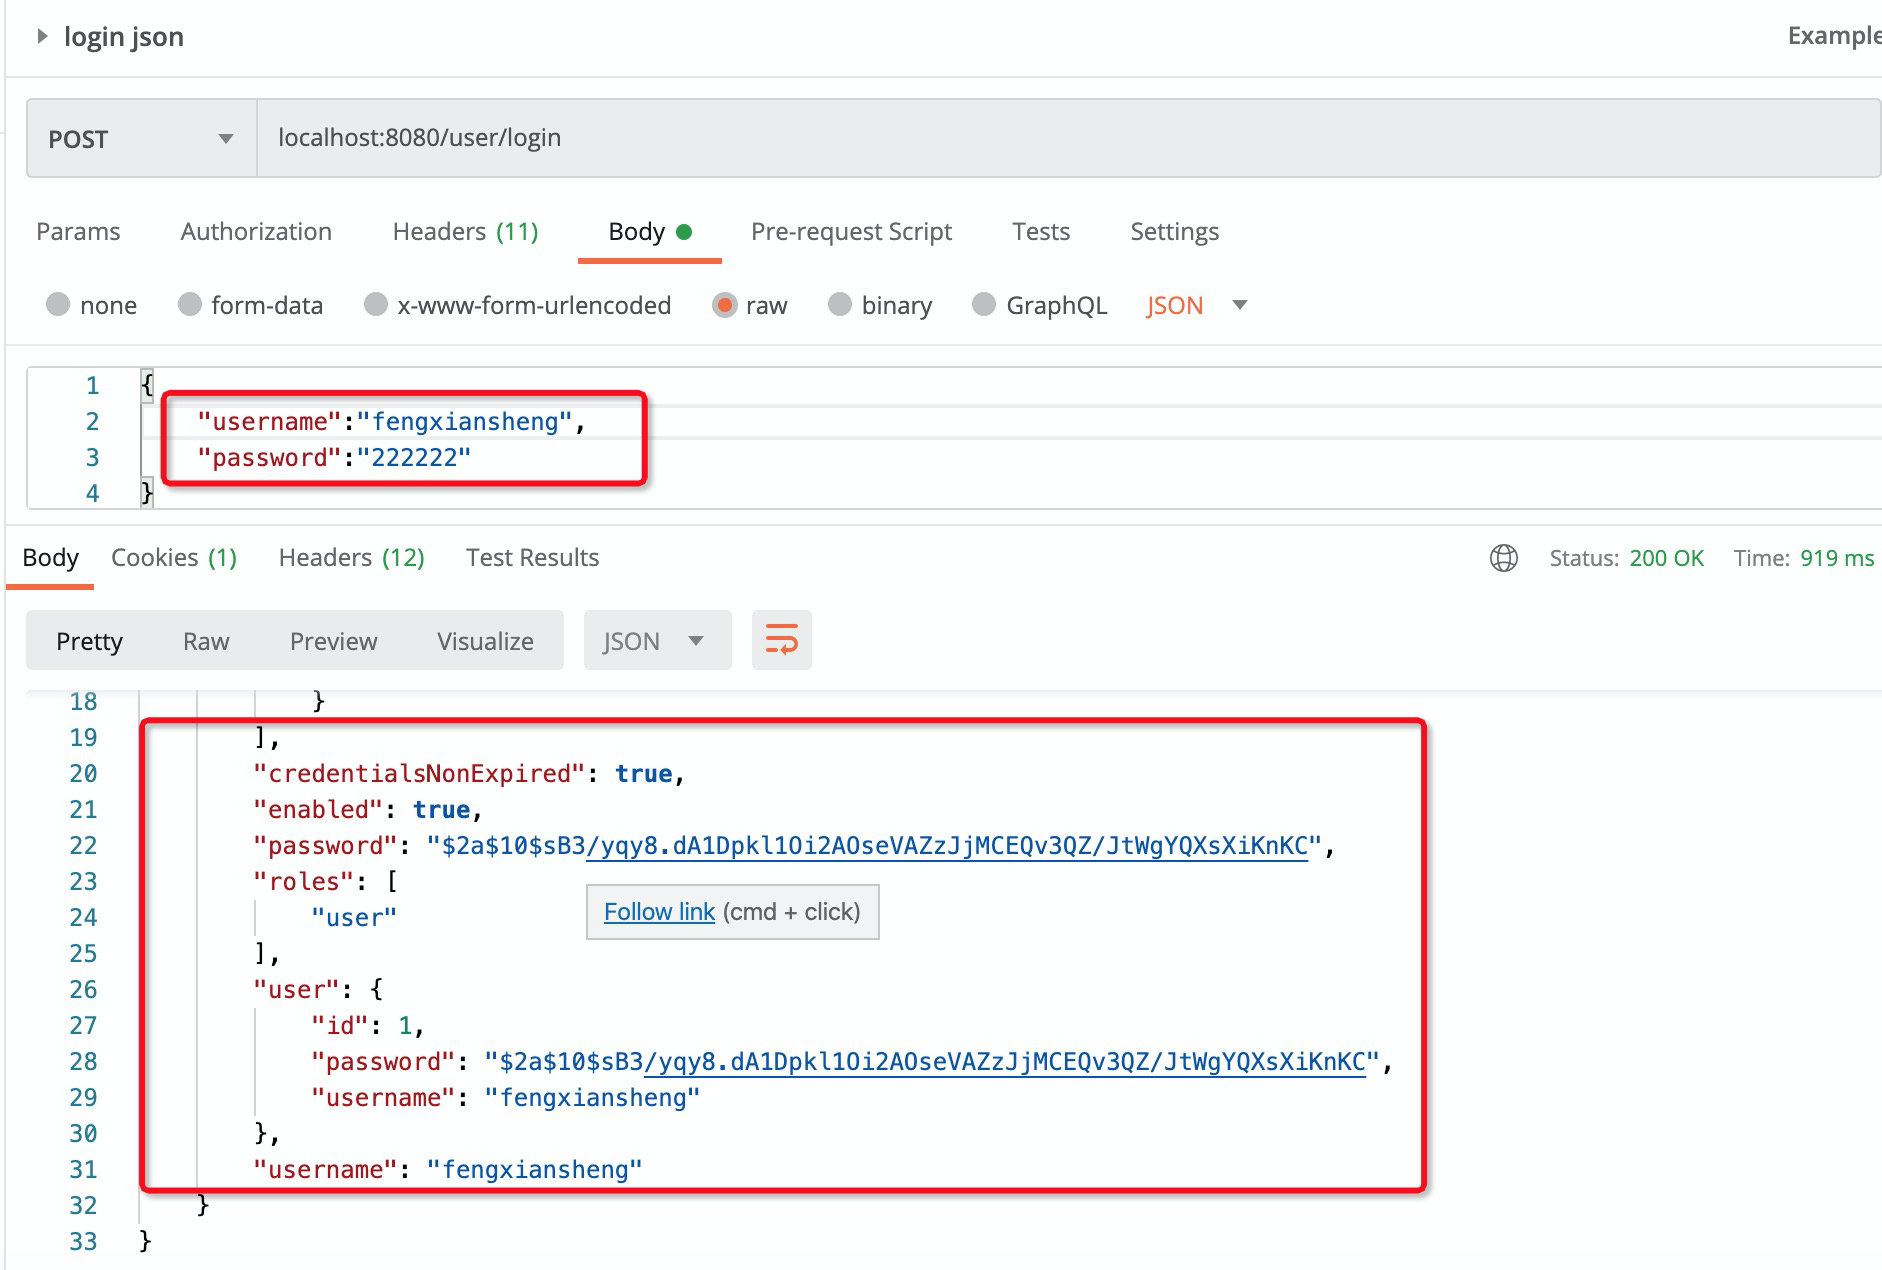
4. json格式登陆
默认情况下是从 UsernamePasswordAuthenticationFilter 的attemptAuthentication方法中获取表单中的参数,
我们新建一个类,继承 UsernamePasswordAuthenticationFilter,复写 attemptAuthentication方法
从json中获取参数
/**
 * 自定义 UsernamePasswordAuthenticationFilter,从请求中获取用户名密码
 */
public class MyUsernamePasswordAuthenticationFilter extends UsernamePasswordAuthenticationFilter {


    @Override
    public Authentication attemptAuthentication(HttpServletRequest request, HttpServletResponse response) throws AuthenticationException {

        //如果请求方式不是 post,直接异常
        if (!request.getMethod().equals("POST")) {
            throw new AuthenticationServiceException("请求方式有误:" + request.getMethod());
        }
        //如果请求的参数格式不是json,直接异常
        if (!request.getContentType().equals(MediaType.APPLICATION_JSON_VALUE)){
            throw new AuthenticationServiceException("参数不是json:" + request.getMethod());
        }
        String username=null;
        String password = null;
        try {
            //从 json 数据中 获取用户名、密码
            Map<String,String> map = JSONObject.parseObject(request.getInputStream(),Map.class);
            username = map.get("username");//但是参数名可能不是这个,最好是用 getUsernameParameter() 方法获取参数名
            password = map.get("password");
        } catch (IOException e) {
            throw new AuthenticationServiceException("参数不对:" + request.getMethod());
        }
        if (username == null) {
            username = "";
        }
        if (password == null) {
            password = "";
        }
        username = username.trim();
        // 封装用户名、密码,下面的 authenticate 方法会从中拿到 用户名, 调用我们的 LoginUserService 获取用户,然后比较密码
        UsernamePasswordAuthenticationToken authRequest
                = new UsernamePasswordAuthenticationToken(username,password);
        //设置ip、sessionId信息
        setDetails(request,authRequest);
        // authenticate 方法中封装了具体的密码认证逻辑
        return this.getAuthenticationManager().authenticate(authRequest);
    }
}
修改 SecurityConfig,声明我们的 MyUsernamePasswordAuthenticationFilter 的bean对象
同时使用下面新的 configure 方法,老的可以暂时注释掉
@Configuration
public class SecurityConfig extends WebSecurityConfigurerAdapter {
    /**
     * 声明一个 PasswordEncoder ,这样数据库存储的密码就不需要 "{加密方式}",这样的前缀
     * @return
     */
    @Bean
    public PasswordEncoder passwordEncoder(){
        return new BCryptPasswordEncoder();
    }

    @Bean
    public MyUsernamePasswordAuthenticationFilter myUsernamePasswordAuthenticationFilter() throws Exception {
        MyUsernamePasswordAuthenticationFilter filter = new MyUsernamePasswordAuthenticationFilter();
        filter.setAuthenticationManager(authenticationManagerBean());//认证使用
        //设置登陆成功返回值是json
        filter.setAuthenticationSuccessHandler(new AuthenticationSuccessHandler() {
            @Override
            public void onAuthenticationSuccess(HttpServletRequest request, HttpServletResponse response, Authentication authentication) throws IOException {
                response.setContentType("application/json;charset=utf-8");
                PrintWriter out = response.getWriter();
                out.write(JSONObject.toJSONString(authentication));
            }
        });
        //设置登陆失败返回值是json
        filter.setAuthenticationFailureHandler(new AuthenticationFailureHandler() {
            @Override
            public void onAuthenticationFailure(HttpServletRequest request, HttpServletResponse response, AuthenticationException exception) throws IOException, ServletException {
                response.setContentType("application/json;charset=utf-8");
                PrintWriter out = response.getWriter();
                Map<String,String> map = new HashMap<>();
                map.put("errMsg", exception.getMessage());
                out.write(JSONObject.toJSONString(map));
                out.flush();
                out.close();
            }
        });
        filter.setFilterProcessesUrl("/user/login");
        return filter;
    }

    @Override
    protected void configure(HttpSecurity http) throws Exception {
        http.authorizeRequests()
                .anyRequest().authenticated()
                .and().csrf().disable();
        //把自定义认证过滤器加到拦截器链中
        http.addFilterAt(myUsernamePasswordAuthenticationFilter(), UsernamePasswordAuthenticationFilter.class);
    }
}
5. 获取当前登录用户
只有一行代码: SecurityContextHolder.getContext().getAuthentication()
修改 SecController
@GetMapping("/sec")
public String sec(){
Authentication authentication = SecurityContextHolder.getContext().getAuthentication();
LoginUser currentUser = (LoginUser) authentication.getPrincipal();
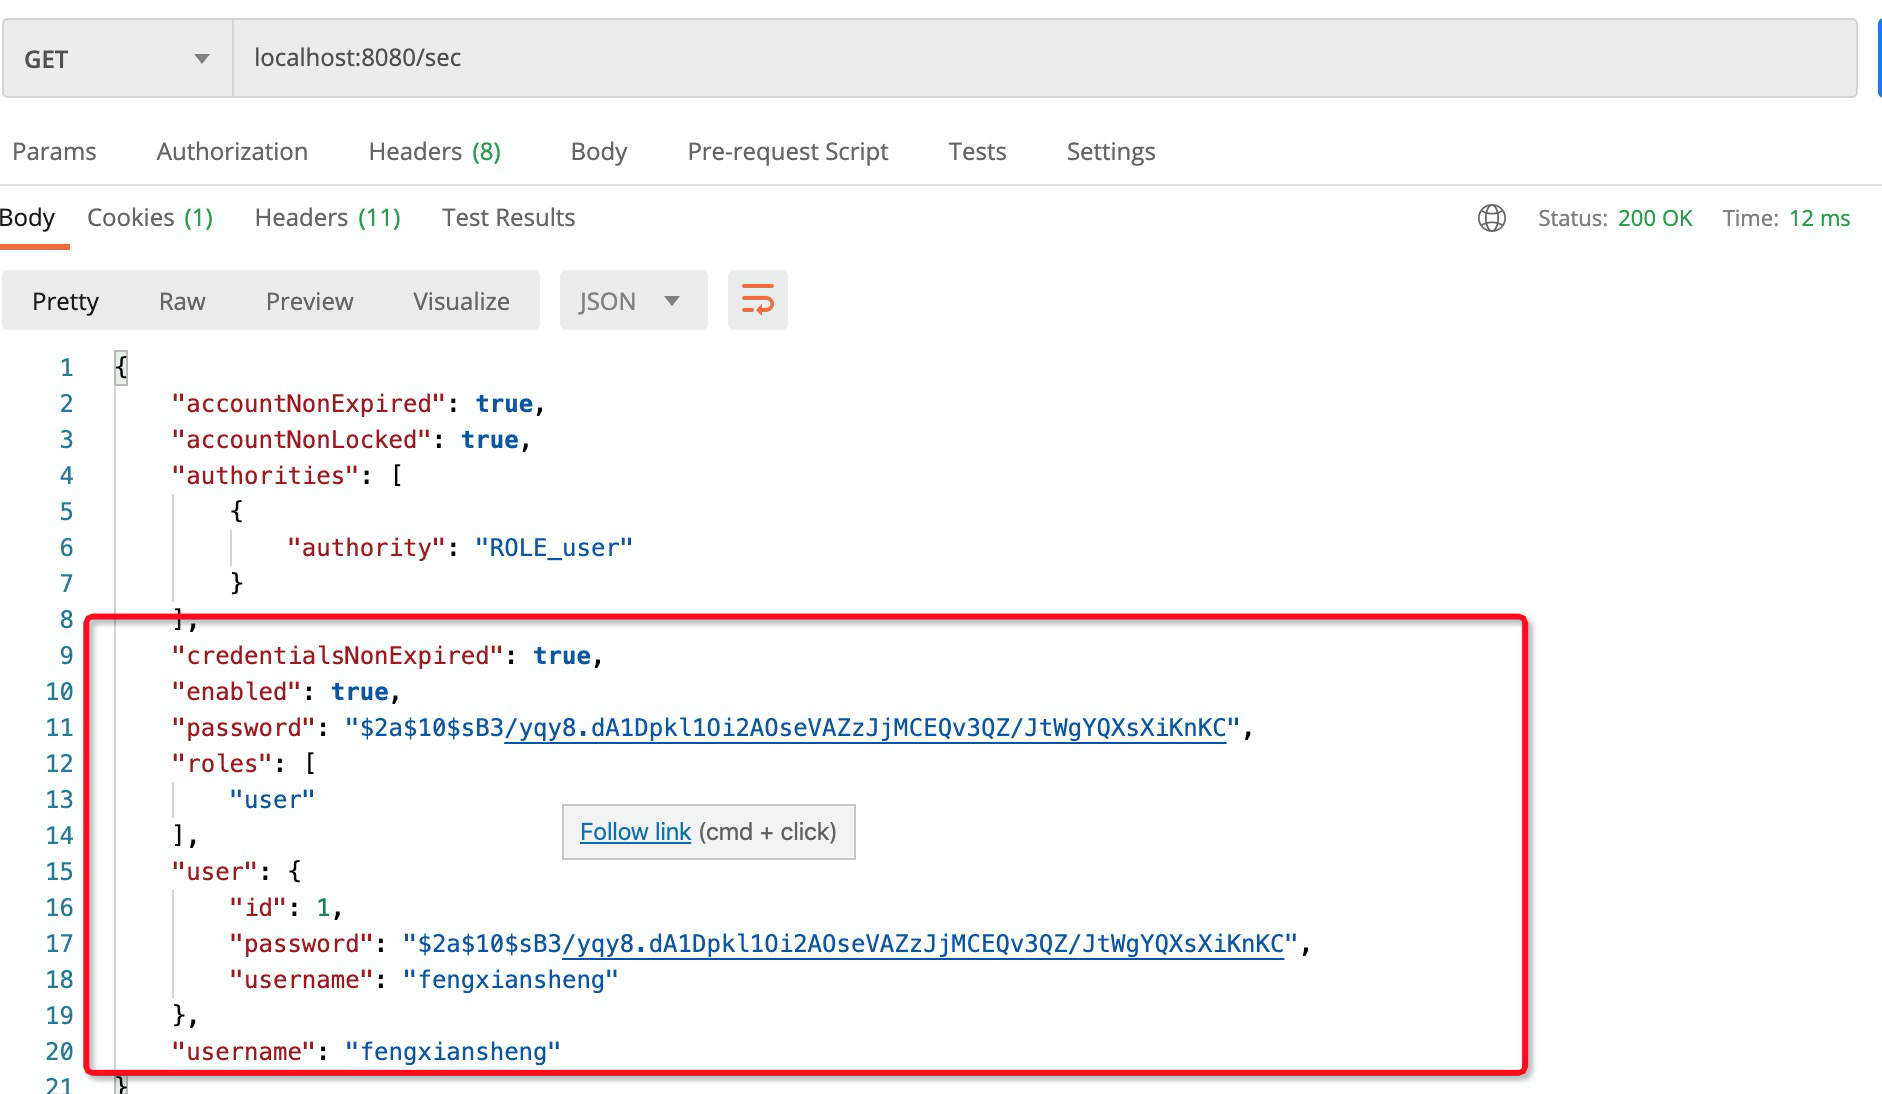
return JSONObject.toJSONString(currentUser);
}
登录成功后,访问:localhost:8080/sec
更新当前用户信息:SecurityContextHolder.getContext().setAuthentication(authResult)
比如:
// 可以找个地方写个这样的静态方法,如果要更新登录的用户信息,就调用这个方法
public static void setLoginUser(UserDetails userDetails) {
	SecurityContextHolder.getContext().setAuthentication(
		new UsernamePasswordAuthenticationToken(userDetails, userDetails.getPassword(), userDetails.getAuthorities()));
}
6. 验证码
添加验证码生成的工具包
<dependency>
  <groupId>com.github.penggle</groupId>
  <artifactId>kaptcha</artifactId>
  <version>2.3.2</version>
</dependency>
修改 SecController 增加:
@GetMapping("/code")
public void getVerifyCode(HttpServletResponse resp, HttpSession session) throws IOException {
    //验证码配置
    Properties properties = new Properties();
    properties.setProperty("kaptcha.image.width", "150");
    properties.setProperty("kaptcha.image.height", "50");
    properties.setProperty("kaptcha.textproducer.char.string", "0123456789");
    properties.setProperty("kaptcha.textproducer.char.length", "4");
    Config config = new Config(properties);
    DefaultKaptcha kaptcha = new DefaultKaptcha();
    kaptcha.setConfig(config);

    //生成验证码
    resp.setContentType("image/jpeg");
    String text = kaptcha.createText();
    session.setAttribute("verify_code", text);
    BufferedImage image = kaptcha.createImage(text);
    try(ServletOutputStream out = resp.getOutputStream()) {
        ImageIO.write(image, "jpg", out);
    }
}
修改 SecurityConfig
@Override
protected void configure(HttpSecurity http) throws Exception {
    http.authorizeRequests()
        .antMatchers("/code").permitAll()// 验证码请求不用登录
        .anyRequest().authenticated()
        .and().csrf().disable();

    //把自定义认证过滤器加到拦截器链中
    http.addFilterAt(myUsernamePasswordAuthenticationFilter(), UsernamePasswordAuthenticationFilter.class);
}
修改 MyUsernamePasswordAuthenticationFilter
.....
String username=null;
String password = null;
String code = null;
try {
Map<String,String> map = JSONObject.parseObject(request.getInputStream(),Map.class);
code = map.get("code");
username = map.get("username");
password = map.get("password");
} catch (IOException e) {
throw new AuthenticationServiceException("参数不对:" + request.getMethod());
}
// 校验验证码
String verify_code = (String) request.getSession().getAttribute("verify_code");
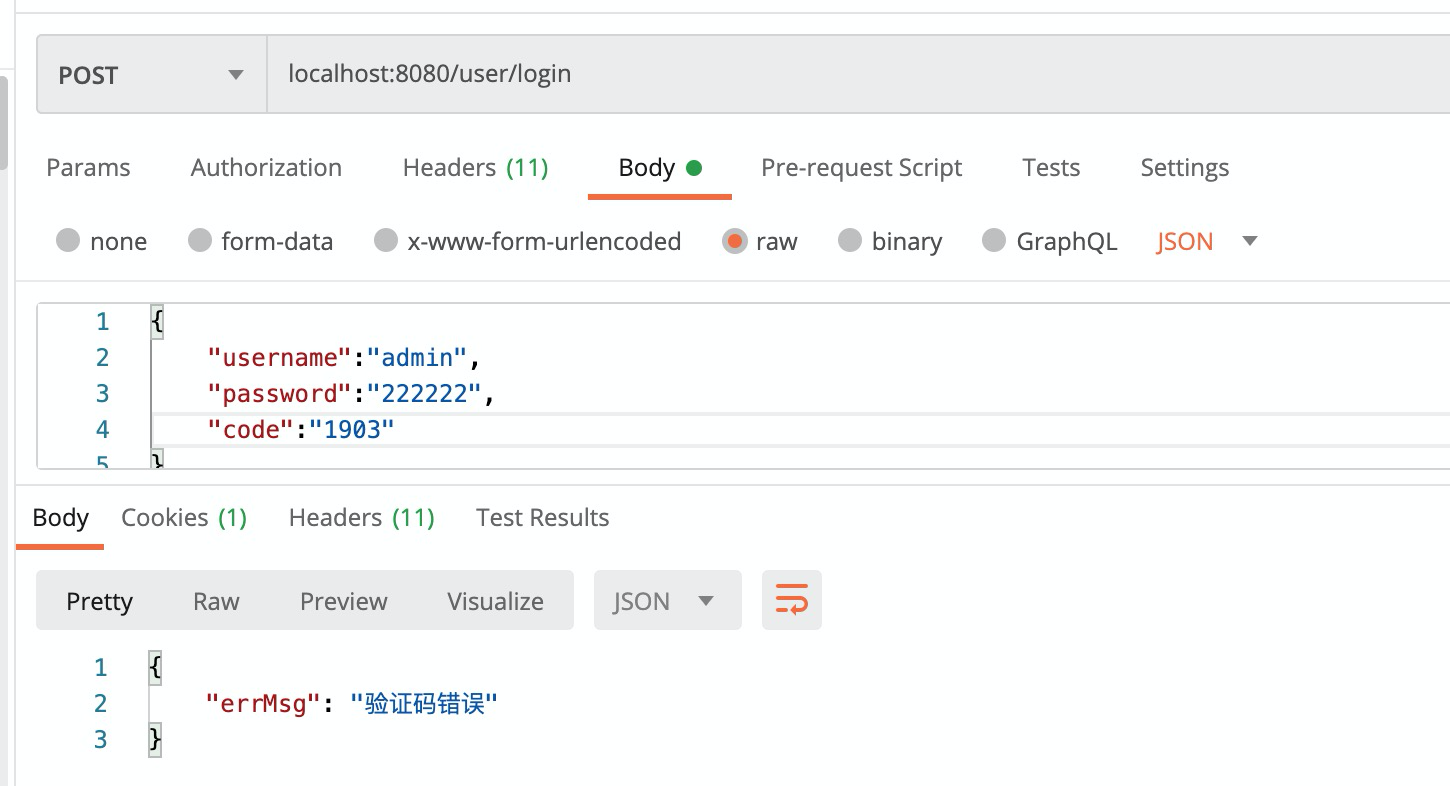
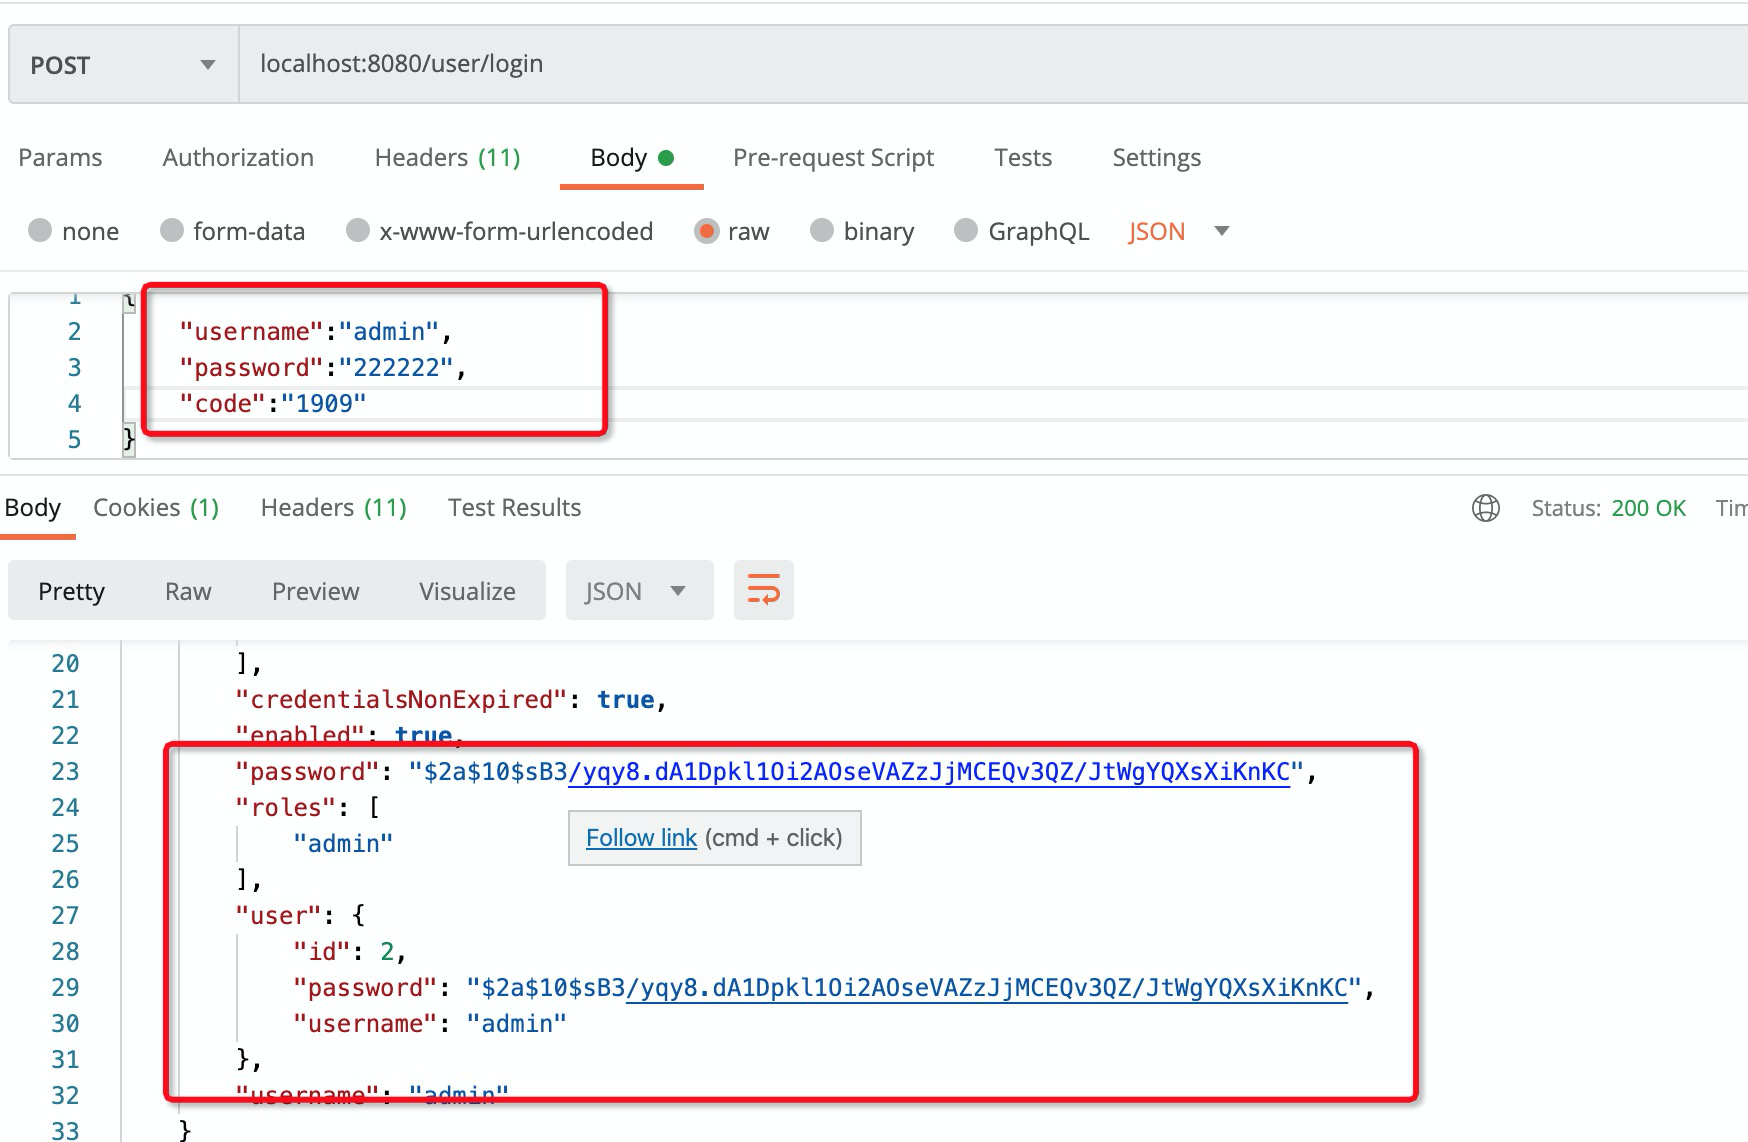
if (code == null || verify_code == null || !code.equals(verify_code)) {
throw new AuthenticationServiceException("验证码错误");
}
.....


 176
176


 被折叠的 条评论
为什么被折叠?
被折叠的 条评论
为什么被折叠?
 到【灌水乐园】发言


