


当使用Spring Boot时,我们可以通过拦截器(Interceptor)和监听器(Listener)来实现对请求和响应的处理。拦截器和监听器提供了一种可插拔的机制,用于在请求处理过程中进行自定义操作,例如记录日志、身份验证、权限检查等。下面通过提供一个示例,展示如何使用拦截器和监听器来记录请求日志。
首先,我们创建一个简单的Spring Boot项目,并添加所需的依赖。在这个示例中,我们将使用Spring Boot Starter Web。
-
创建一个Spring Boot项目并添加依赖
创建一个新的Spring Boot项目,可以使用Spring Initializr(https://start.spring.io/)进行初始化。在"Dependencies"中添加"Spring Web"依赖,并生成项目。
-
创建拦截器
在项目中创建一个名为 RequestLoggingInterceptor 的类,实现 HandlerInterceptor 接口。这个拦截器将记录请求的URL、HTTP方法和时间戳。
import org.springframework.web.servlet.HandlerInterceptor;

import javax.servlet.http.HttpServletRequest;
import javax.servlet.http.HttpServletResponse;

public class RequestLoggingInterceptor implements HandlerInterceptor {

    @Override
    public boolean preHandle(HttpServletRequest request, HttpServletResponse response, Object handler) throws Exception {
        // 记录请求的URL、HTTP方法和时间戳
        System.out.println("RequestLoggingInterceptor"+"启动了");
        System.out.println("Request URL: " + request.getRequestURL());
        System.out.println("HTTP Method: " + request.getMethod());
        System.out.println("Timestamp: " + System.currentTimeMillis());
        return true;
    }
}
-
注册拦截器
在Spring Boot应用程序的配置类中,注册拦截器,使其生效。
import org.springframework.beans.factory.annotation.Autowired;
import org.springframework.context.annotation.Configuration;
import org.springframework.web.servlet.config.annotation.InterceptorRegistry;
import org.springframework.web.servlet.config.annotation.WebMvcConfigurer;

@Configuration
public class WebConfig implements WebMvcConfigurer {

    private final RequestLoggingInterceptor requestLoggingInterceptor;

    @Autowired
    public WebConfig(RequestLoggingInterceptor requestLoggingInterceptor) {
        this.requestLoggingInterceptor = requestLoggingInterceptor;
    }

    @Override
    public void addInterceptors(InterceptorRegistry registry) {
        // 注册拦截器
        registry.addInterceptor(requestLoggingInterceptor);
    }
}
-
创建监听器
在项目中创建一个名为 RequestListener 的类,实现 ServletRequestListener 接口。这个监听器将在请求的开始和结束时记录日志。
import javax.servlet.ServletRequestEvent;
import javax.servlet.ServletRequestListener;
import javax.servlet.annotation.WebListener;
import javax.servlet.http.HttpServletRequest;

@WebListener
public class RequestListener implements ServletRequestListener {

    @Override
    public void requestInitialized(ServletRequestEvent sre) {
        HttpServletRequest request = (HttpServletRequest) sre.getServletRequest();
        System.out.println("RequestListener"+"启动了");
        // 记录请求的URL、HTTP方法和时间戳
        System.out.println("Request URL: " + request.getRequestURL());
        System.out.println("HTTP Method: " + request.getMethod());
        System.out.println("Timestamp: " + System.currentTimeMillis());
    }

    @Override
    public void requestDestroyed(ServletRequestEvent sre) {
        // 请求处理完成后的操作
        System.out.println("Request processing completed.");
    }
}
-
编写控制器
创建一个简单的控制器来模拟请求处理
import org.springframework.web.bind.annotation.GetMapping;
import org.springframework.web.bind.annotation.PostMapping;
import org.springframework.web.bind.annotation.RequestBody;
import org.springframework.web.bind.annotation.RestController;

@RestController
public class UserController {

    @GetMapping("/user")
    public String getUser() {
        return "Get User";
    }

    @PostMapping("/user")
    public String saveUser(@RequestBody String user) {
        return "Save User: " + user;
    }
}
-
在启动类或配置类上添加 @ServletComponentScan 注解
启用对监听器的支持
import org.springframework.boot.SpringApplication;
import org.springframework.boot.autoconfigure.SpringBootApplication;
import org.springframework.boot.web.servlet.ServletComponentScan;

@SpringBootApplication
@ServletComponentScan
public class HelloWorldApplication {

    public static void main(String[] args) {
        SpringApplication.run(HelloWorldApplication.class, args);
    }
}
-
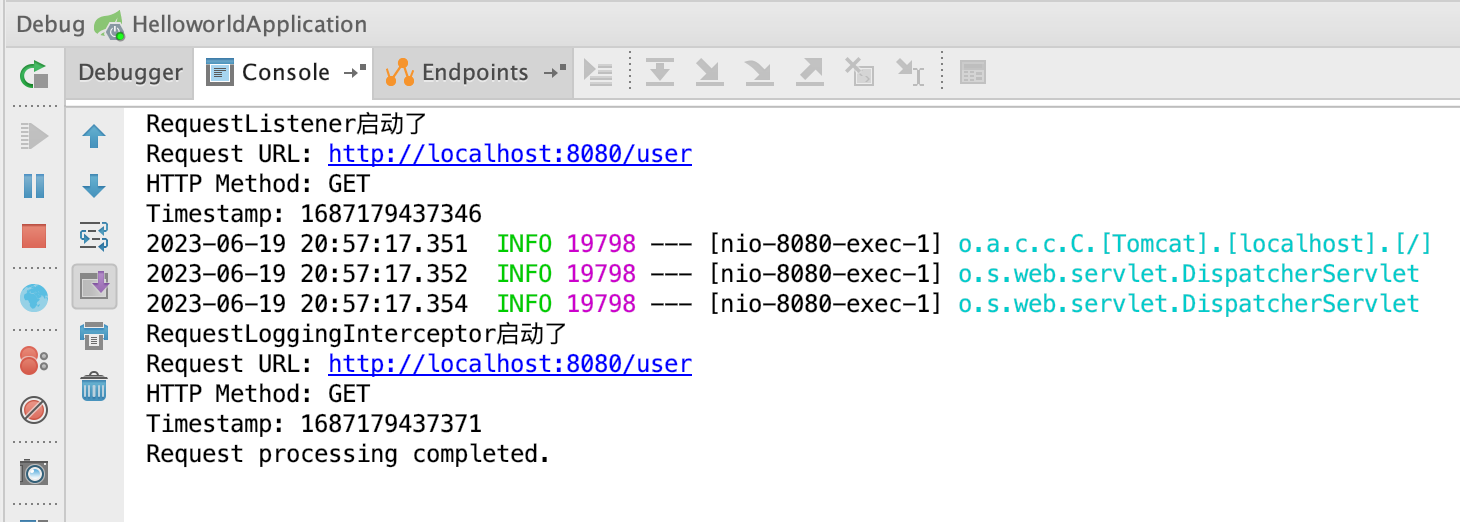
运行应用程序
现在,你可以运行Spring Boot应用程序并访问一些URL,观察控制台输出的日志信息。每次发起请求时,拦截器和监听器都会捕获请求并输出相关的日志。示例效果如下:
本文由 mdnice 多平台发布


 155
155


 被折叠的 条评论
为什么被折叠?
被折叠的 条评论
为什么被折叠?
 到【灌水乐园】发言


