


 超级会员免费看
 本文详细介绍了如何将苹果MacBook Pro设置为无线WIFI热点,通过雷电接口连接网络,然后共享给iPhone使用。步骤包括设置网络共享、配置WIFI名称和密码,最终实现手机成功连接并上网。
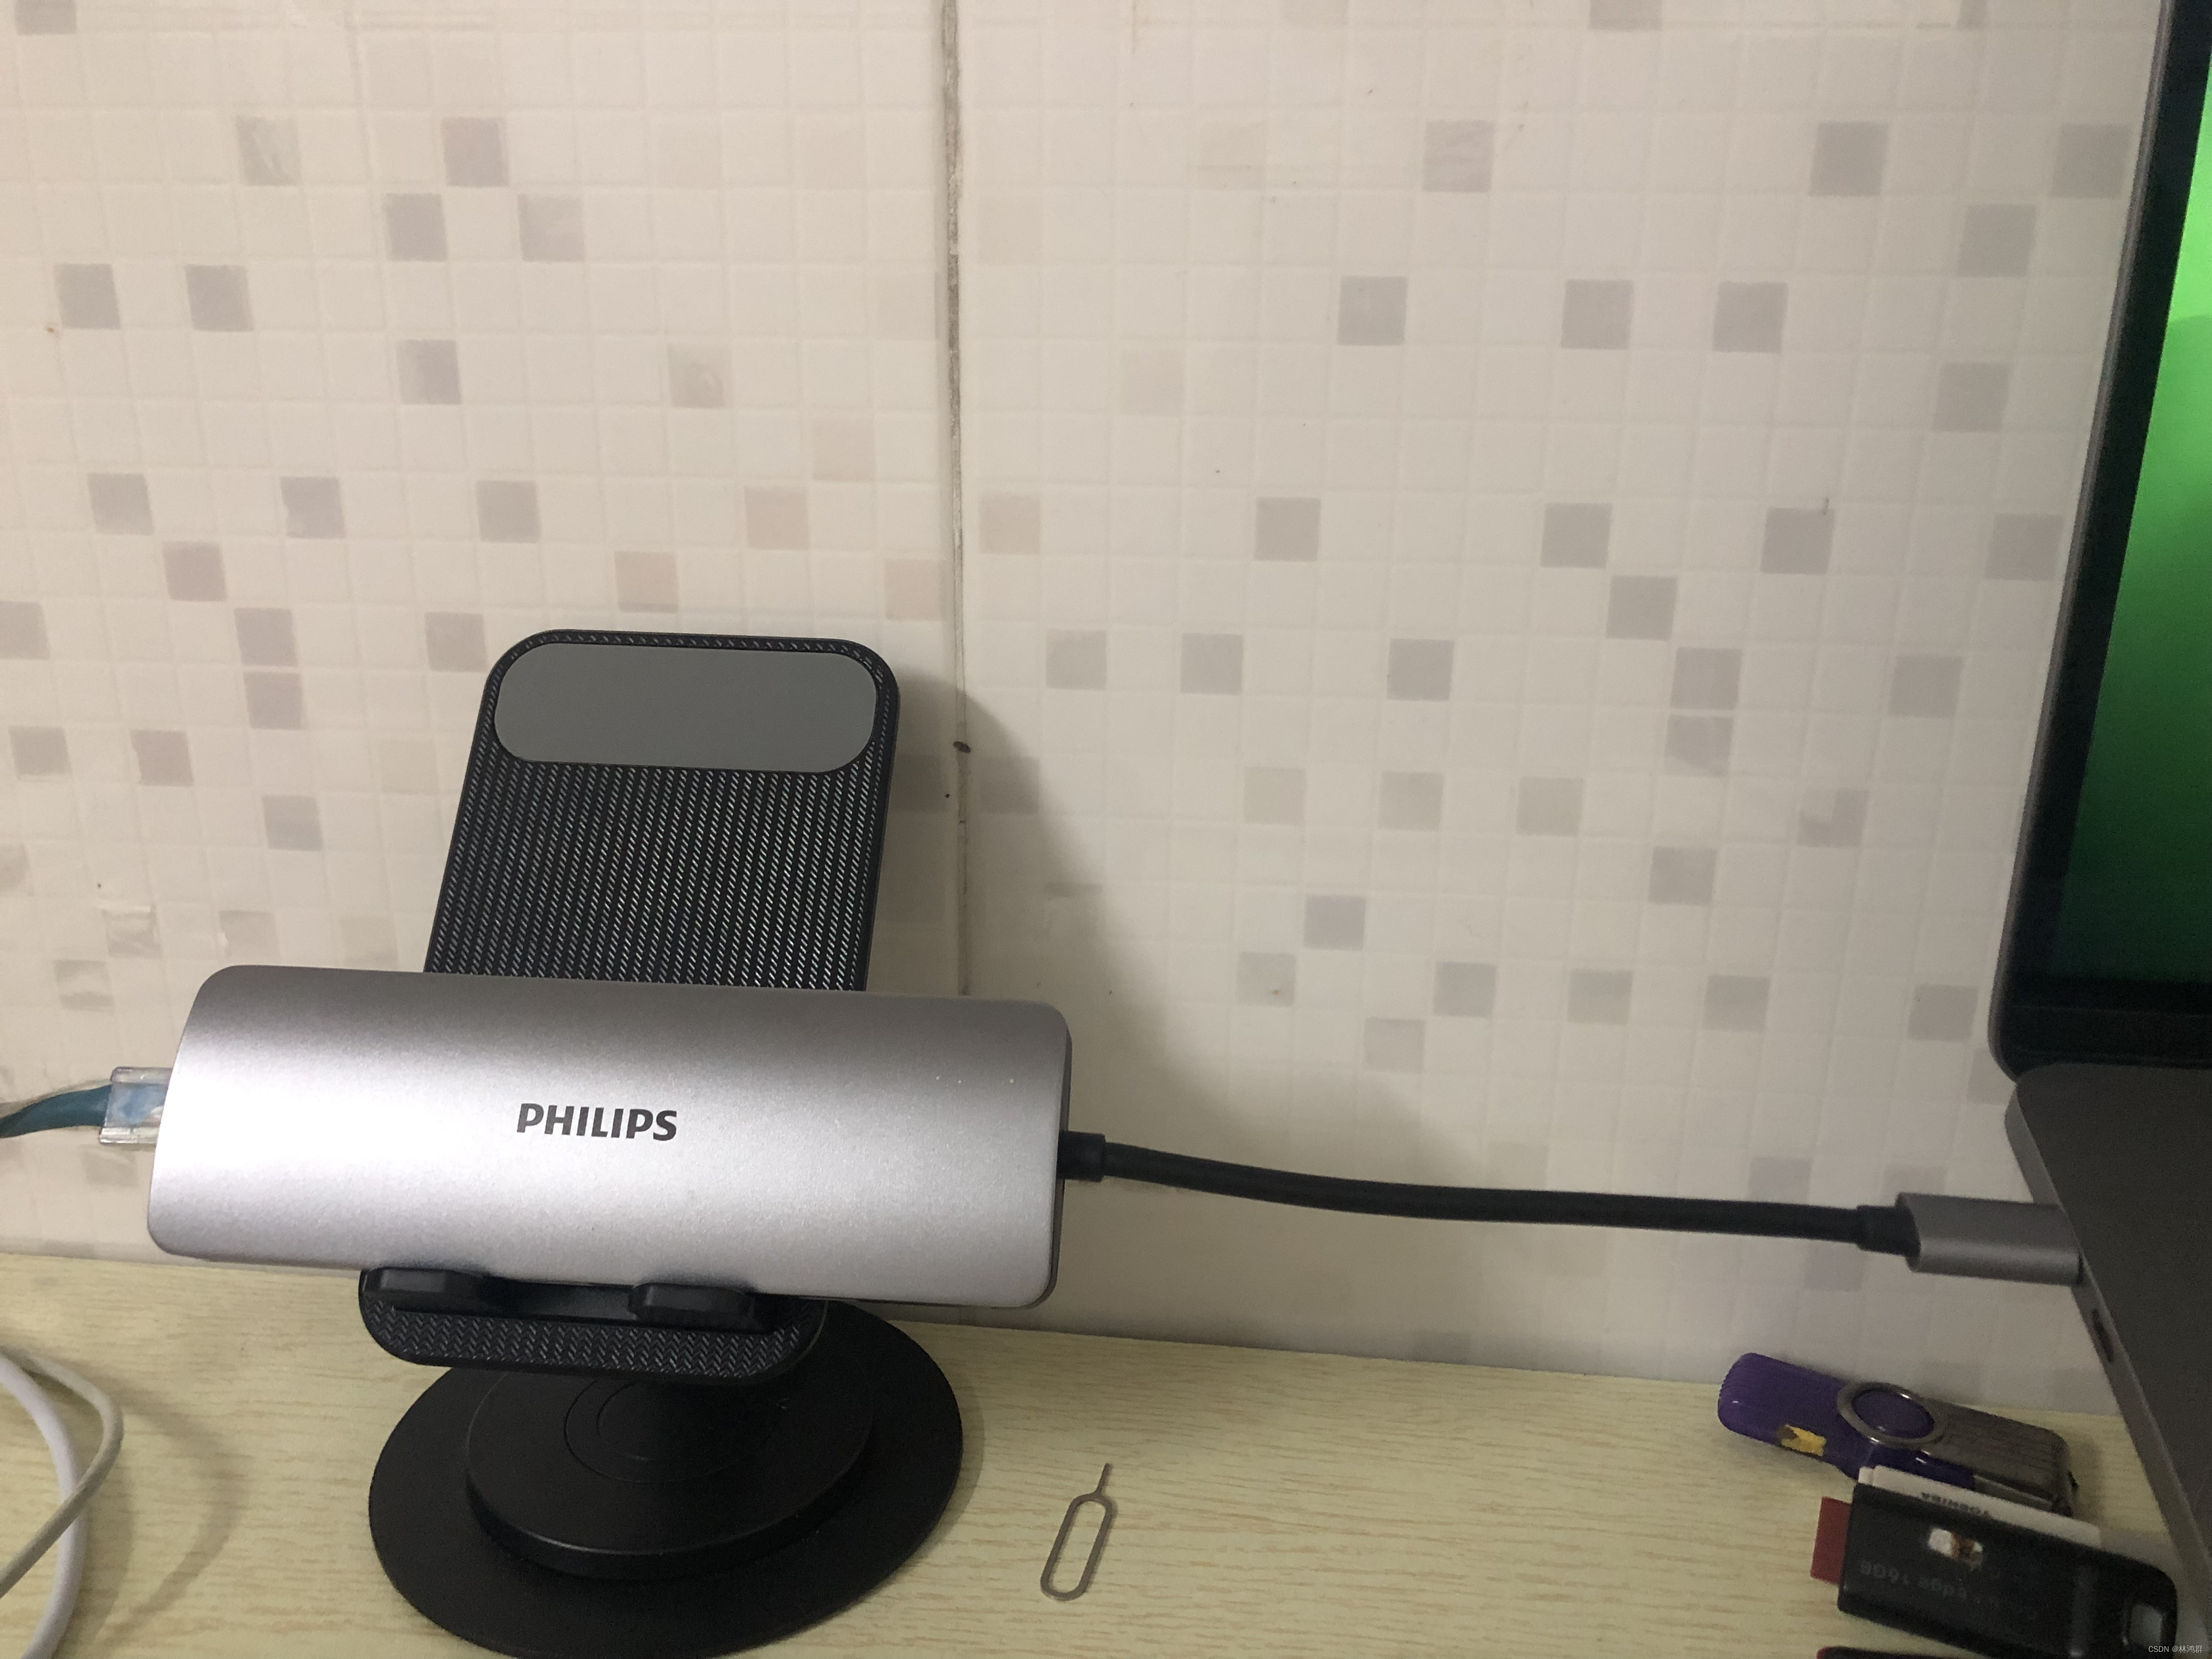
1. 雷电接口连接Apple MacBook Pro ,另一头RJ45接口连接网络水晶头
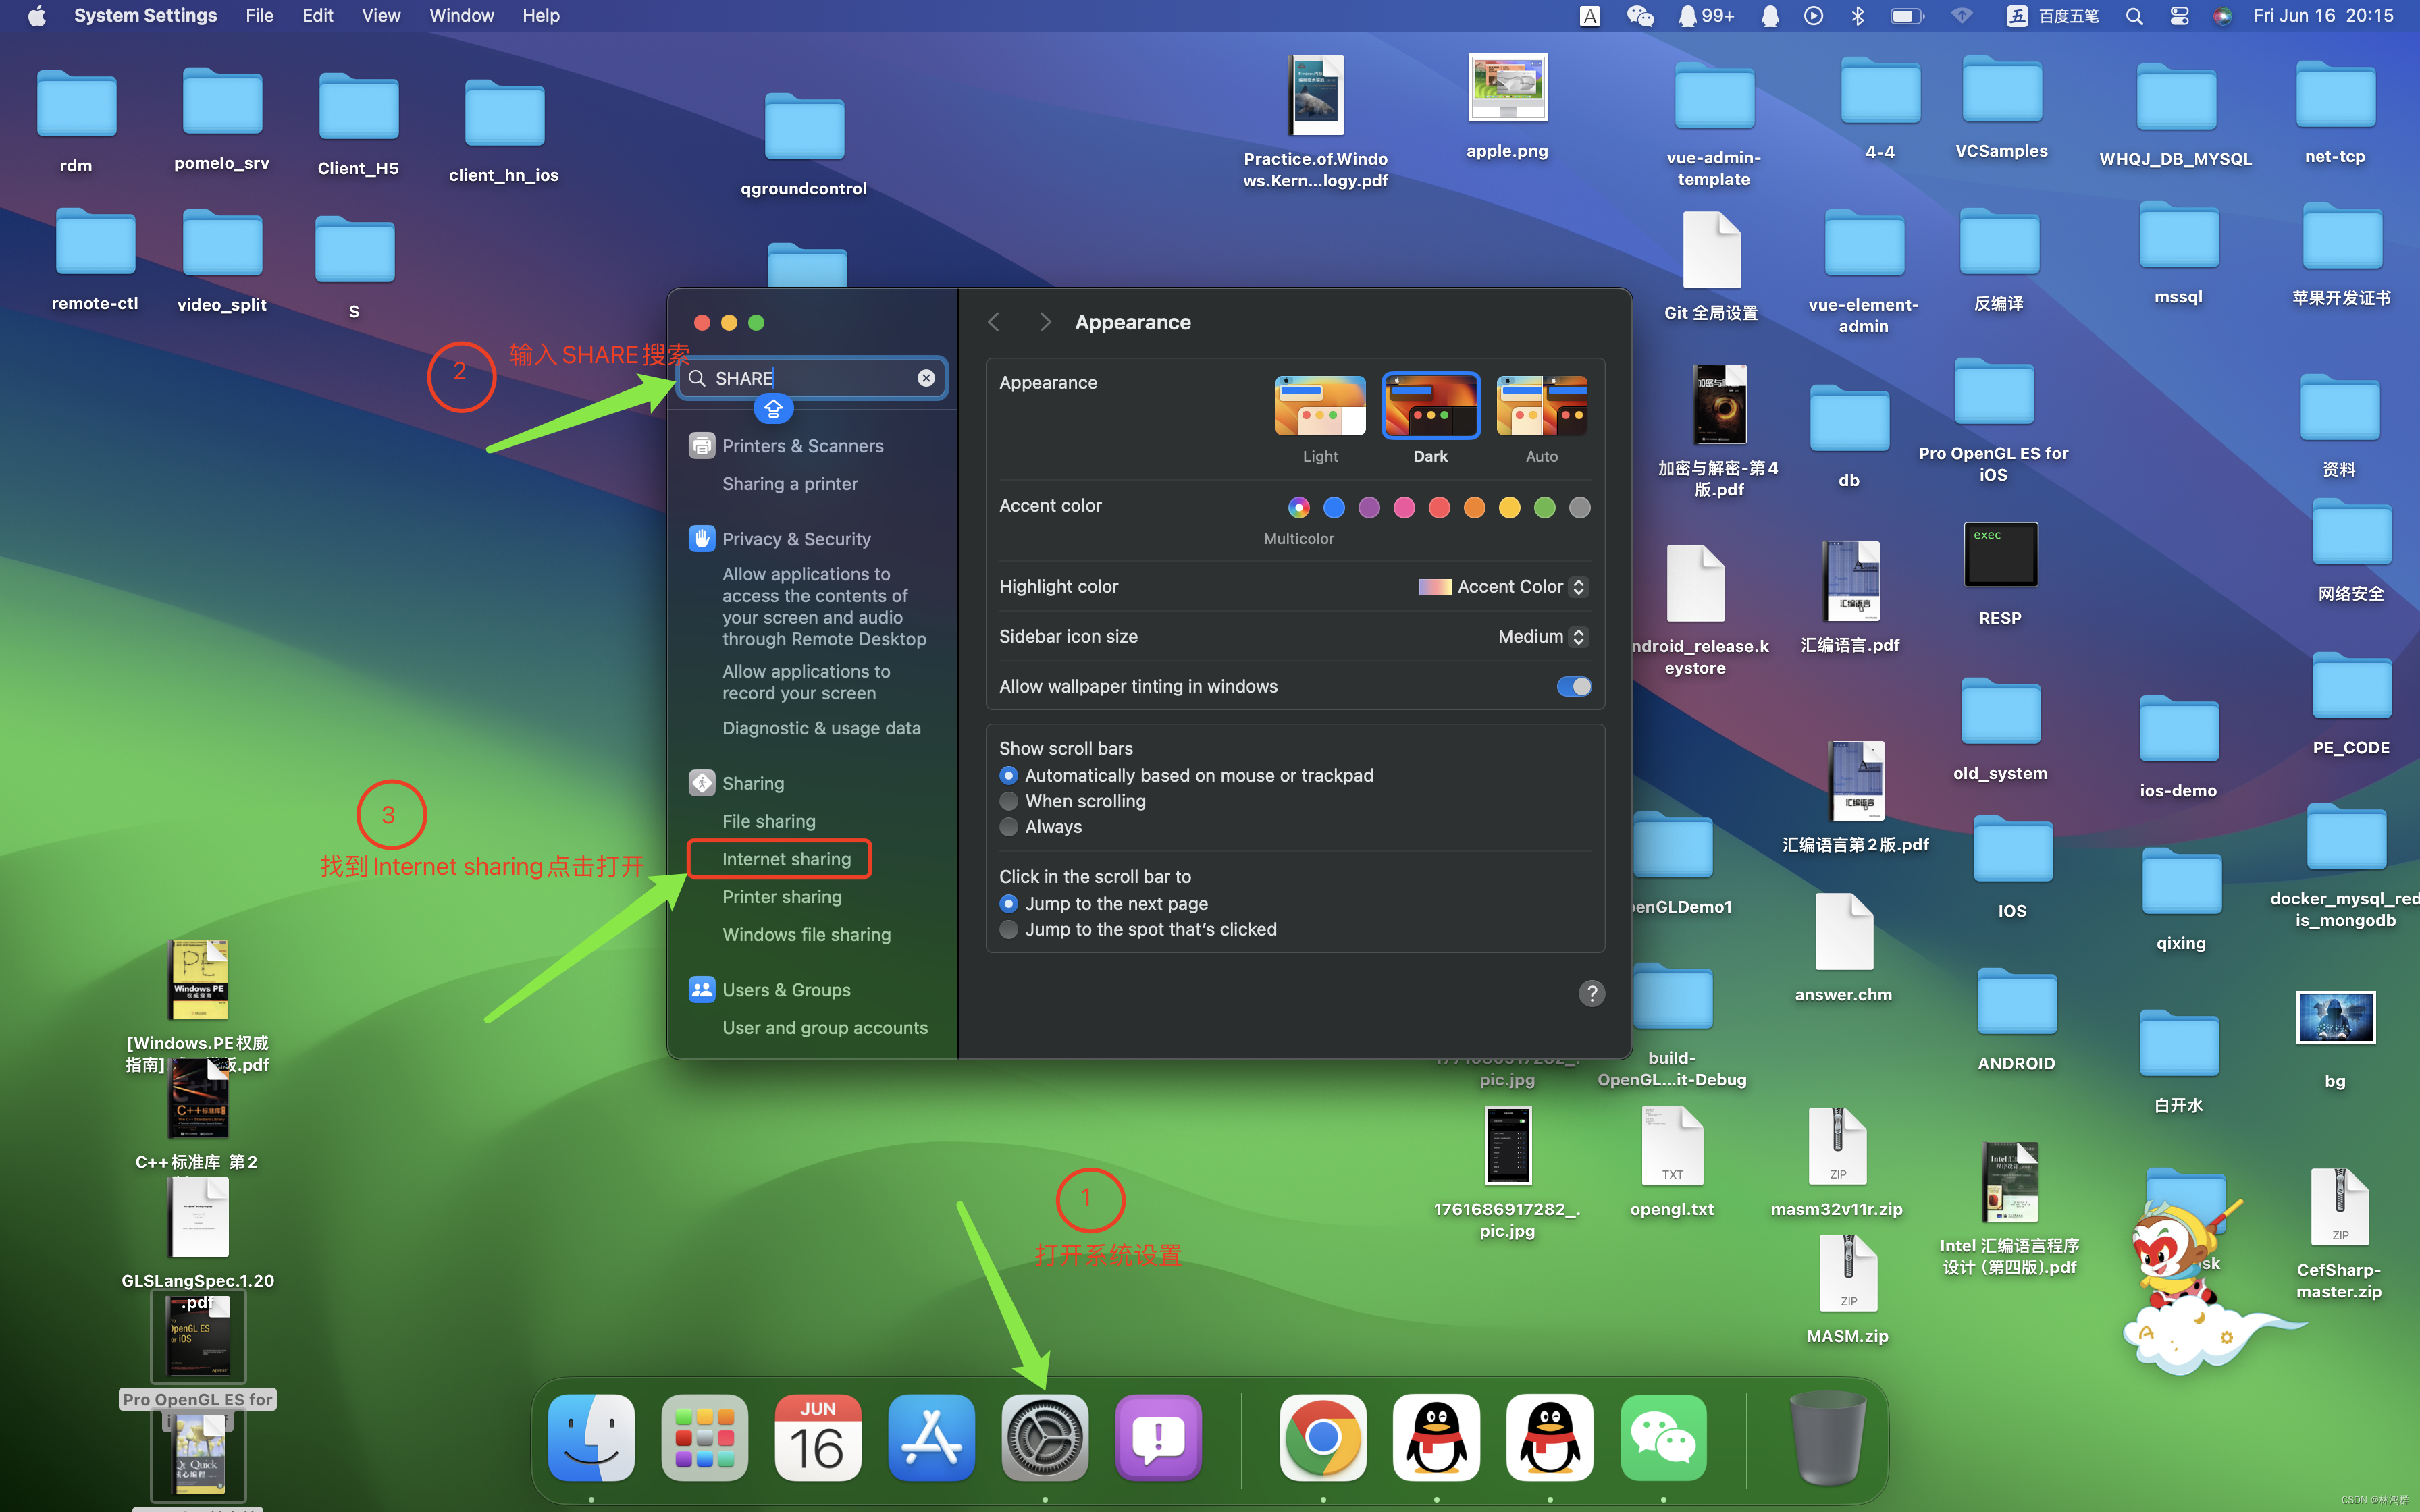
2.打开网络共享设置
3.RJ45接口网络共享给WIFI设置

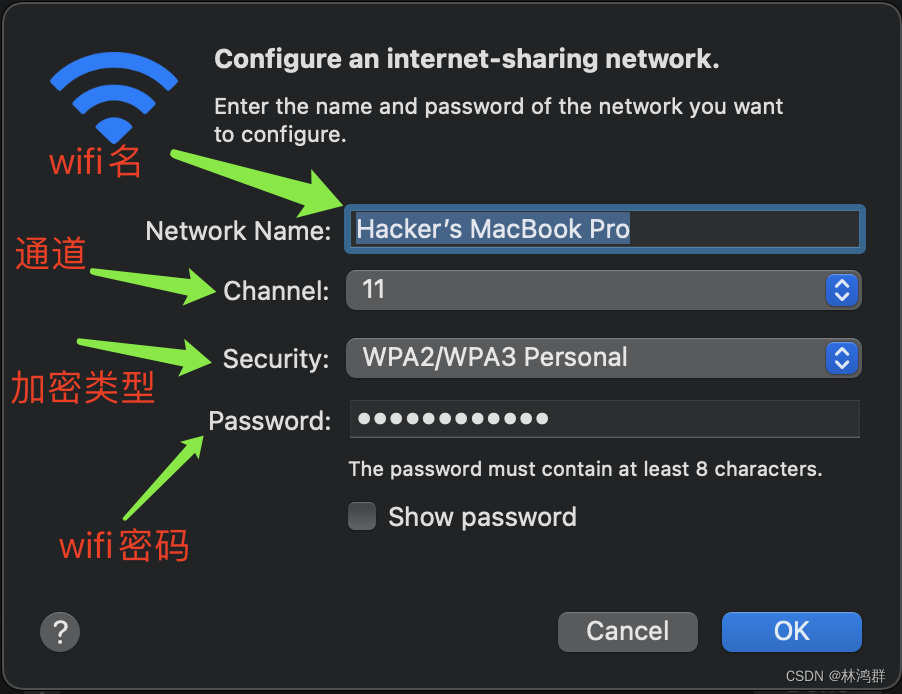
4.设置wifi密码与wifi名
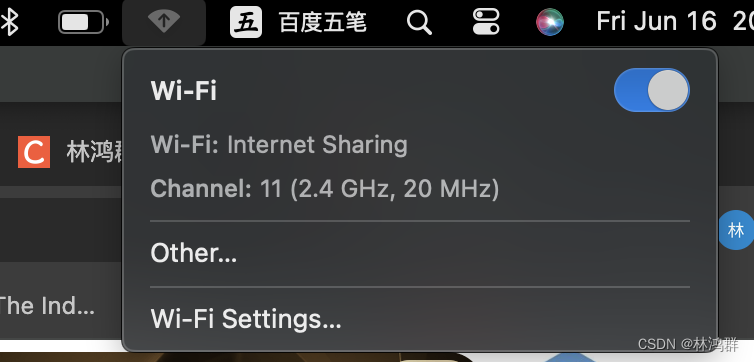
5. WIF热点设置成功
 <
<
1. 雷电接口连接Apple MacBook Pro ,另一头RJ45接口连接网络水晶头
2.打开网络共享设置
3.RJ45接口网络共享给WIFI设置
4.设置wifi密码与wifi名
5. WIF热点设置成功
<
 1万+
1756
1万+
1756

 被折叠的 条评论
为什么被折叠?
被折叠的 条评论
为什么被折叠?
 到【灌水乐园】发言


 订阅专栏 解锁全文


