


先前暑期学习了一点点SpringBoot的内容,但那时没有学过spring,学的懵懵懂懂的,现在大抵是忘却了罢!
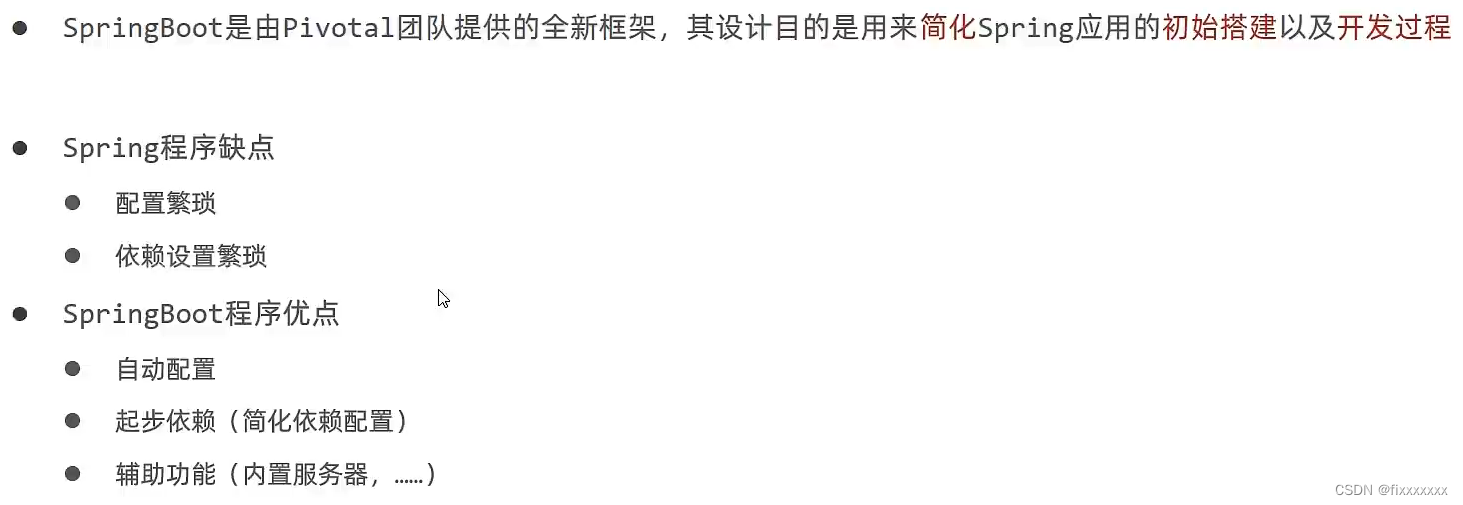
SpringBoot简介
SpringBoot入门程序
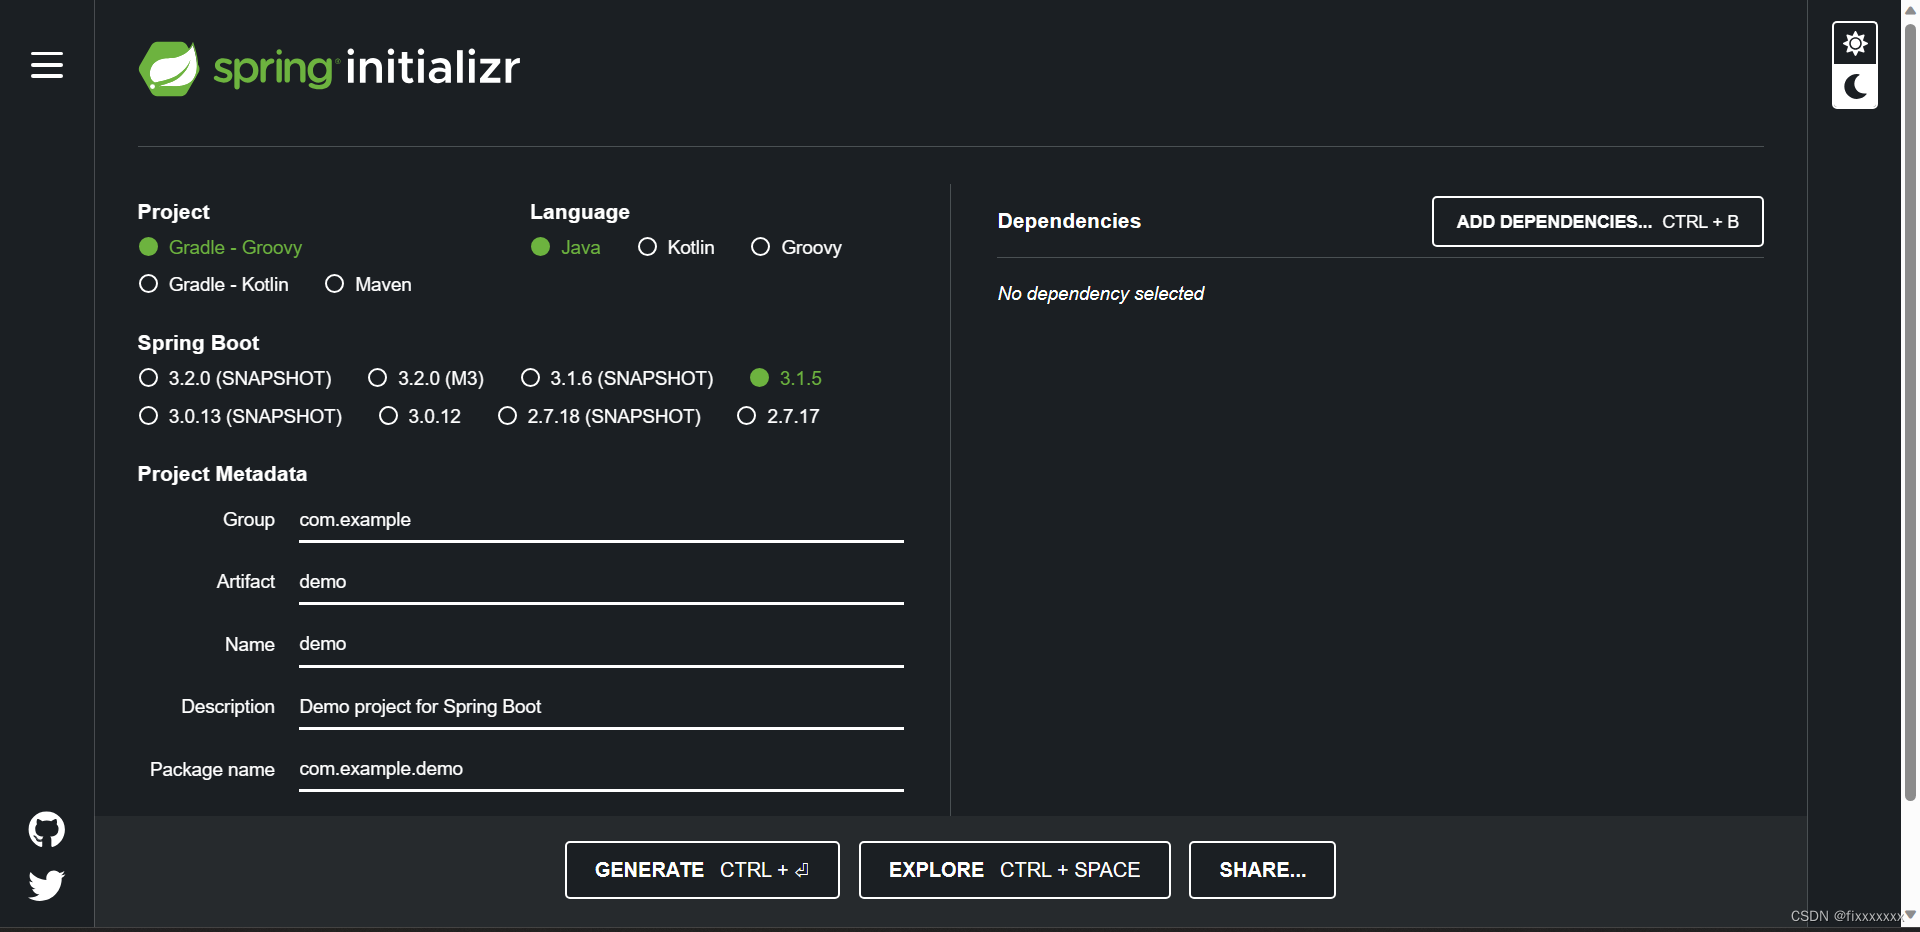
创建SpringBoot工程模块:
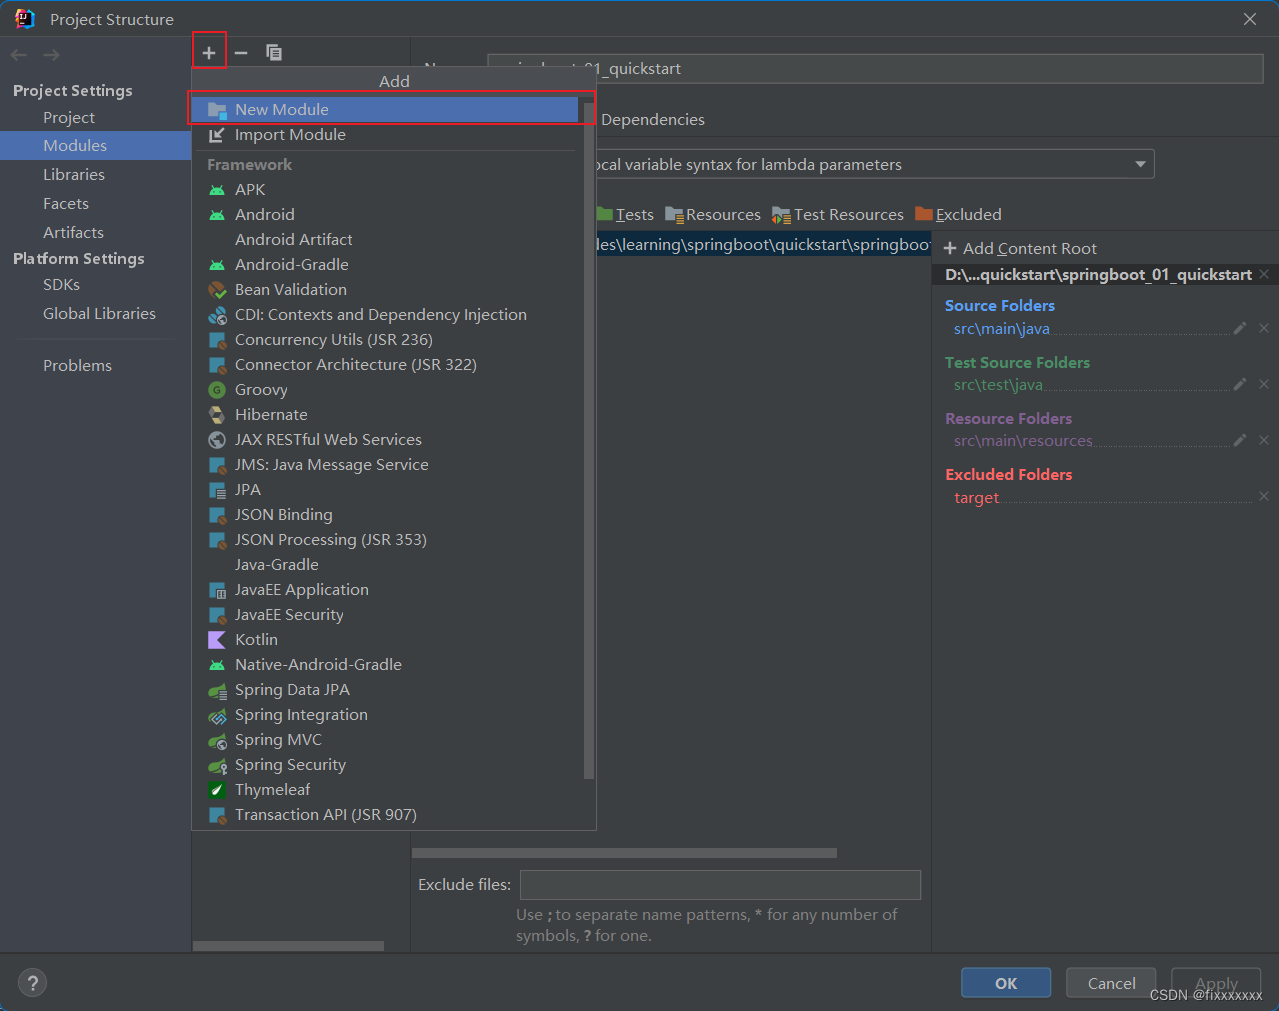
选择Spring Initializr
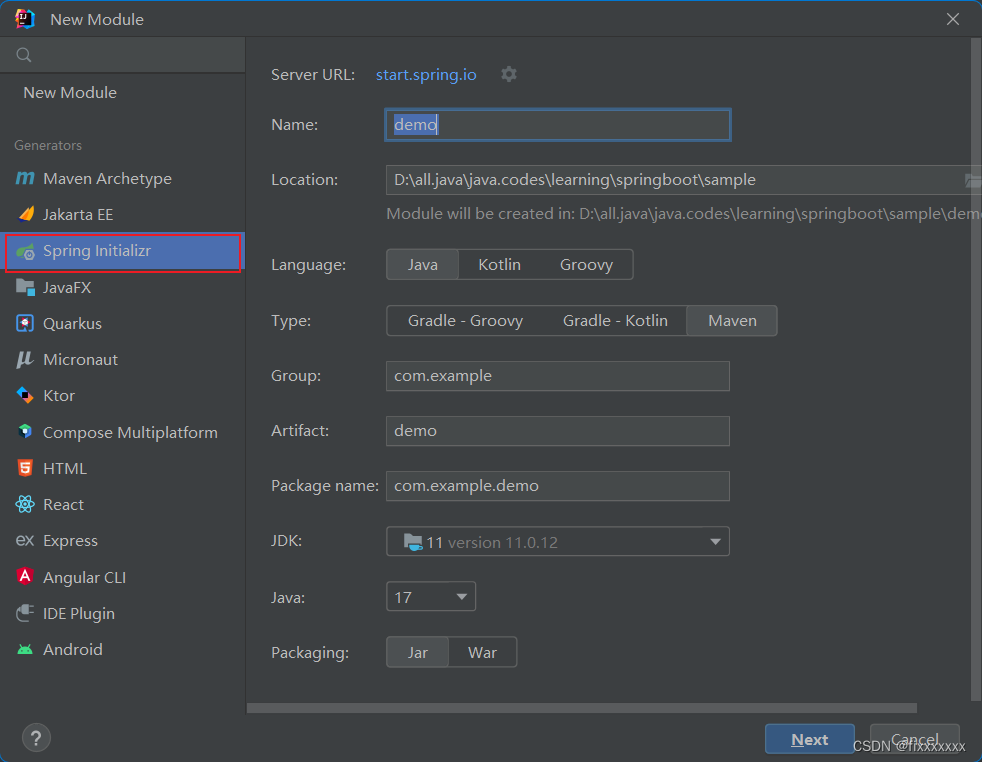
而后选择好JDK和java版本
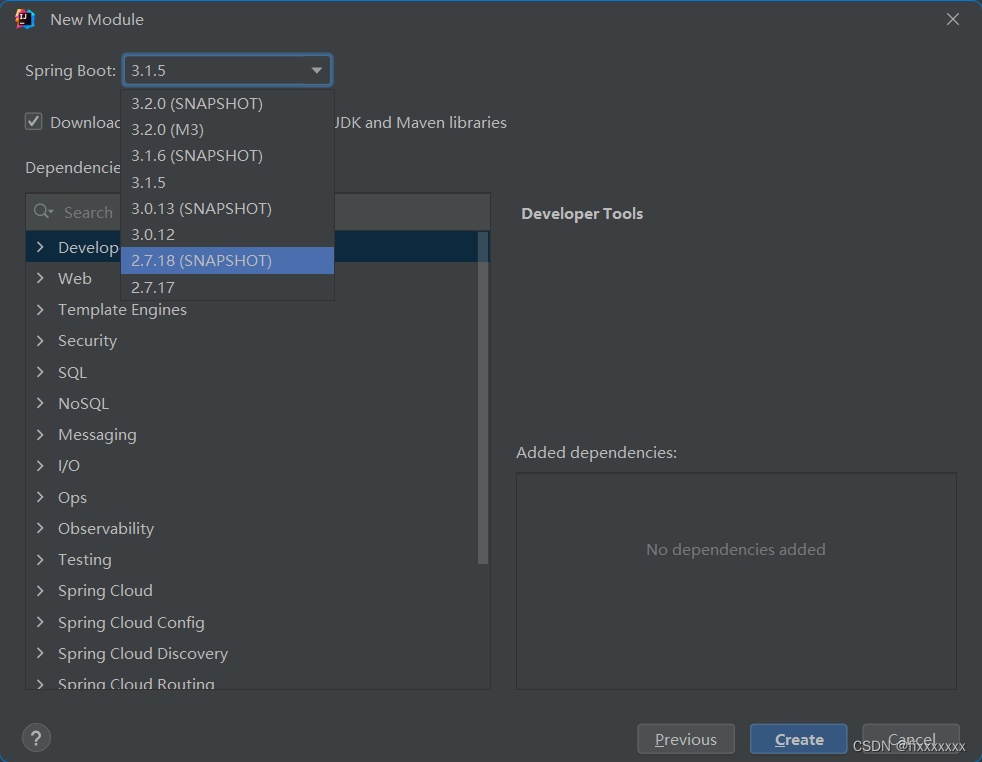
选择SpringBoot版本,SpringBoot高版本需要JDK17。
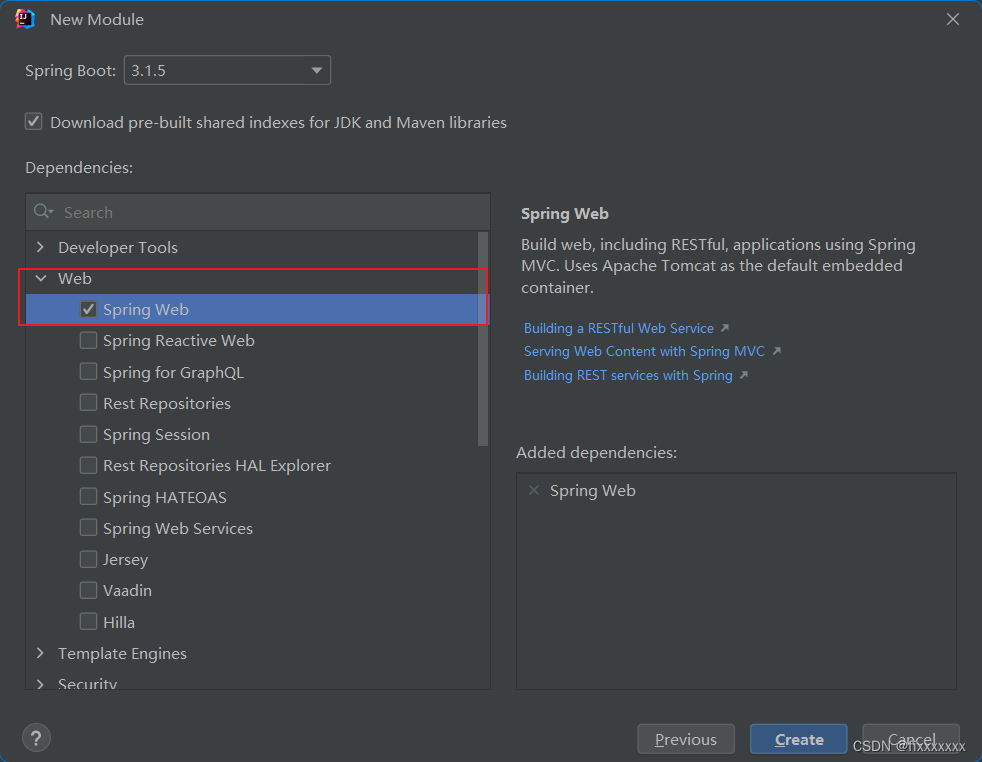
选择Spring Web框架,点击创建(需联网!)。
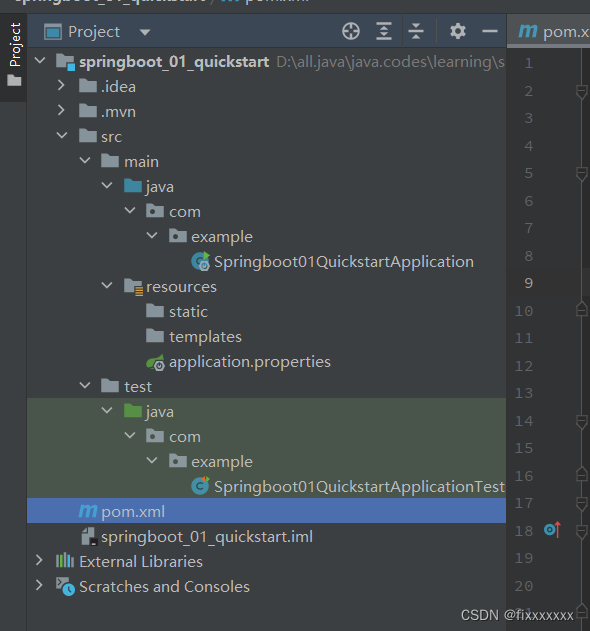
创建好之后,文件目录(删除了些许还未用到的文件):
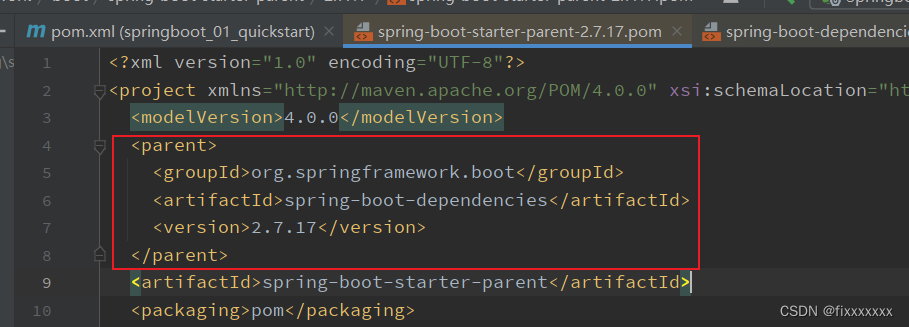
pom文件内容:
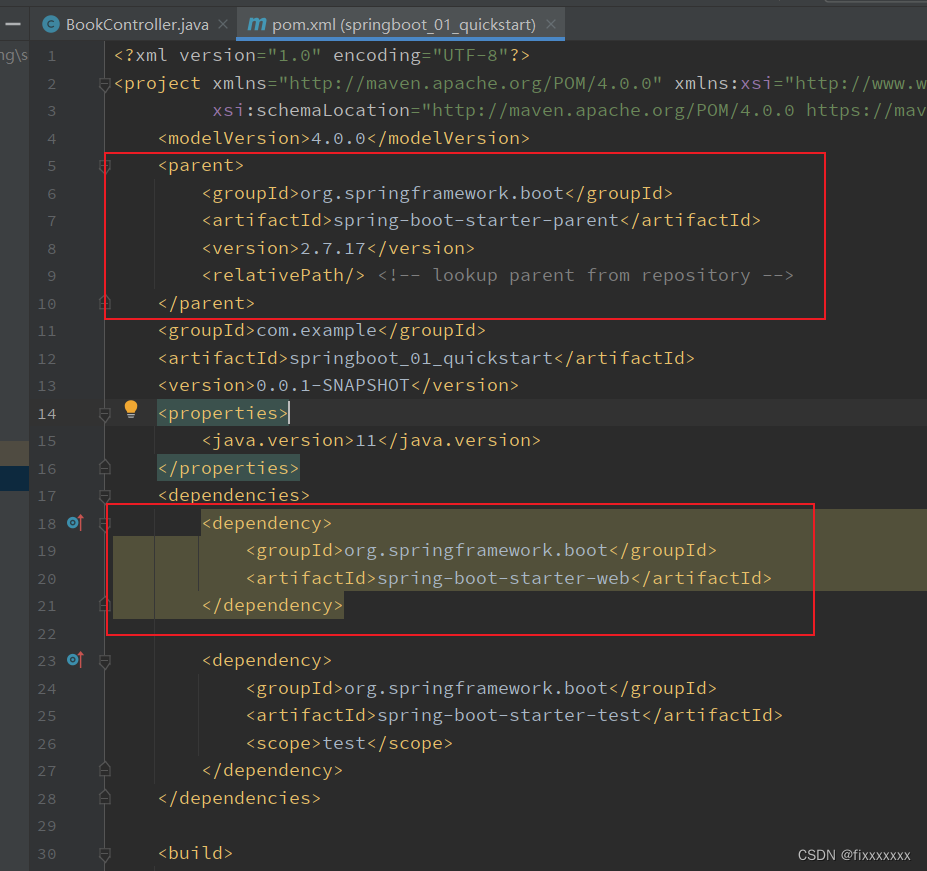
继承了springboot框架父文件,同时有springboot-web的依赖。
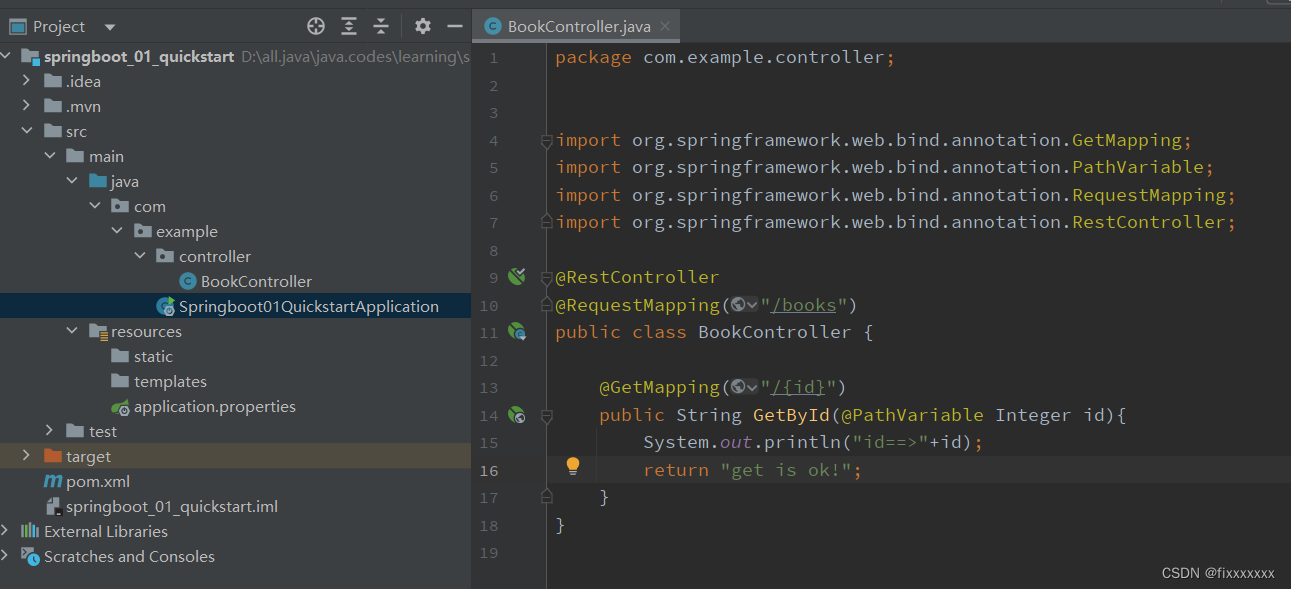
创建一个controller工程即可快速启动:
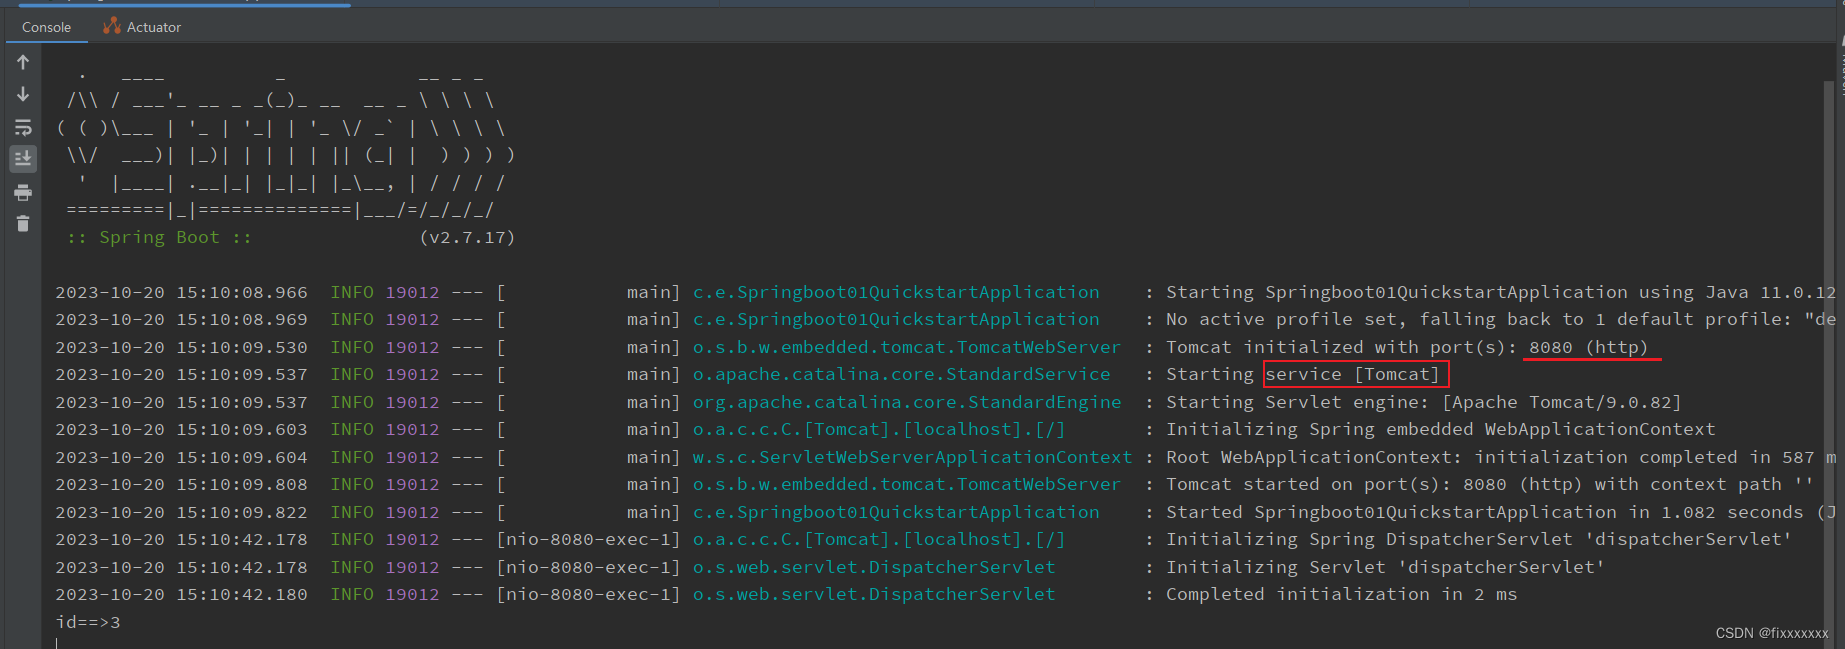
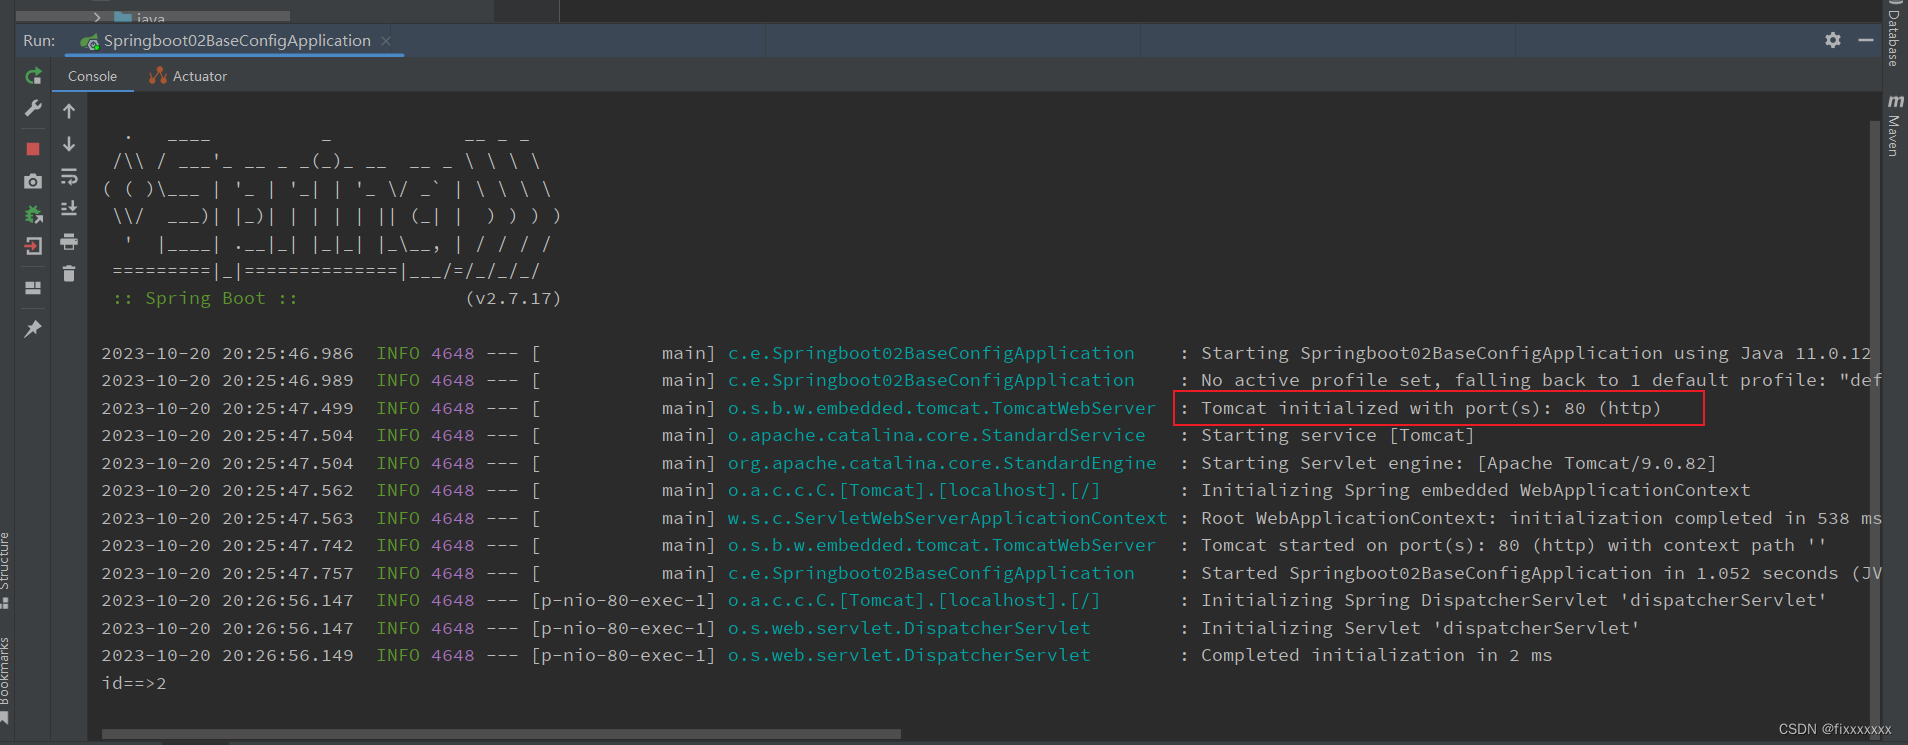
直接run!
由于springboot内置了tomcat,所以可以直接启动web服务器,默认端口8080
使用postman进行测试:
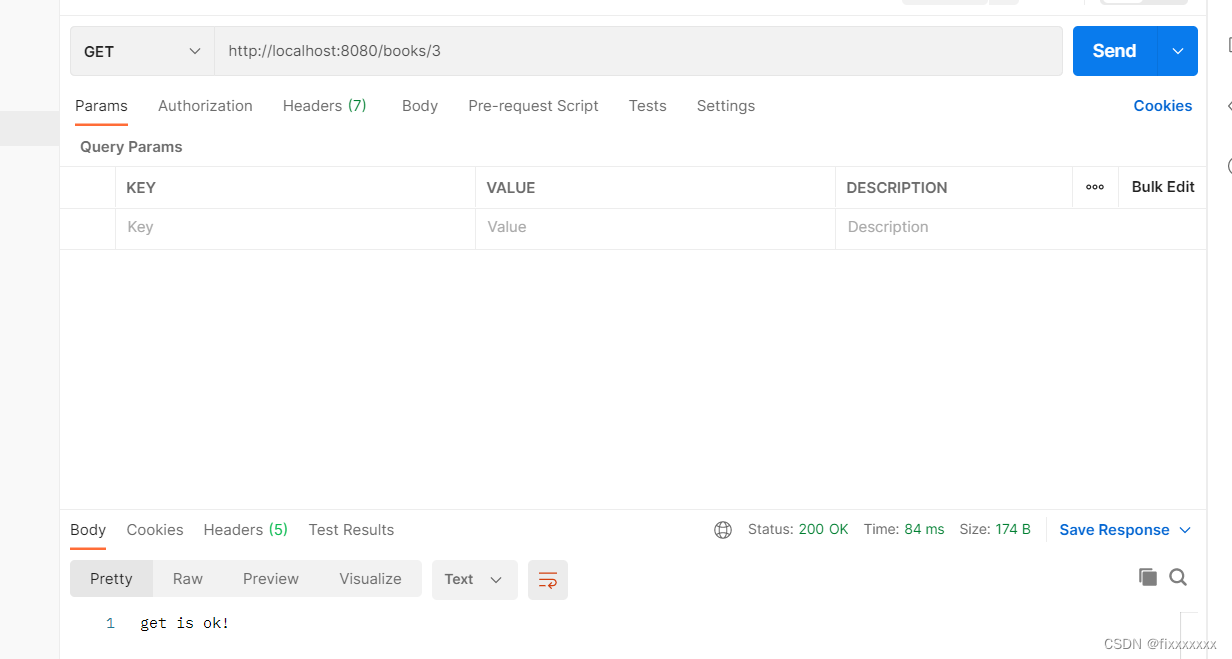
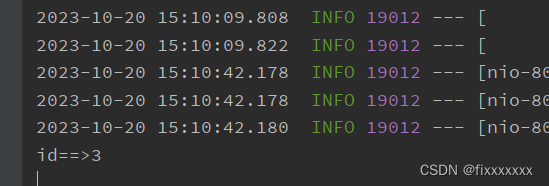
测试成功!
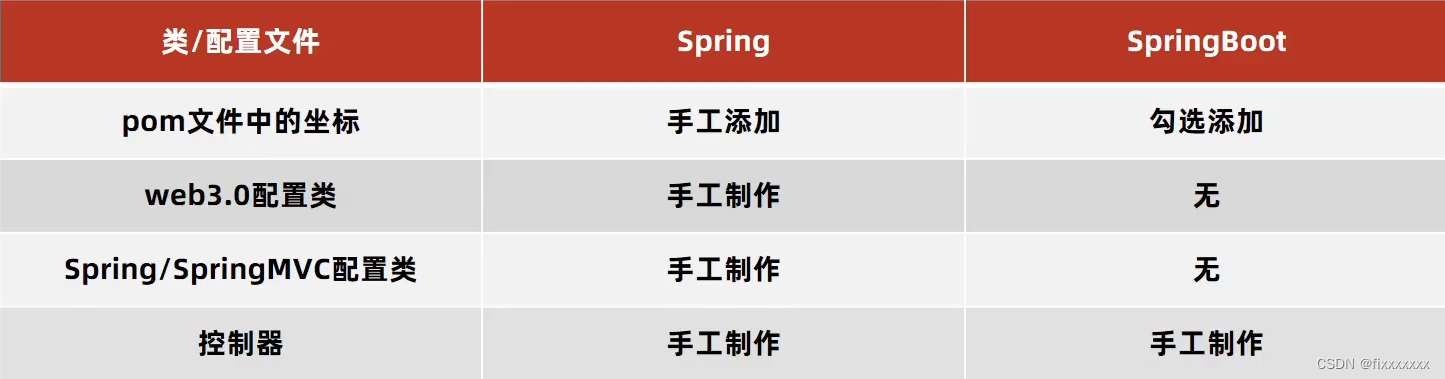
spring程序与springboot程序对比:
创建springboot程序也可直接去spring官网创建zip包,与idea操作相当:
SpringBoot程序快速启动
要想将springboot程序打包后并启动,只需这样操作:


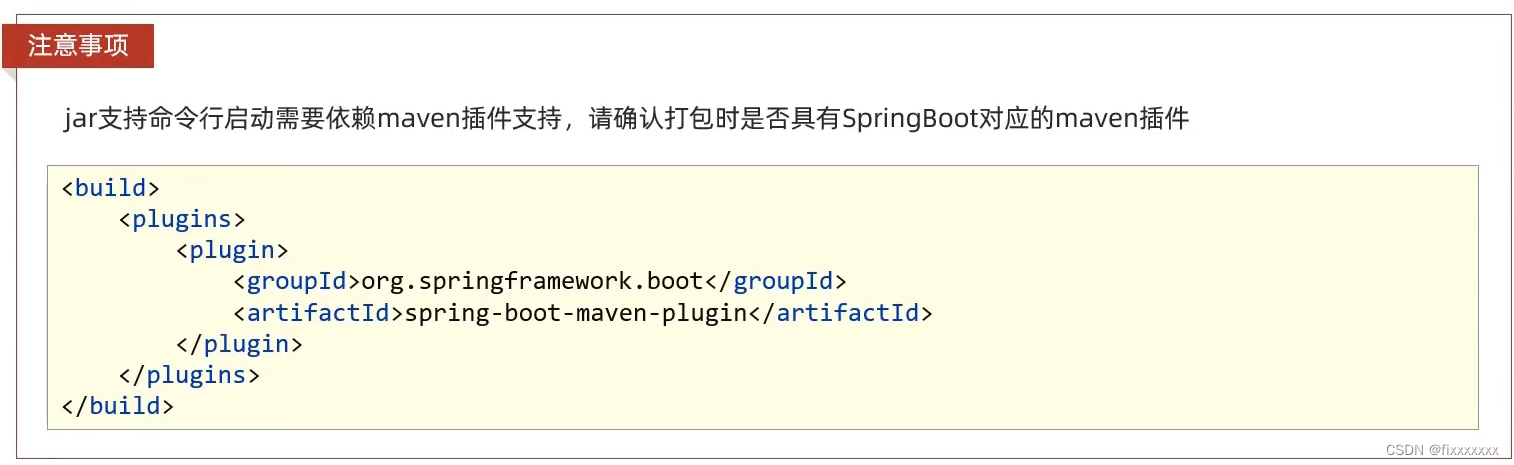
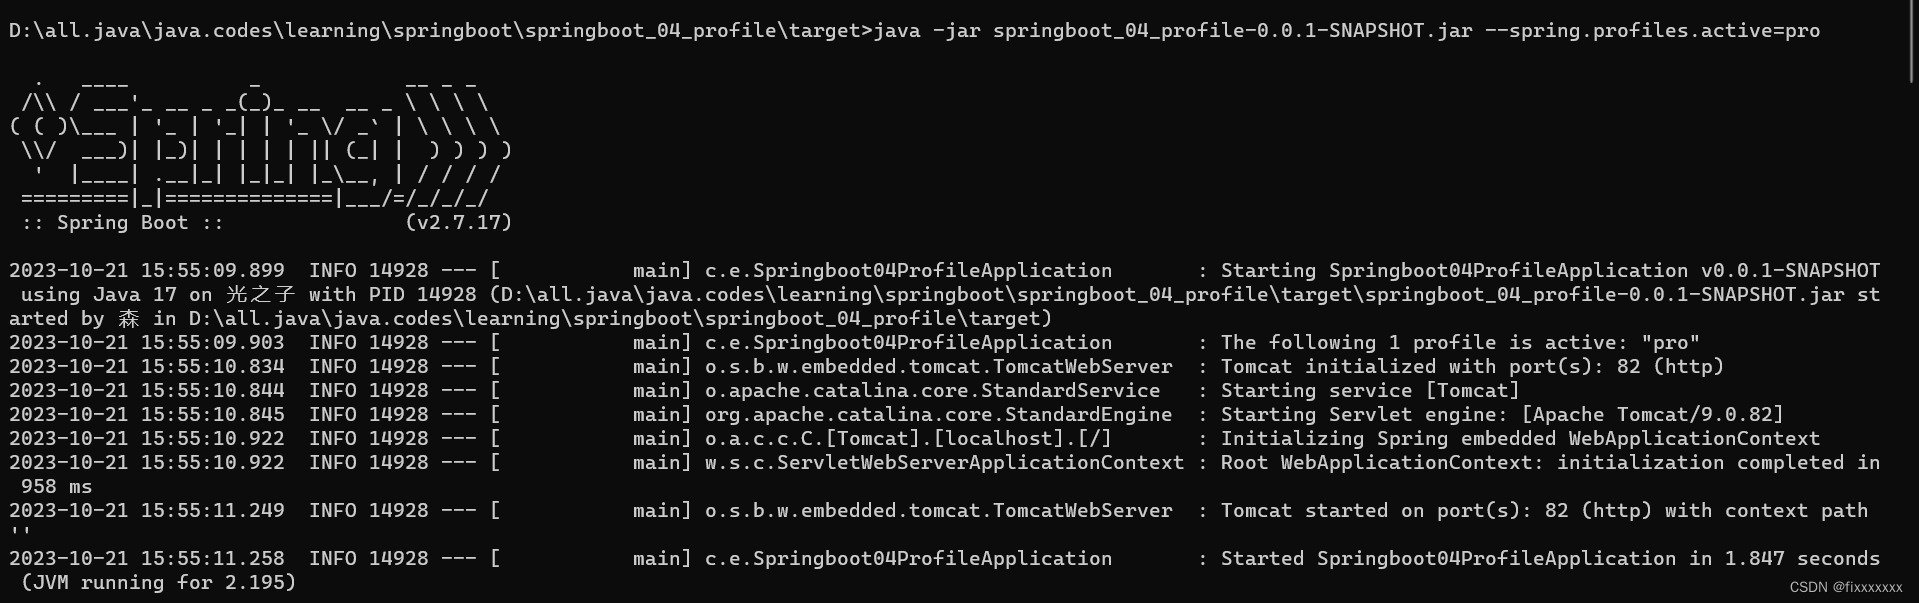
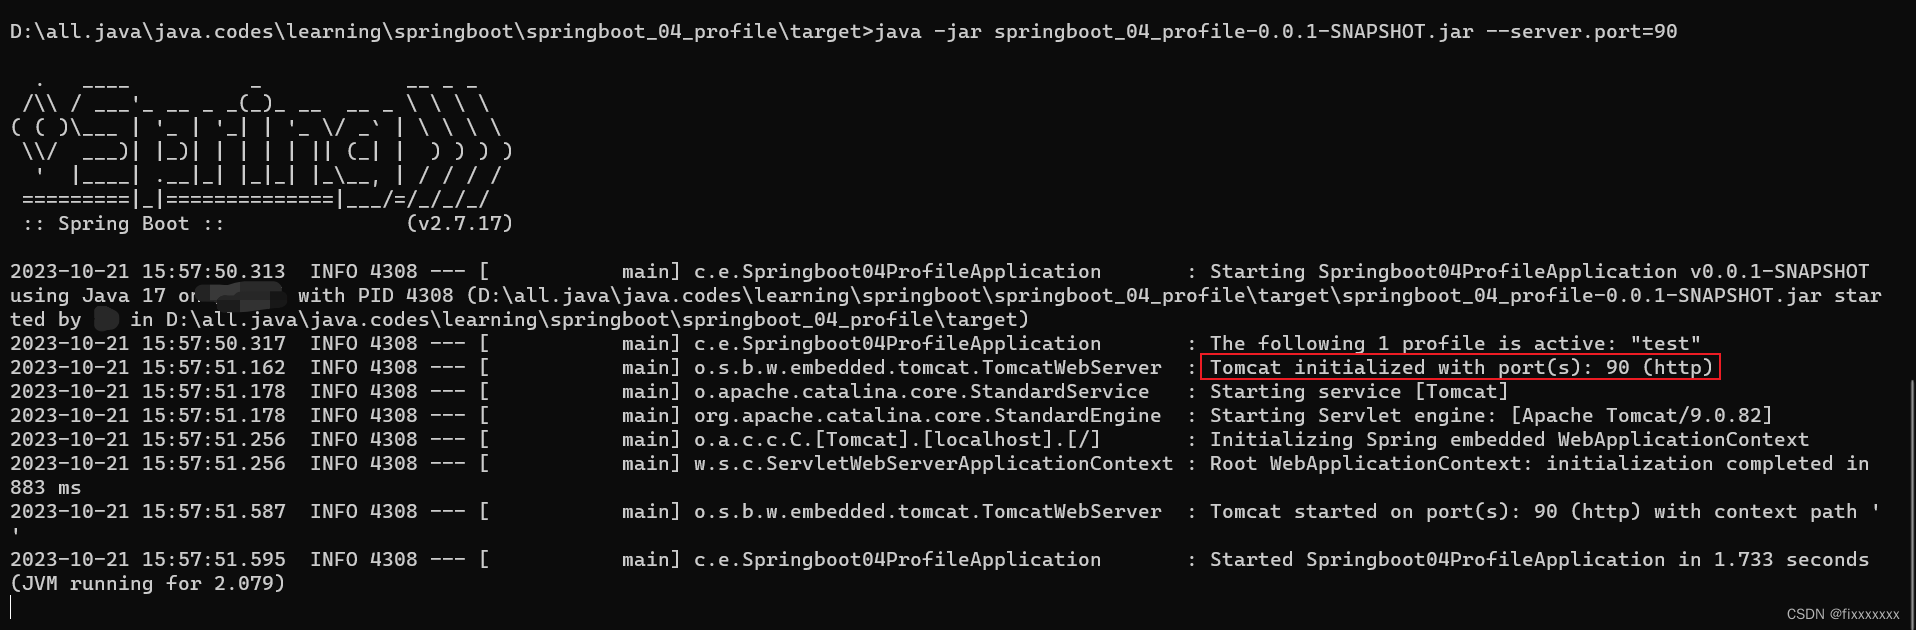
打包后在cmd运行:
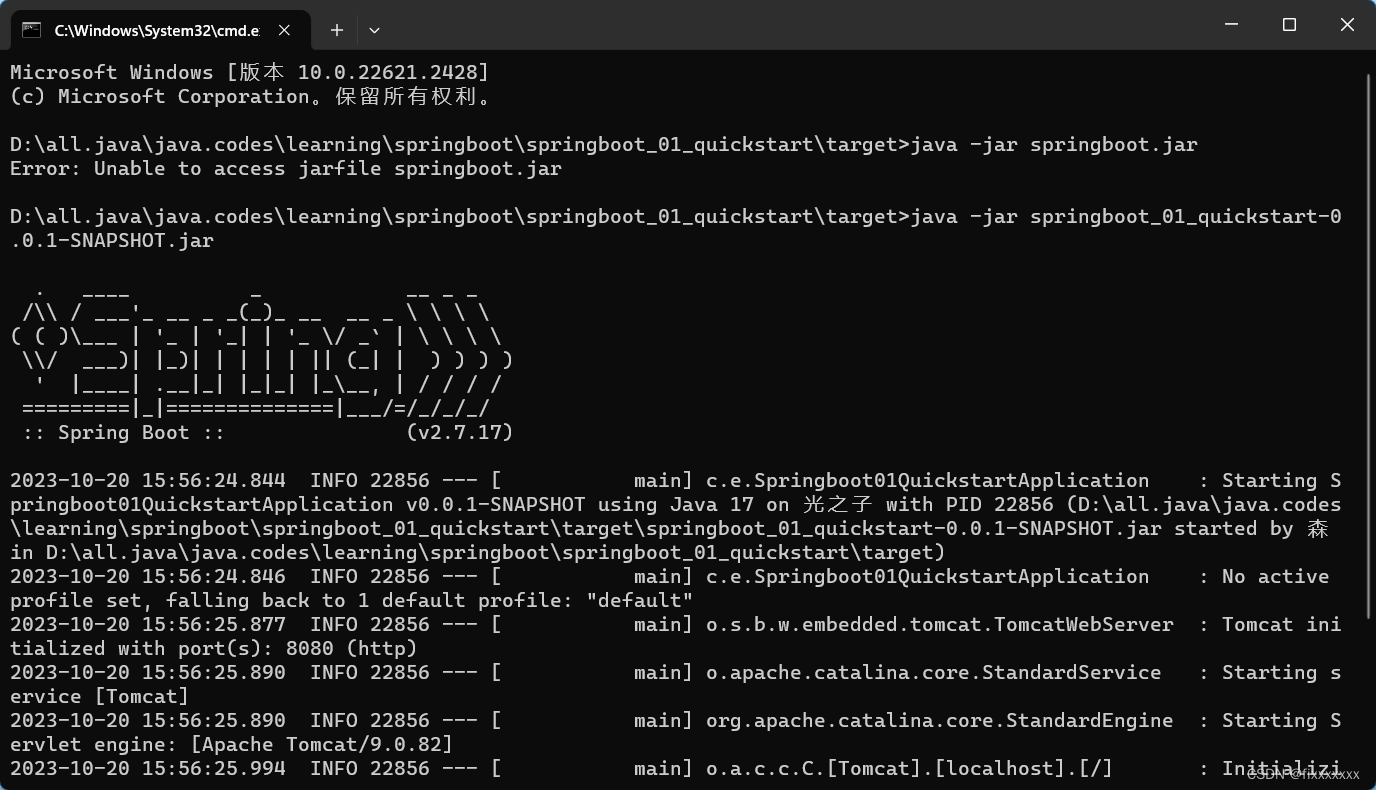
此时服务器已经启动,使用postman进行测试:
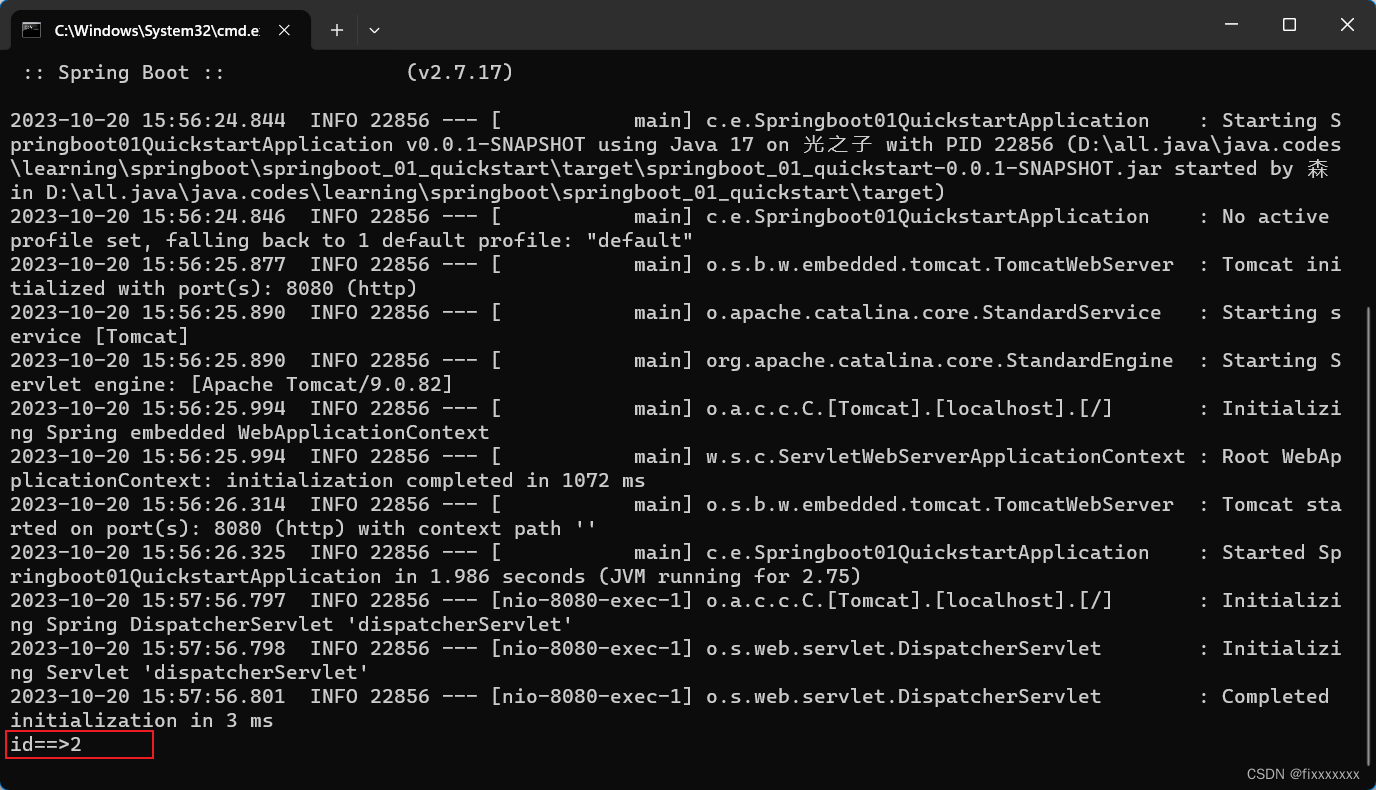
成功运行。
SpringBoot简介
起步依赖
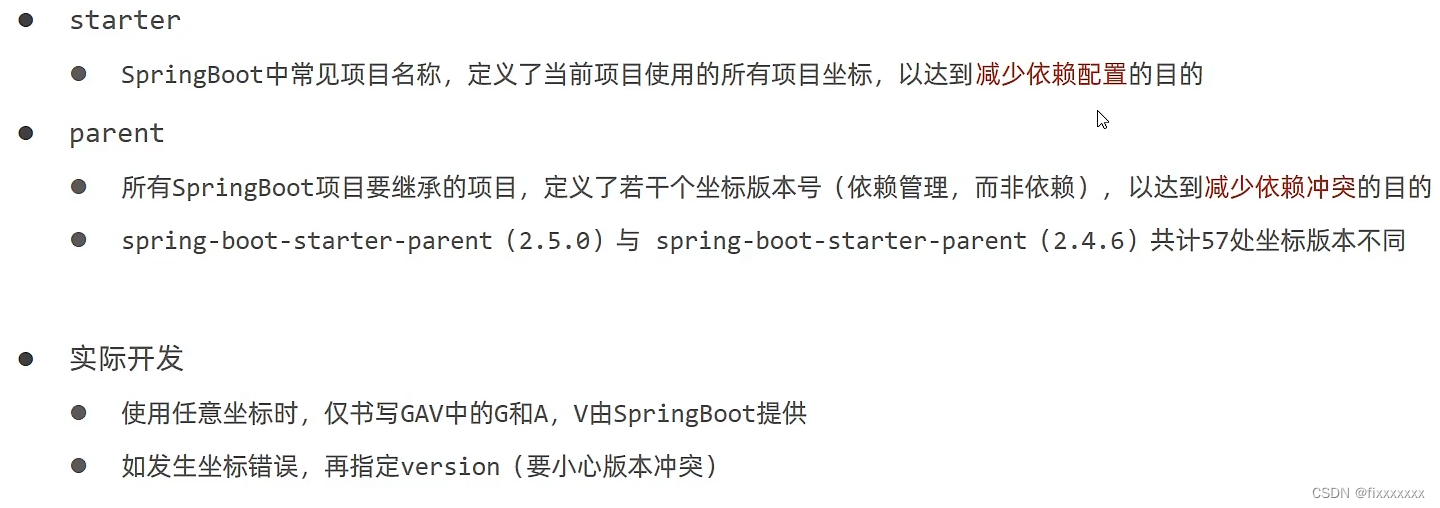
所有springboot项目的parent中都带有许多插件,parent又继承dependencies
dependencies中有许多dependencyManagement,属性。属性整合了各个插件的版本,使得兼容。所以只需选定springboot的版本,其运行相关的坐标就都配置好了。若要添加相应坐标,也只需在dependencies里添加artifactId和groupId就行,无需指定版本。
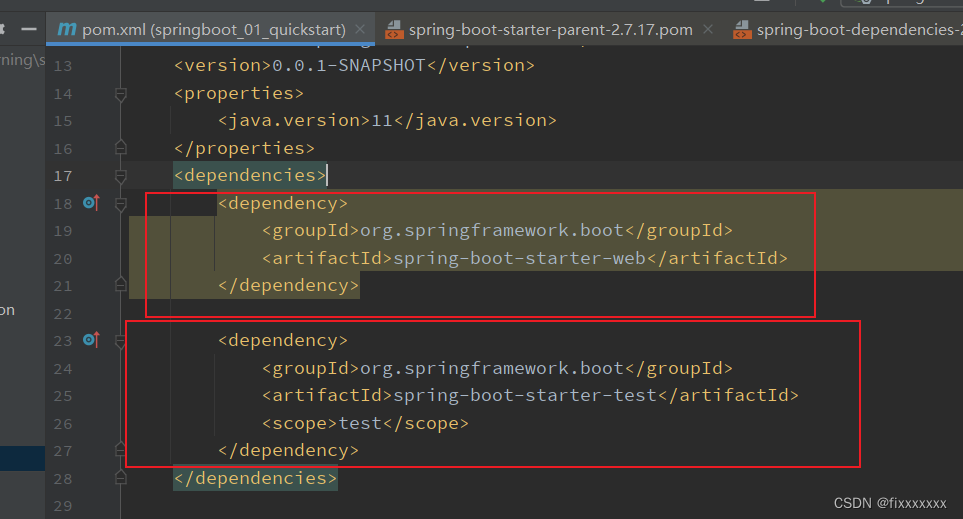
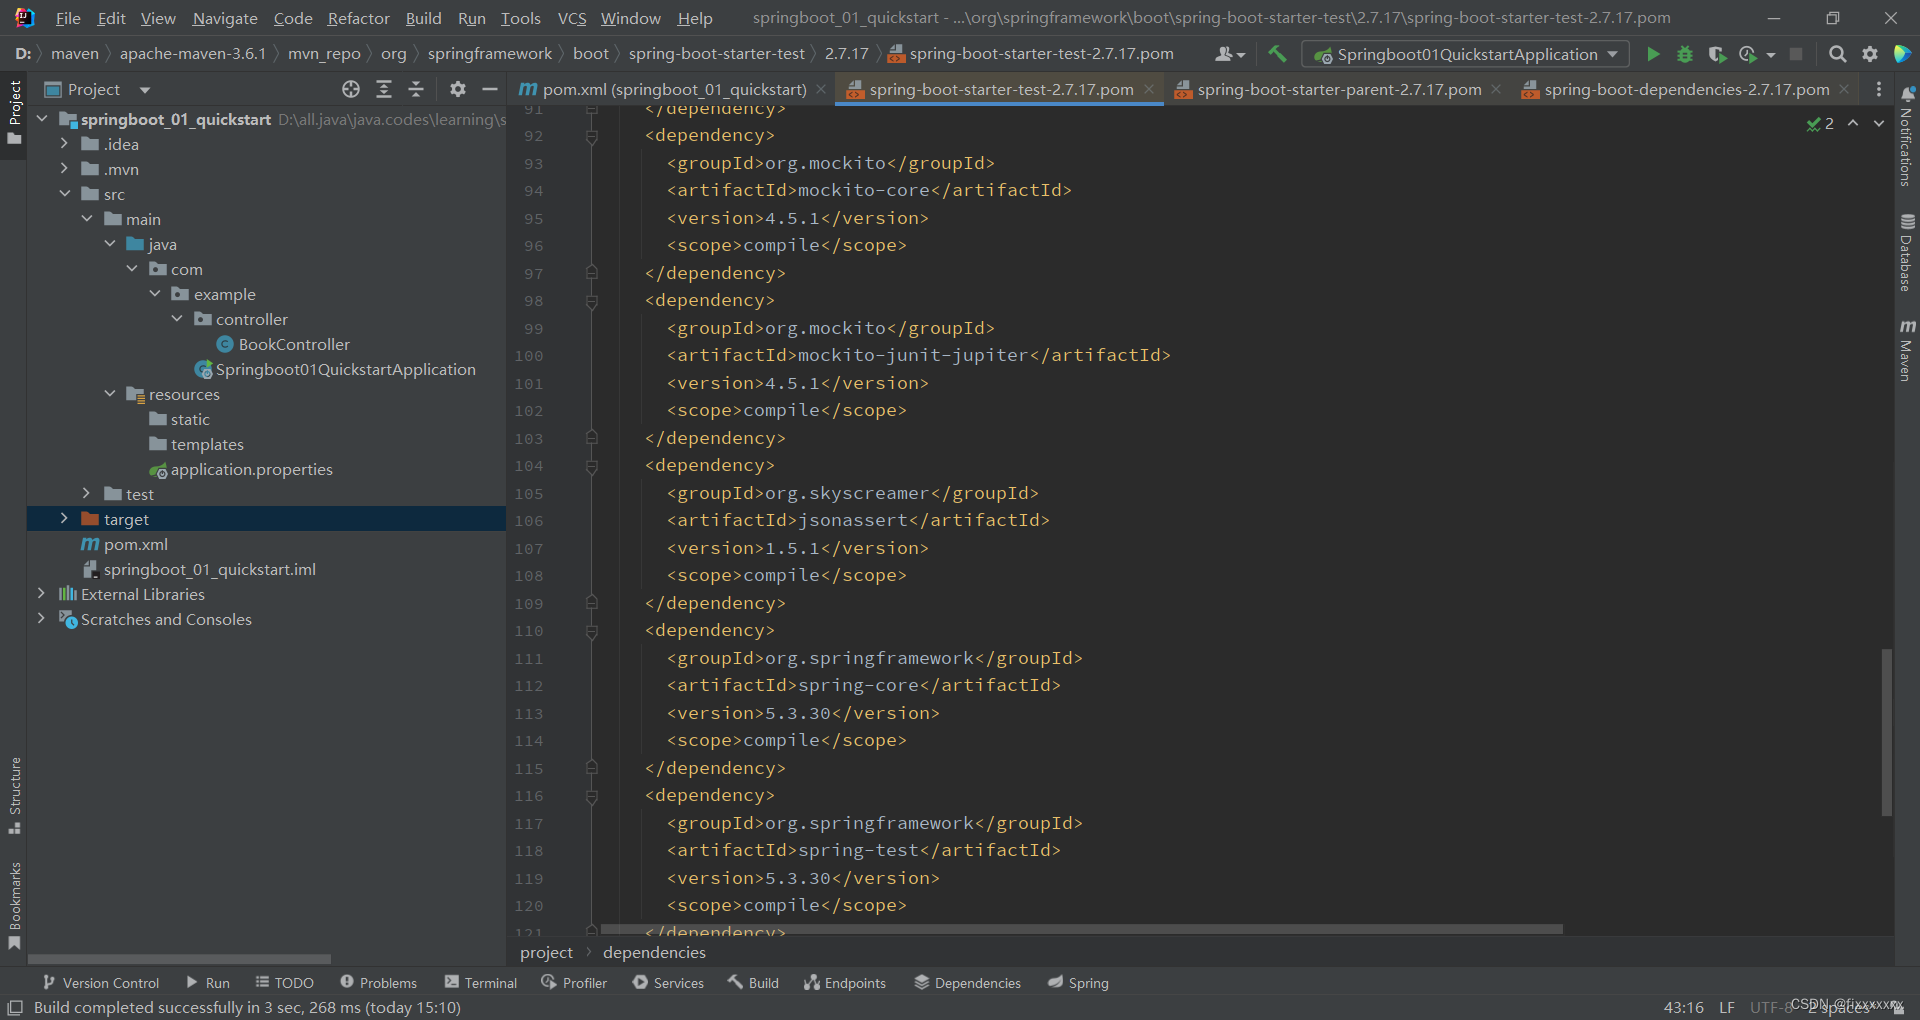
xml文件里还有两个依赖,spring-boot-starter-web和spring-boot-starter-test,web相关的依赖是我们在创建modudle时勾选的dependencies Spring Web添加的,test依赖是自带的。点进test依赖,发现里面打包了test的若干依赖。
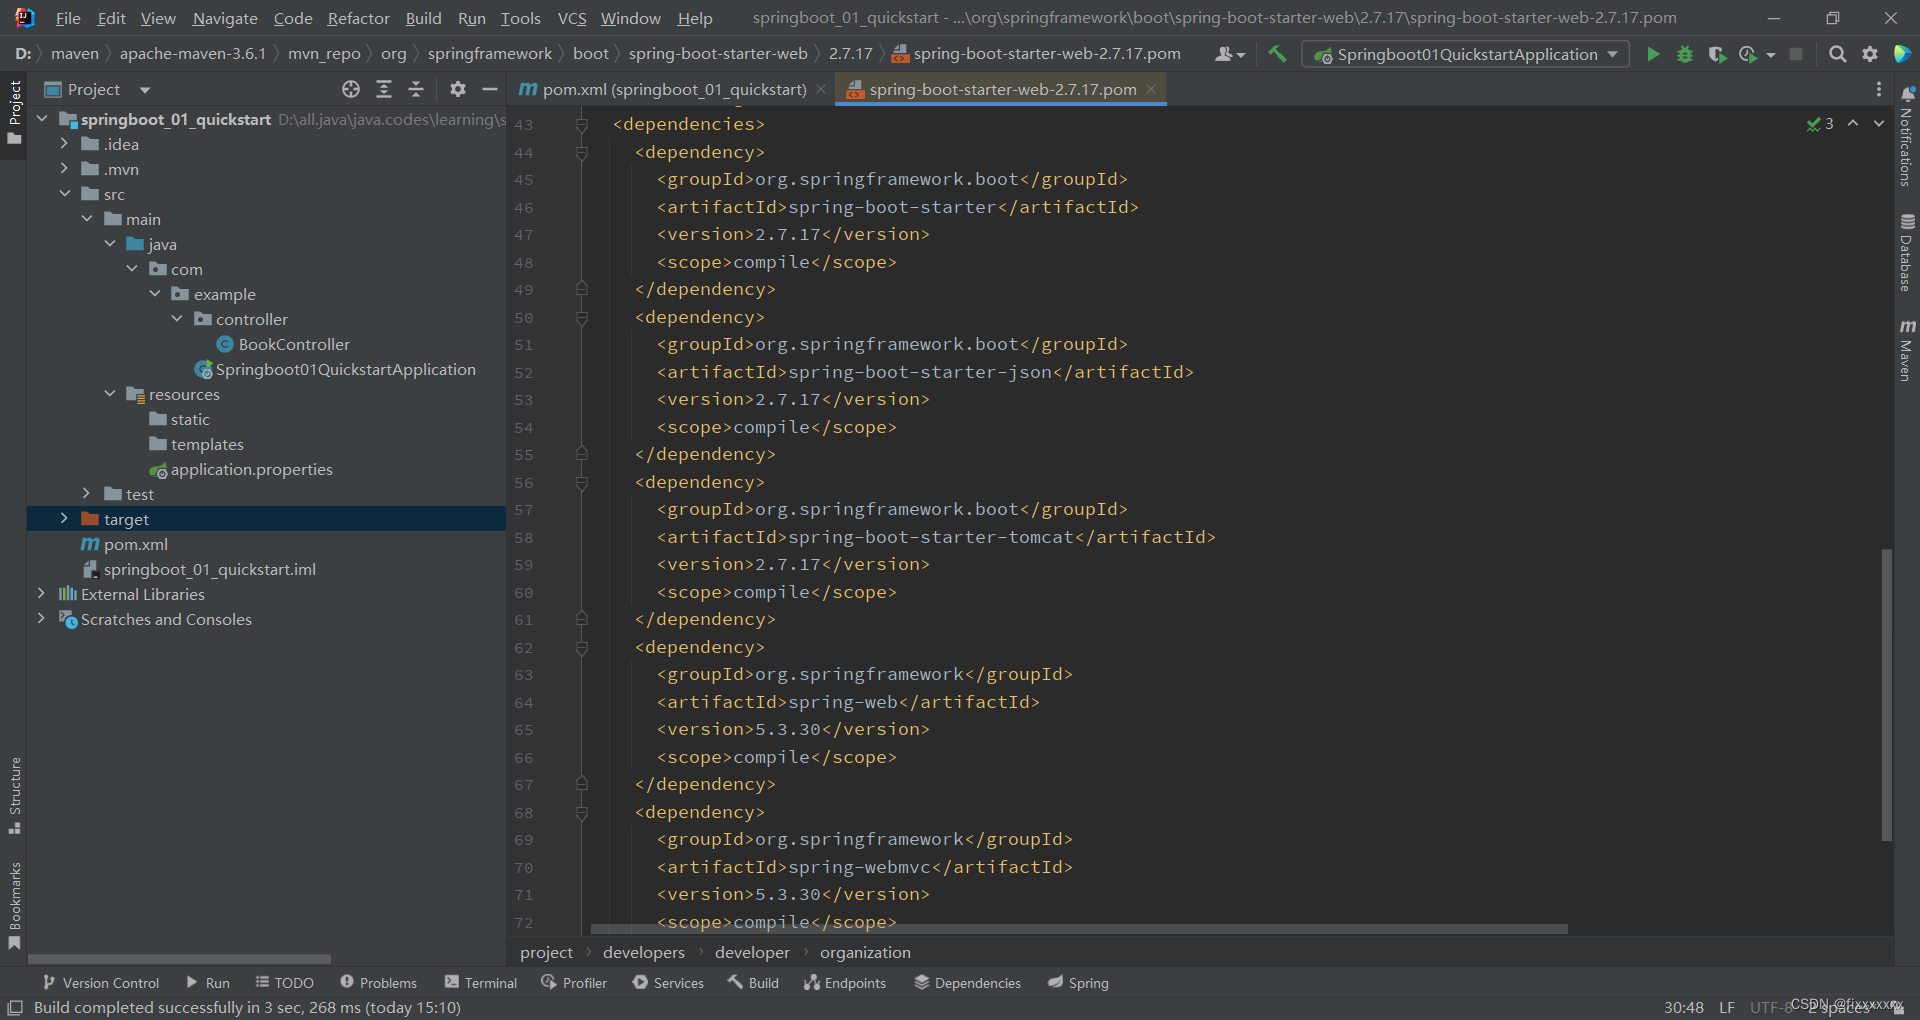
spring-boot-starter-web依赖里面同样整合了web相关的依赖,包括spring-webmvc等等。
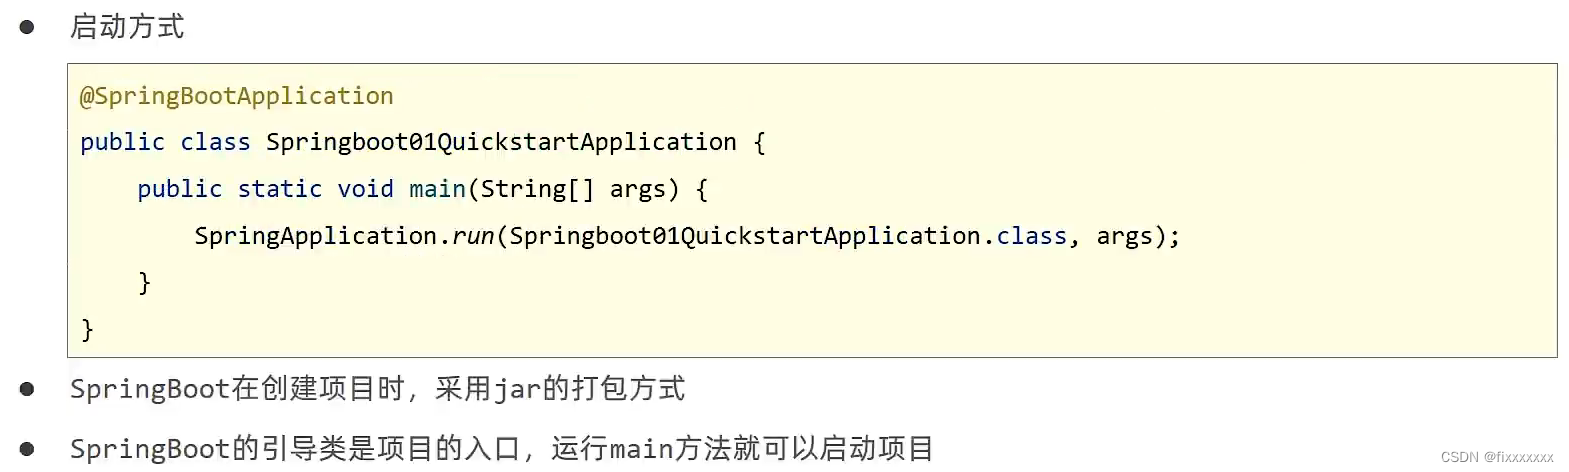
再看Application类,这是springboot程序的主启动类,也叫引导类。
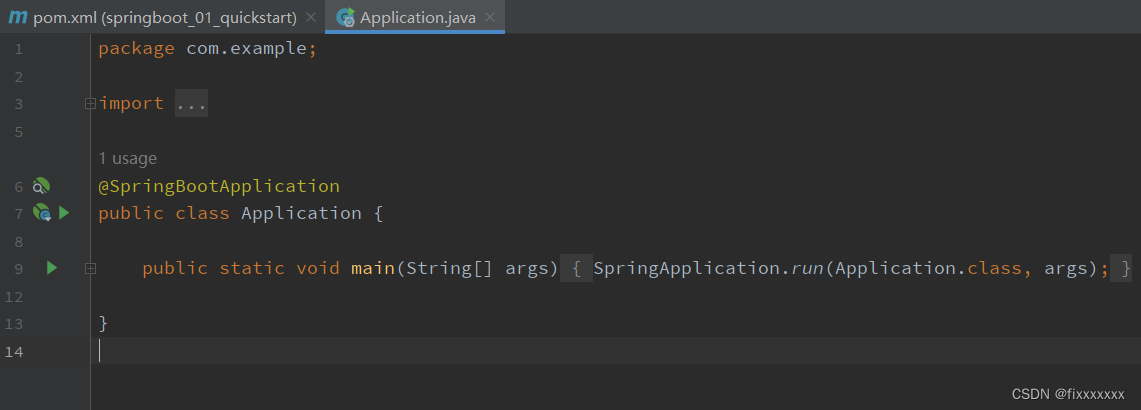
执行的依据就是起步依赖。我们配置了Spring Web,故启动了服务器。
辅助功能
springboot自带许多辅助开发的功能,如junit,logoback,tomcat服务器等等,只需引入相关坐标即可。

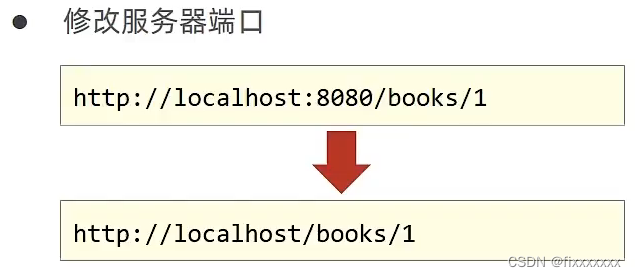
基础配置
配置文件格式
配置格式
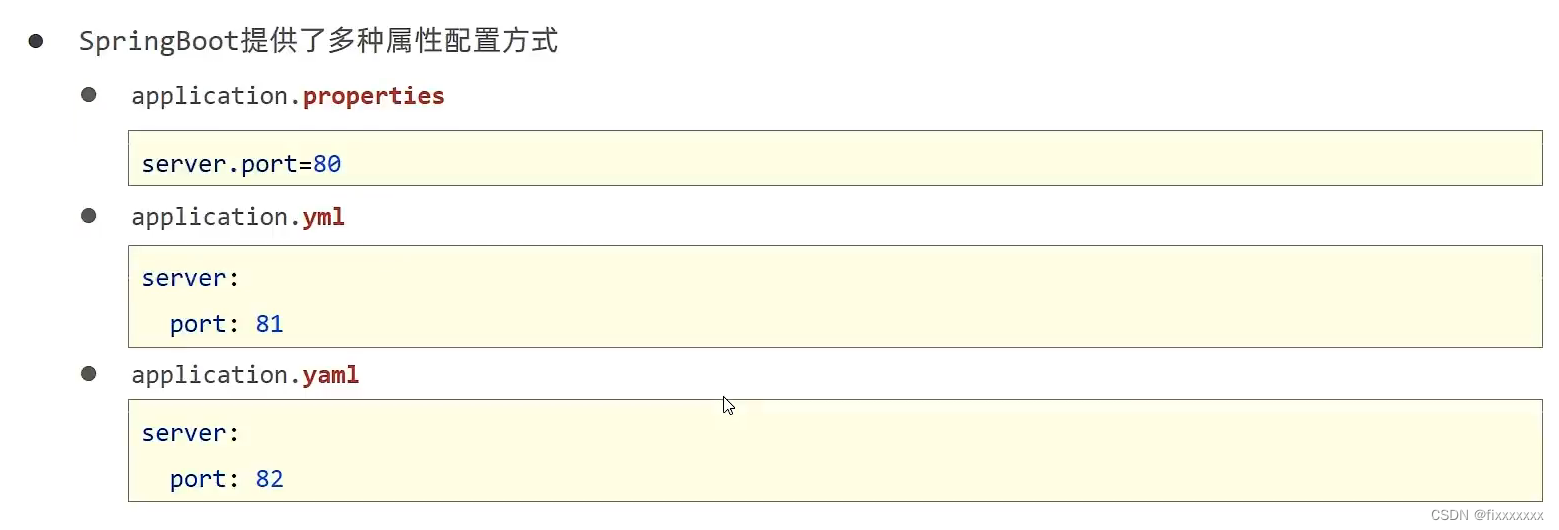
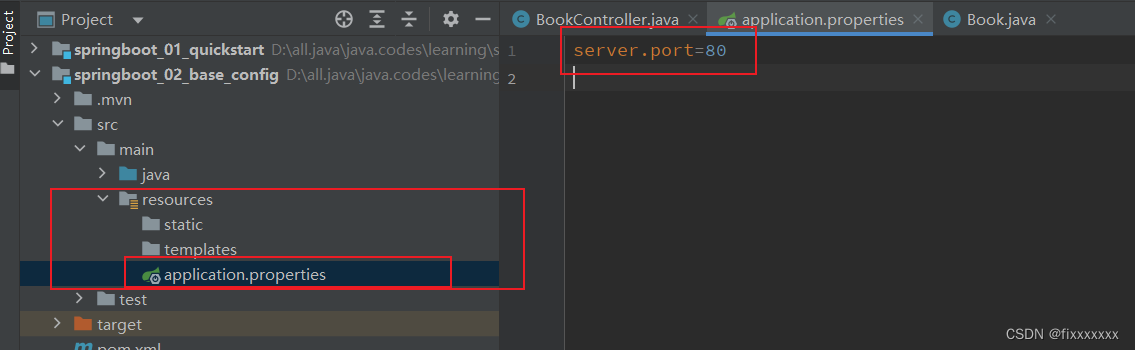
第一种方法:
第二种方法:
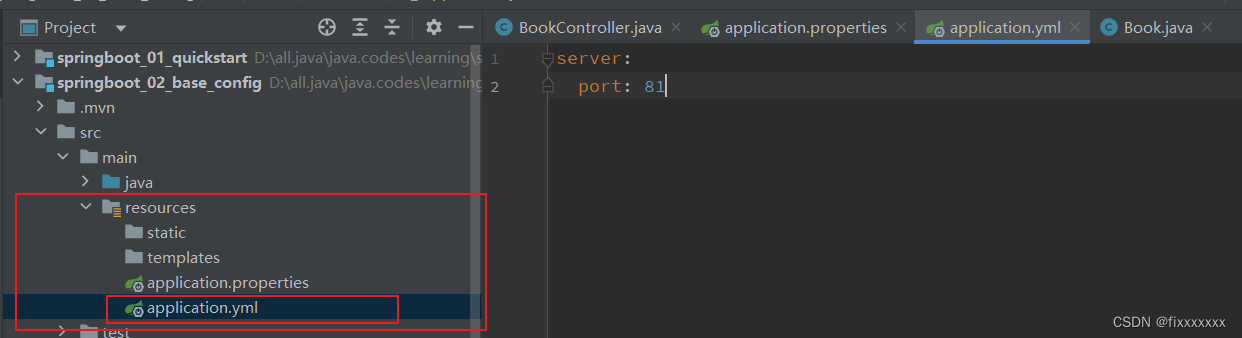

第三种:
以后主要写在yml文件。
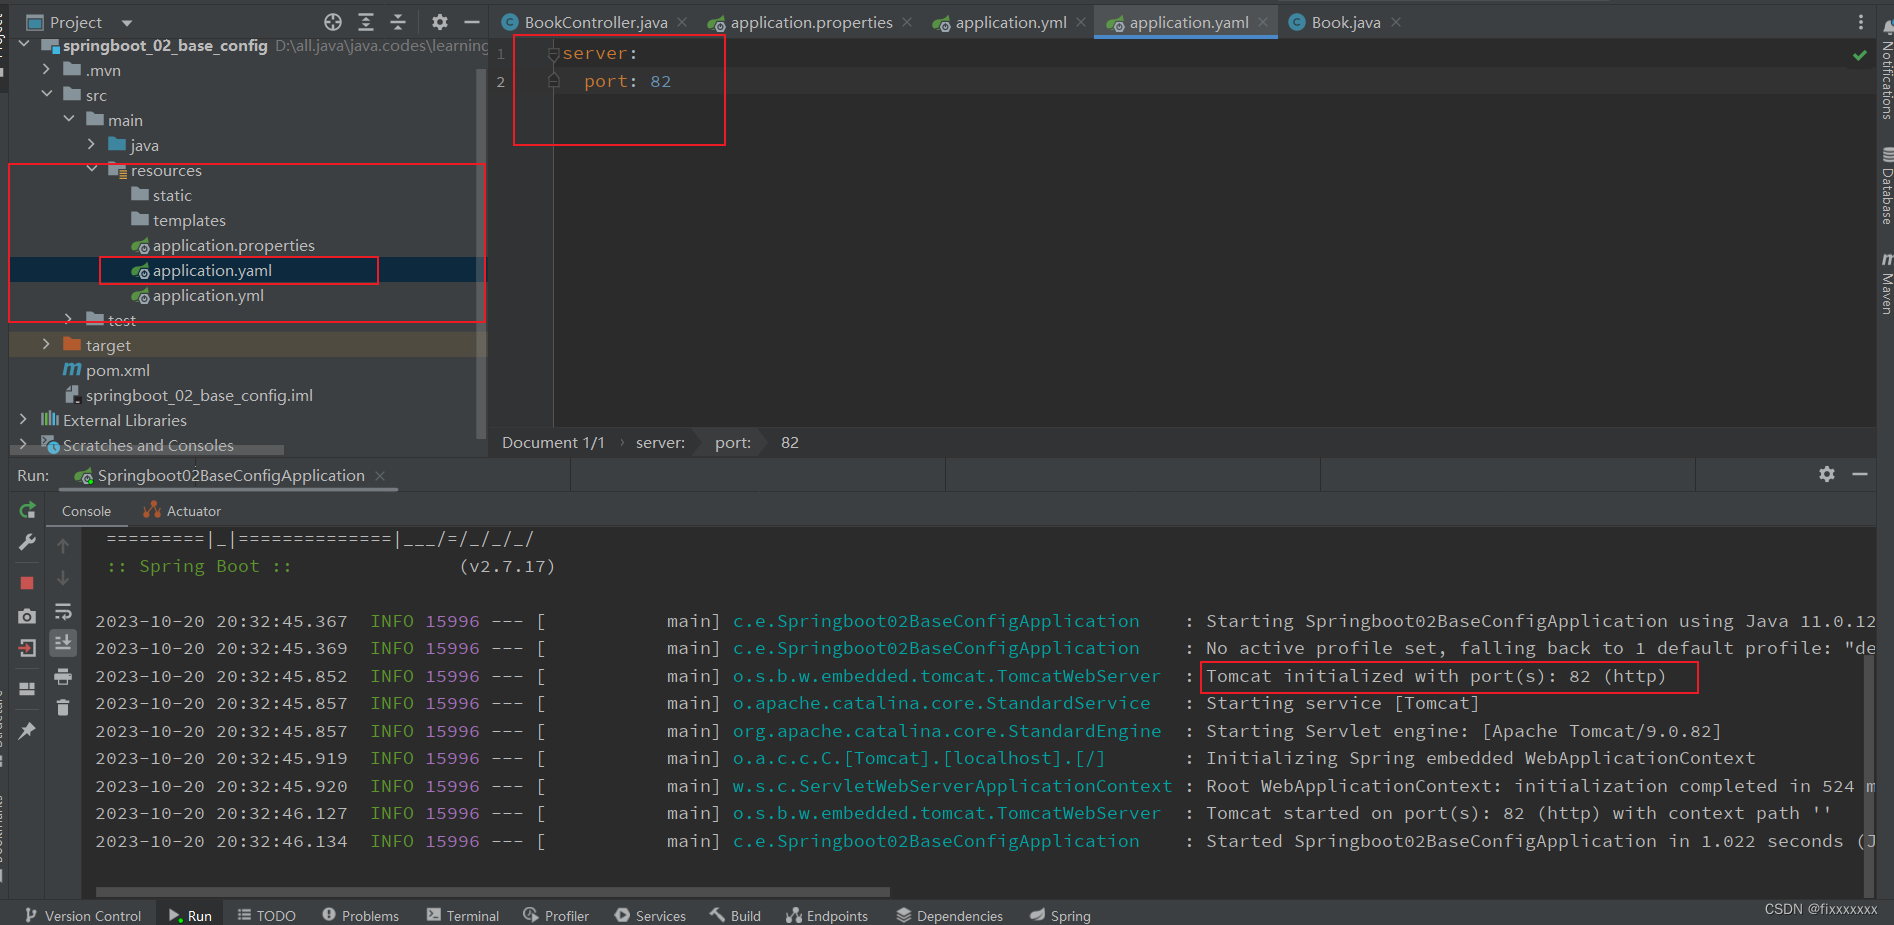
若三个文件同时存在,则存在优先级关系:

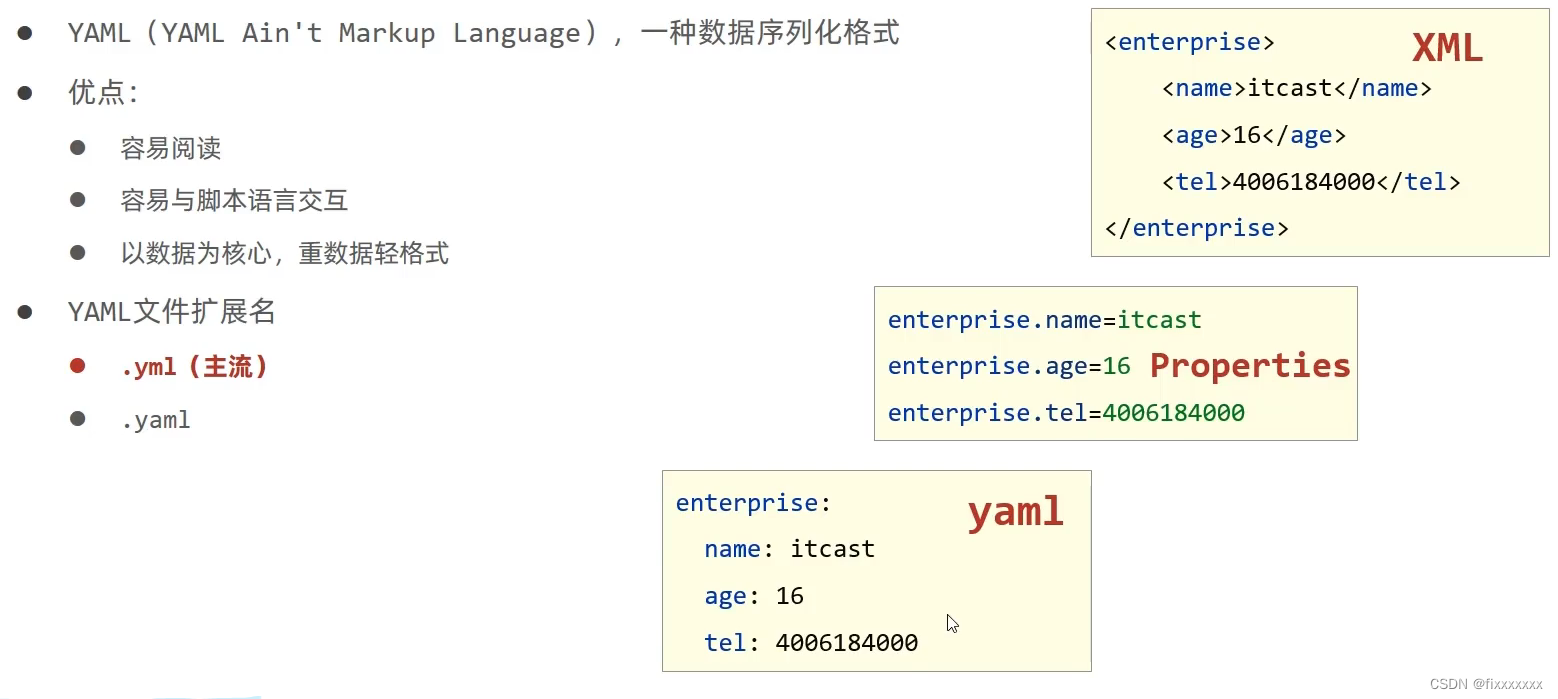
yaml
yaml格式
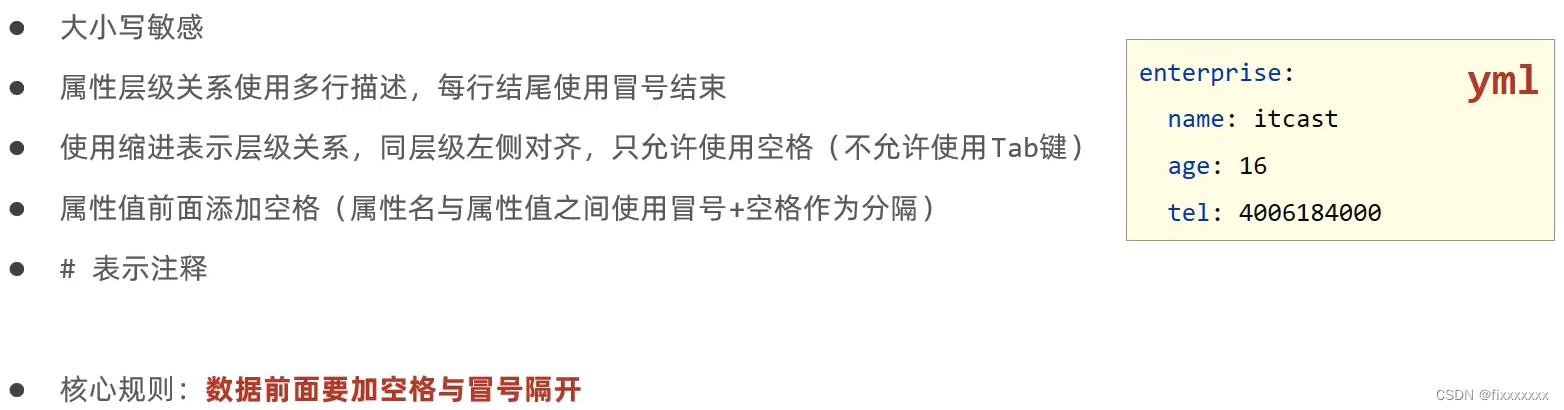
yaml语法规则
yaml数组数据
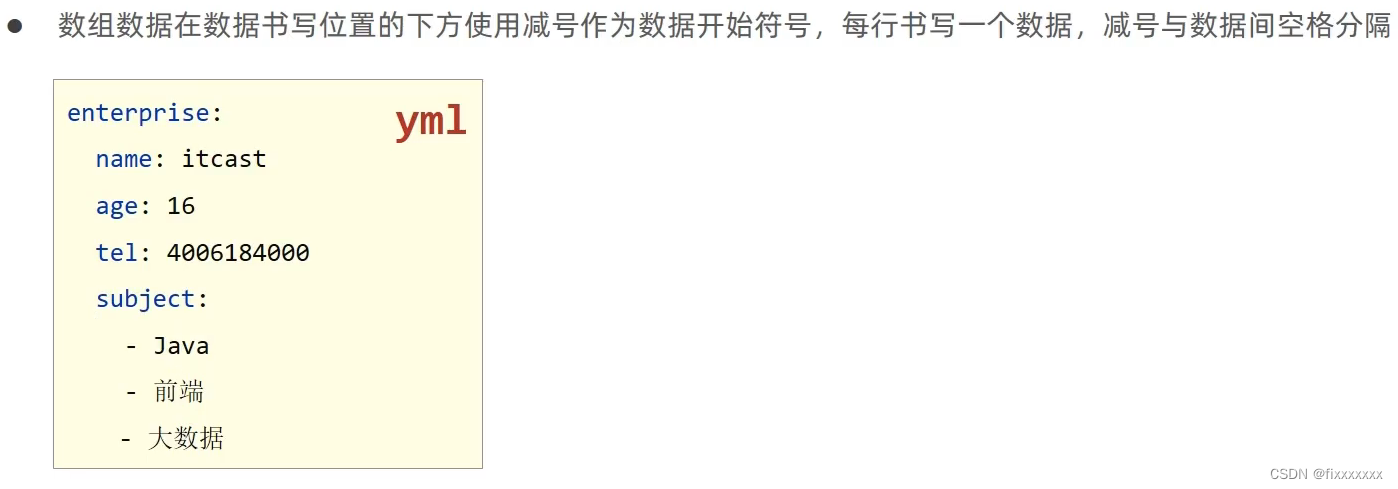
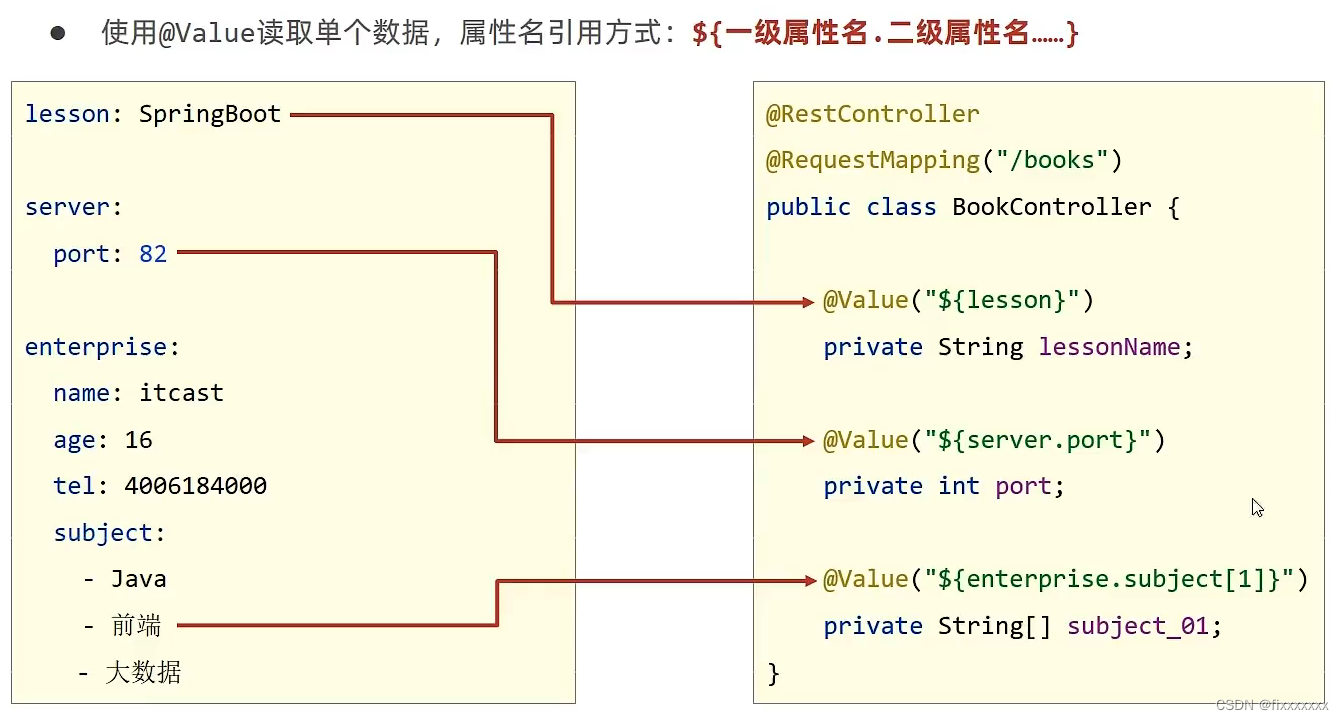
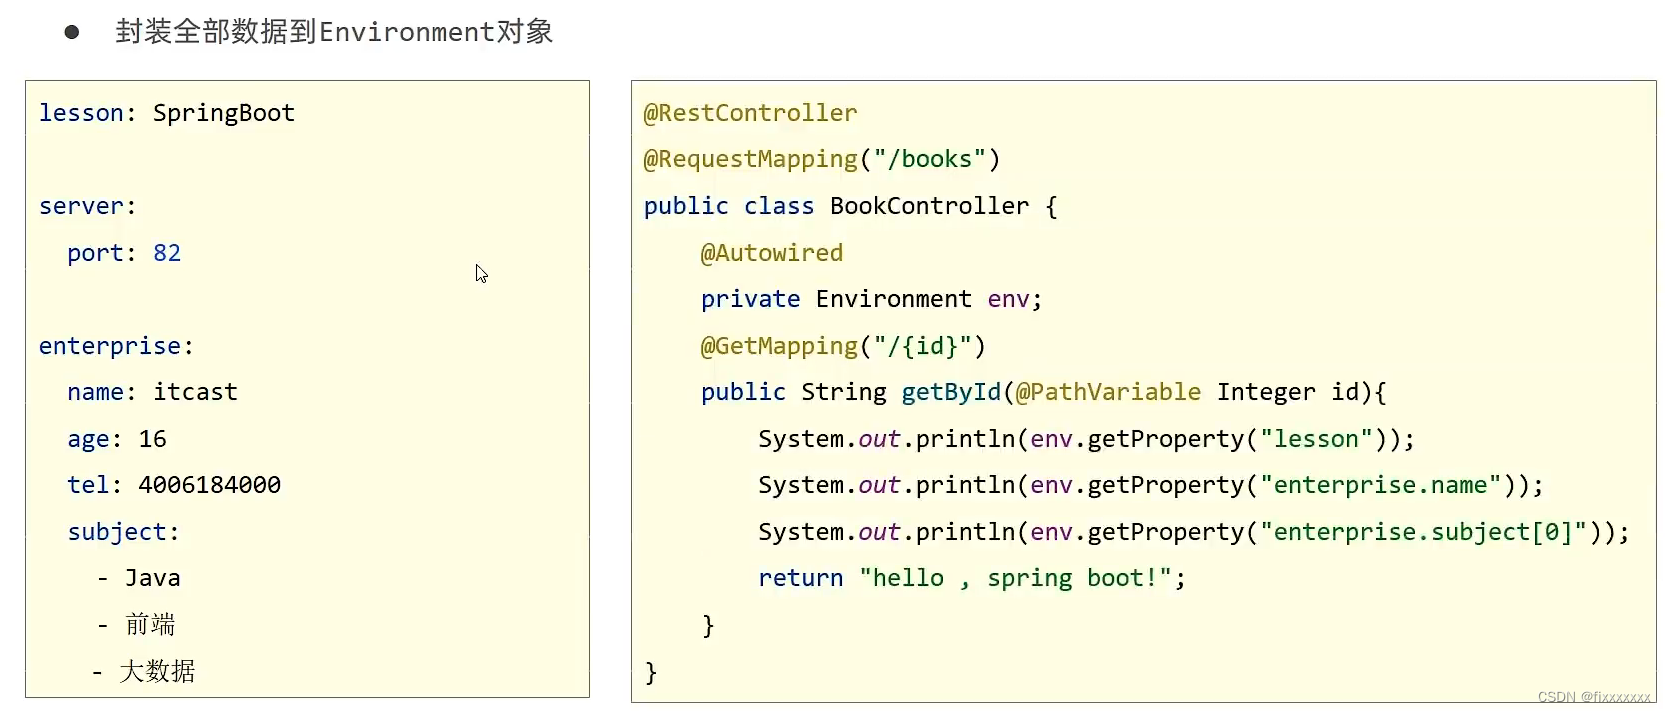
yaml数据读取方式
演示:
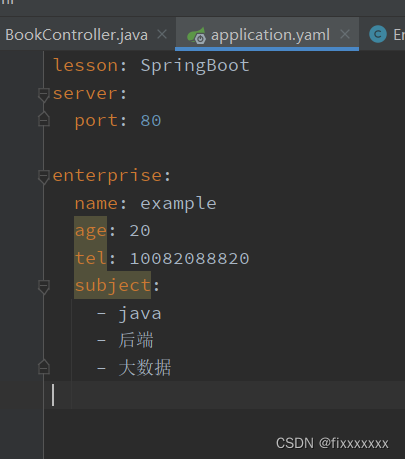
yaml文件内数据:
BookController类内容:
package com.example.controller;

import com.example.domain.Enterprise;
import org.springframework.beans.factory.annotation.Autowired;
import org.springframework.beans.factory.annotation.Value;
import org.springframework.core.env.Environment;
import org.springframework.web.bind.annotation.GetMapping;
import org.springframework.web.bind.annotation.PathVariable;
import org.springframework.web.bind.annotation.RequestMapping;
import org.springframework.web.bind.annotation.RestController;


@RestController
@RequestMapping("/books")
public class BookController {

    @Autowired
    private Environment environment;

    @Autowired
    private Enterprise enterprise;

    @Value("${lesson}")
    private String lesson;

    @Value("${server.port}")
    private String port;

    @Value("${enterprise.subject[0]}")
    private String name;


    @GetMapping("/{id}")
    public String GetById(@PathVariable Integer id){
        System.out.println("the id we got is :"+ id);
        System.out.println(lesson);
        System.out.println(port);
        System.out.println(name);
        System.out.println(environment.getProperty("lesson"));
        System.out.println(environment.getProperty("enterprise.subject[1]"));
        System.out.println("------------------");
        System.out.println(enterprise);
        return "perfect!";
    }
}
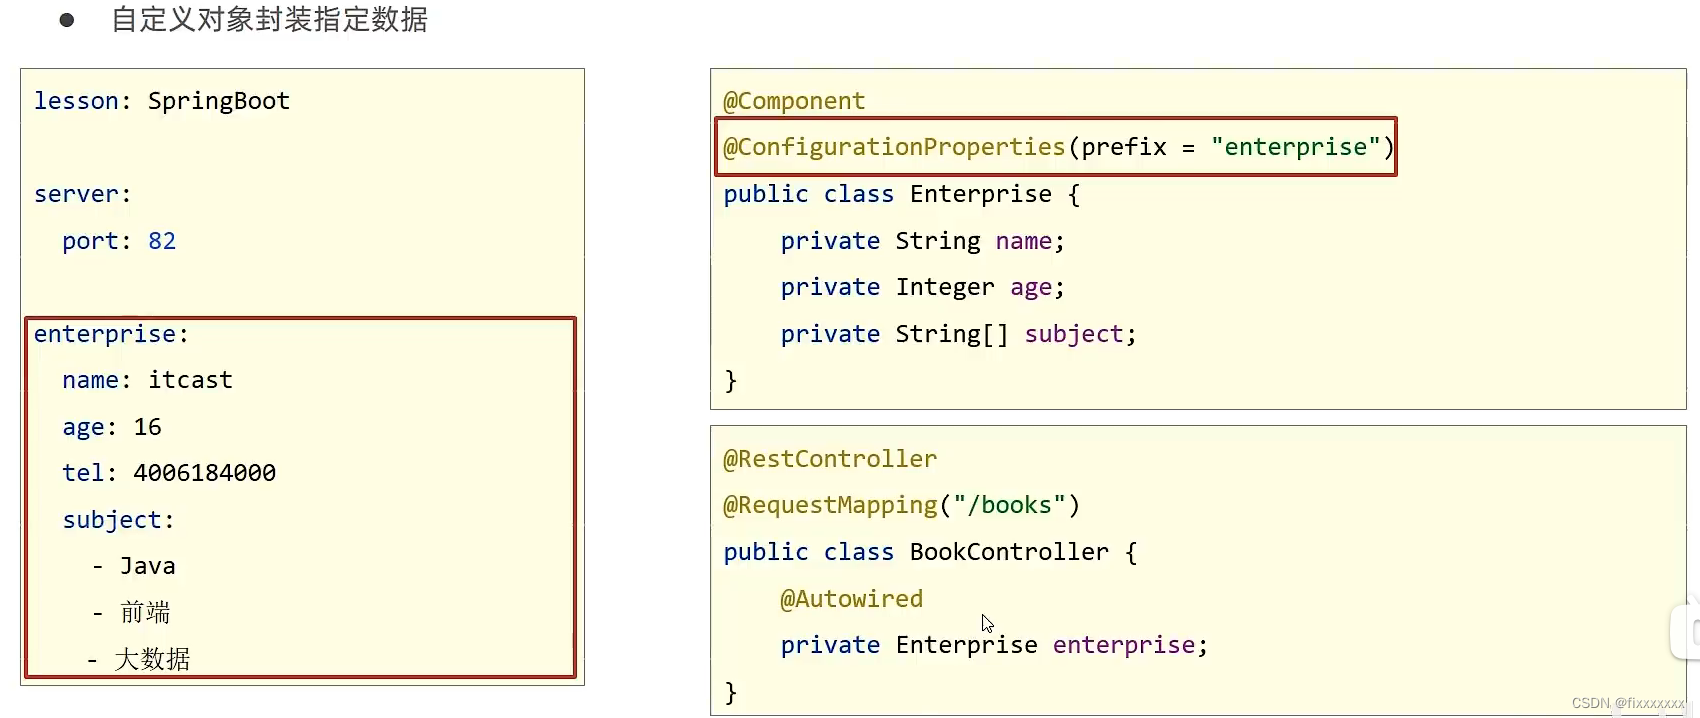
Enterprise中属性与yaml中的enterprise属性一致,包含get set toString方法,还有两个注解:

@Component,将其定义为bean
@ConfigurationProperties(prefix="enterprise"),使其从配置中的enterprise中读取属性。
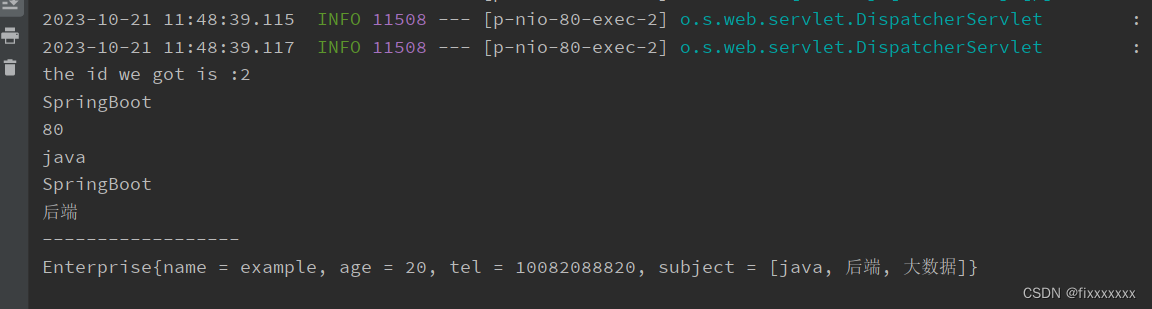
使用postman发送请求:
多环境启动
多环境开发配置
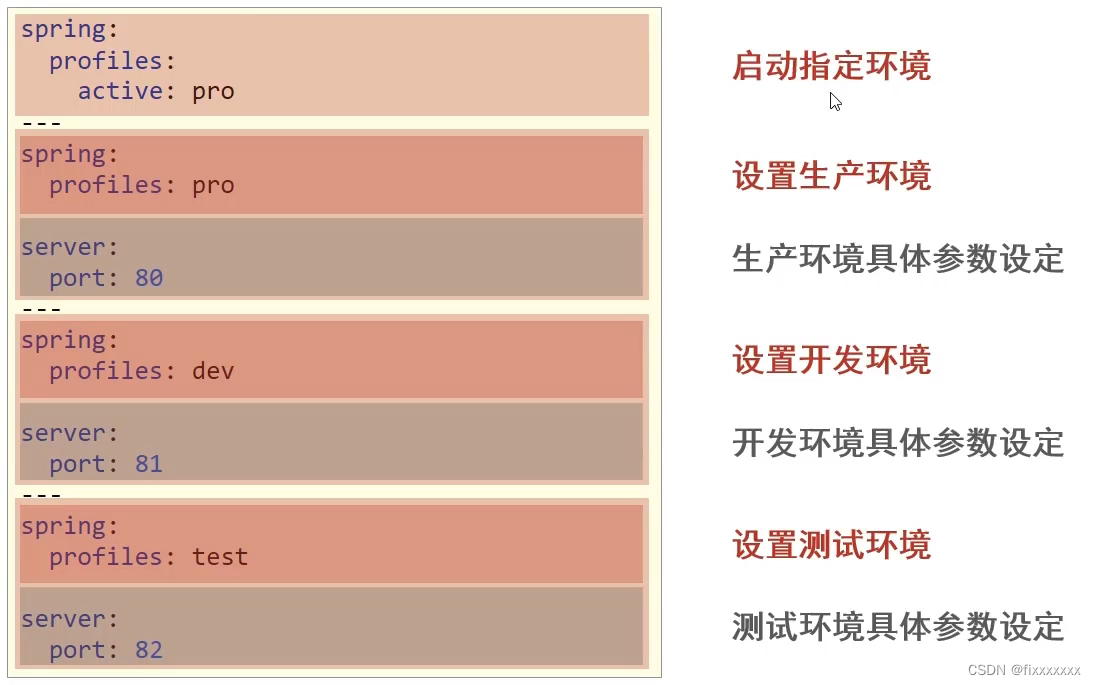
使用yml文件来配置启动环境:
"---"用来分隔不同环境。
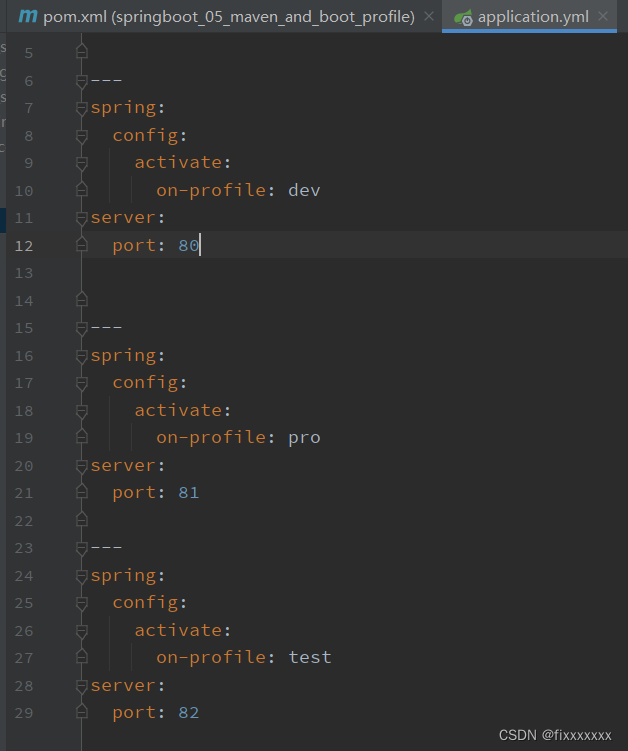
这是过时的写法,推荐使用新的写法:
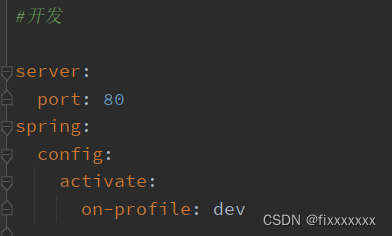
演示:


也可使用propertites文件来配置:
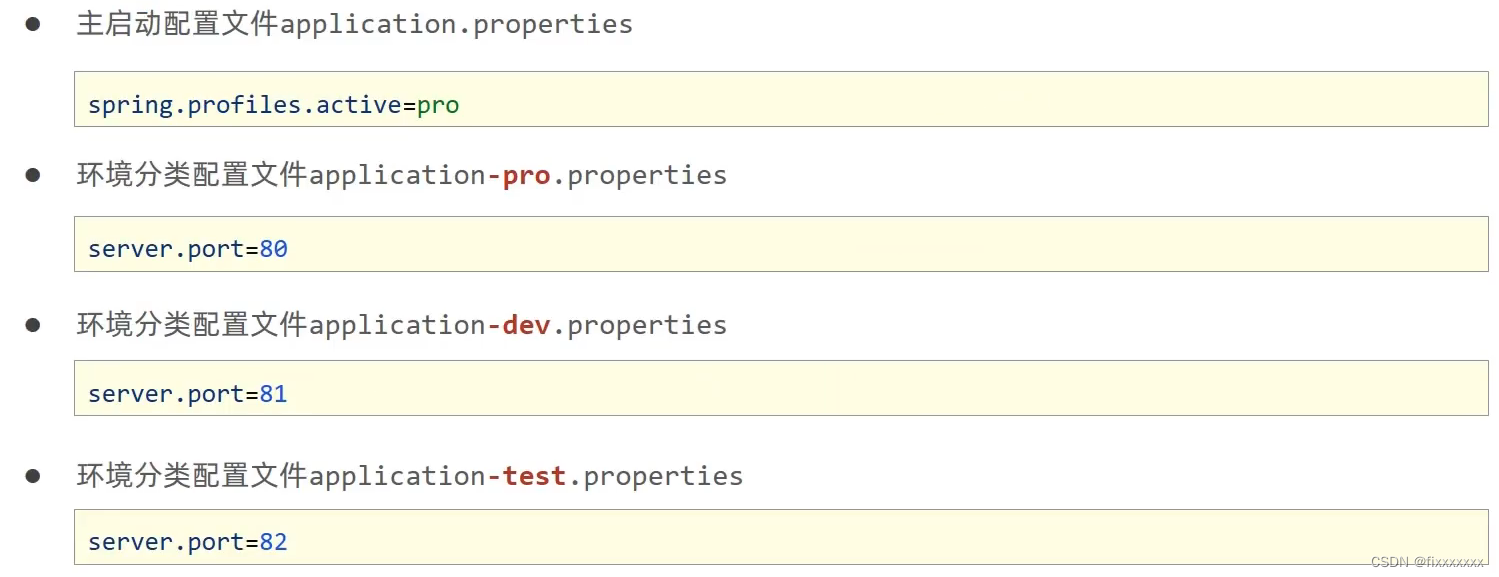
相对于yml文件来说,更加的麻烦,但是若是在配置内容较多时比较友好,但目前更多的是使用yml格式。
注意,properties文件和yml文件同时存在时,由于properties文件的优先级更高,所以会按照properties中的配置来执行。
多环境命令行启动参数设置
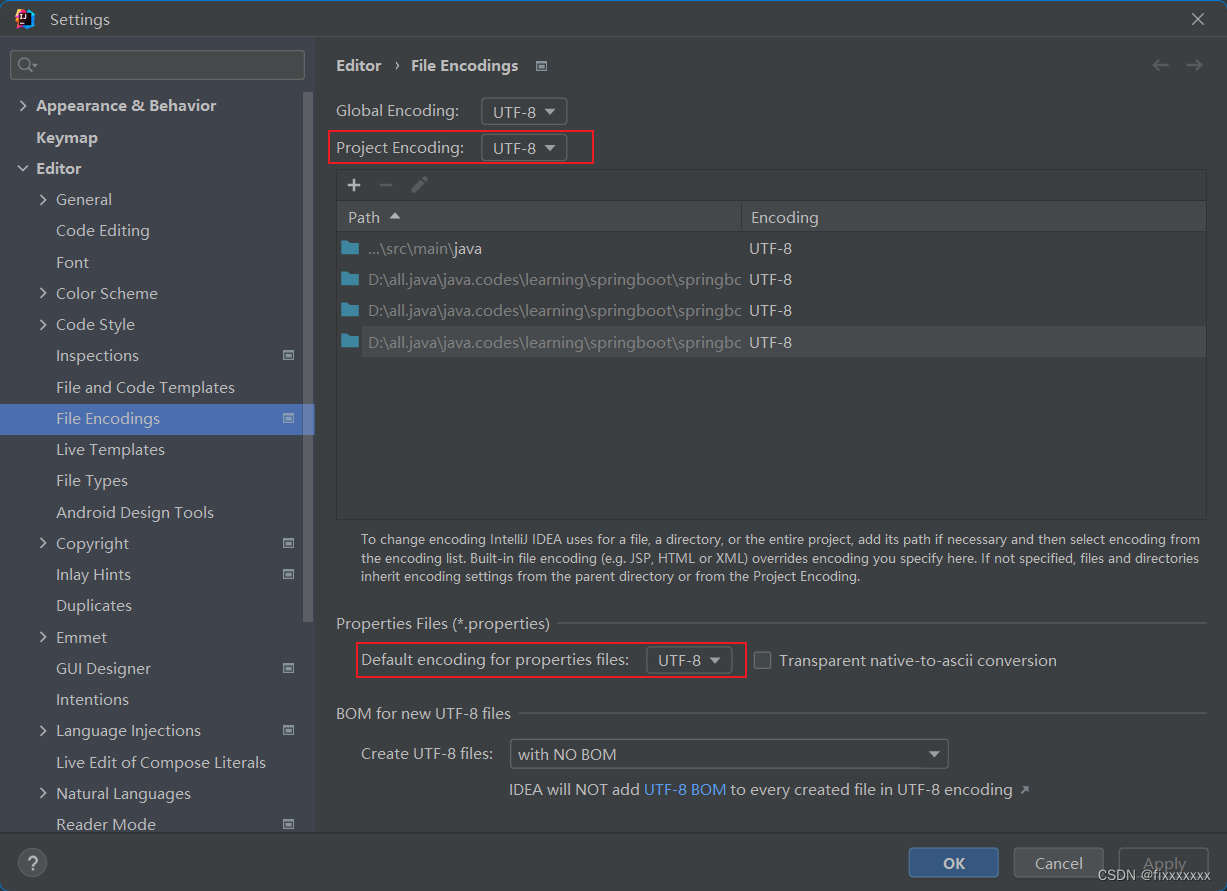
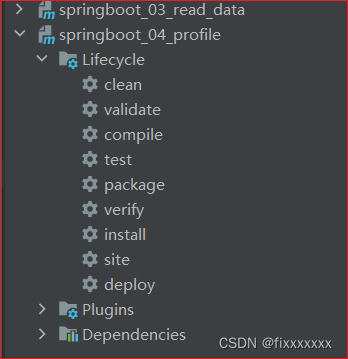
在文件打包前,最好先clean一下,防止之前运行结果影响,还应先设置一下文件编码规则,设为UTF-8,防止因中文编码问题打包失败
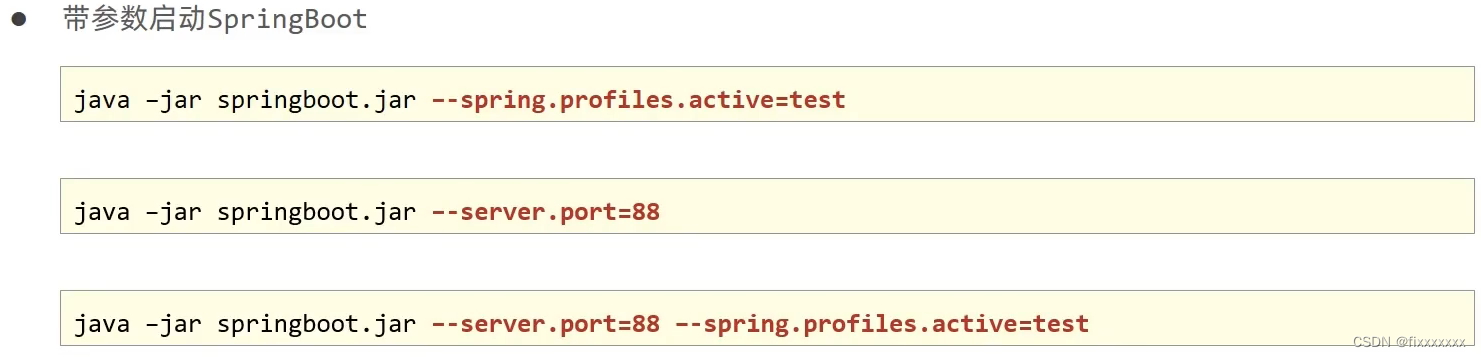
参数加载优先级顺序:
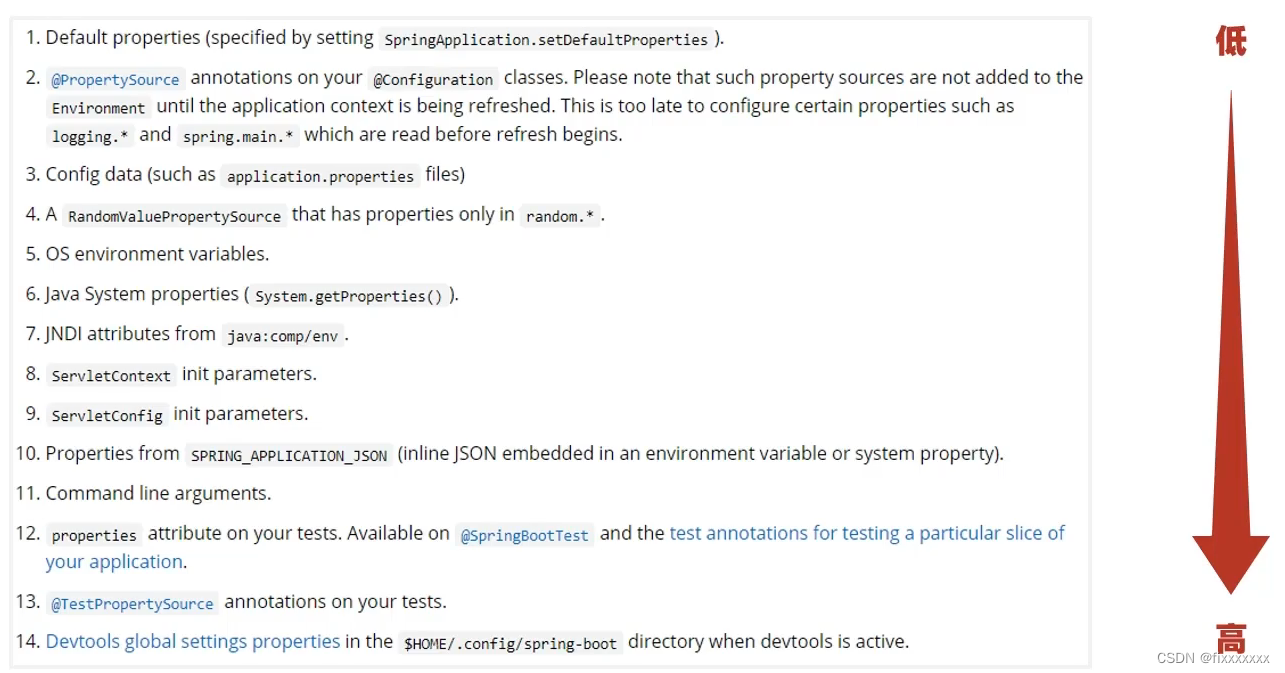
命令行的指令优先级在11,还是很高的。
多环境开发兼容问题
先前学过,使用maven也能控制多环境开发启动的服务器端口,在spring boot和maven都设置了时,到底该听从谁的呢?
众所周知,打包功能packaeg是maven提供的,那当然就是听maven的了。
所以我们现在要做的就是让maven控制版本,用springboot来加载maven设定的版本。
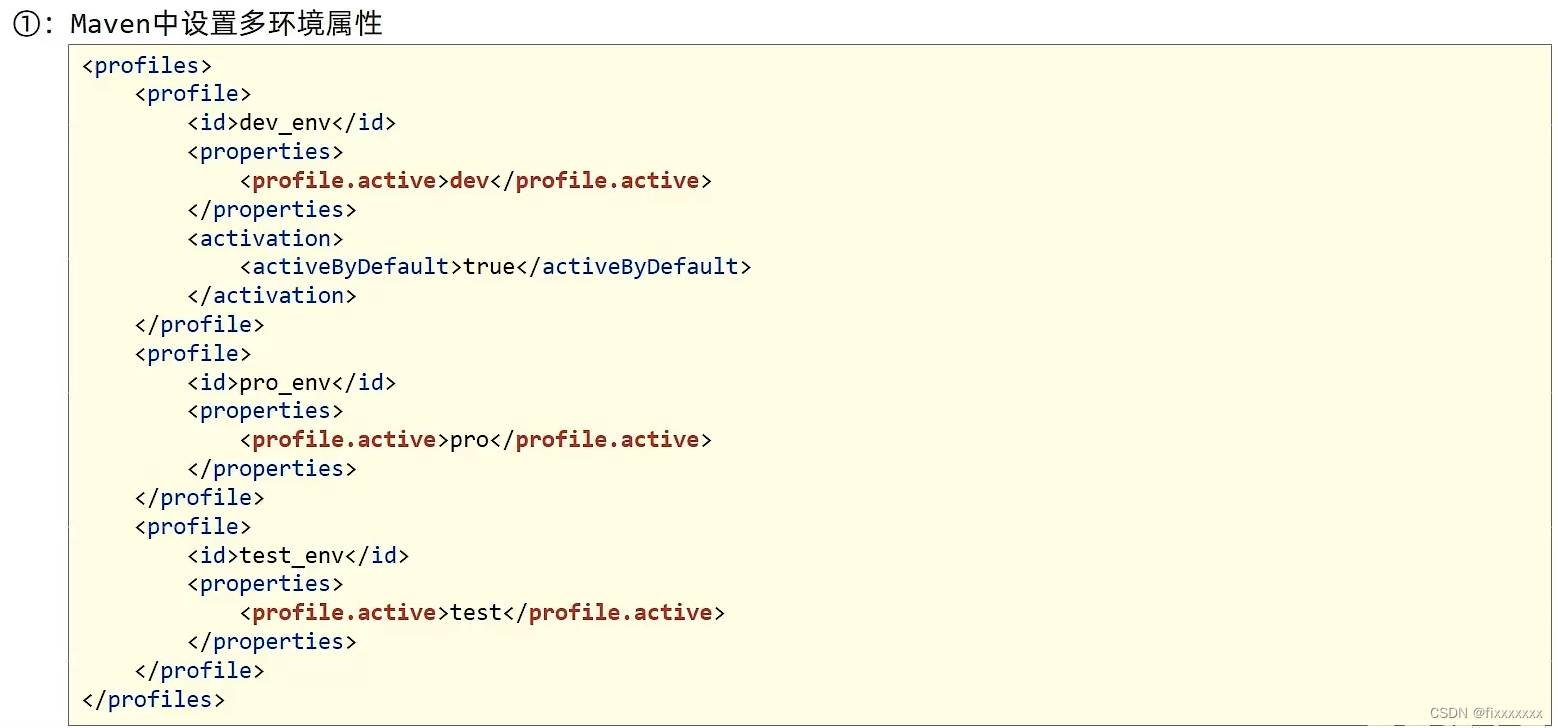
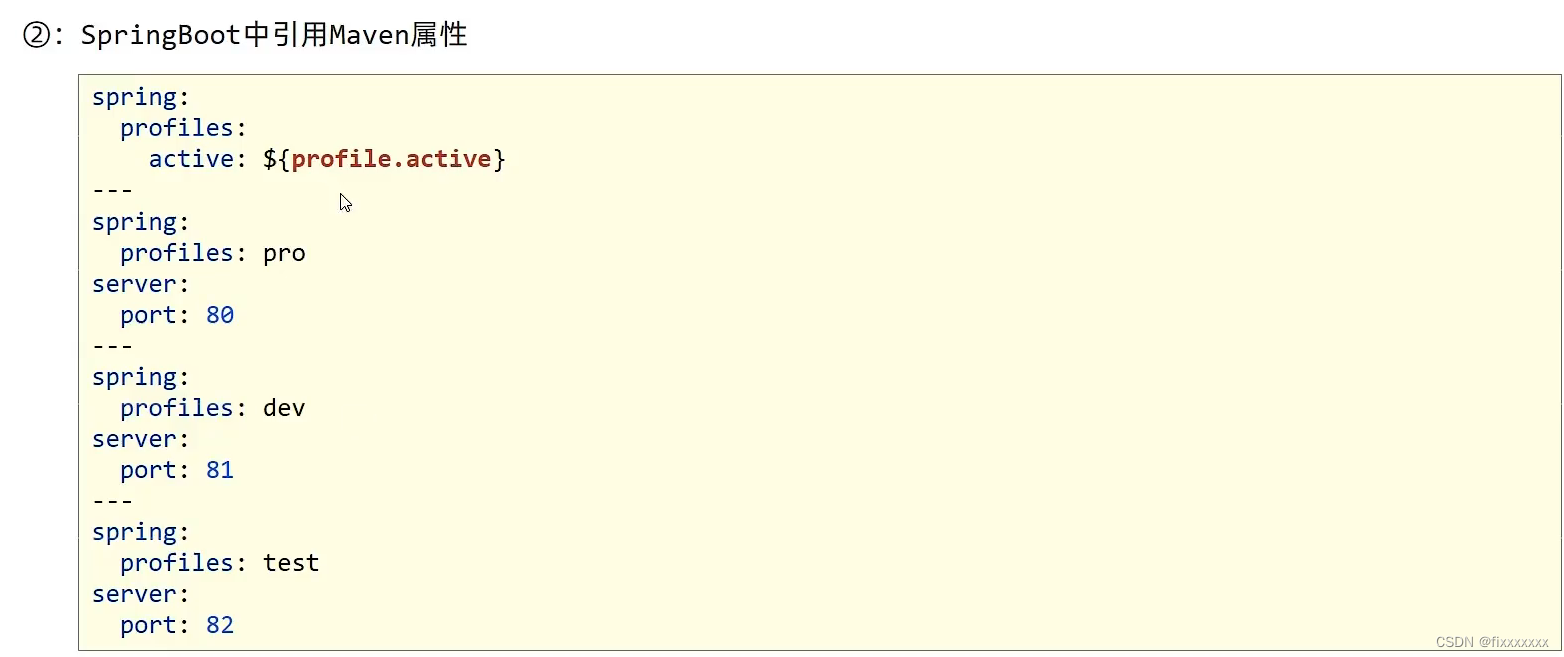
标红的为属性名,可以任意修改。
演示:
pom.xml文件中部分代码:
<profiles>
		<!--开发环境-->
		<profile>
			<id>dev</id>
			<properties>
				<profile.active>dev</profile.active>
			</properties>
		</profile>
		<!--生产环境-->
		<profile>
			<id>pro</id>
			<properties>
				<profile.active>pro</profile.active>
			</properties>
			<activation>
				<activeByDefault>true</activeByDefault>
			</activation>
		</profile>
		<!--测试环境-->
		<profile>
			<id>test</id>
			<properties>
				<profile.cative>test</profile.cative>
			</properties>
		</profile>
	</profiles>
	<build>
		<plugins>
			<plugin>
				<groupId>org.springframework.boot</groupId>
				<artifactId>spring-boot-maven-plugin</artifactId>
			</plugin>
			<plugin>
				<groupId>org.apache.maven.plugins</groupId>
				<artifactId>maven-resources-plugin</artifactId>
				<version>3.2.0</version>
				<configuration>
					<encoding>UTF-8</encoding>
					<useDefaultDelimiters>true</useDefaultDelimiters>
				</configuration>
			</plugin>
		</plugins>
	</build>
yml文件:
运行结果:

配置文件分类
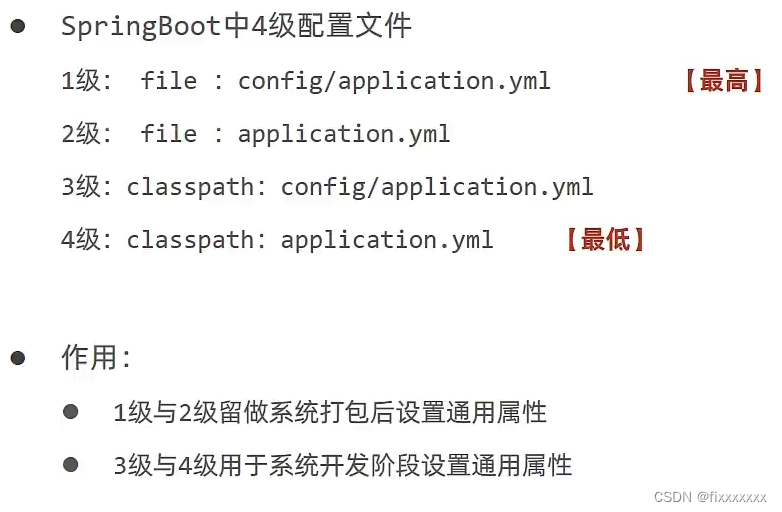
演示:
在resource目录下创建一个yml文件,和一个config包,包内还一个yml文件,都只配了端口,config内的yml配置的端口为80,外面的为81。

运行结果为:
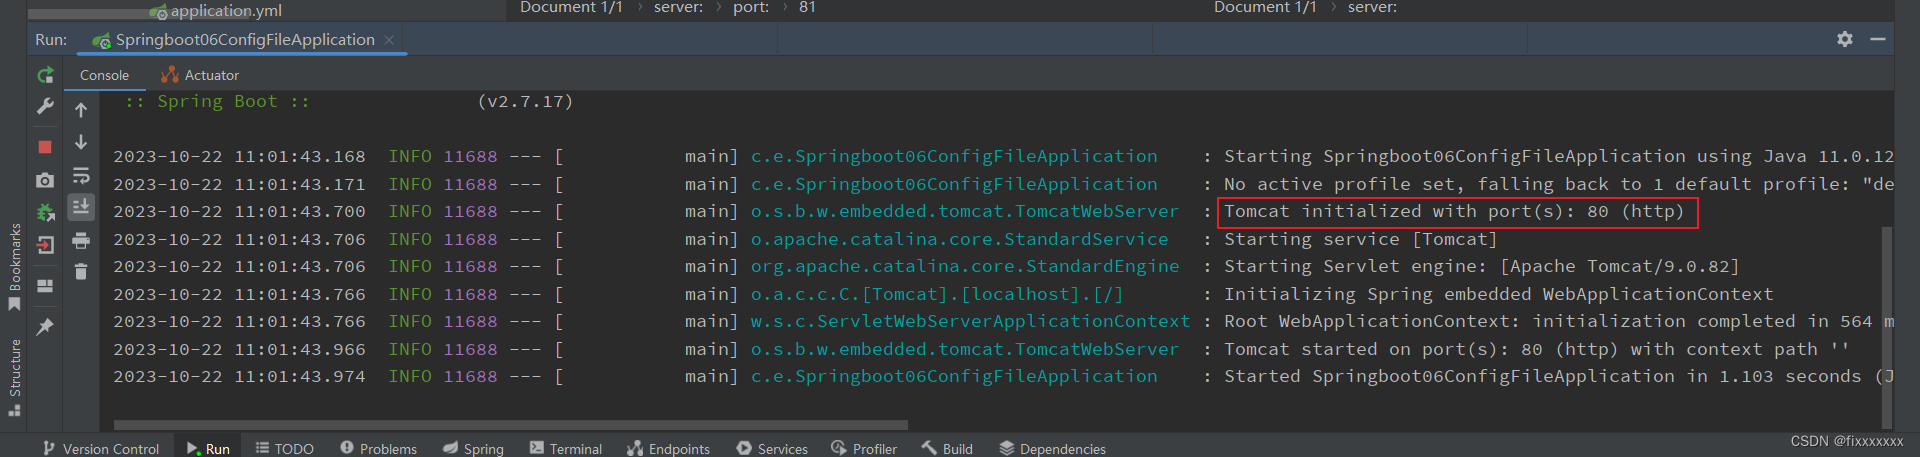
故config内的yml优先级更高。
我们再将项目打包,到文件目录去配置:
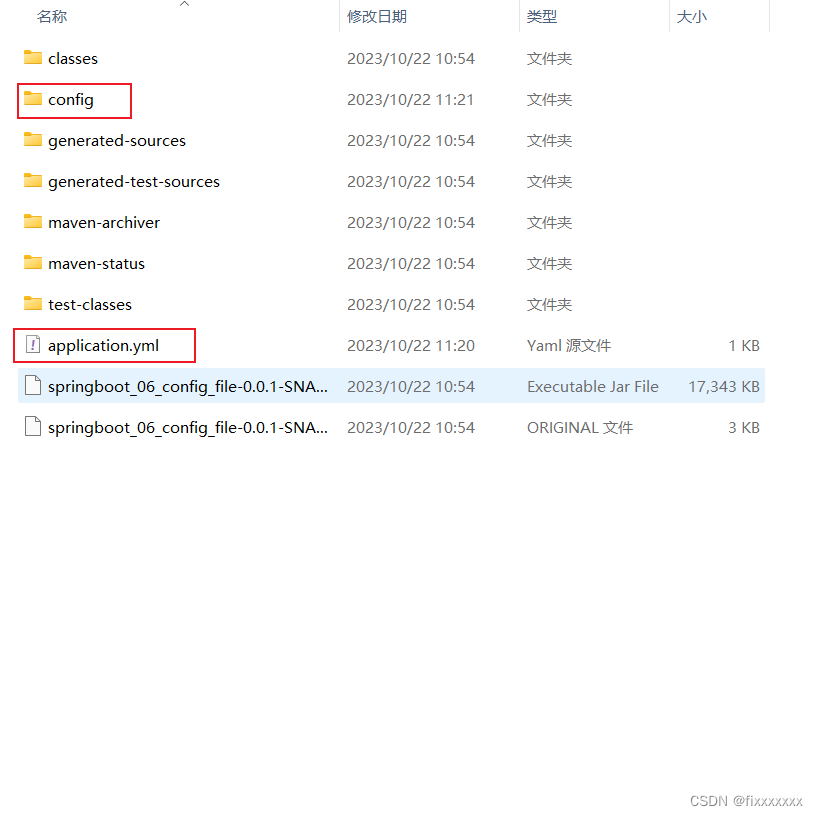
同样创建一个yml文件和一个config文件夹,config文件夹内也有个yml文件,配置的端口为89,外面的yml文件配置的端口为85。运行:
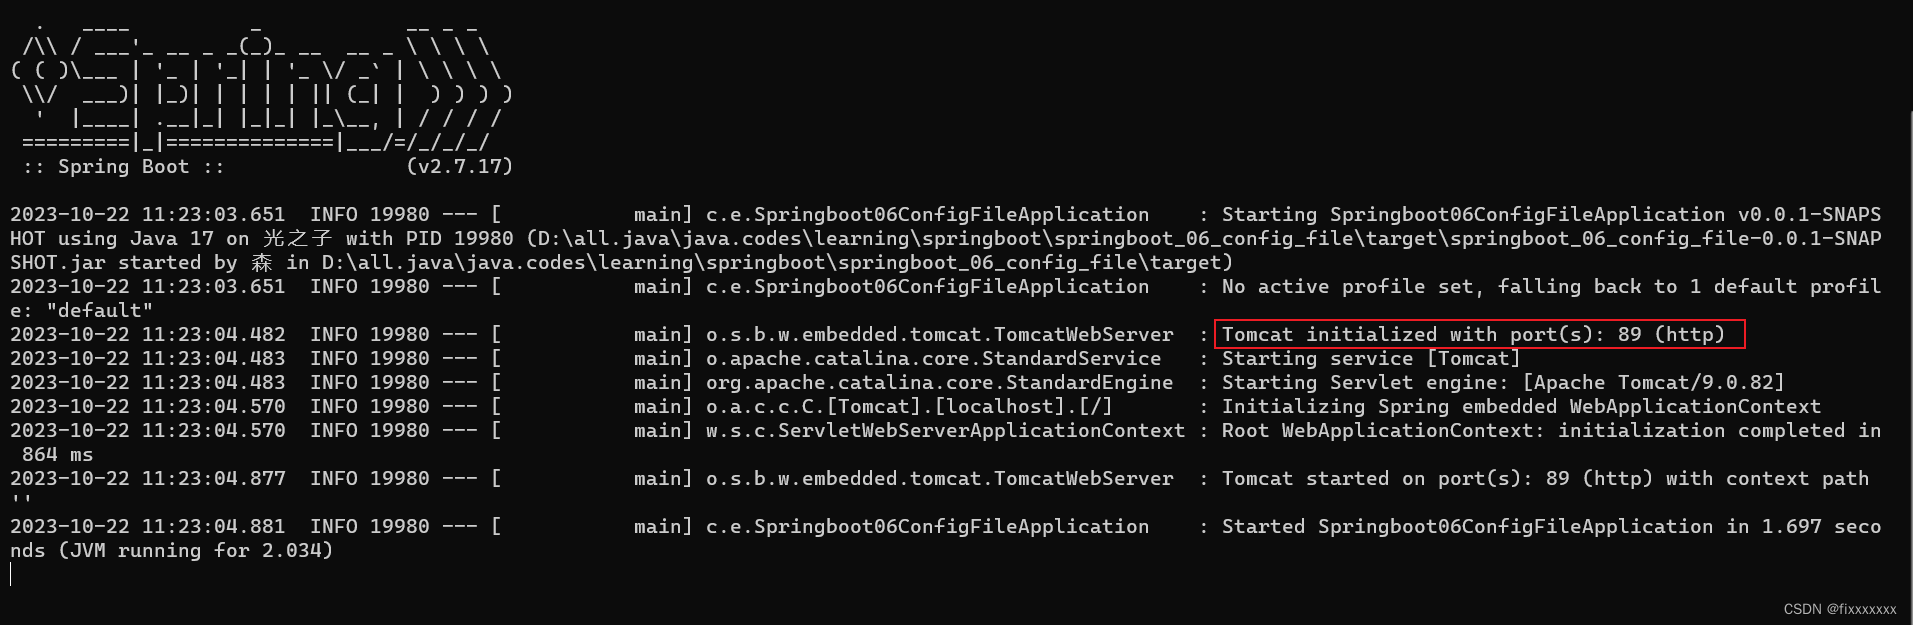
同样是config内的文件配置起作用。
整合第三方技术
整合JUnit
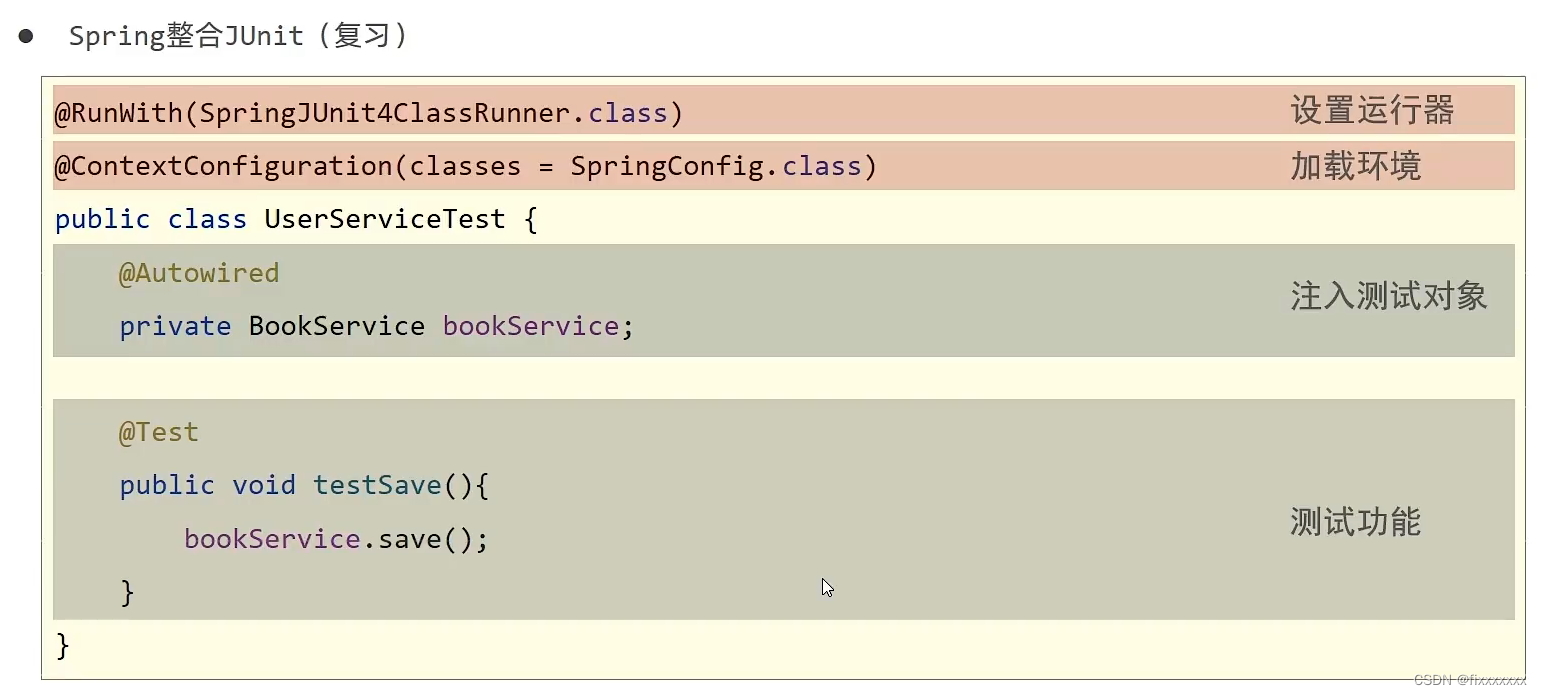
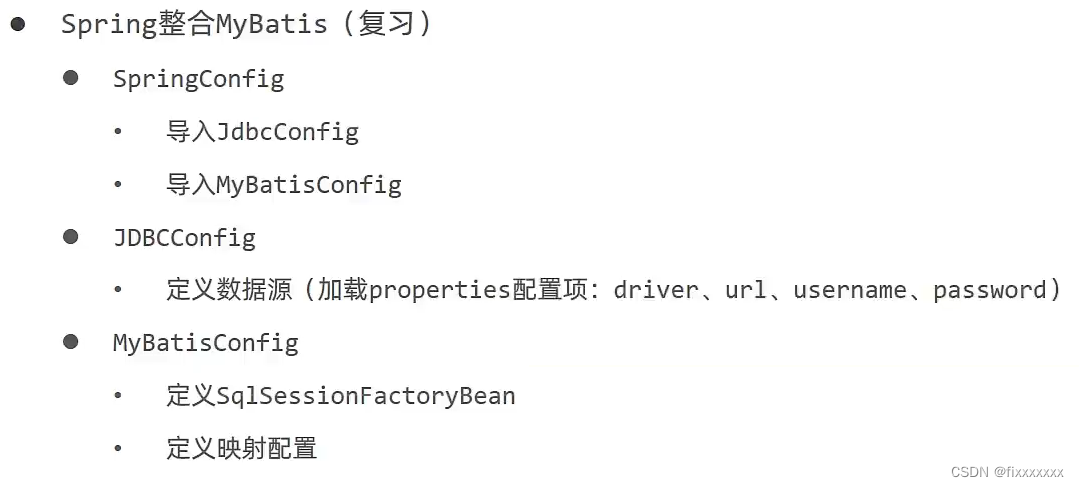
先看看spring是如何整合JUnit的吧:
springboot整合JUnit异常简单,要做的springboot都给我们做了,我们只需简单地注入对象就能直接开始测试了:
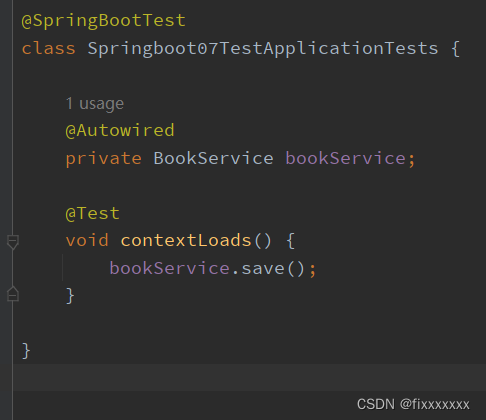
其实是引导类起到了配置类的作用
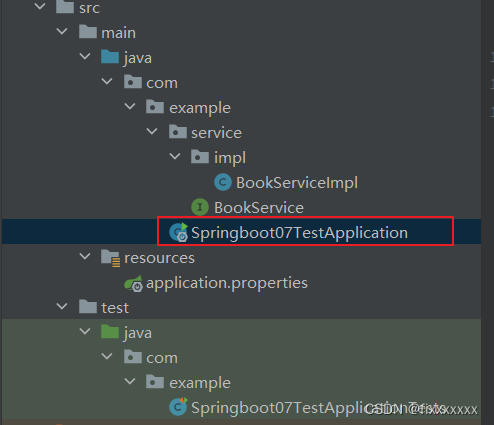
引导类会扫描自己所在的包及子包,故配置的BookService才能被加载成bean。
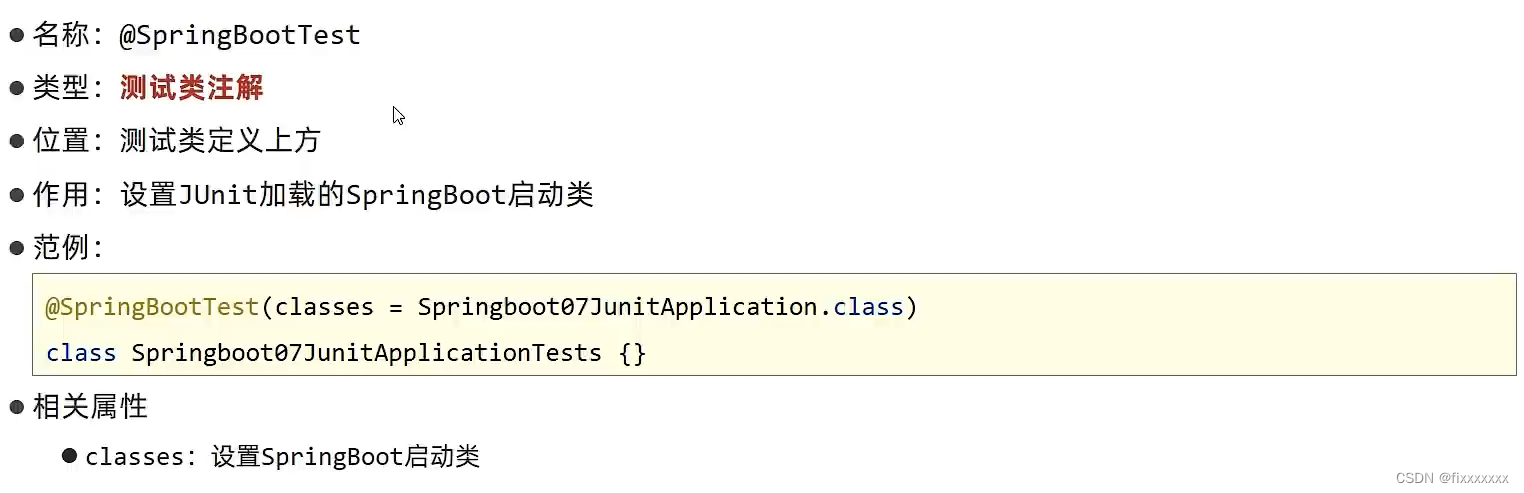
配置类会默认加载引导类,这也是在初始化spring的环境,如果测试类和引导类不在同一个包,就无法加载bean,此时测试就会失败,若硬是不在同一包下就是想用,则需指定参数:

注解解释:
基于SpringBoot实现SSM整合
springboot不存在整合spring,同样不存在整合springMvc,故只需整合Mybatis就行了。
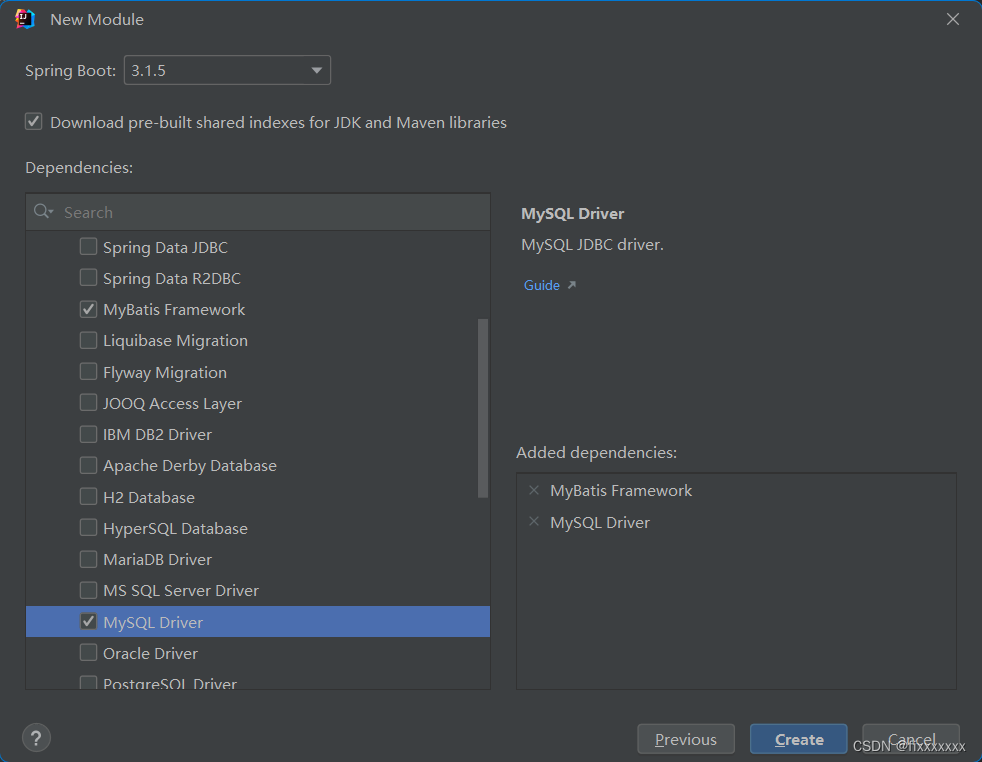
使用springboot整合mybatis极其方便
首先,创建项目时勾选mybatis和mybatis依赖:
然后在resource内新建yml文件设置数据源参数:
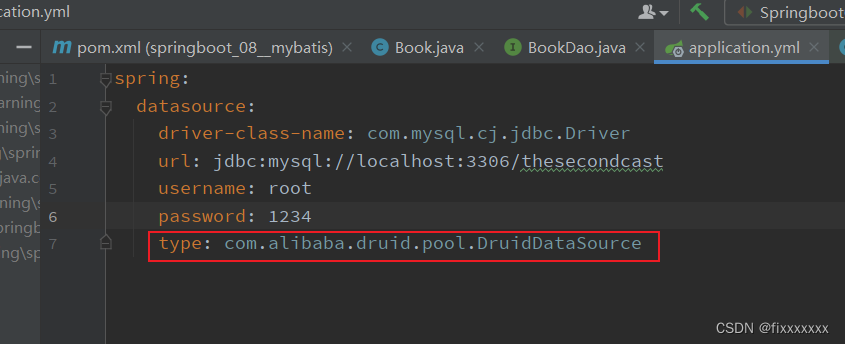
(使用了druid连接池)

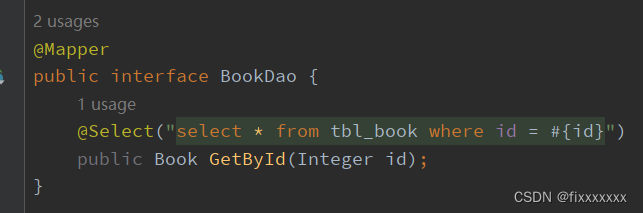
然后定义数据层接口与映射配置:
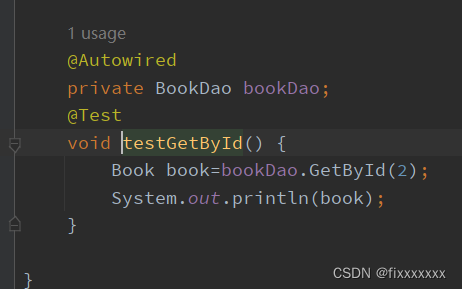
最后开始测试:

整合案例
我们来用springboot整合一下先前spring的案例,加载一下book的操作页面。
首先将先前在spring的代码拷贝过来,稍作修改:

由于springboot不存在spring 和springMvc的配置类,故基于二者的配置全部不需要,直接将config这个包删去。
controller内的BookController内容完全不变,其他的返回码,异常处理也都不做修改。
dao内的BookDao应加上注解@Mapper,否则spring无法找到dao的实现类,ServiceImpl中就无法注入BookDao。
添加数据库连接的配置,与上文一致。
最后就是将前端网页资源放在resource的static目录下。接着就可以启动项目了:
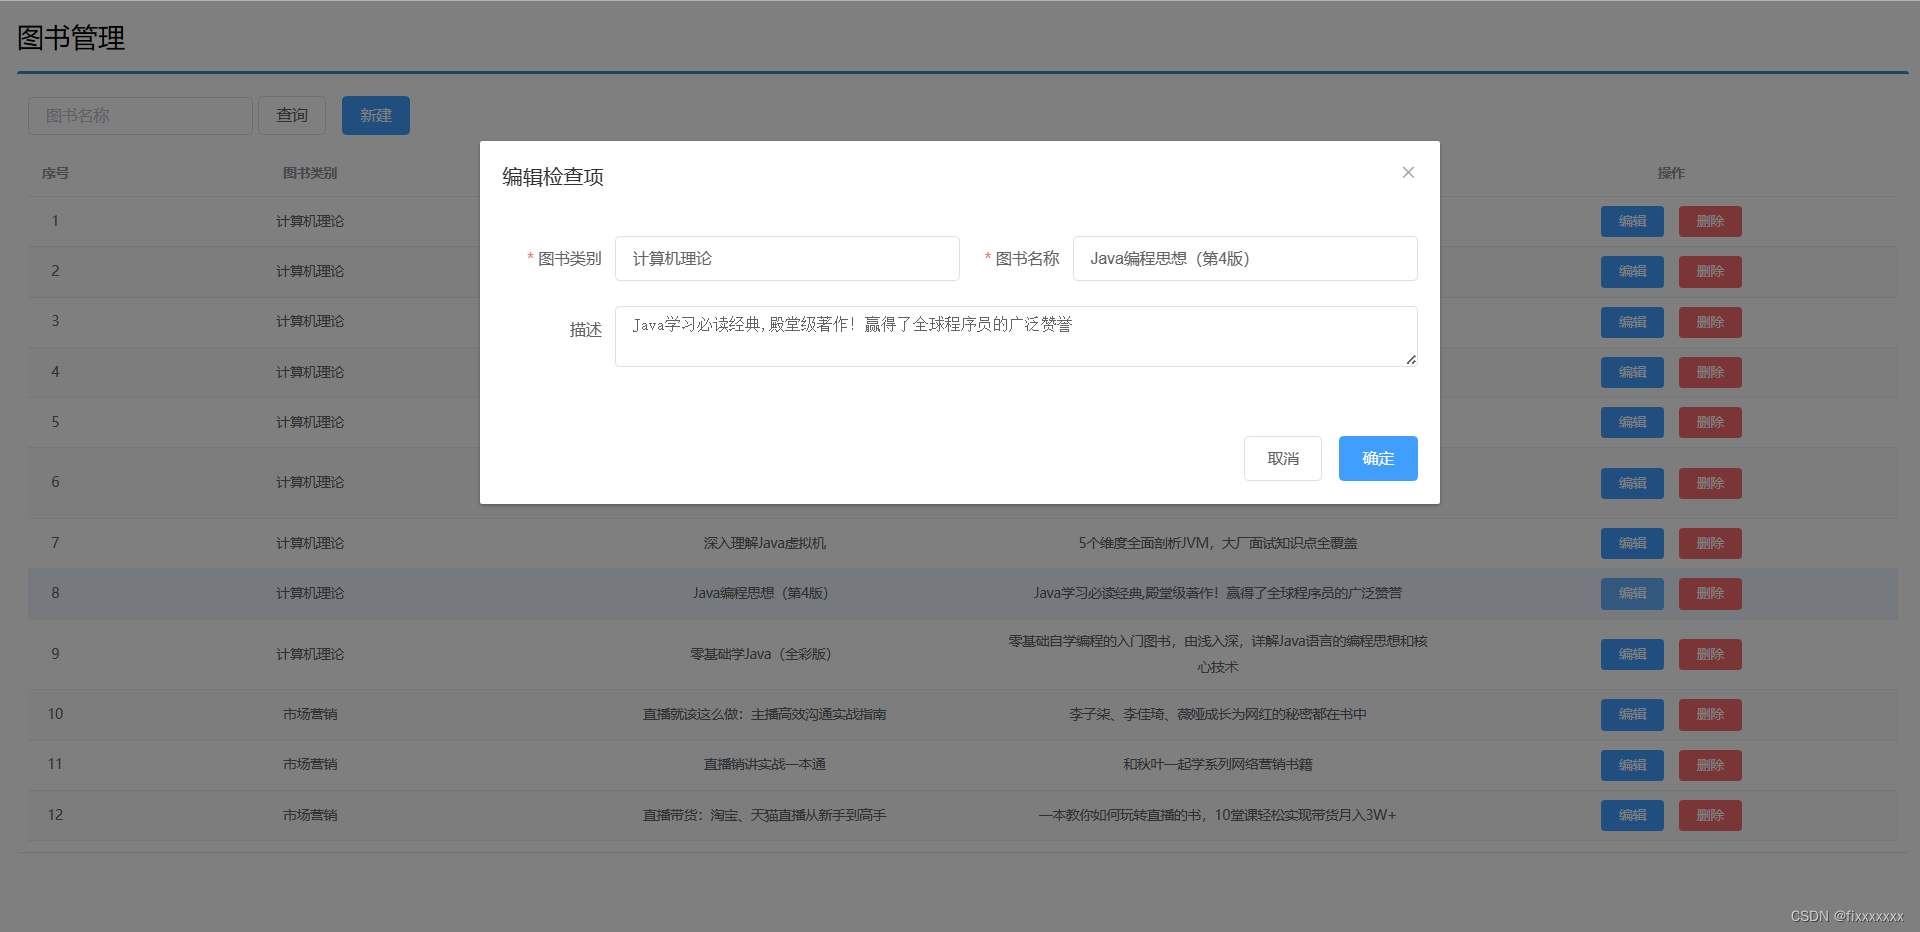
与先前效果一致。
以上内容均学自b站黑马ssm教学视频


 2198
2198


 被折叠的 条评论
为什么被折叠?
被折叠的 条评论
为什么被折叠?
 到【灌水乐园】发言


