自定义RedisTemplate
序列化源码分析
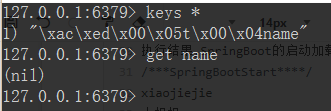
- 在JAVA程序中看到中文是没有问题的,但是在Redis客户端工具,也就是命令行中看见是编码的
-

- 继续分析源码
- 查看RedisTemplate.class
- 在RedisAutoConfiguration.class中点击
-

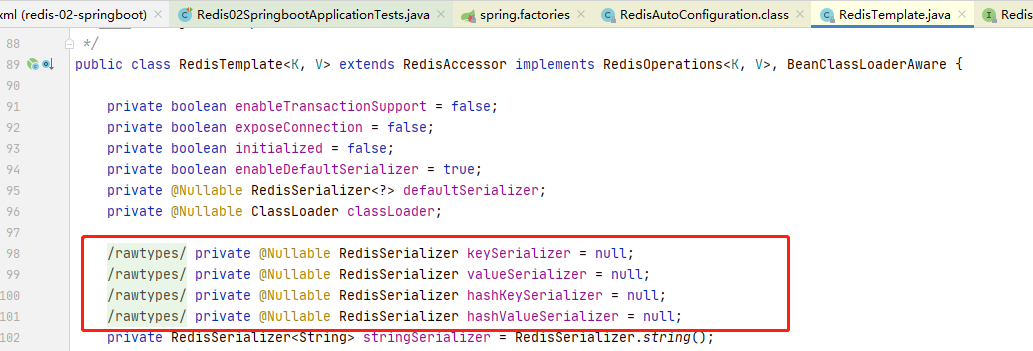
- 在上面可以看到序列化支持的
-

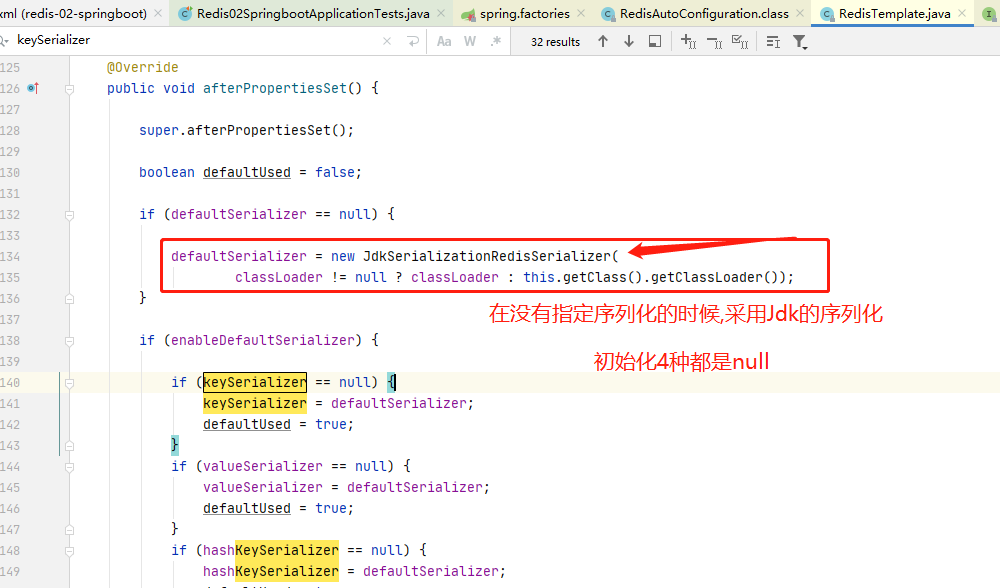
- 往下稍微滑动一些可以看到,默认采用的是JDK的序列化,因为默认4种都是空的
-

- 但是我们一般都是采用JSON来做序列化的,这个时候就需要自己定义序列化了
默认序列化存在的问题
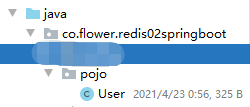
- 创建测试实体类,User
-

package co.flower.redis02springboot.pojo;

import lombok.AllArgsConstructor;
import lombok.Data;
import lombok.NoArgsConstructor;
import org.springframework.stereotype.Component;

@Data
@Component
@AllArgsConstructor
@NoArgsConstructor
public class User {

    private String name;

    private int age;

}
测试存储JSON
/**
     * 测试默认序列化
     */
@Test
public void testSerial() throws JsonProcessingException {
    User user = new User("小姐姐", 18);
    // 使用jackson转换为字符串,我也没用过
    String jsonUser = new ObjectMapper().writeValueAsString(user);
    redisTemplate.opsForValue().set("user",jsonUser);
    System.out.println(redisTemplate.opsForValue().get("user"));
}

执行结果
{"name":"小姐姐","age":18}
测试存储对象User
/**
     * 测试默认序列化
     */
@Test
public void testSerial() throws JsonProcessingException {
    User user = new User("小姐姐", 18);
    // 使用jackson转换为字符串,我也没用过
    //        String jsonUser = new ObjectMapper().writeValueAsString(user);
    redisTemplate.opsForValue().set("user",user);
    System.out.println(redisTemplate.opsForValue().get("user"));
}

执行结果
// org.springframework.data.redis.serializer.SerializationException:
Cannot serialize; nested exception is org.springframework.core.serializer.support.SerializationFailedException:
Failed to serialize object using DefaultSerializer; nested exception is java.lang.IllegalArgumentException: DefaultSerializer requires
a Serializable payload but received an object of type [co.flower.redis02springboot.pojo.User]
    at org.springframework.data.redis.serializer.JdkSerializationRedisSerializer.serialize(JdkSerializationRedisSerializer.java:96)
- 提示不能序列化,因为没有实现Serializable接口,所以不能被JDKSerialzationRedisSerializer序列化
- 为User实现Serializable接口
-

- 再次测试,执行成功
- 返回结果:User(name=小姐姐, age=18)
自定义RedisTemplate
- 在java下创建config包,里面创建RedisConfig.java
-

- 复制源码中的代码进行改动
- 自己设置序列化方式
- 设置方法
- 通过redisTemplate对象进行设置
- 比如:setKeySerializer
-

- 点击入参
-

- 查看实现类,就知道有哪些能设置了
-

- 配置类代码 RedisConfig.java
package co.flower.redis02springboot.config;

import com.fasterxml.jackson.annotation.JsonAutoDetect;
import com.fasterxml.jackson.annotation.PropertyAccessor;
import com.fasterxml.jackson.databind.ObjectMapper;
import org.springframework.boot.autoconfigure.condition.ConditionalOnMissingBean;
import org.springframework.boot.autoconfigure.condition.ConditionalOnSingleCandidate;
import org.springframework.context.annotation.Bean;
import org.springframework.context.annotation.Configuration;
import org.springframework.data.redis.connection.RedisConnectionFactory;
import org.springframework.data.redis.core.RedisTemplate;
import org.springframework.data.redis.serializer.Jackson2JsonRedisSerializer;
import org.springframework.data.redis.serializer.StringRedisSerializer;

@Configuration
public class RedisConfig {

    @Bean
    public RedisTemplate<String, Object> redisTemplate(RedisConnectionFactory redisConnectionFactory) {
        RedisTemplate<String, Object> template = new RedisTemplate();
        template.setConnectionFactory(redisConnectionFactory);
        // JSON序列化配置 不需要被,不需要知道具体参数含义 大概知道是做什么的就可以 这个就是采用JSON序列化对象
        Jackson2JsonRedisSerializer jackson2JsonRedisSerializer  = new Jackson2JsonRedisSerializer(Object.class);
        ObjectMapper om = new ObjectMapper();
        om.setVisibility(PropertyAccessor.ALL, JsonAutoDetect.Visibility.ANY);
        om.enableDefaultTyping(ObjectMapper.DefaultTyping.NON_FINAL);
        jackson2JsonRedisSerializer.setObjectMapper(om);
        // String的序列化配置
        StringRedisSerializer stringRedisSerializer = new StringRedisSerializer();
        // 所有的Key通过String序列化
        template.setKeySerializer(stringRedisSerializer);
        template.setHashKeySerializer(stringRedisSerializer);
        // 所有的value通过JSON序列化
        template.setValueSerializer(jackson2JsonRedisSerializer);
        template.setHashValueSerializer(jackson2JsonRedisSerializer);
        // 调用刚才看的序列化源码中默认的方法,重新设置序列化
        template.afterPropertiesSet();
        return template;
    }

}
采用自定义配置之后,清空数据库再次测试测试代码如下
/**
     * 测试自定义序列化
     */
@Test
public void testSerial() throws JsonProcessingException {
    User user = new User("小姐姐", 18);
    // 使用jackson转换为字符串,我也没用过
    //        String jsonUser = new ObjectMapper().writeValueAsString(user);
    redisTemplate.getConnectionFactory().getConnection().flushDb();// 清空数据库
    redisTemplate.opsForValue().set("user",user);
    System.out.println(redisTemplate.opsForValue().get("user"));
}
- 没有问题,查询数据库,直接从客户端查询
-

- 也没有问题,OK,nice,开发中如果使用的话,直接拷贝就可以用了!当然是配置类,但是一般开发中不直接在业务中引入redisTemplate,而是编写一个RedisUtils工具类,来包装一下默认的,因为使用起来比较麻烦~,我就不照着视屏巧了,好几百行[捂脸],用的时候直接从公司拿,没有的话百度一个!
问题AQF:
依赖报错:
在依赖redis的时候不要指定泛型,不然会报错
/**
* 我居然直接就指定了泛型 RedisTemplate<String,Object>结果就直接报错了,删除泛型后成功
*/
@Autowired
private RedisTemplate redisTemplate;
作者:彼岸舞
时间:2021\05\05
内容关于:Redis
本文属于作者原创,未经允许,禁止转发


 290
290


 被折叠的 条评论
为什么被折叠?


