


 本文详细介绍了CAS服务器的安装配置,包括基础安装、免SSL配置、服务注册、HTTP协议设置、多属性返回配置以及单点登出功能。在服务注册中,通过JSON文件管理服务,并展示了如何配置JDBC查询以从数据库中获取用户属性。同时,还涵盖了单点登出的配置,确保客户端在CAS登出时能够收到通知。
安装前置条件:本地电脑已经配置好git maven3.x.x jdk1.8
一、基础安装
1.下载服务器端代码模板并且切换至5.3分支:
git clone https://github.com/apereo/cas-overlay-template.git
cd cas-overlay-template
git checkout -b 5.3 remotes/origin/5.3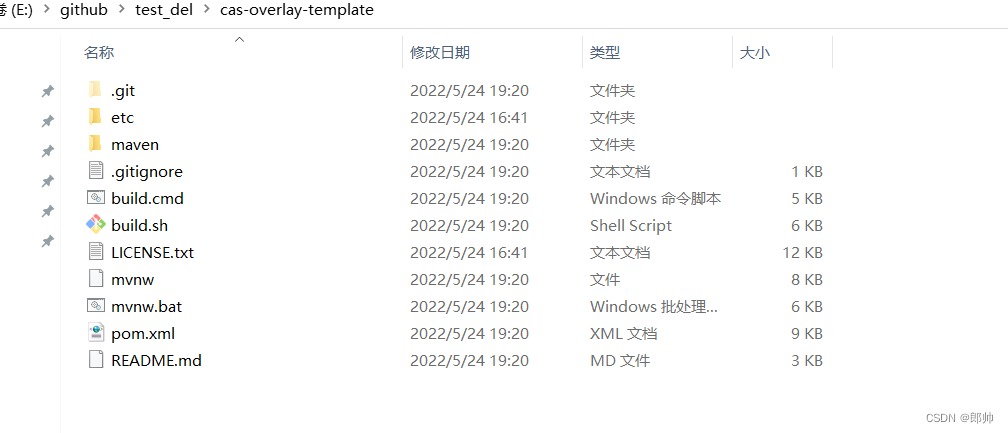
2.在该目录下右击鼠标,选择运行git bash here,在命令窗口运行下列命令
##run命令其实是打包并运行服务,相当于mvn clean package | jar -jar cas.war
build.sh run
3.运行报错
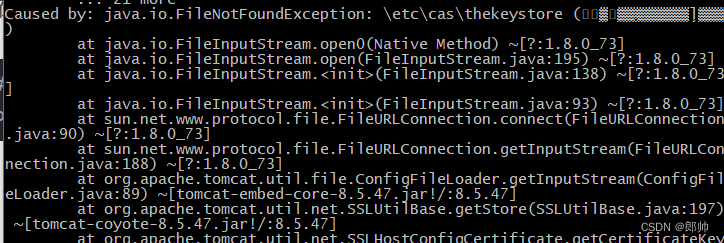
该错误产生原因:\etc\cas\thekeystore是生成的密钥文件的,因为这里不使用加密,所以需要将cas的https协议忽略并将http协议设置为允许
4.修改http协议,在cas-overlay-template目录下,依次创建src\main\resources目录,结果如下:
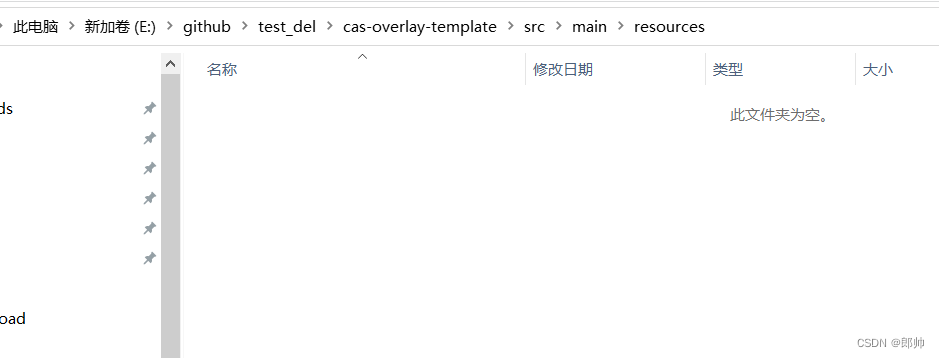
进入cas-overlay-template-5.3\target\cas\WEB-INF\classes目录下,将源代码默认的application.properties和services文件夹复制到src\main\resources目录下(在该目录下修改配置,这样在打包的时候,该目录下的配置会覆盖原先的默认配置) ,如图:

修改复制后的application.properties文件,修改处有两点,
第一点,注释ssl配置:
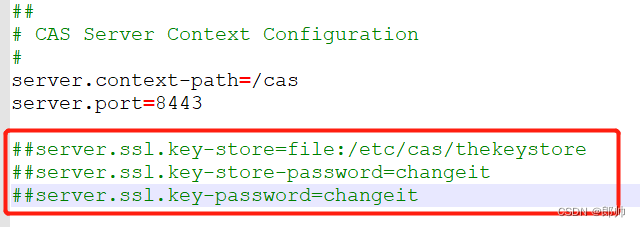
第二点,在配置文件最后加上
#默认true cookie只能用https协议发送
cas.tgc.secure=false
#从json配置文件中读取客户端服务注册
cas.serviceRegistry.initFromJson=true
修改services\HTTPSandIMAPS-10000001.json,加入"http"

5.重新运行build.sh run
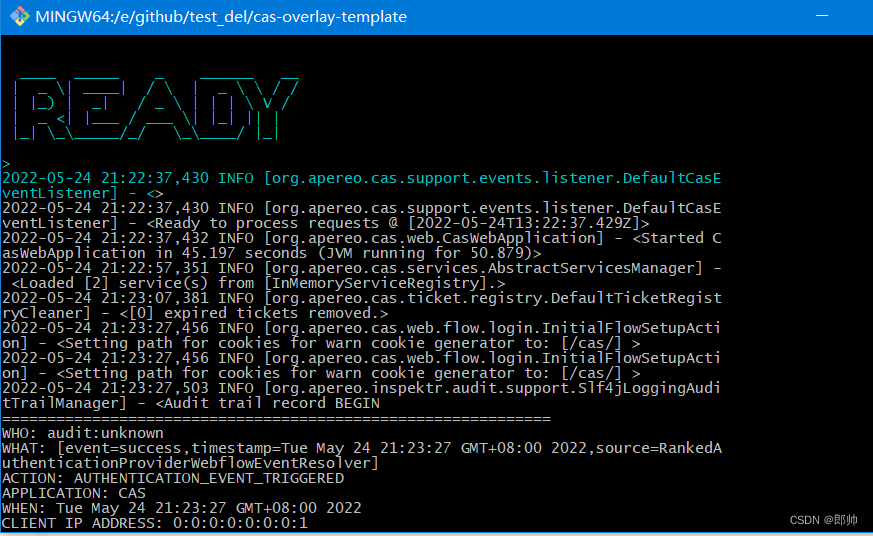
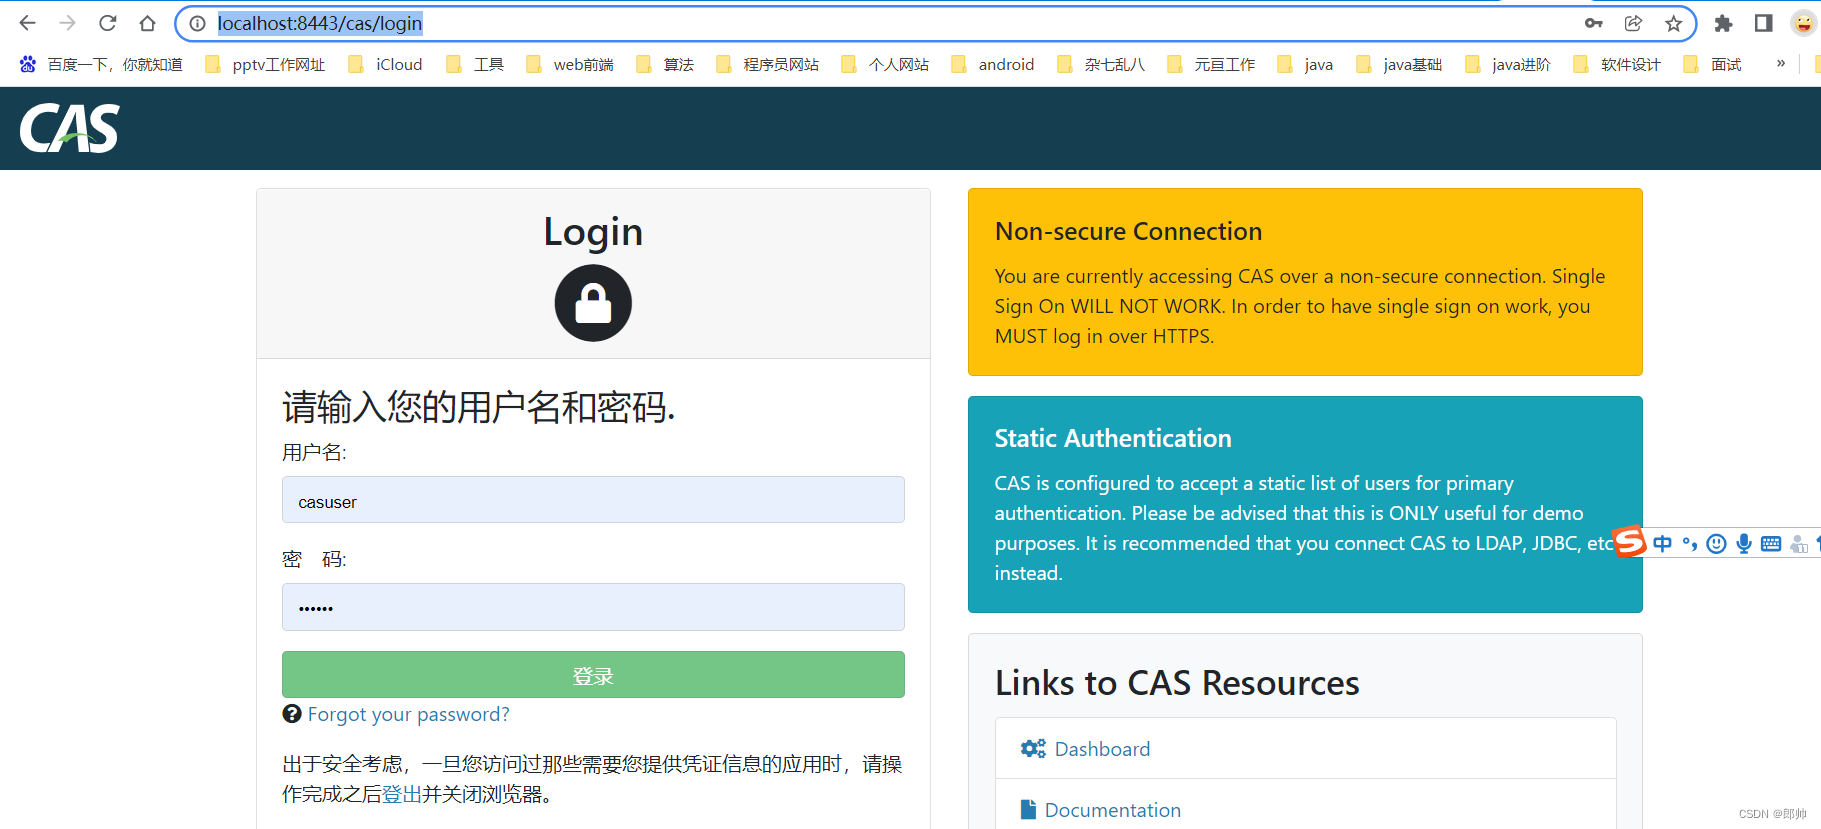
6.访问http://localhost:8443/cas/login 用户名密码casuser/Mellon(可以在application.properties配置文件修改)
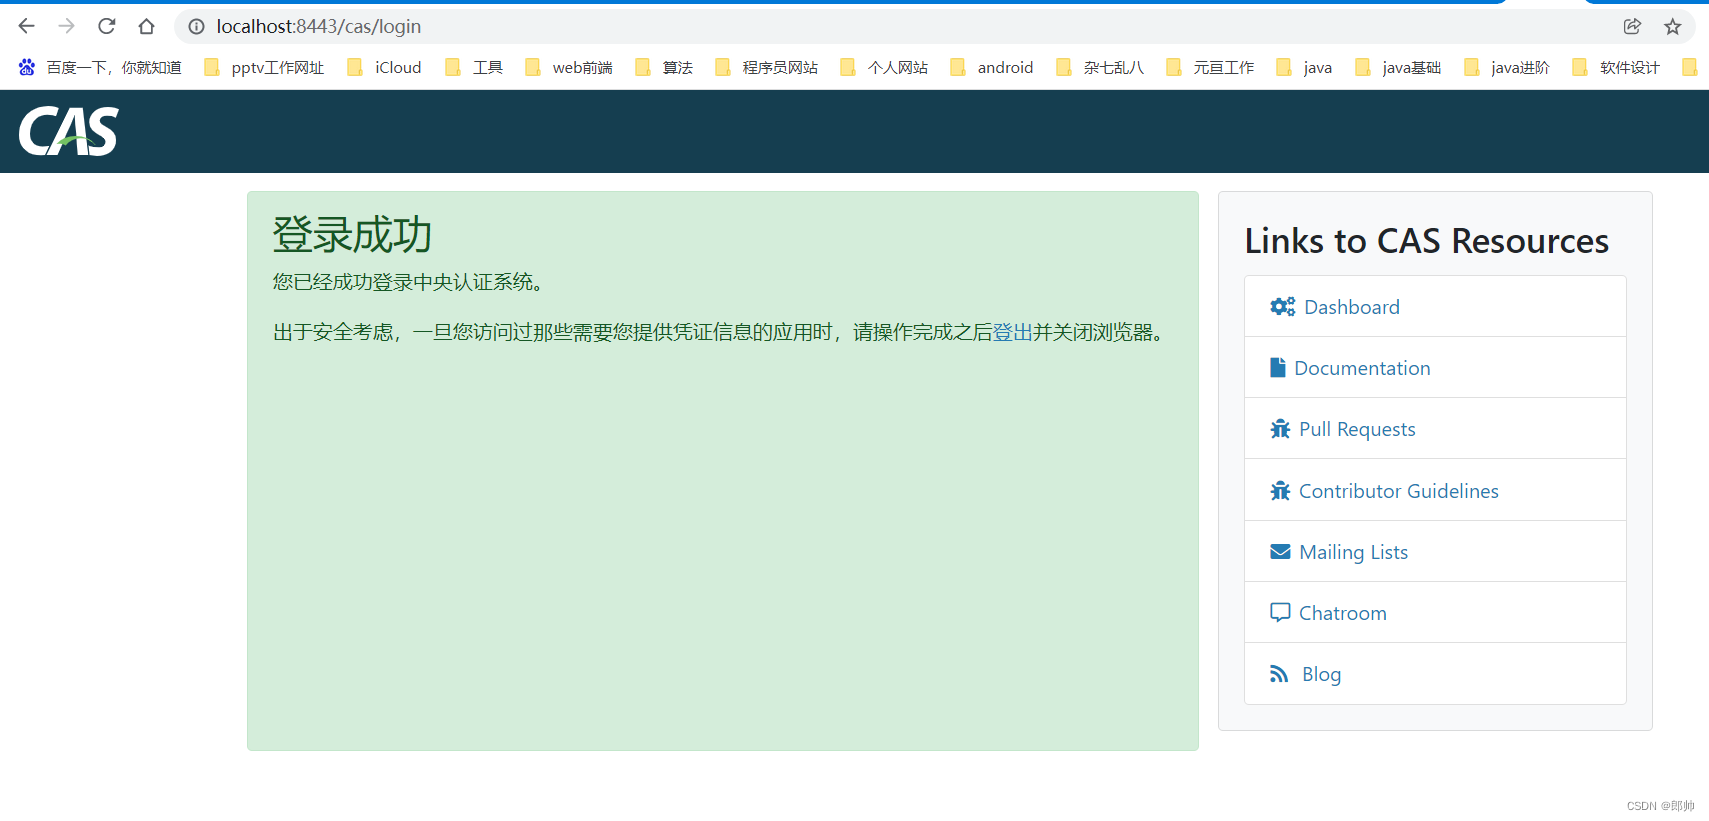
7.登录成功:
ps:由于本人电脑既有jdk1.8 又有jdk11,且配置的默认jdk是11,在运行时报类找不到错误,需要用jdk1.8运行war包,如下:
##打包
build.cmd package
##进入打包后的目录
cd target
##运行war包
"C:\Program Files\Java\jdk1.8.0_73\bin\java.exe" -jar cas.war
二、cas服务注册配置
1. 在服务根目录的pom.xml中添加以下配置,将默认的json文件剔除
<dependentWarExcludes>
	**/services/*.json
</dependentWarExcludes>
添加完后如下:
<plugin>
                <groupId>org.apache.maven.plugins</groupId>
                <artifactId>maven-war-plugin</artifactId>
                <version>2.6</version>
                <configuration>
                    <warName>cas</warName>
                    <failOnMissingWebXml>false</failOnMissingWebXml>
                    <recompressZippedFiles>false</recompressZippedFiles>
                    <archive>
                        <compress>false</compress>
                        <manifestFile>${manifestFileToUse}</manifestFile>
                    </archive>
                    <overlays>
                        <overlay>
                            <groupId>org.apereo.cas</groupId>
                            <artifactId>cas-server-webapp${app.server}</artifactId>
                        </overlay>
                    </overlays>
					<dependentWarExcludes>
						**/services/*.json
					</dependentWarExcludes>
                </configuration>
            </plugin>
2.pom.xml中添加注册服务依赖
				<!--  json服务注册的支持 -->
				<dependency>
					<groupId>org.apereo.cas</groupId>
					<artifactId>cas-server-support-json-service-registry</artifactId>
					<version>${cas.version}</version>
				</dependency>
3.将src\main\resources\services目录下json文件清空,新建json文件CasClientAuto-10000002.json 内容如下,文件名格式最好是name-id.json,下面注册了localhost:8087这个服务,最后面的attributeReleasePolicy代表了登录成功后返回配置的所有用户属性
{
  "@class" : "org.apereo.cas.services.RegexRegisteredService",
  "serviceId" : "^(https|http)://localhost:8087.*",
  "name" : "CasClientAuto",
  "id" : 10000002,
  "description" : "Apereo foundation sample service",
  "evaluationOrder" : 10,
  "attributeReleasePolicy" : {
    "@class" :"org.apereo.cas.services.ReturnAllAttributeReleasePolicy"
  }
}
4.在application.properties中加入:
#设置服务注册配置文件位置
cas.serviceRegistry.json.location=classpath:/services
# 不设置X-Frame-Options 允许cas嵌入ifream
cas.httpWebRequest.header.xframe=false
5.重新打包启动,可以看到控制台打印出了加载的注册服务数量,此时客户端尝试连接cas,如果客户端不是localhost:8087,会跳转到服务无注册页面
“Loaded [1] service(s) from [JsonServiceRegistry]”
2022-05-31 14:53:37,631 INFO [org.apereo.cas.support.events.listener.DefaultCasEventListener] - <


  ____  _____    _    ______   __
 |  _ \| ____|  / \  |  _ \ \ / /
 | |_) |  _|   / _ \ | | | \ V /
 |  _ <| |___ / ___ \| |_| || |
 |_| \_\_____/_/   \_\____/ |_|

>
2022-05-31 14:53:37,631 INFO [org.apereo.cas.support.events.listener.DefaultCasEventListener] - <[0m>
2022-05-31 14:53:37,632 INFO [org.apereo.cas.support.events.listener.DefaultCasEventListener] - <Ready to process requests @ [2022-05-31T06:53:37.630Z]>
2022-05-31 14:53:37,635 INFO [org.apereo.cas.web.CasWebApplication] - <Started CasWebApplication in 48.712 seconds (JVM running for 54.523)>
2022-05-31 14:53:57,524 INFO [org.apereo.cas.services.AbstractServicesManager] - <Loaded [1] service(s) from [JsonServiceRegistry].>
2022-05-31 14:54:07,527 INFO [org.apereo.cas.ticket.registry.DefaultTicketRegistryCleaner] - <[0] expired tickets removed.>
2022-05-31 14:54:57,527 INFO [org.apereo.cas.services.AbstractServicesManager] - <Loaded [1] service(s) from [JsonServiceRegistry].>
2022-05-31 14:55:57,530 INFO [org.apereo.cas.services.AbstractServicesManager] - <Loaded [1] service(s) from [JsonServiceRegistry].>
2022-05-31 14:56:07,530 INFO [org.apereo.cas.ticket.registry.DefaultTicketRegistryCleaner] - <[0] expired tickets removed.>
2022-05-31 14:56:57,533 INFO [org.apereo.cas.services.AbstractServicesManager] - <Loaded [1] service(s) from [JsonServiceRegistry].>
2022-05-31 14:57:57,537 INFO [org.apereo.cas.services.AbstractServicesManager] - <Loaded [1] service(s) from [JsonServiceRegistry].>
2022-05-31 14:58:07,531 INFO [org.apereo.cas.ticket.registry.DefaultTicketRegistryCleaner] - <[0] expired tickets removed.>
2022-05-31 14:58:57,540 INFO [org.apereo.cas.services.AbstractServicesManager] - <Loaded [1] service(s) from [JsonServiceRegistry].>
2022-05-31 14:59:45,071 INFO [org.apereo.cas.web.flow.login.InitialFlowSetupAction] - <Setting path for cookies for warn cookie generator to: [/cas/] >
2022-05-31 14:59:45,114 INFO [org.apereo.inspektr.audit.support.Slf4jLoggingAuditTrailManager] - <Audit trail record BEGIN
=============================================================
WHO: audit:unknown
WHAT: [event=success,timestamp=Tue May 31 14:59:45 GMT+08:00 2022,source=RankedAuthenticationProviderWebflowEventResolver]
ACTION: AUTHENTICATION_EVENT_TRIGGERED
APPLICATION: CAS
WHEN: Tue May 31 14:59:45 GMT+08:00 2022
CLIENT IP ADDRESS: 0:0:0:0:0:0:0:1
SERVER IP ADDRESS: 0:0:0:0:0:0:0:1
三、多属性配置返回,cas配置mysql存储用户数据
1.在mysql5.6数据库中创建cas_server数据库(mysql8以下都可以),创建用户表添加数据
##创建表
CREATE TABLE `user` (
  `id` bigint(20) NOT NULL AUTO_INCREMENT,
  `username` varchar(100) DEFAULT NULL,
  `password` varchar(100) DEFAULT NULL,
  `email` varchar(100) DEFAULT NULL,
  `telphone` varchar(100) DEFAULT NULL,
  `nickname` varchar(100) DEFAULT NULL,
  `role` varchar(100) DEFAULT NULL,
  PRIMARY KEY (`id`),
  UNIQUE KEY `system_user_UN` (`username`)
) ENGINE=InnoDB AUTO_INCREMENT=3 DEFAULT CHARSET=utf8;
添加数据
INSERT INTO cas_server.`user` (username,password,email,telphone,nickname,`role`) VALUES
	 ('admin','123456','875053643@qq.com','13864272108','管理员','admin'),
	 ('langzhijie','123456','1386272108@163.com','18019228197','郎智杰','user');
2.在src\main\resources\application.properties文件中添加如下配置:
# JDBC配置
#数据库连接
cas.authn.jdbc.query[0].url=jdbc:mysql://127.0.0.1:3306/cas_server?useUnicode=true&characterEncoding=UTF-8&autoReconnect=true&useSSL=false&serverTimezone=UTC
#数据库dialect配置
cas.authn.jdbc.query[0].dialect=org.hibernate.dialect.MySQLDialect
#数据库用户名
cas.authn.jdbc.query[0].user=root
#数据库用户密码
cas.authn.jdbc.query[0].password=123456
#数据库事务自动提交
cas.authn.jdbc.query[0].autocommit=false
#数据库驱动
cas.authn.jdbc.query[0].driverClass=com.mysql.jdbc.Driver
#超时配置
cas.authn.jdbc.query[0].idleTimeout=5000
#查询账号密码SQL,必须包含密码字段
cas.authn.jdbc.query[0].sql=select * from user where username=?
#指定上面的SQL查询字段名(必须)
cas.authn.jdbc.query[0].fieldPassword=password

###############单行属性
#开启单行属性
cas.authn.attributeRepository.jdbc[0].singleRow=true
#设置数据库表和cas服务器之间查询结果的映射关系,具体与数据库的字段名为准
cas.authn.attributeRepository.jdbc[0].attributes.email=email
cas.authn.attributeRepository.jdbc[0].attributes.nickname=nickname
cas.authn.attributeRepository.jdbc[0].attributes.telphone=telphone
cas.authn.attributeRepository.jdbc[0].order=0
#返回所有属性
cas.authn.attributeRepository.jdbc[0].requireAllAttributes=true
#查询所有属性字段的SQL语句
cas.authn.attributeRepository.jdbc[0].sql=SELECT * FROM user WHERE {0}
#指定上面的SQL查询条件
cas.authn.attributeRepository.jdbc[0].username=username
#数据库连接
cas.authn.attributeRepository.jdbc[0].url=jdbc:mysql://127.0.0.1:3306/cas_server?useUnicode=true&characterEncoding=UTF-8&autoReconnect=true&useSSL=false&serverTimezone=UTC
#数据库dialect配置
cas.authn.attributeRepository.jdbc[0].dialect=org.hibernate.dialect.MySQLDialect
#数据库用户名
cas.authn.attributeRepository.jdbc[0].user=root
#数据库用户密码
cas.authn.attributeRepository.jdbc[0].password=123456
#数据库事务自动提交
cas.authn.attributeRepository.jdbc[0].autocommit=false
#数据库驱动
cas.authn.attributeRepository.jdbc[0].driverClass=com.mysql.jdbc.Driver
#超时配置
cas.authn.attributeRepository.jdbc[0].idleTimeout=5000
3.在pom.xml中添加
                <!-- 数据库的 JDBC 插件 -->
				<dependency>
					<groupId>org.apereo.cas</groupId>
					<artifactId>cas-server-support-jdbc</artifactId>
					<version>${cas.version}</version>
				</dependency>
				<dependency>
					<groupId>org.apereo.cas</groupId>
					<artifactId>cas-server-support-jdbc-drivers</artifactId>
					<version>${cas.version}</version>
				</dependency>
				<!-- 属性返回依赖包 -->
				<dependency>
					<groupId>org.apereo.cas</groupId>
					<artifactId>cas-server-core-authentication-attributes</artifactId>
					<version>${cas.version}</version>
				</dependency>
4.重新打包启动,可以看到客户端已经可以获取到用户相关的属性
四、单点登出
在不配置的情况下,cas登出不会通知已登录的客户端退出,导致已登录的客户端通过局部会话依然可以访问
1.在客户端注册配置文件中增加以下配置
"logoutType" : "FRONT_CHANNEL",
"logoutUrl" : "http://127.0.0.1:8085/test/"
logoutType配置登出类型:
FRONT_CHANNEL:显示(cas前端)退出,当访问cas登出页面时,登出页面(浏览器)发送get请求到logoutUrl,此方式logoutUrl适合配置客户端的前端页面,由客户端的前端页面执行退出操作
BACK_CHANNEL: 隐式(cas后端)退出,当访问cas登出页面时,cas服务端发送post请求到logoutUrl,带有st参数,此方式logoutUrl适合配置客户端的后端接口,由客户端的后端接口执行退出操作
2.当执行退出操作时,服务端会打印日志,显示发出的退出通知
2022-06-30 14:24:05,045 INFO [org.apereo.cas.logout.DefaultLogoutManager] - <[1] logout requests were processed>---------------------------------------------------------------------------------------------------------------------------------
完整的客户端注册文件HTTPSandIMAPS-10000001.json示例:
{
  "@class" : "org.apereo.cas.services.RegexRegisteredService",
  "serviceId" : "^(https|imaps|http)://.*",
  "name" : "HTTPS and IMAPS",
  "id" : 10000001,
  "description" : "This service definition authorizes all application urls that support HTTPS and IMAPS protocols.",
  "evaluationOrder" : 10000,
  "logoutType" : "BACK_CHANNEL",
  "logoutUrl": "http://127.0.0.1:8085/test/",
  "attributeReleasePolicy" : {
    "@class" :"org.apereo.cas.services.ReturnAllAttributeReleasePolicy"
  }
}
完整的application.properties配置文件:
##
# CAS Server Context Configuration
#
server.context-path=/cas
server.port=8443

##server.ssl.key-store=file:/etc/cas/thekeystore
##server.ssl.key-store-password=changeit
##server.ssl.key-password=changeit

server.max-http-header-size=2097152
server.use-forward-headers=true
server.connection-timeout=20000
server.error.include-stacktrace=ALWAYS

server.compression.enabled=true
server.compression.mime-types=application/javascript,application/json,application/xml,text/html,text/xml,text/plain

server.tomcat.max-http-post-size=2097152
server.tomcat.basedir=build/tomcat
server.tomcat.accesslog.enabled=true
server.tomcat.accesslog.pattern=%t %a "%r" %s (%D ms)
server.tomcat.accesslog.suffix=.log
server.tomcat.min-spare-threads=10
server.tomcat.max-threads=200
server.tomcat.port-header=X-Forwarded-Port
server.tomcat.protocol-header=X-Forwarded-Proto
server.tomcat.protocol-header-https-value=https
server.tomcat.remote-ip-header=X-FORWARDED-FOR
server.tomcat.uri-encoding=UTF-8

spring.http.encoding.charset=UTF-8
spring.http.encoding.enabled=true
spring.http.encoding.force=true

##
# CAS Cloud Bus Configuration
#
spring.cloud.bus.enabled=false

# Indicates that systemPropertiesOverride can be used.
# Set to false to prevent users from changing the default accidentally. Default true.
spring.cloud.config.allow-override=true

# External properties should override system properties.
spring.cloud.config.override-system-properties=false

# When allowOverride is true, external properties should take lowest priority, and not override any
# existing property sources (including local config files).
spring.cloud.config.override-none=false

# spring.cloud.bus.refresh.enabled=true
# spring.cloud.bus.env.enabled=true
# spring.cloud.bus.destination=CasCloudBus
# spring.cloud.bus.ack.enabled=true

endpoints.enabled=false
endpoints.sensitive=true

endpoints.restart.enabled=false
endpoints.shutdown.enabled=false

# Control the security of the management/actuator endpoints
# The 'enabled' flag below here controls the rendering of details for the health endpoint amongst other things.
management.security.enabled=true
management.security.roles=ACTUATOR,ADMIN
management.security.sessions=if_required
management.context-path=/status
management.add-application-context-header=false

# Define a CAS-specific "WARN" status code and its order
management.health.status.order=WARN, DOWN, OUT_OF_SERVICE, UNKNOWN, UP

# Control the security of the management/actuator endpoints
# With basic authentication, assuming Spring Security and/or relevant modules are on the classpath.
security.basic.authorize-mode=role
security.basic.path=/cas/status/**
# security.basic.enabled=true
# security.user.name=casuser
# security.user.password=

##
# CAS Web Application Session Configuration
#
server.session.timeout=300
server.session.cookie.http-only=true
server.session.tracking-modes=COOKIE

##
# CAS Thymeleaf View Configuration
#
spring.thymeleaf.encoding=UTF-8
spring.thymeleaf.cache=true
spring.thymeleaf.mode=HTML
spring.thymeleaf.template-resolver-order=100
##
# CAS Log4j Configuration
#
# logging.config=file:/etc/cas/log4j2.xml
server.context-parameters.isLog4jAutoInitializationDisabled=true

##
# CAS AspectJ Configuration
#
spring.aop.auto=true
spring.aop.proxy-target-class=true

##
# CAS Authentication Credentials
#
#cas.authn.accept.users=casuser::Mellon

# JDBC配置
#数据库连接
cas.authn.jdbc.query[0].url=jdbc:mysql://129.204.20.98:3306/cas_server?useUnicode=true&characterEncoding=UTF-8&autoReconnect=true&useSSL=false&serverTimezone=UTC
#数据库dialect配置
cas.authn.jdbc.query[0].dialect=org.hibernate.dialect.MySQLDialect
#数据库用户名
cas.authn.jdbc.query[0].user=root
#数据库用户密码
cas.authn.jdbc.query[0].password=AAbb05364##
#数据库事务自动提交
cas.authn.jdbc.query[0].autocommit=false
#数据库驱动
cas.authn.jdbc.query[0].driverClass=com.mysql.jdbc.Driver
#超时配置
cas.authn.jdbc.query[0].idleTimeout=5000
#查询账号密码SQL,必须包含密码字段
cas.authn.jdbc.query[0].sql=select * from user where username=?
#指定上面的SQL查询字段名(必须)
cas.authn.jdbc.query[0].fieldPassword=password

###############单行属性
#开启单行属性
cas.authn.attributeRepository.jdbc[0].singleRow=true
#设置数据库表和cas服务器之间查询结果的映射关系,具体与数据库的字段名为准
cas.authn.attributeRepository.jdbc[0].attributes.email=email
cas.authn.attributeRepository.jdbc[0].attributes.nickname=nickname
cas.authn.attributeRepository.jdbc[0].attributes.telphone=telphone
cas.authn.attributeRepository.jdbc[0].attributes.sex=sex
cas.authn.attributeRepository.jdbc[0].attributes.userage=userage
cas.authn.attributeRepository.jdbc[0].order=0
#返回所有属性
cas.authn.attributeRepository.jdbc[0].requireAllAttributes=true
#查询所有属性字段的SQL语句
cas.authn.attributeRepository.jdbc[0].sql=SELECT * FROM user WHERE {0}
#指定上面的SQL查询条件
cas.authn.attributeRepository.jdbc[0].username=username
#数据库连接
cas.authn.attributeRepository.jdbc[0].url=jdbc:mysql://129.204.20.98:3306/cas_server?useUnicode=true&characterEncoding=UTF-8&autoReconnect=true&useSSL=false&serverTimezone=UTC
#数据库dialect配置
cas.authn.attributeRepository.jdbc[0].dialect=org.hibernate.dialect.MySQLDialect
#数据库用户名
cas.authn.attributeRepository.jdbc[0].user=root
#数据库用户密码
cas.authn.attributeRepository.jdbc[0].password=AAbb05364##
#数据库事务自动提交
cas.authn.attributeRepository.jdbc[0].autocommit=false
#数据库驱动
cas.authn.attributeRepository.jdbc[0].driverClass=com.mysql.jdbc.Driver
#超时配置
cas.authn.attributeRepository.jdbc[0].idleTimeout=5000

#默认true cookie只能用https协议发送
cas.tgc.secure=false
#从json配置文件中读取客户端服务注册
cas.serviceRegistry.initFromJson=true
#设置服务注册配置文件位置
cas.serviceRegistry.json.location=classpath:/services
# 不设置X-Frame-Options
cas.httpWebRequest.header.xframe=false
## st过期时间
cas.ticket.st.timeToKillInSeconds=300
cas.ticket.st.numberOfUses=5
#允许单点登出跟随service参数给出的跳转地址重定向功能
cas.logout.followServiceRedirects=true参考:CAS 5.3服务器搭建_supermapsupport的博客-CSDN博客
服务注册配置和多属性返回配置:http://support.supermap.com.cn/datawarehouse/webdochelp/iedge/subject_introduce/security/othersecurity/cas_configation.htm
cas官方客户端:CAS单点登录(五)——Service配置及管理_Anumbrella的博客-CSDN博客_cas 配置


 395
395

 被折叠的 条评论
为什么被折叠?
被折叠的 条评论
为什么被折叠?
 到【灌水乐园】发言


