


最近在算法移植中涉及到Linphone,于是开始研究Linphone。首先在Ubuntu下编译成功Linphone,然后开始研究源码,结合网上的资料,写了下面的学习笔记,其中参考的网上资料,在文中添加上链接。
Linphone之Mediastreamer2分析
一、Linphone中流媒体处理结构
分为2个部分MEDIASTREAMER2和ORTP
MEDIASTREAMER2**负责媒体流的处理**,mediastreamer2是一个功能强大且小巧的流引擎,专门为视频电话应用而开发的。为linphone中所有的接收、发送多媒体流提供处理,包括音频视频捕捉、编码、解码、渲染。Mediastreamer2中的两个重要概念:filter、graph。
参考资料:
mediastreamer2的使用
http://www.xuebuyuan.com/793753.html
1、Filter: 媒体库中处理数据的组件。一个filter有0到数个输入流和0到数个输出流。
filter的作用:在mediastreamer2里面是MSFilter,可以利用MSFilter实现下面的应用,实例参见/mediastreamer2/tests/:
捕获音频或者视频数据.、播放音频或者显示视频数据.、发送或者接受RTP数据.、对音频或者视频数据的编解码、变化 (视频大小调整, 音频取样等等) 数据、 复制数据.、混和音频视频数据.
2、graph的作用:是管理几个连接在一起的filter的组件. 它能够把数据从输出流传输到输入流 并且负责管理这些filters
ORTP**负责流媒体如何安全可靠的传输**。
ORTP实现了RTP协议,提供良好的API访问功能.多种RTP格式支持;发送接收的实时调度;单线程支持多路媒体流;自适应的缓冲区算法;实现了RTCP。
二、Linphone中linphonec_main_loop 源码走读初步研究
int
main (int argc, char *argv[]) {
    linphonec_vtable.call_state_changed=linphonec_call_state_changed;
    linphonec_vtable.notify_presence_received = linphonec_notify_presence_received;
    linphonec_vtable.new_subscription_requested = linphonec_new_unknown_subscriber;
    linphonec_vtable.auth_info_requested = linphonec_prompt_for_auth;
    linphonec_vtable.display_status = linphonec_display_status;
    linphonec_vtable.display_message=linphonec_display_something;
    linphonec_vtable.display_warning=linphonec_display_warning;
    linphonec_vtable.display_url=linphonec_display_url;
    linphonec_vtable.text_received=linphonec_text_received;
    linphonec_vtable.dtmf_received=linphonec_dtmf_received;
    linphonec_vtable.refer_received=linphonec_display_refer;
    linphonec_vtable.transfer_state_changed=linphonec_transfer_state_changed;
    linphonec_vtable.call_encryption_changed=linphonec_call_encryption_changed;

    if (! linphonec_init(argc, argv) ) exit(EXIT_FAILURE);

    linphonec_main_loop (linphonec);

    linphonec_finish(EXIT_SUCCESS);

    exit(EXIT_SUCCESS); /* should never reach here */
}
linphonec_main_loop (linphonec)这个函数里面,该函数是一个while循环,他的主要流程就是等待终端输入命令,然后根据命令来进行不同的响应或者发出不同的SIP消息,完毕,然后进入下一轮循环重新等待命令的输入。
参考资料:http://jituo666.blog.163.com/blog/static/294817212011101022650493/
voip—linphone 分析
1、Linphone初始化工作
linphonec_init(argc, argv);调用:
/*
* Initialize linphone core
*/
linphonec=linphone_core_new (&linphonec_vtable, configfile_name, factory_configfile_name, NULL);
调用:
lc=linphone_core_new_with_config(vtable, config, userdata);调用:
linphone_core_init(core, vtable, config, userdata);static void linphone_core_init(LinphoneCore * lc, const LinphoneCoreVTable *vtable, LpConfig *config, void * userdata){
const char *remote_provisioning_uri = NULL;
LinphoneCoreVTable* local_vtable= linphone_core_v_table_new();
ms_message("Initializing LinphoneCore %s", linphone_core_get_version());
lc->config=lp_config_ref(config);
lc->data=userdata;
lc->ringstream_autorelease=TRUE;
memcpy(local_vtable,vtable,sizeof(LinphoneCoreVTable));
_linphone_core_add_listener(lc, local_vtable, TRUE);
linphone_core_set_state(lc,LinphoneGlobalStartup,"Starting up");
ortp_init();
linphone_core_activate_log_serialization_if_needed();
ms_init();
linphone_core_register_default_codecs(lc);
/* Get the mediastreamer2 event queue */
/* This allows to run event's callback in linphone_core_iterate() */
lc->msevq=ms_factory_get_event_queue(ms_factory_get_fallback());
lc->sal=sal_init();
sal_set_user_pointer(lc->sal,lc);
sal_set_callbacks(lc->sal,&linphone_sal_callbacks);
#ifdef TUNNEL_ENABLED
lc->tunnel=linphone_core_tunnel_new(lc);
#endif
lc->network_last_check = 0;
lc->network_last_status = FALSE;
lc->register_last_check = 0;
lc->http_provider = belle_sip_stack_create_http_provider(sal_get_belle_sip_stack(lc->sal), "0.0.0.0");
lc->http_verify_policy = belle_tls_verify_policy_new();
belle_http_provider_set_tls_verify_policy(lc->http_provider,lc->http_verify_policy);
certificates_config_read(lc);
remote_provisioning_uri = linphone_core_get_provisioning_uri(lc);
if (remote_provisioning_uri == NULL) {
linphone_configuring_terminated(lc, LinphoneConfiguringSkipped, NULL);
} // else linphone_core_start will be called after the remote provisioning (see linphone_core_iterate)
}linphone_core_init分析
首先,就是与oRTP(基于RFC3550的一个实现)协议栈相关的初始化操作:如:
ortp_init();/**
* Initialize the oRTP library. You should call this function first before using
* oRTP API.
**/
void ortp_init()
{
if (ortp_initialized++) return;
#ifdef _WIN32
win32_init_sockets();
#endif
av_profile_init(&av_profile);
ortp_global_stats_reset();
init_random_number_generator();
ortp_message("oRTP-" ORTP_VERSION " initialized.");
}其中,
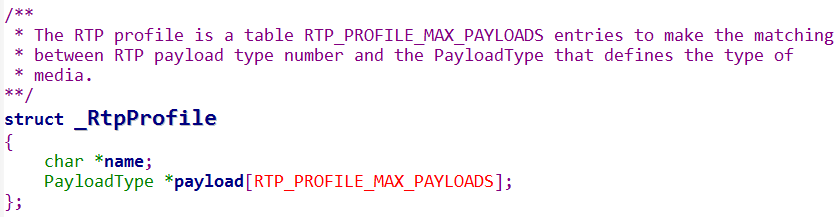
av_profile_init(&av_profile);负载类型的初始化。rtp最大支持128种负载类型。这里有个概念: ORTP_VAR_PUBLIC RtpProfile av_profile;
rtp全局统计信息初始化
typedef struct rtp_stats
{
    uint64_t packet_sent;       /*number of outgoing packets */
    uint64_t packet_dup_sent;   /*number of outgoing duplicate packets */
    uint64_t sent;              /* outgoing total bytes (excluding IP header) */
    uint64_t packet_recv;       /* number of incoming packets */
    uint64_t packet_dup_recv;   /* number of incoming duplicate packets */
    uint64_t recv;              /* incoming bytes of payload and delivered in time to the application */
    uint64_t hw_recv;           /* incoming bytes of payload */
    uint64_t outoftime;         /* number of incoming packets that were received too late */
    int64_t  cum_packet_loss;   /* cumulative number of incoming packet lost */
    uint64_t bad;               /* incoming packets that did not appear to be RTP */
    uint64_t discarded;         /* incoming packets discarded because the queue exceeds its max size */
    uint64_t sent_rtcp_packets; /* outgoing RTCP packets counter (only packets that embed a report block are considered) */
} rtp_stats_t;
linphone_core_activate_log_serialization_if_needed(); (待后续分析)
其次,mediastream2的一些初始化。
ms_init();
/**
 * Helper macro for backward compatibility.
 * Use ms_base_init() and ms_voip_init() instead.
 */
#define ms_init()   ms_base_init(), ms_voip_init(), ms_plugins_init()
void ms_voip_init(){
if (ms_voip_ref++ >0 ) {
ms_message ("Skiping ms_voip_init, because [%i] ref",ms_voip_ref);
return;
}
ms_srtp_init();
ms_factory_init_voip(ms_factory_get_fallback());
}调用:
ms_snd_card_manager_register_desc(cm,ms_snd_card_descs[i]);
包括日志相关的设置
ortp_set_log_level_mask(ORTP_MESSAGE|ORTP_WARNING|ORTP_ERROR|ORTP_FATAL);
ortp_set_log_handler(ms_android_log_handler);
Filter初始化/注册:
/* register builtin MSFilter’s */
for (i=0;ms_filter_descs[i]!=NULL;i++){
ms_filter_register(ms_filter_descs[i]);
}
声卡初始化:
cm=ms_snd_card_manager_get();
for (i=0;ms_snd_card_descs[i]!=NULL;i++){
ms_snd_card_manager_register_desc(cm,ms_snd_card_descs[i]);
}
网络摄像头的初始化:
MSWebCamManager *wm;
wm=ms_web_cam_manager_get();
for (i=0;ms_web_cam_descs[i]!=NULL;i++){
ms_web_cam_manager_register_desc(wm,ms_web_cam_descs[i]);
}
绘制视频图像初始化(opengl):
libmsandroidopengldisplay_init();
初始化一个mediastream2的事件队列:ms_event_queue_new();
struct _MSEventQueue *ms_factory_get_event_queue(MSFactory *obj){
    if (obj->evq==NULL){
        obj->evq=ms_event_queue_new();
    }
    return obj->evq;
}
. 再次,初始化一个很重要的结构体对象:
lc->sal=sal_init();
struct Sal{
    SalCallbacks callbacks;
    MSList *calls; /*MSList of SalOp */
    MSList *registers;/*MSList of SalOp */
    MSList *out_subscribes;/*MSList of SalOp */
    MSList *in_subscribes;/*MSList of SalOp */
    MSList *pending_auths;/*MSList of SalOp */
    MSList *other_transactions; /*MSList of SalOp */
    int running;
    int session_expires;
    int keepalive_period;
    void *up;
    bool_t one_matching_codec;
    bool_t double_reg;
    bool_t use_rports;
    bool_t use_101;
    bool_t reuse_authorization;
    char* rootCa; /* File _or_ folder containing root CA */
};
这个对象很重要,在全局只有一个。是sip信号处理抽象层;初始化它的同时进行belle-sip的初始化
sal_set_callbacks(lc->sal,&linphone_sal_callbacks);
并设置协议信号处理回调函数结构体对象:linphone_sal_callbacks,用以处理各种sip消息。
typedef struct SalCallbacks{
    SalOnCallReceived call_received;
    SalOnCallRinging call_ringing;
    SalOnCallAccepted call_accepted;
    SalOnCallAck call_ack;
    SalOnCallUpdating call_updating;
    SalOnCallTerminated call_terminated;
    SalOnCallFailure call_failure;
    SalOnCallReleased call_released;
    SalOnAuthFailure auth_failure;
    SalOnRegisterSuccess register_success;
    SalOnRegisterFailure register_failure;
    SalOnVfuRequest vfu_request;
    SalOnDtmfReceived dtmf_received;
    SalOnRefer refer_received;
    SalOnTextReceived text_received;
    SalOnTextDeliveryUpdate text_delivery_update;
    SalOnIsComposingReceived is_composing_received;
    SalOnNotifyRefer notify_refer;
    SalOnSubscribeReceived subscribe_received;
    SalOnSubscribeClosed subscribe_closed;
    SalOnSubscribeResponse subscribe_response;
    SalOnNotify notify;
    SalOnSubscribePresenceReceived subscribe_presence_received;
    SalOnSubscribePresenceClosed subscribe_presence_closed;
    SalOnParsePresenceRequested parse_presence_requested;
    SalOnConvertPresenceToXMLRequested convert_presence_to_xml_requested;
    SalOnNotifyPresence notify_presence;
    SalOnPingReply ping_reply;
    SalOnAuthRequested auth_requested;
    SalOnInfoReceived info_received;
    SalOnPublishResponse on_publish_response;
    SalOnExpire on_expire;
}SalCallbacks;
最后,就是初始化一些配置信息:
if (remote_provisioning_uri == NULL) {
        linphone_configuring_terminated(lc, LinphoneConfiguringSkipped, NULL);
    } // else linphone_core_start will be called after the remote provisioning (see linphone_core_iterate)

void linphone_configuring_terminated(LinphoneCore *lc, LinphoneConfiguringState state, const char *message) {
    linphone_core_notify_configuring_status(lc, state, message);

    if (state == LinphoneConfiguringSuccessful) {
        if (linphone_core_is_provisioning_transient(lc) == TRUE)
            linphone_core_set_provisioning_uri(lc, NULL);
    }

    linphone_core_start(lc);
}
static void linphone_core_start(LinphoneCore * lc) {
    sip_setup_register_all();//linphone_sip_login 注册上去
    sound_config_read(lc);
    net_config_read(lc);
    rtp_config_read(lc);
    codecs_config_read(lc);
    sip_config_read(lc);
    video_config_read(lc);
    beauty_config_read(lc);
    //autoreplier_config_init(&lc->autoreplier_conf);
    lc->presence_model=linphone_presence_model_new_with_activity(LinphonePresenceActivityOnline, NULL);
    misc_config_read(lc);
    ui_config_read(lc);
#ifdef TUNNEL_ENABLED
    if (lc->tunnel) {
        linphone_tunnel_configure(lc->tunnel);
    }
#endif

    linphone_core_notify_display_status(lc,_("Ready"));
    lc->auto_net_state_mon=lc->sip_conf.auto_net_state_mon;
    linphone_core_set_state(lc,LinphoneGlobalOn,"Ready");
}
sip_config_read(lc); /* this will start belle sip*/
IP,端口,协议配置。
linphone_core_set_sip_transports(lc,&tr);监听
sal_root_ca();认证
代理配置信息:lc->sip_conf.proxies
默认代理:linphone_core_set_default_proxy_index();
授权信息:
/* get proxies config */
    for(i=0;; i++){
        LinphoneProxyConfig *cfg=linphone_proxy_config_new_from_config_file(lc,i);
        if (cfg!=NULL){
            linphone_core_add_proxy_config(lc,cfg);
            linphone_proxy_config_unref(cfg);
        }else{
            break;
        }
    }
    /* get the default proxy */
    tmp=lp_config_get_int(lc->config,"sip","default_proxy",-1);
    linphone_core_set_default_proxy_index(lc,tmp);

    /* read authentication information */
    for(i=0;; i++){
        LinphoneAuthInfo *ai=linphone_auth_info_new_from_config_file(lc->config,i);
        if (ai!=NULL){
            linphone_core_add_auth_info(lc,ai);
            linphone_auth_info_destroy(ai);
        }else{
            break;
        }
    }
video_config_read(lc);
Linphone 进入“Read” 状态
2、注册到服务器的过程。
在linphone_core_iterate()中
proxy_update(lc); 就是注册的触发函数,依次循环每个代理配置,判断commit=true && reg_sendregistry = true;
I,linphone_proxy_config_activate_sip_setup:激活一个sipsetup环境
II,linphone_proxy_config_register(LinphoneProxyConfig *cfg);生成一个用于注册的SalOp,并设置其contact和
user_pointer 如:
    sal_op_set_contact(obj->op,contact);
    ms_free(contact);
    sal_op_set_user_pointer(obj->op,obj);
然后发出注册消息:sal_register(obj->op,obj->reg_proxy,obj->reg_identity,obj->expires),开始了注册过程...
    首次注册没有授权信息,所以会失败,收到sip消息: EXOSIP_REGISTRATION_FAILURE:
case 401:case 407:process_authentication(sal,ev);就会提出授权要求(有sip信号处理回调函数来处理):auth_requested,并添加到:op->pending_auth=ev;
如果其它原因的错误就需要其它的处理了。比如case 423:case 606,当用户收到授权请求时,就会判断当前的授权信息是否满足,
LinphoneAuthInfo *ai=(LinphoneAuthInfo*)linphone_core_find_auth_info(lc,realm,username);然后给注册操作授权:sal_op_authenticate(h,&sai);
如果当前没有满足的授权信息,则可能需要用户输入授权信息。。。。

如果注册成功:则需要首先提示授权工作了authentication_ok(sal,ev)。再确定回应里面的请求-是否需要重新注册新的contact.(register_again_with_updated_contact),
如果需要,就重新注册,update_contact_from_response(op,last_answer);contact do not match, need to update the register ??。。。。
不需要的话,就可以提示注册成功的消息了。至此,注册完毕;
3、一次呼叫建立的过程
LINPHONE_PUBLIC LinphoneCall * linphone_core_invite(LinphoneCore *lc, const char *url);

LINPHONE_PUBLIC LinphoneCall * linphone_core_invite_address(LinphoneCore *lc, const LinphoneAddress *addr);

LINPHONE_PUBLIC LinphoneCall * linphone_core_invite_with_params(LinphoneCore *lc, const char *url, const LinphoneCallParams *params);

LINPHONE_PUBLIC LinphoneCall * linphone_core_invite_address_with_params(LinphoneCore *lc, const LinphoneAddress *addr, const LinphoneCallParams *params);
四个出发函数。最终要依赖linphone_core_invite_address_with_params,中间可能多一些地址转换,呼叫参数(如是否支持视频等)的初始化工作。
进入到呼叫函数linphone_core_invite_address_with_params后,首先判断当前是否有呼叫,以及是否达到呼叫数目的最大限。
linphone_core_in_call(lc);
linphone_core_can_we_add_call(lc);
接这对默认代理,和呼叫地址中的代理进行匹配,如果不一样,则进行重写默认的代理,以呼叫地址中的代理为准。生成一个from字符串。
如果都为空则 from=linphone_core_get_primary_contact(lc);
/* if no proxy or no identity defined for this proxy, default to primary contact*/
生成URL:parsed_url2=linphone_address_new(from);创建一个新的Call:
call=linphone_call_new_outgoing(lc,parsed_url2,linphone_address_clone(addr),params);
linphone_call_new_outgoing 发起会话请求
LinphoneCall * linphone_call_new_outgoing(struct _LinphoneCore *lc, LinphoneAddress *from, LinphoneAddress *to, const LinphoneCallParams *params, LinphoneProxyConfig *cfg){
LinphoneCall *call = belle_sip_object_new(LinphoneCall);
call->dir=LinphoneCallOutgoing;
call->core=lc;
linphone_call_outgoing_select_ip_version(call,to,cfg);
调用linphone_core_get_local_ip 获取本地的ip 地址
linphone_call_get_local_ip(call, to);
如果设置了nat 防火墙策略,则就用nat 防火墙地址为本地ip 地址,否则,如果配置了ipv6,则使用ipv6 地址。如果仍然没有得到结果,则调用sal_get_default_local_ip 接口来获取。
linphone_call_init_common(call,from,to);
call->params = linphone_call_params_copy(params);
linphone_call_fill_media_multicast_addr(call);
if (linphone_core_get_firewall_policy(call->core) == LinphonePolicyUseIce) {
call->ice_session = ice_session_new();
for backward compatibility purposes, shall be enabled by default in futur
ice_session_enable_message_integrity_check(call->ice_session,lp_config_get_int(lc->config,”net”,”ice_session_enable_message_integrity_check”,0));
ice_session_set_role(call->ice_session, IR_Controlling);
}
if (linphone_core_get_firewall_policy(call->core) == LinphonePolicyUseStun)
{
call->ping_time=linphone_core_run_stun_tests(call->core,call);
}
.#ifdef BUILD_UPNP
if (linphone_core_get_firewall_policy(call->core) == LinphonePolicyUseUpnp)
{
if(!lc->rtp_conf.disable_upnp)
{
call->upnp_session = linphone_upnp_session_new(call);
}
}
.#endif //BUILD_UPNP
discover_mtu(lc,linphone_address_get_domain (to));
if (params->referer)
{
call->referer=linphone_call_ref(params->referer);
}
call->dest_proxy=cfg;
linphone_call_create_op(call);
return call;
}
里面包括一些设置:
linphone_core_get_local_ip(lc,linphone_address_get_domain(to),call->localip);
linphone_call_init_common(call,from,to);//在这里计数:refcnt=1,设置引用基数
call->params=*params;
call->localdesc=create_local_media_description (lc,call); //本地媒体类型描述
call->camera_active=params->has_video;
if (linphone_core_get_firewall_policy(call->core)==LinphonePolicyUseStun)
linphone_core_run_stun_tests(call->core,call); //防火墙策略
discover_mtu(lc,linphone_address_get_domain (to));
if (params->referer){
sal_call_set_referer (call->op,params->referer->op); //呼叫转移
}
设置route:sal_op_set_route(call->op,route);添加到LinphoneCore:linphone_core_add_call(lc,call),然后lc->current_call=call;
接下来,如果需要ping
就可以直接进行呼叫了:linphone_core_start_invite(lc,call,dest_proxy);不然就接着进行ping操作:
if (dest_proxy!=NULL || lc->sip_conf.ping_with_options==FALSE)
{
linphone_core_start_invite(lc,call,dest_proxy);
else
{
/defer the start of the call after the OPTIONS ping/
call->ping_op=sal_op_new(lc->sal);
sal_ping(call->ping_op,from,real_url); ///ping操作
eXosip_options_build_request –>…–> eXosip_options_send_request(options);
sal_op_set_user_pointer(call->ping_op,call);
call->start_time=time(NULL);
}
linphone_core_iterator里面如果curtime-call->start_time>=2,则会不等ping回来,就呼叫linphone_core_start_invite(lc,call,NULL);
如果需要ping操作,就需要处理Ping_op的回应,消息处理函数是:other_request_reply(sal,ev);
–>sal->callbacks.ping_reply(op);在ping_reply里面:linphone_core_start_invite(call->core,call,NULL);
至此,终于可以进行呼叫。当对初始化的call进行
I,为呼叫操作设置contact,sal_op_set_contact(call->op, contact);而这里的contact是从get_fixed_contact(lc,call,dest_proxy),即dest_proxy而来的。

II,linphone_call_init_media_streams(call);初始化音频,视频的媒体流,
    第一部分:初始化 audio_stream_new ,统计信息初始化:ms_filter_enable_statistics(TRUE);ms_filter_reset_statistics();
        创建配置session:stream->session=create_duplex_rtpsession(locport,ipv6);//RTP_SESSION_SENDRECV 模式的
        rtpr=rtp_session_new(RTP_SESSION_SENDRECV);[[[===
                rtp_session_set_recv_buf_size(rtpr,MAX_RTP_SIZE);
                rtp_session_set_scheduling_mode(rtpr,0);
                rtp_session_set_blocking_mode(rtpr,0);
                rtp_session_enable_adaptive_jitter_compensation(rtpr,TRUE);
                rtp_session_set_symmetric_rtp(rtpr,TRUE);
                rtp_session_set_local_addr(rtpr,ipv6 ? "::" : "0.0.0.0",locport);
                rtp_session_signal_connect(rtpr,"timestamp_jump",(RtpCallback)rtp_session_resync,(long)NULL);
                rtp_session_signal_connect(rtpr,"ssrc_changed",(RtpCallback)rtp_session_resync,(long)NULL);
                rtp_session_set_ssrc_changed_threshold(rtpr,0);
                rtp_session_set_rtcp_report_interval(rtpr,2500); /*at the beginning of the session send more reports*/
                disable_checksums(rtp_session_get_rtp_socket(rtpr));
        添加发送的filter:stream->rtpsend=ms_filter_new(MS_RTP_SEND_ID);
        添加回声消除的filter:stream->ec=ms_filter_new_from_desc(ec_desc);
        生成并初始化,为本stream注册rtp事件队列:stream->evq=ortp_ev_queue_new();rtp_session_register_event_queue(stream->session,stream->evq);
        其它初始化:stream->play_dtmfs=TRUE;
            stream->use_gc=FALSE;
            stream->use_agc=FALSE;
            stream->use_ng=FALSE;


        接着,如果支持回声限制,则根据配置信息设置一些相关参数,如:audio_stream_enable_echo_limiter(audiostream,ELControlFull);
        接着,如果支持回声消除,则根据配置信息设置一些相关参数,如:audio_stream_set_echo_canceller_params;
        接着,是否支持获取控制,以便不获取噪声,有个噪声的gateway要设置:
        int enabled=lp_config_get_int(lc->config,"sound","noisegate",0);
        audio_stream_enable_noise_gate(audiostream,enabled);

        在就是为session设置if (lc->a_rtp) rtp_session_set_transports(audiostream->session,lc->a_rtp,lc->a_rtcp);
        给Call也注册一个ort事件队列:call->audiostream_app_evq = ortp_ev_queue_new();
                    rtp_session_register_event_queue(audiostream->session,call->audiostream_app_evq);
第二部分:如果支持视频,则需要call->videostream=video_stream_new(md->streams[1].port,linphone_core_ipv6_enabled(lc));//初始化视频流
具体:VideoStream stream = (VideoStream )ms_new0 (VideoStream, 1);
stream->session=create_duplex_rtpsession(locport,use_ipv6);
stream->evq=ortp_ev_queue_new();
stream->rtpsend=ms_filter_new(MS_RTP_SEND_ID);
rtp_session_register_event_queue(stream->session,stream->evq);
stream->sent_vsize.width=MS_VIDEO_SIZE_CIF_W;
stream->sent_vsize.height=MS_VIDEO_SIZE_CIF_H;
stream->dir=VideoStreamSendRecv;
choose_display_name(stream);
        接下来:设置display_filter_name,设置video_stream_set_event_callback,设置rtp_session_set_transports,
        注册rtp事件队列:rtp_session_register_event_queue(call->videostream->session,call->videostream_app_evq);
III,sal_call_set_local_media_description ,设置本地媒体格式描述。
解析地址from ,url,等,然后开始真正呼叫。。err=sal_call(call->op,from,real_url);具体展开。。。:
        int sal_call(SalOp *h, const char *from, const char *to){
        int err;
        osip_message_t *invite=NULL;
        sal_op_set_from(h,from);
        sal_op_set_to(h,to);
        sal_exosip_fix_route(h);
        err=eXosip_call_build_initial_invite(&invite,to,from,sal_op_get_route(h),"Phone call");
        if (err!=0){
            ms_error("Could not create call.");
            return -1;
        }
        osip_message_set_allow(invite, "INVITE, ACK, CANCEL, OPTIONS, BYE, REFER, NOTIFY, MESSAGE, SUBSCRIBE, INFO");
        if (h->base.contact){
            _osip_list_set_empty(&invite->contacts,(void (*)(void*))osip_contact_free);
            osip_message_set_contact(invite,h->base.contact);
        }
        if (h->base.root->session_expires!=0){
            osip_message_set_header(invite, "Session-expires", "200");
            osip_message_set_supported(invite, "timer");
        }
        if (h->base.local_media){
            h->sdp_offering=TRUE;
            set_sdp_from_desc(invite,h->base.local_media);
        }else h->sdp_offering=FALSE;
        if (h->replaces){
            osip_message_set_header(invite,"Replaces",h->replaces);
            if (h->referred_by)
                osip_message_set_header(invite,"Referred-By",h->referred_by);
        }

        eXosip_lock();
        err=eXosip_call_send_initial_invite(invite);
        eXosip_unlock();
        h->cid=err;
        if (err<0){
            ms_error("Fail to send invite !");
            return -1;
        }else{
            sal_add_call(h->base.root,h);//把操作添加到sal中....
        }
        return 0;
}
最后设置状态:Contacting。。。
    barmsg=ortp_strdup_printf("%s %s", _("Contacting"), real_url);
    if (lc->vtable.display_status!=NULL)
        lc->vtable.display_status(lc,barmsg);
如此,便开始了等待代理服务器返回消息的状态
接下来分析,当接受到对放来的call-request的时候,怎么处理
    case EXOSIP_CALL_INVITE:表示收到了一个呼叫的消息。执行:inc_new_call(Sal *sal, eXosip_event_t *ev);
首先为这个消息生成一个SalOp操作。得到sdp信息:eXosip_get_sdp_info(ev->request);接着从request里面获取一些参数如:origin
ua,replaces,from ,to ,sdp,call_info,tid,cid, did,等等,然后进入sip消息回调里面的call_received回调进行处理,进入这个函数后就是
和主动呼叫(outgoingcall)的模式很相像了,判断收处于呼叫状态,是否达到最大呼叫数目linphone_core_can_we_add_call,有传入的salop得到from
和to,进而判断是否是重复呼叫is_duplicate_call?如果都满足上述条件,就可以惊醒呼叫的创建了:call=linphone_call_new_incoming(lc,from_addr,to_addr,h);
里面包括判决是否发ping指令,本地medaidesc,linphone_call_init_common,create_local_media_description,以及
linphone_core_get_firewall_policy等等。。。,随后开始进行sdp,媒体类型协商:sal_call_get_final_media_description–>sdp_process,
最后添加call,linphone_core_add_call,提示电话来了的消息: lc->vtable.display_status(lc,barmesg); //XX is contacting you?
与此同时,开始ring_start(),播放ringback(/* play the ring if this is the only call*/),
同时发180消息sal_call_notify_ringing(h,propose_early_media || ringback_tone!=NULL);如果自动应答模式,还需接受call.linphone_core_accept_call(lc,call);
具体如下:
sal_call_notify_ringing(h,propose_early_media || ringback_tone!=NULL);//180消息

if (propose_early_media || ringback_tone!=NULL){
    linphone_call_set_state(call,LinphoneCallIncomingEarlyMedia,"Incoming call early media");
    linphone_core_update_streams(lc,call,md);
}
if (sal_call_get_replaces(call->op)!=NULL && lp_config_get_int(lc->config,"sip","auto_answer_replacing_calls",1)){
    linphone_core_accept_call(lc,call);
}
在换回来说吧,当主叫一方收到180Ring的消息后(case EXOSIP_CALL_RINGING),进入到函数:call_ringing(Sal *sal, eXosip_event_t *ev)
首先:call_proceeding(Sal *sal, eXosip_event_t *ev) —>
/* update contact if received and rport are set by the server
note: will only be used by remote for next INVITE, if any…*/
update_contact_from_response(op,ev->response);
然后得到sdp:sdp=eXosip_get_sdp_info(ev->response);生成本地的mediadesc,然后协商出一个result md,if (op->base.local_media) sdp_process(op);
回调到sip消息回调处理函数里面sal->callbacks.call_ringing(op);,通知界面,开始early medai,ringing了。。。linphone_core_update_streams,即update一下。
又回去,当被叫决定答应呼叫是,他会调用int linphone_core_accept_call(LinphoneCore *lc, LinphoneCall *call);
里面会做:
I、/* check if this call is supposed to replace an already running one*/replaced=sal_call_get_replaces(call->op);
II、/try to be best-effort in giving real local or routable contact address/ —>sal_op_set_contact(call->op,contact);
III、/stop ringing /–>ring_stop(lc->ringstream);
IV、if (call->audiostream==NULL)
linphone_call_init_media_streams(call); //这个之前已经做过了,这里只是检查做没做,谨慎期间。
IIV、sal_call_accept(call->op);//发送200OK消息
IIIV、new_md=sal_call_get_final_media_description(call->op);
linphone_core_update_streams(lc, call, new_md); //更新媒体流
VI、通知:ms_message(“call answered.”);
设计和原理:
mediastream2中每一个处理实体都包含一个MSFilter结构,每一个MSFiter有一个或者若干个输入和输出,通过这些输入和输出可以将各个MSFilter连接起来。
下面为一个简单的例子:
MSSpeexDec:接收输入的音频数据包(假设音频用speex编码),解码并输出到下一个MSFilter。
MSRtpRecv –> MSSpeexDec –> MSFileRec
媒体处理中的调度对象为MSTicker,它一个独立的线程,其每10ms被唤醒一次,然后它会处理他所管理的媒体链的数据。几个MSTicker可以同时运行,例如,一个负责处理音频,一个负责处理视频,或在不同的处理器中运行不同的MSTicker。
三、Linphone中mediastreamer2
参考资料:
流媒体学习一——-mediastreamer2 的简介
http://www.cnblogs.com/cy568searchx/p/4366280.html
使用简单:
如果你想创建音视频流,要调用audiostream.h和videostream.h的定义来创建音视频流。
如果你想添加mediastreamer2的功能,实现一个mediastreamer2 filter是非常简单的,因为mediastreamer2是非常轻量级的封装。
由于mediastreamer2是一个轻框架,工程师可以集中精力在于:图像/信号算法的实现。
mediastreamer2适用于嵌入式系统
mediastreamer2是纯C开发的
mediastreamer2可以用gcc编译
mediastreamer2最小依赖只需oRTP和libc。其他(ffmpeg, speex, alsa…)根据需要添加。
由于是插件框架,mediastreamer2可以通过硬件codecs接口扩展,如video codecs dsp
ediastreamer2是轻量级的。例如,在linux/x86平台上,使用共享库的时全功能大约只有800k
四、ortp
rtprecv.c 、rtpsend.c :如何接收和发送单RTP数据流。
mrtprecv.c 、mrtpsend.c :如何同时接收和发送多个RTP数据流。


 5280
5280


 被折叠的 条评论
为什么被折叠?
被折叠的 条评论
为什么被折叠?
 到【灌水乐园】发言


