


iOS UITableView 用法实例:
之前在iOS UITableView 用法一:初探 中总结了UITabelView的用法和功能,给出了iphone下的简单应用
下面是实例开发的一个小程序,运行在iPad上,采用分割界面,ui布局采用UITableView,各主要界面展示如下:
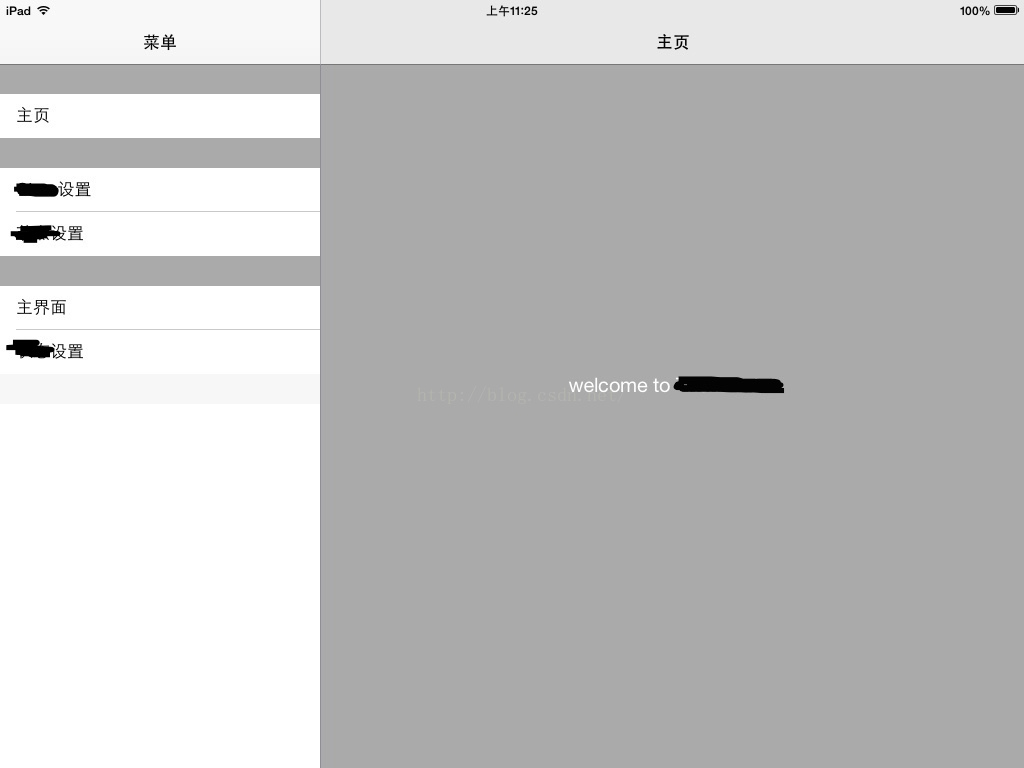
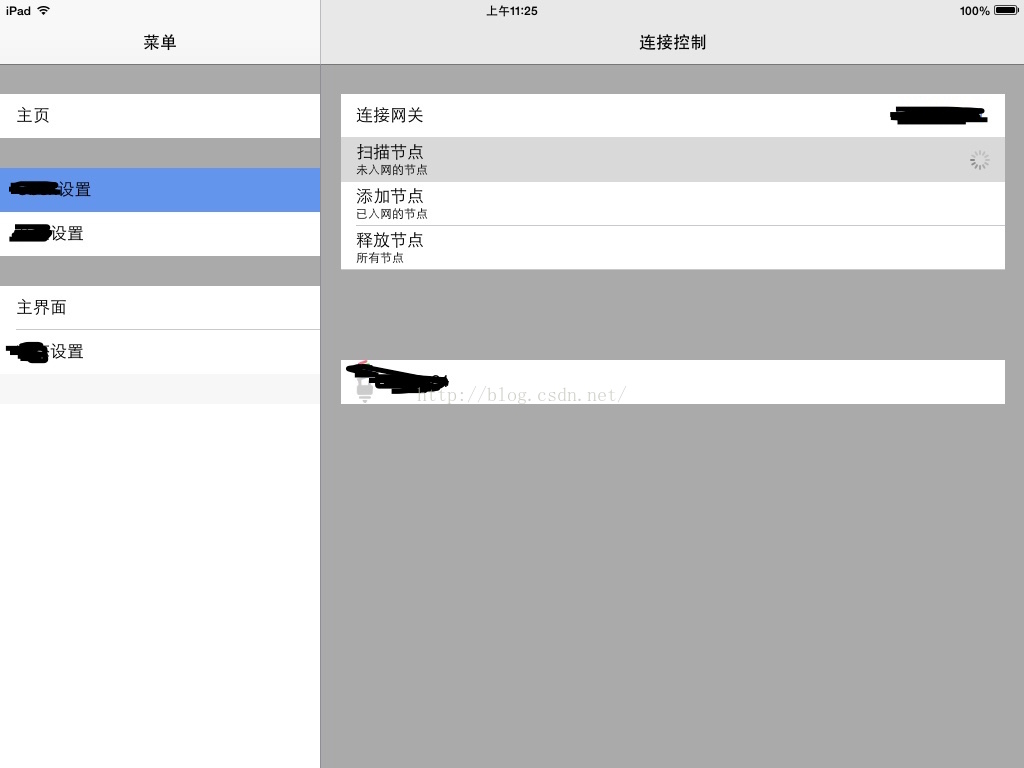
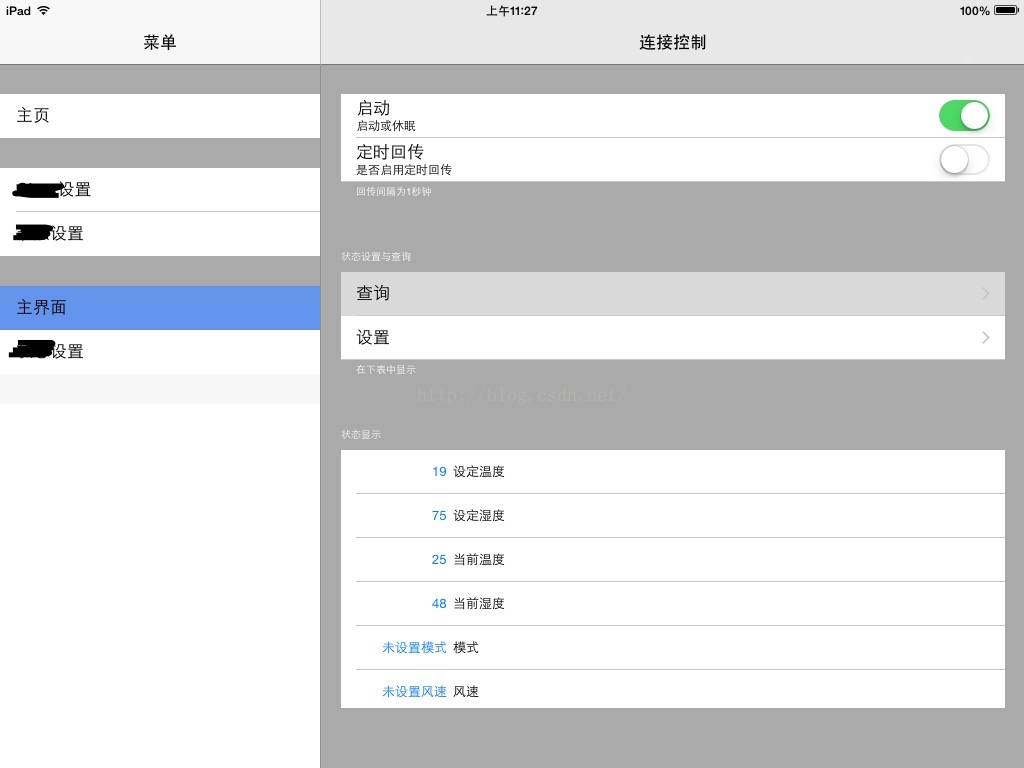

以上页面的ui均采用tableview实现,下面的代码是第二个界面中详情页的实现代码,这部分代码展示了实现该UI界面所使用到的有关UITableView的数据源函数和委托函数。
#pragma mark - UItableview Delegate
//供单元格配置函数调用,非系统函数
- (void)configureCell:(UITableViewCell *)cell forIndexPath:(NSIndexPath *)indexPath {
LampNode *node = [nodeListArray objectAtIndex:indexPath.row];
cell.textLabel.text = node.ID;
cell.textLabel.textColor = [UIColor blackColor];
switch (node.kind){
case RGB:
cell.imageView.image = [UIImage imageNamed:@"RGB"];
break;
case DOUBLE:
cell.imageView.image = [UIImage imageNamed:@"DOUBLE"];
break;
case SIGNAL:
cell.imageView.image = [UIImage imageNamed:@"SIGNAL"];
break;
default:
cell.imageView.image = [UIImage imageNamed:@"SIGNAL"];
break;
}
}
//供单元格配置函数调用,非系统函数 配置该表的第一部分的单元格
-(void)configureSection0Cell:(UITableViewCell *)cell forIndexPath:(NSIndexPath *)indexPath{
switch (indexPath.row) {
case 0:
cell.accessoryView = accessoryBtn;
break;
case 1:
cell.accessoryView = accessoryIndicator;
break;
case 2:
break;
case 3:
break;
default:
break;
}
}
- (NSInteger)numberOfSectionsInTableView:(UITableView *)tableView{
//return the number of sections
return 2;
}
-(NSInteger)tableView:(UITableView *)tableView numberOfRowsInSection:(NSInteger)section{
//return the number of rows in the section
NSInteger numOfRow =0 ;
if (section == 0) {
primaryModel *pm = self.linkModelArray[section];
/*这里一定要注意,两句的区别,用下面这一句,不会调用懒加载,这是因为直接引用了该属性,上一句加上self关键字,实际上是调用了设值函数,也就调用了懒加载*/
//primarymodel *pm = _linkModelArray[section];
numOfRow = pm.rowtitle.count;
}else if(section == 1){
numOfRow = nodeListArray.count;
}
return numOfRow;
}
- (UITableViewCell *)tableView:(UITableView *)tableView cellForRowAtIndexPath:(NSIndexPath *)indexPath {
NSLog(@"cellForRowAtIndexPath %ld %ld",(long)indexPath.section,(long)indexPath.row);//第几组,第几行
NSString *cellIdentifier = @"Cell";
NSString *linkCellIdentifier = @"linkCell";
UITableViewCell *cell;
if (indexPath.section == 0) {
cell = [tableView dequeueReusableCellWithIdentifier:linkCellIdentifier];
if(!cell){
cell = [[UITableViewCell alloc] initWithStyle:UITableViewCellStyleSubtitle reuseIdentifier:linkCellIdentifier];
}
primaryModel *rowTitles = _linkModelArray[indexPath.section];
cell.textLabel.text = rowTitles.rowtitle[indexPath.row];
cell.detailTextLabel.text = rowTitles.rowdetailtitle[indexPath.row];
// cell.accessoryType = UITableViewCellAccessoryCheckmark;//附属类型:对号
[self configureSection0Cell:cell forIndexPath:indexPath];
}else if(indexPath.section == 1){
cell = [tableView dequeueReusableCellWithIdentifier:cellIdentifier];
if (!cell) {
cell = [[UITableViewCell alloc]initWithStyle:UITableViewCellStyleDefault reuseIdentifier:cellIdentifier];
}
[self configureCell:cell forIndexPath:indexPath];
}
return cell;
}
#pragma mark TableViewdDelegate
- (UIView *)tableView:(UITableView *)tableView viewForHeaderInSection:(NSInteger)section{
UILabel *sectionLabelView = [[UILabel alloc] initWithFrame:CGRectMake(15,5, self.view.bounds.size.width, 30)];
if (section == 0) {//由于第二组并没有使用数据模型,所以这里要把section限制在0,否则会发生下标越界
primaryModel *pm = _linkModelArray[section];
sectionLabelView.text = pm.sectiontitle;
}
sectionLabelView.font = [UIFont fontWithName:@"Helvetica" size:10];
sectionLabelView.textColor = [UIColor whiteColor];
sectionLabelView.backgroundColor = [UIColor lightGrayColor];
return sectionLabelView;
}
//必须要先实现该方法,viewForHeaderInSection方法才有效
- (CGFloat) tableView:(UITableView *)tableView heightForHeaderInSection:(NSInteger)section{
return 30;
}
/**
* 显示当前组的脚标
*/
-(UIView *)tableView:(UITableView *)tableView viewForFooterInSection:(NSInteger)section{
UIView *tempView = [[UIView alloc] initWithFrame:CGRectMake(0, 0, self.view.bounds.size.width, 70)];
UILabel *subView = [[UILabel alloc] initWithFrame:CGRectMake(15,5, self.view.bounds.size.width, 10)];
if (section == 0) {
primaryModel *pm = _linkModelArray[section];
subView.text = pm.desc;
}
subView.font = [UIFont fontWithName:@"Helvetica" size:10];
subView.textColor = [UIColor whiteColor];
subView.backgroundColor = [UIColor lightGrayColor];
tempView.backgroundColor = [UIColor lightGrayColor];
[tempView addSubview:subView];
NSLog(@"footerview hight %f",tempView.bounds.size.height);
return tempView;
}
//必须要先实现该方法,viewForFooterInSection方法才有效
- (CGFloat)tableView:(UITableView *)tableView heightForFooterInSection:(NSInteger)section{
return 60;
}
- (void)tableView:(UITableView *)tableView didSelectRowAtIndexPath:(NSIndexPath *)indexPath
{
[self tableView:tableView accessoryButtonTappedForRowWithIndexPath:indexPath];
}
//- (NSIndexPath *)tableView:(UITableView *)tableView willSelectRowAtIndexPath:(NSIndexPath *)indexPath{
// UITableViewCell *cell= [tableView cellForRowAtIndexPath:indexPath];
//
// if (indexPath.section == 0) {
// cell.selectionStyle = UITableViewCellSelectionStyleNone;//第一组中由于是switch按钮,所以不选中行
// }else if (indexPath.section != 0){
// cell.selectionStyle = UITableViewCellSelectionStyleBlue;//第二组选中之后,呈浅灰色,也即默认设置
// }
// return indexPath;
//}
/**
* 附件按钮的事件。即事件传递到 UITableViewDelegate 的accessoryButtonTappedForRowWithIndexPath 方法。
* 但由于didselectRowWithIndexPath会覆盖accessorytype,所以就讲该方法放到didSelectRowAtIndexPath方法中进行调用
*/
- (void) tableView:(UITableView *)tableView accessoryButtonTappedForRowWithIndexPath:(NSIndexPath *)indexPath{
switch (indexPath.section) {
case 0:
switch (indexPath.row) {
case 0:
NSLog(@"this is section %ld , row %ld linkBtn",(long)indexPath.section,(long)indexPath.row);
[self linkBtn];
break;
case 1:
NSLog(@"this is section %ld , row %ld searchBtn",(long)indexPath.section,(long)indexPath.row);
[self searchBtn];
break;
case 2:
NSLog(@"this is section %ld , row %ld addNodeBtn",(long)indexPath.section,(long)indexPath.row);
[self addNodeBtn];
break;
case 3:
NSLog(@"this is section %ld , row %ld releaseBtn",(long)indexPath.section,(long)indexPath.row);
[self releaseBtn];
break;
default:
break;
}
break;
default:
break;
}
}
@end


 119
119

 被折叠的 条评论
为什么被折叠?
被折叠的 条评论
为什么被折叠?
 到【灌水乐园】发言


