


1.配置ntp时间服务器,确保客户端主机能和服务主机同步时间
2.配置ssh免密登陆,能够通过客户端主机通过redhat用户和服务端主机基于公钥验证方式进行远程连接
一.配置ntp时间服务器,确保客户端主机能和服务主机同步时间
1、软件安装
[root@localhost ~]# yum install chrony -y2、查看客户端主机时间
[root@client ~]# timedatectl
               Local time: 日 2003-07-13 07:16:23 CST
           Universal time: 六 2003-07-12 23:16:23 UTC
                 RTC time: 日 2023-04-16 11:47:14
                Time zone: Asia/Shanghai (CST, +0800)
System clock synchronized: no
              NTP service: active
          RTC in local TZ: no
[root@client ~]#
3、修改配置文件
客户端主机:
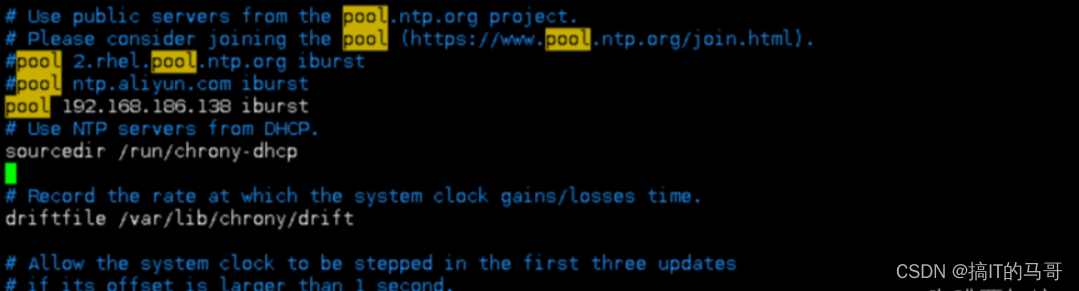
[root@client ~]# vim /etc/chrony.conf
#添加服务端地址
pool 192.168.65.138 iburst
[root@server ~]# vim /etc/chrony.conf
#设置允许哪个客户端可以访问该服务器
# Allow NTP client access from local network.
allow 192.168.186.0/24

# Serve time even if not synchronized to a time source.
local stratum 10
(值10可被取代,可选范围为1-15。假如该计算机可以连接到一台最终与真实时间同步的计算机,那么该计算机的stratum层级几乎可以肯定比10小。因此,为local命令选取stratum 10这样的大数值,可以防止机器本身的时间与真实时间混淆,可以保证该机器不会将本身的时间授时给那些可以连接同步到真实时间的ntp服务器的ntp客户端。)
4、查看服务器时间,并重启chronyd服务
[root@server ~]# date
2023年 04月 16日 星期日 19:51:18 CST
[root@server ~]# grep allow /etc/chrony.conf
allow 192.168.186.0/24
[root@server ~]# systemctl restart chronyd
5、用客户端去同步,并再次查看客户端的时间是否与客户端一致
[root@client ~]# ping 192.168.65.138
[root@client ~]# grep iburst /etc/chrony.conf
#pool 2.rhel.pool.ntp.org iburst
#pool ntp.aliyun.com iburst
pool 192.168.65.138 iburst
[root@client ~]# systemctl restart chronyd
[root@client ~]# chronyc sources
MS Name/IP address         Stratum Poll Reach LastRx Last sample
===============================================================================
^* 192.168.65.138              10   6    17     0    -19us[  -53us] +/-  354us
[root@client ~]# timedatectl
               Local time: 日 2023-04-16 20:00:55 CST
           Universal time: 日 2023-04-16 12:00:55 UTC
                 RTC time: 日 2023-04-16 12:00:56
                Time zone: Asia/Shanghai (CST, +0800)
System clock synchronized: yes
              NTP service: active
          RTC in local TZ: no
[root@client ~]# chronyc ntpdata

Remote address  : 192.168.65.138 (C0A8BA8A)
Remote port     : 123
Local address   : 192.168.65.137 (C0A8BA89)
Leap status     : Normal
Version         : 4
Mode            : Server
Stratum         : 10
Poll interval   : 6 (64 seconds)
Precision       : -26 (0.000000015 seconds)
Root delay      : 0.000000 seconds
Root dispersion : 0.000000 seconds
Reference ID    : 7F7F0101 ()
Reference time  : Sun Apr 16 12:03:56 2023
Offset          : -0.000075828 seconds
Peer delay      : 0.000886137 seconds
Peer dispersion : 0.000000034 seconds
Response time   : 0.000293112 seconds
Jitter asymmetry: +0.00
NTP tests       : 111 111 1111
Interleaved     : No
Authenticated   : No
TX timestamping : Daemon
RX timestamping : Kernel
Total TX        : 7
Total RX        : 7
Total valid RX  : 7
[root@client ~]#二.配置ssh免密登陆,能够通过客户端主机通过redhat用户和服务端主机基于公钥验证方式进行远程连接
1、创建用户redhat
[root@client ~]# useradd redhat
[root@client ~]# passwd redhat
更改用户 redhat 的密码 。
新的密码:
无效的密码: 密码少于 8 个字符
重新输入新的密码:
passwd:所有的身份验证令牌已经成功更新。
[root@client ~]#
2、创建新的密钥对,并且发送到指定目录中
[root@client .ssh]# su redhat
[redhat@client .ssh]$ ssh-keygen -t rsa
Generating public/private rsa key pair.
Enter file in which to save the key (/home/redhat/.ssh/id_rsa):
Enter passphrase (empty for no passphrase):
Enter same passphrase again:
Your identification has been saved in /home/redhat/.ssh/id_rsa
Your public key has been saved in /home/redhat/.ssh/id_rsa.pub
The key fingerprint is:
SHA256:ttXkI8fBsvXzKNTArpYWluWKxVRVtDFNbPzcYi/1HpQ redhat@client
The key's randomart image is:
+---[RSA 3072]----+
|            ...O=|
|           +    O|
|          o O  ++|
|         o & =oE=|
|        S X X.=+.|
|       . * O ..=o|
|        o * . .oo|
|         o   .  .|
|                 |
+----[SHA256]-----+
[redhat@client .ssh]$
[redhat@client .ssh]$ ll
总用量 8
-rw-------. 1 redhat redhat 2602  4月 16 20:47 id_rsa
-rw-r--r--. 1 redhat redhat  567  4月 16 20:47 id_rsa.pub
[root@server .ssh]# ll
总用量 8
-rw-------. 1 root root 1695  4月 16 20:43 authorized_keys
-rw-r--r--. 1 root root 2590  4月 16 20:50 id_rsa
3、客户端测试
[redhat@client .ssh]$ ssh 192.168.186.138
The authenticity of host '192.168.186.138 (192.168.186.138)' can't be established.
ED25519 key fingerprint is SHA256:IjiKi+oexrRWTbUACwNqXYQvu2F8yakPx49b7PW9lto.
This key is not known by any other names
Are you sure you want to continue connecting (yes/no/[fingerprint])? yes
Warning: Permanently added '192.168.186.138' (ED25519) to the list of known hosts.
redhat@192.168.186.138's password:
Activate the web console with: systemctl enable --now cockpit.socket

Register this system with Red Hat Insights: insights-client --register
Create an account or view all your systems at https://red.ht/insights-dashboard
Last login: Sat Apr  8 10:10:53 2023


 356
356


 被折叠的 条评论
为什么被折叠?
被折叠的 条评论
为什么被折叠?
 到【灌水乐园】发言


