


基于Spring Boot 3.3.4,详细说明Spring Security 6.3.3的使用
摘要
Spring Boot框架版本在持续迭代中,Spring相关组件也在不断更新,JDK版本的发布频率也更加的频繁。做为一名持续学习的开发者,紧跟技术时代潮流,持续学习新技术,持续更新自己的技能储备,是往前冲锋的必备能力和品质。希望大家跟我一样,保持对技术的渴望,保持学习的激情,一起努力吧。
JWT也是现在前后端分离主流的身份认证载体,在本文中,我们会循序渐进从Spring Boot框架起步,一步步整合JWT,使用RSA公钥、私钥对JWT进行签名和验签,一点点揭开Spring Security的神秘面纱。
现在微服务开发主流的是Spring Boot框架,要开发一个微服务,其中一个非常重要的环节就是登录认证,Spring Boot针对登录认证原生有一套解决方案,对应的组件是Spring Security。接下来,让我们一步步在最新的框架版本中一起学习如何使用Spring Security完成后端微服务的登录认证吧。
本文选择目前Spring Boot最新版本3.3.4,里面使用的Spring Security版本是6.3.3,OpenJDK也选择最新的一个LTS版本21,IDE也选择IntelliJ IDEA目前最新的社区版本2024.2.3。
本地开发环境说明
开发用到的主要框架、工具版本如下
| 开发依赖 | 版本 |
|---|---|
| Spring Boot | 3.3.4 |
| Spring Security | 6.3.3 |
| nimbus-jose-jwt | 9.41.1 |
| JDK | 21 |
| IntelliJ IDEA | 2024.2.3 |
先快速完整一个微服务的搭建
pom.xml依赖
核心内容如下
<?xml version="1.0" encoding="UTF-8"?>
<project xmlns="http://maven.apache.org/POM/4.0.0"
         xmlns:xsi="http://www.w3.org/2001/XMLSchema-instance"
         xsi:schemaLocation="http://maven.apache.org/POM/4.0.0 http://maven.apache.org/xsd/maven-4.0.0.xsd">

    <parent>
        <groupId>org.springframework.boot</groupId>
        <artifactId>spring-boot-starter-parent</artifactId>
        <version>3.3.4</version>
        <relativePath/>
    </parent>
    <modelVersion>4.0.0</modelVersion>

    <groupId>com.wen3.framework-demo</groupId>
    <artifactId>wen3-framework-springsecurity-demo</artifactId>
    <version>1.0.0-SNAPSHOT</version>

    <dependencies>
        <dependency>
            <groupId>org.springframework.boot</groupId>
            <artifactId>spring-boot-starter-web</artifactId>
        </dependency>
    </dependencies>
</project>
启动类
package com.wen3.security.springsecurity;

import org.springframework.boot.SpringApplication;
import org.springframework.boot.autoconfigure.SpringBootApplication;

/**
 * @author tangheng
 */
@SpringBootApplication
public class DemoSpringSecurityApplication {

    public static void main(String[] args) {
        SpringApplication.run(DemoSpringSecurityApplication.class, args);
    }
}
修改tomcat默认端口
server:
  port: 8081
这样就完成了一个最简单的Spring Boot 3.3.4版本的微服务搭建,接下来我们一点点增加内容
增加Spring Security依赖
核心内容如下
<dependencies>
    <dependency>
        <groupId>org.springframework.boot</groupId>
        <artifactId>spring-boot-starter-web</artifactId>
    </dependency>
    <dependency>
        <groupId>org.springframework.boot</groupId>
        <artifactId>spring-boot-starter-security</artifactId>
    </dependency>
</dependencies>
简单介绍下Spring Security涉及的一些概念
为了方便大家对Spring Security有一些基本了解,把涉及的一些重要概念单独拿出来讲解一下,希望对大家理解Spring Security的流程有些帮助。
加密器
- 主要用于用户密码的加密。
- 接口:
org.springframework.security.crypto.password.PasswordEncoder - 常用的实现类:
org.springframework.security.crypto.bcrypt.BCryptPasswordEncoder BCryptPasswordEncoder使用了较复杂的加密算法,每次生成的加密串都不一样,大大提高了破解难度
UserDetailsService接口
- 接口:
org.springframework.security.core.userdetails.UserDetailsService - 主要用于用户信息获取,根据账号查找用户信息,然后交由调用者进行密码等重要信息的匹配,通常需要自己实现这个接口,一般从数据库获取用户信息
AuthenticationProvider接口
- 接口:
org.springframework.security.authentication.AuthenticationProvider - 对用户信息进行校验,校验通过后提供用户凭证
Authentication,对校验过程提供丰富的扩展支持 - 常用的实现类:
org.springframework.security.authentication.dao.DaoAuthenticationProvider - 这个实现类会从
UserDetailsServic获取用户信息
AuthenticationManager接口
- 接口:
org.springframework.security.authentication.AuthenticationManager - 认证管理器,对
Authentication进行认证 - 默认是创建
org.springframework.security.authentication.ProviderManager实例,然后ProviderManager再去找AuthenticationProvider,然后AuthenticationProvider对UsernamePasswordAuthenticationToken进行认证
增加JWT依赖
<dependencies>
    <dependency>
        <groupId>org.springframework.boot</groupId>
        <artifactId>spring-boot-starter-web</artifactId>
    </dependency>
    <dependency>
        <groupId>org.springframework.boot</groupId>
        <artifactId>spring-boot-starter-security</artifactId>
    </dependency>
    <dependency>
        <groupId>com.nimbusds</groupId>
        <artifactId>nimbus-jose-jwt</artifactId>
        <version>9.41.1</version>
    </dependency>
</dependencies>
为什么选择nimbus-jose-jwt这个开源库呢?
- 因为在
Spring Security的其它组件中,使用的也是这个JWT库,比如spring-security-oauth2-authorization-server - 为了与
Spring Boot框架体系保持一致,在讲解Spring Security与JWT整合的时候,我们也首选nimbus-jose-jwt开源库 nimbus-jose-jwt开源库也使用当前最新版本9.41.1
新增启动配置类
了解完了Spring Security的几个核心概念,我们开始编写代码,先编写一个启动配置类,用于配置Spring Security,如下
package com.wen3.security.springsecurity.autoconfigure;

import com.wen3.security.springsecurity.filter.JwtFilter;
import com.wen3.security.springsecurity.filter.JwtTokenAuthenticationFilter;
import com.wen3.security.springsecurity.filter.LoginAuthenticationFilter;
import com.wen3.security.springsecurity.service.DemoDetailsService;
import org.springframework.context.annotation.Bean;
import org.springframework.context.annotation.Configuration;
import org.springframework.http.HttpMethod;
import org.springframework.security.authentication.AuthenticationManager;
import org.springframework.security.authentication.AuthenticationProvider;
import org.springframework.security.authentication.dao.DaoAuthenticationProvider;
import org.springframework.security.config.annotation.authentication.configuration.AuthenticationConfiguration;
import org.springframework.security.config.annotation.method.configuration.EnableMethodSecurity;
import org.springframework.security.config.annotation.web.builders.HttpSecurity;
import org.springframework.security.config.annotation.web.configurers.AbstractHttpConfigurer;
import org.springframework.security.config.annotation.web.configurers.FormLoginConfigurer;
import org.springframework.security.config.http.SessionCreationPolicy;
import org.springframework.security.core.userdetails.UserDetailsService;
import org.springframework.security.crypto.bcrypt.BCryptPasswordEncoder;
import org.springframework.security.crypto.password.PasswordEncoder;
import org.springframework.security.web.SecurityFilterChain;
import org.springframework.security.web.authentication.UsernamePasswordAuthenticationFilter;
import org.springframework.security.web.util.matcher.AntPathRequestMatcher;
import org.springframework.security.web.util.matcher.RequestMatcher;
import org.springframework.stereotype.Component;

/**
 * @author tangheng
 */
@EnableMethodSecurity(securedEnabled = true)
@Configuration
public class DemoWen3Security {

    @Bean
    Wen3JwtProperties wen3JwtProperties() {
        return new Wen3JwtProperties();
    }

    /**配置加密器,主要用于用户密码的加密*/
    @Bean
    public PasswordEncoder passwordEncoder() {
        return new BCryptPasswordEncoder();
    }

    /**用户信息获取*/
    @Bean
    public DemoDetailsService demoDetailsService() {
        return new DemoDetailsService();
    }

    /**对用户信息进行校验,校验通过后提供用户凭证Authentication,对校验过程提供丰富的扩展支持*/
    @Bean
    public AuthenticationProvider authenticatorProvider() {
        DaoAuthenticationProvider provider = new DaoAuthenticationProvider();
        //设置密码加密器
        provider.setPasswordEncoder(passwordEncoder());
        //设置用户信息获取接口,获取用户信息
        provider.setUserDetailsService(demoDetailsService());
        return provider;
    }

    /**认证管理器,对Authentication进行认证*/
    @Bean
    public AuthenticationManager authenticationManager(AuthenticationConfiguration configuration) throws Exception {
        //获取认证管理器
        return configuration.getAuthenticationManager();
    }

    @Bean
    JwtFilter jwtFilter() {
        return new JwtFilter();
    }

    @Bean
    public SecurityFilterChain securityFilterChain(HttpSecurity http) throws Exception {
        http.authorizeHttpRequests(authorizeHttpRequestsCustomizer -> {
            authorizeHttpRequestsCustomizer
                    .requestMatchers(HttpMethod.POST, "/login/common").permitAll()
                    .requestMatchers(HttpMethod.GET, "/login/verify").permitAll()
                    .requestMatchers(new AntPathRequestMatcher("/**/test")).permitAll()
                    .anyRequest().authenticated();
        });

        // token校验过滤器
        http.addFilterBefore(jwtFilter(), UsernamePasswordAuthenticationFilter.class);

        // 禁用表单提交 取消默认的登录页面
        http.formLogin(AbstractHttpConfigurer::disable);
        // 禁用注销 取消默认的登出页面
        http.logout(AbstractHttpConfigurer::disable);
        // 禁用csrf功能,方便使用curl或postman测试
        http.csrf(AbstractHttpConfigurer::disable);

        //将自己的认证服务加入
        http.authenticationProvider(authenticatorProvider());
        //禁用session,因为使用token
        http.sessionManagement(session -> session.sessionCreationPolicy(SessionCreationPolicy.STATELESS));
        //禁用http基本认证,因为传输数据用的post,且请求体为JSON
        http.httpBasic(AbstractHttpConfigurer::disable);

        return http.build();
    }
}
登录Controller
/login/common和/login/verify已经在Spring Security设置忽略认证/login/common是登录接口,验证用户名和密码,然后返回JWT/login/verify是校验JWT的接口
具体代码如下
package com.wen3.security.springsecurity.controller;

import com.wen3.security.springsecurity.autoconfigure.Wen3JwtProperties;
import com.wen3.security.springsecurity.dto.CommonResponse;
import com.wen3.security.springsecurity.po.DemoUser;
import com.wen3.security.springsecurity.utils.RSAUtils;
import com.wen3.security.springsecurity.vo.UserVo;
import jakarta.annotation.Resource;
import jakarta.servlet.http.HttpSession;
import jakarta.validation.Valid;
import org.springframework.security.authentication.AuthenticationManager;
import org.springframework.security.authentication.UsernamePasswordAuthenticationToken;
import org.springframework.security.core.Authentication;
import org.springframework.security.core.context.SecurityContextHolder;
import org.springframework.security.core.userdetails.UserDetails;
import org.springframework.web.bind.annotation.*;

@RestController
@RequestMapping("/login")
public class LoginController {

    /**注入认证管理器*/
    @Resource
    private AuthenticationManager authenticationManager;
    @Resource
    private Wen3JwtProperties wen3JwtProperties;

    @PostMapping("/common")
    public CommonResponse login(
            @RequestBody // 将请求体中的json数据映射为UserVo对象
            @Valid // 开启校验,必须有UserVo对象才能通过校验
            UserVo user, HttpSession session){

//        //加入验证码 因为将验证码存在在session中,所以需要从session中取出来
//        String captcha = (String) session.getAttribute("captcha");
//        //判断验证码是否正确
//        if(!captcha.equalsIgnoreCase(user.getCaptcha())){
//            return ResponseResult.error("验证码错误");
//        }

        //使用authenticate()方法接收UsernamePasswordAuthenticationToken对象,并返回一个包含用户详细信息的 Authentication 对象。
        Authentication authentication = authenticationManager.authenticate(
                //将用户名和密码[和证书]封装到UsernamePasswordAuthenticationToken对象中,用来包装认证信息
                new UsernamePasswordAuthenticationToken(user.getUsername(), user.getPassword())
        );

        //getContext()获取当前线程的SecurityContext,并返回一个SecurityContext对象。
        //setAuthentication()设置当前线程的SecurityContext,并将Authentication对象作为参数传入。
        SecurityContextHolder.getContext().setAuthentication(authentication);
        //使用getPrincipal()方法获取认证信息,并转换为UserDetails对象
        UserDetails userDetails = (UserDetails) authentication.getPrincipal();
        DemoUser resuser = (DemoUser) userDetails;
        //生成JWT令牌
        String token = RSAUtils.createJwt(RSAUtils.convertToPrivateKey(wen3JwtProperties.getPrivateKey()), resuser);
        //返回token,后面使用token进行认证
        return CommonResponse.success(token);
    }

    @GetMapping("/verify")// /user/login
    public CommonResponse verify(String jwt){
        boolean valid = RSAUtils.verifyJwt(RSAUtils.convertToRSAPublicKey(wen3JwtProperties.getPublicKey()), jwt);
        //返回token,后面使用token进行认证
        return CommonResponse.success(valid);
    }
}
编写RSA工具类
JWT与RSA公私钥
- 使用
RSA私钥对JWT进行签名 - 使用
RSA公钥对JWT进行验签 - 采用
RS512加密算法
编写RSAUtils
package com.wen3.security.springsecurity.utils;

import cn.hutool.core.codec.Base64;
import com.nimbusds.jose.*;
import com.nimbusds.jose.crypto.RSASSASigner;
import com.nimbusds.jose.crypto.RSASSAVerifier;
import com.nimbusds.jwt.JWTClaimsSet;
import com.nimbusds.jwt.SignedJWT;
import com.nimbusds.jwt.util.DateUtils;
import com.wen3.security.springsecurity.po.DemoUser;
import com.wen3.security.springsecurity.vo.UserVo;
import lombok.SneakyThrows;
import org.slf4j.event.KeyValuePair;

import java.security.*;
import java.security.interfaces.RSAPrivateKey;
import java.security.interfaces.RSAPublicKey;
import java.security.spec.KeySpec;
import java.security.spec.PKCS8EncodedKeySpec;
import java.security.spec.X509EncodedKeySpec;
import java.text.ParseException;
import java.util.Date;
import java.util.TreeSet;

public class RSAUtils {

    public static final String ALGORITHM_RSA = "RSA";

    /**
     * 获取秘钥对对象
     *
     * @return
     * @throws NoSuchAlgorithmException
     */
    public static KeyValuePair getRSAKeyPair() throws NoSuchAlgorithmException {
        // KeyPairGenerator类用于生成公钥和私钥对,基于RSA算法生成对象
        KeyPairGenerator keyPairGenerator = KeyPairGenerator.getInstance(ALGORITHM_RSA);
        // 初始化密钥对生成器
        keyPairGenerator.initialize(2048, new SecureRandom());
        // 生成一个密钥对,保存在keyPair中
        KeyPair keyPair = keyPairGenerator.generateKeyPair();
        // 得到公钥
        RSAPublicKey publicKey = (RSAPublicKey) keyPair.getPublic();
        String publicKeyStr = Base64.encode(publicKey.getEncoded());
        // 得到私钥
        RSAPrivateKey privateKey = (RSAPrivateKey) keyPair.getPrivate();
        String privateKeyStr = Base64.encode(privateKey.getEncoded());
        return new KeyValuePair(privateKeyStr, publicKeyStr);
    }

    /**
     * 获取秘钥对对象
     *
     * @return
     * @throws NoSuchAlgorithmException
     */
    public static KeyPair generateKeyPair() throws NoSuchAlgorithmException {
        // KeyPairGenerator类用于生成公钥和私钥对,基于RSA算法生成对象
        KeyPairGenerator keyPairGenerator = KeyPairGenerator.getInstance(ALGORITHM_RSA);
        // 初始化密钥对生成器
        keyPairGenerator.initialize(2048, new SecureRandom());
        // 生成一个密钥对,保存在keyPair中
        return keyPairGenerator.generateKeyPair();
    }

    public static void printAllAlgorithms() {
        TreeSet<String> algorithms = new TreeSet<>();

        Provider[] providers = Security.getProviders();
        System.out.println("-----Provider 列表如下:-----");
        for (Provider provider : providers) {
            System.out.println(provider.getName());
        }

        System.out.println("-----支持的签名算法如下:-----");

        for (Provider provider : providers) {
            for (Provider.Service service : provider.getServices())
                if (service.getType().equals("Signature")) {
                    algorithms.add(service.getAlgorithm());
                }
        }

        for (String algorithm : algorithms) {
            System.out.println(algorithm);
        }
    }

    @SneakyThrows
    public static String createJwt(PrivateKey privateKey, DemoUser demoUser) {
        // 创建一个JWT对象
        JWTClaimsSet claimsSet = new JWTClaimsSet.Builder()
                .subject("user123")
                .issueTime(new Date())
                .claim("userId", demoUser.getId())
                .claim("userName", demoUser.getUsername())
                // 设置过期时间为当前时间后的一分钟
                .expirationTime(new Date(System.currentTimeMillis() + 60 * 1000)).build();
        JWSHeader header = new JWSHeader.Builder(JWSAlgorithm.RS512).build();
        SignedJWT signedJWT = new SignedJWT(header, claimsSet);
        // 创建RSA签名器
        JWSSigner signer = new RSASSASigner(privateKey);
        // 对JWT进行签名
        signedJWT.sign(signer);
        // 将JWT序列化为字符串
        String jwtString = signedJWT.serialize();
        return jwtString;
    }

    public static boolean verifyJwt(RSAPublicKey rsaPublicKey, String jwt) {
        // 创建RSA验证器
        JWSVerifier verifier = new RSASSAVerifier(rsaPublicKey);
        // 验证JWT签名
        boolean valid = false;
        JWTClaimsSet claimsSet = null;
        try {
            SignedJWT signedJWT = SignedJWT.parse(jwt);
            valid = signedJWT.verify(verifier);
            claimsSet = signedJWT.getJWTClaimsSet();
        } catch (JOSEException|ParseException e) {
            return false;
        }
        if(!valid) {
            return false;
        }

        System.out.println("JWT signature is valid.");

        // 获取JWT的声明
        System.out.println("Subject: " + claimsSet.getSubject());
        System.out.println("Expiration Time: " + claimsSet.getExpirationTime());
        return DateUtils.isAfter(claimsSet.getExpirationTime(), new Date(), 0);
    }

    @SneakyThrows
    public static DemoUser getUserFromJwt(RSAPublicKey rsaPublicKey, String jwt) {
        // 创建RSA验证器
        JWSVerifier verifier = new RSASSAVerifier(rsaPublicKey);
        // 验证JWT签名
        boolean valid = false;
        JWTClaimsSet claimsSet = null;
        try {
            SignedJWT signedJWT = SignedJWT.parse(jwt);
            valid = signedJWT.verify(verifier);
            claimsSet = signedJWT.getJWTClaimsSet();
        } catch (JOSEException|ParseException e) {
            return null;
        }
        if(!valid) {
            return null;
        }

        System.out.println("JWT signature is valid.");

        // 获取JWT的声明
        System.out.println("Subject: " + claimsSet.getSubject());
        System.out.println("Expiration Time: " + claimsSet.getExpirationTime());

        valid = DateUtils.isAfter(claimsSet.getExpirationTime(), new Date(), 0);
        if(!valid) {
            return null;
        }

        return DemoUser.builder()
                .id(claimsSet.getLongClaim("userId"))
                .build();
    }

    @SneakyThrows
    public static PrivateKey convertToPrivateKey(String privateKeyStr) {
        // 将字符串Base64解码
        byte[] decodeKey = Base64.decode(privateKeyStr);
        // 创建x509证书封装类
        KeySpec x509= new PKCS8EncodedKeySpec(decodeKey);
        // 指定RSA
        KeyFactory keyFactory = KeyFactory.getInstance(ALGORITHM_RSA);
        // 生成私钥
        return keyFactory.generatePrivate(x509);
    }

    @SneakyThrows
    public static RSAPublicKey convertToRSAPublicKey(String publicKeyStr) {
        // 将字符串Base64解码
        byte[] decodeKey = Base64.decode(publicKeyStr);
        // 创建x509证书封装类
        KeySpec x509= new X509EncodedKeySpec(decodeKey);
        // 指定RSA
        KeyFactory keyFactory = KeyFactory.getInstance(ALGORITHM_RSA);
        // 生成私钥
        return (RSAPublicKey)keyFactory.generatePublic(x509);
    }
}
UserDetails实现类
UserDetailsService接口查询的用户信息就是UserDetails
package com.wen3.security.springsecurity.po;

import lombok.*;
import lombok.experimental.Accessors;
import lombok.experimental.FieldDefaults;
import org.springframework.security.core.GrantedAuthority;
import org.springframework.security.core.userdetails.UserDetails;

import java.util.Collection;
import java.util.List;

@Data
@Accessors(chain = true)
@Builder
@AllArgsConstructor
@NoArgsConstructor
@FieldDefaults(level = AccessLevel.PRIVATE)
public class DemoUser implements UserDetails {

    Long id;
    String name;
    String username;
    String password;
    String email;
    String role;

    @Override
    public Collection<? extends GrantedAuthority> getAuthorities() {
        return List.of();
    }

    @Override
    public boolean isAccountNonExpired() {
        return true;//表示账号没有过期
    }

    @Override
    public boolean isAccountNonLocked() {
        return true;//表示账号没有被锁定
    }

    @Override
    public boolean isCredentialsNonExpired() {
        return true;//表示密码没有过期
    }

    @Override
    public boolean isEnabled() {
        return true;//表示账号可用
    }
}
UserDetailsService实现类
DemoDetailsService对UserDetailsService做了一个最简单的实现,真实的业务逻辑一般是从数据库匹配用户信息,这里只是为了演示。
package com.wen3.security.springsecurity.service;

import cn.hutool.core.util.RandomUtil;
import com.wen3.security.springsecurity.po.DemoUser;
import jakarta.annotation.Resource;
import lombok.Setter;
import org.apache.commons.lang3.RandomStringUtils;
import org.springframework.beans.factory.annotation.Autowired;
import org.springframework.security.core.userdetails.UserDetails;
import org.springframework.security.core.userdetails.UserDetailsService;
import org.springframework.security.core.userdetails.UsernameNotFoundException;
import org.springframework.security.crypto.bcrypt.BCryptPasswordEncoder;
import org.springframework.security.crypto.password.PasswordEncoder;
import org.springframework.stereotype.Service;

/**
 * @author tangheng
 */
public class DemoDetailsService implements UserDetailsService {

    @Setter(onMethod_ = @Resource)
    private PasswordEncoder passwordEncoder;
    @Setter(onMethod_ = @Autowired)
    private BCryptPasswordEncoder bCryptPasswordEncoder;

    @Override
    public UserDetails loadUserByUsername(String username) throws UsernameNotFoundException {
        return DemoUser.builder()
                .username(username)
                .password(passwordEncoder.encode("123456"))
                .id(RandomUtil.randomLong())
                .email(RandomStringUtils.randomAlphabetic(10))
                .name(RandomStringUtils.randomAlphabetic(10))
                .role("user")
                .build();
    }
}
校验JWT过滤器
package com.wen3.security.springsecurity.filter;

import com.wen3.security.springsecurity.autoconfigure.Wen3JwtProperties;
import com.wen3.security.springsecurity.po.DemoUser;
import com.wen3.security.springsecurity.utils.RSAUtils;
import jakarta.annotation.Resource;
import jakarta.servlet.FilterChain;
import jakarta.servlet.ServletException;
import jakarta.servlet.http.HttpServletRequest;
import jakarta.servlet.http.HttpServletResponse;
import lombok.Setter;
import org.springframework.security.authentication.UsernamePasswordAuthenticationToken;
import org.springframework.security.core.context.SecurityContextHolder;
import org.springframework.web.filter.OncePerRequestFilter;

import java.io.IOException;
import java.util.ArrayList;
import java.util.Objects;

public class JwtFilter extends OncePerRequestFilter {

    @Setter(onMethod_ = @Resource)
    private Wen3JwtProperties wen3JwtProperties;

    @Override
    protected void doFilterInternal(HttpServletRequest request, HttpServletResponse response, FilterChain filterChain)
            throws ServletException, IOException {
        String authorizationHeader = request.getHeader("Authorization");
        if(Objects.isNull(authorizationHeader) || !authorizationHeader.startsWith("Bearer ")) {
            filterChain.doFilter(request, response);
            return;
        }

        System.out.println("authorizationHeader="+authorizationHeader);//Bearer xxx.yyy.zzz
        // 获取token
        String token = authorizationHeader.substring(7);
        // 解析token 这里验证了token是否有效
        DemoUser demoUser = RSAUtils.getUserFromJwt(RSAUtils.convertToRSAPublicKey(wen3JwtProperties.getPublicKey()), token);
        if(Objects.isNull(demoUser)) {
            // 如果请求头中没有token,则返回未授权响应
            response.setStatus(HttpServletResponse.SC_UNAUTHORIZED);
            response.getWriter().write("Unauthorized");
            return;
        }
        //在JWT验证通过后,将用户信息注入到Spring Security的上下文中,从而实现无状态的用户认证。
        Long user = demoUser.getId();//获取负载信息
        // 创建认证信息
        UsernamePasswordAuthenticationToken authentication =
                new UsernamePasswordAuthenticationToken(user, null, new ArrayList<>());
        // 将认证信息放入SecurityContext中
        SecurityContextHolder.getContext().setAuthentication(authentication);
        filterChain.doFilter(request, response);
    }
}
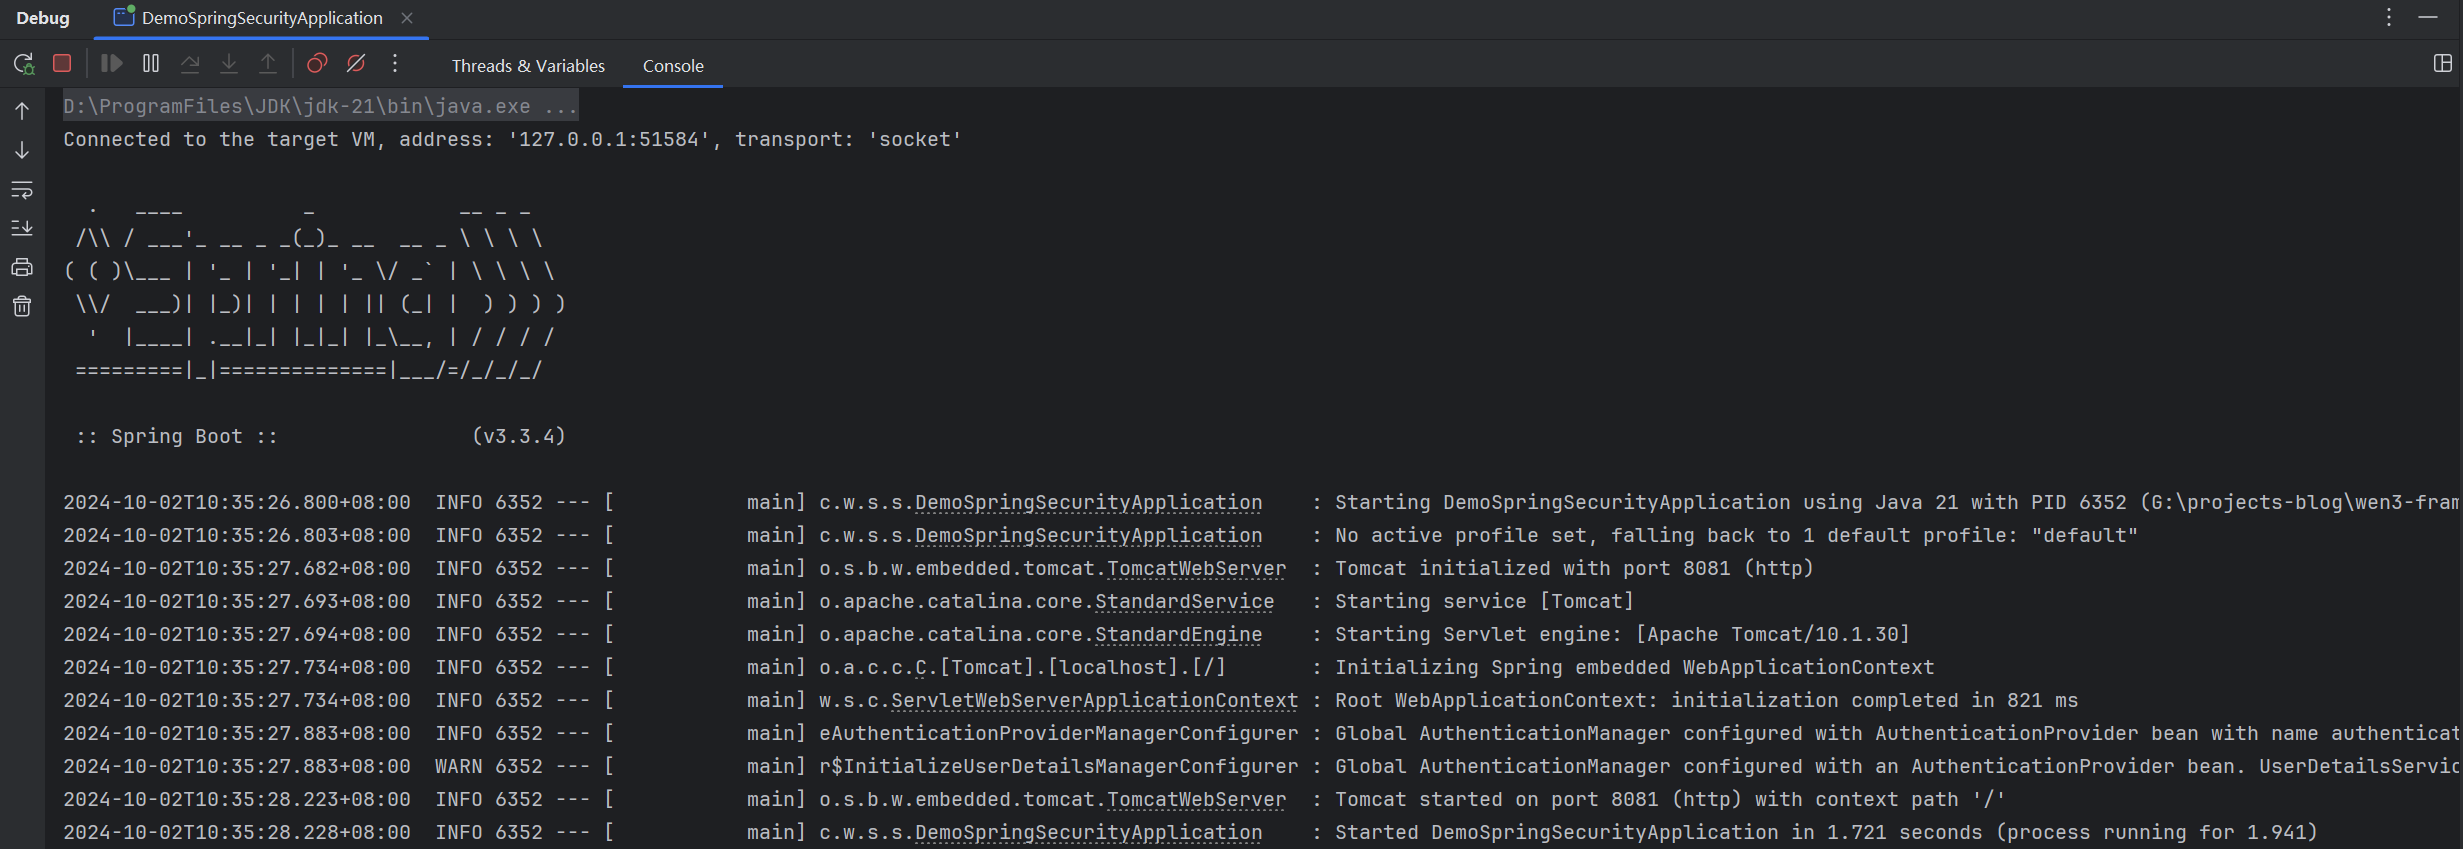
启动工程
启动日志如下
测试
测试登录接口
curl -ik -H "Content-Type: application/json" -XPOST --url "http://localhost:8081/login/common" -d '{"username":"admin","password":"123456"}'
接口响应
HTTP/1.1 200
Set-Cookie: JSESSIONID=F79A0F3992DE853067B3721AEFDD4BBE; Path=/; HttpOnly
X-Content-Type-Options: nosniff
X-XSS-Protection: 0
Cache-Control: no-cache, no-store, max-age=0, must-revalidate
Pragma: no-cache
Expires: 0
X-Frame-Options: DENY
Content-Type: application/json
Transfer-Encoding: chunked
Date: Wed, 02 Oct 2024 07:33:02 GMT

{"currentPage":null,"hasNextPage":null,"code":100000,"msg":"","data":"eyJhbGciOiJSUzUxMiJ9.eyJzdWIiOiJ1c2VyMTIzIiwidXNlck5hbWUiOiJhZG1pbiIsImV4cCI6MTcyNzg1NDQ0MiwiaWF0IjoxNzI3ODU0MzgyLCJ1c2VySWQiOjQxOTAxMjYxNzUzODU5NDEwOTF9.abkfjtkoPeHvTR-TIyRPw6iQw2sI9bBqZra2Qzo-6GUhG4OYyeO0iGLyS5AIns_a1_3WQaj4w2arW1DR1sgHwx6tNVtWQWlKGBgffShqSwJHGVm1s6WiWjDkRYT6dnJfUSe8kULlOs6Gvj3hg3MOKYNAxxYynfvF73O4WOlD5D9CQQjGeMWJBBa_gDu3KUQdDFEaLhYZlsMRbMbUSV2s5EH3w7HXiHYwU4HSp9bq-XujZeXQn-wQAf0XDzaQQpoPJyLt10-HM1NE2Y2PlNTc9ok_MbrvuH5cz5VPmmlnu73Eo6GFE1k22PIfXa6QL2Qhc5O_H8kNvTFNujideqKCtg"}
测试校验JWT接口
curl -ik -H "Content-Type: application/json" -XGET --url "http://localhost:8081/login/verify?jwt=eyJhbGciOiJSUzUxMiJ9.eyJzdWIiOiJ1c2VyMTIzIiwidXNlck5hbWUiOiJhZG1pbiIsImV4cCI6MTcyNzg1NDQ0MiwiaWF0IjoxNzI3ODU0MzgyLCJ1c2VySWQiOjQxOTAxMjYxNzUzODU5NDEwOTF9.abkfjtkoPeHvTR-TIyRPw6iQw2sI9bBqZra2Qzo-6GUhG4OYyeO0iGLyS5AIns_a1_3WQaj4w2arW1DR1sgHwx6tNVtWQWlKGBgffShqSwJHGVm1s6WiWjDkRYT6dnJfUSe8kULlOs6Gvj3hg3MOKYNAxxYynfvF73O4WOlD5D9CQQjGeMWJBBa_gDu3KUQdDFEaLhYZlsMRbMbUSV2s5EH3w7HXiHYwU4HSp9bq-XujZeXQn-wQAf0XDzaQQpoPJyLt10-HM1NE2Y2PlNTc9ok_MbrvuH5cz5VPmmlnu73Eo6GFE1k22PIfXa6QL2Qhc5O_H8kNvTFNujideqKCtg"
接口响应
HTTP/1.1 200
X-Content-Type-Options: nosniff
X-XSS-Protection: 0
Cache-Control: no-cache, no-store, max-age=0, must-revalidate
Pragma: no-cache
Expires: 0
X-Frame-Options: DENY
Content-Type: application/json
Transfer-Encoding: chunked
Date: Wed, 02 Oct 2024 07:33:55 GMT

{"currentPage":null,"hasNextPage":null,"code":100000,"msg":"","data":true}
总结
- 本文演示了如何使用
Spring Security完成身份认证 - 演示了如何使用
RSA非对称加密对JWT进行签名和验签 - 校验
JWT的逻辑放在JwtFilter,可以根据业务需求进行自定义扩展。比如,根据用户的不同权限进一步判断用户是否有访问该资源的权限。


 986
986

 被折叠的 条评论
为什么被折叠?
被折叠的 条评论
为什么被折叠?
 到【灌水乐园】发言


