


HreoWinGauge2.0 试用版下载地址:http://download.csdn.net/source/6896899
(8)添加按钮控件和定时器
在设计窗体中添加如下三个控件:
添加一个Button控件,更改属性如下:“Name”设为“btnStartStop”;“Text”设为“Start/Stop”。并添加Click事件响应函数。
添加一个Button控件,更改属性如下:“Name”设为“btnClear”;“Text”设为“Clear”。并添加Click事件响应函数。
添加一个Timer(定时器)控件,更改属性如下:“Name”设为“timer1”;“Interval”设为“100”。并添加Tick事件响应函数。
在窗体中调整好两个Button控件的位置,效果见图7.3-9。
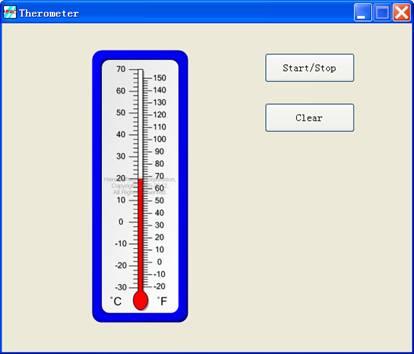
图7.3-9 Therometer窗体5
(9)编写各控件事件响应函数
在Therometer.cs文件头部添加HeroWinGauge命名空间的引用:“using HeroWinGauge;”,并添加各控件事件响应函数。完整的程序代码如下:
using System;
using System.Collections.Generic;
using System.ComponentModel;
using System.Data;
using System.Drawing;
using System.Text;
using System.Windows.Forms;
using HeroWinGauge;
namespace HeroWinGaugeSamples
{
publicpartialclass Therometer :Form
{
privateLinearPointer lp1;
privateLinearScale ls1;
privatedouble angle,d;
privateRandom ran;
public Therometer()
{
InitializeComponent();
ls1 = (HeroWinGauge.LinearScale)gaugeContainer1.GaugeComponents[0].BottomLayerParts[0];
lp1 = (HeroWinGauge.LinearPointer)gaugeContainer1.GaugeComponents[0].MiddleLayerParts[0];
lp1.Value = 20; // temperature: 20 degree
angle = 0; // 0 degree (the center of the differance between max and min value
ran =new Random();
d = (ls1.EndValue - ls1.StartValue) * ran.NextDouble() / 2;
}
privatevoid btnStartStop_Click(object sender,EventArgs e)
{
if (this.timer1.Enabled)
{
this.timer1.Stop();
}
else
{
this.timer1.Start();
}
}
privatevoid btnClear_Click(object sender,EventArgs e)
{
lp1.Value = 20;
angle = 0;
}
privatevoid timer1_Tick(object sender,EventArgs e)
{
// generate a random number between 0 and 100
angle = angle + 1;
if (angle >= 360)
{
angle = 0;
d = (ls1.EndValue - ls1.StartValue)*ran.NextDouble() / 2;
}
lp1.Value = 20 + d *Math.Sin(angle *Math.PI / 180);
}
}
}
注意:在以上代码的Therometer ()函数中,线形指针对象引用lp1和线形刻度对象引用ls1付值的代码都比较长,使用者可能会觉得比较麻烦。如何快速取得线形指针对象和线形刻度对象的引用?这里介绍另外一种快速获得内部对象引用的方法。例如要获得LinearPointer对象的引用,用户只须以上介绍中相应的“GaugePart Collection Editor”对话框左侧“Members”列举项中,选择该LinearPointer对象,然后点击Members”列举项右侧的“S”功能键(见图7.3-7),系统将会弹出“The property symbol has been copied to clipboard.”提示框。表示已将引用对象的编程符号复制到Windows的剪贴板中,然后使用者就可将其粘贴到程序中。
(10)运行程序
到此,一个完整的温度计演示程序已全部完成,可以编译运行。运行此程序时,可按“Start/Stop”按钮启动或停止温度计演示,按“Clear”按钮复位温度计至初始位置。


 被折叠的 条评论
为什么被折叠?
被折叠的 条评论
为什么被折叠?
 到【灌水乐园】发言


