微信小程序实现tabs标签栏自定义组件

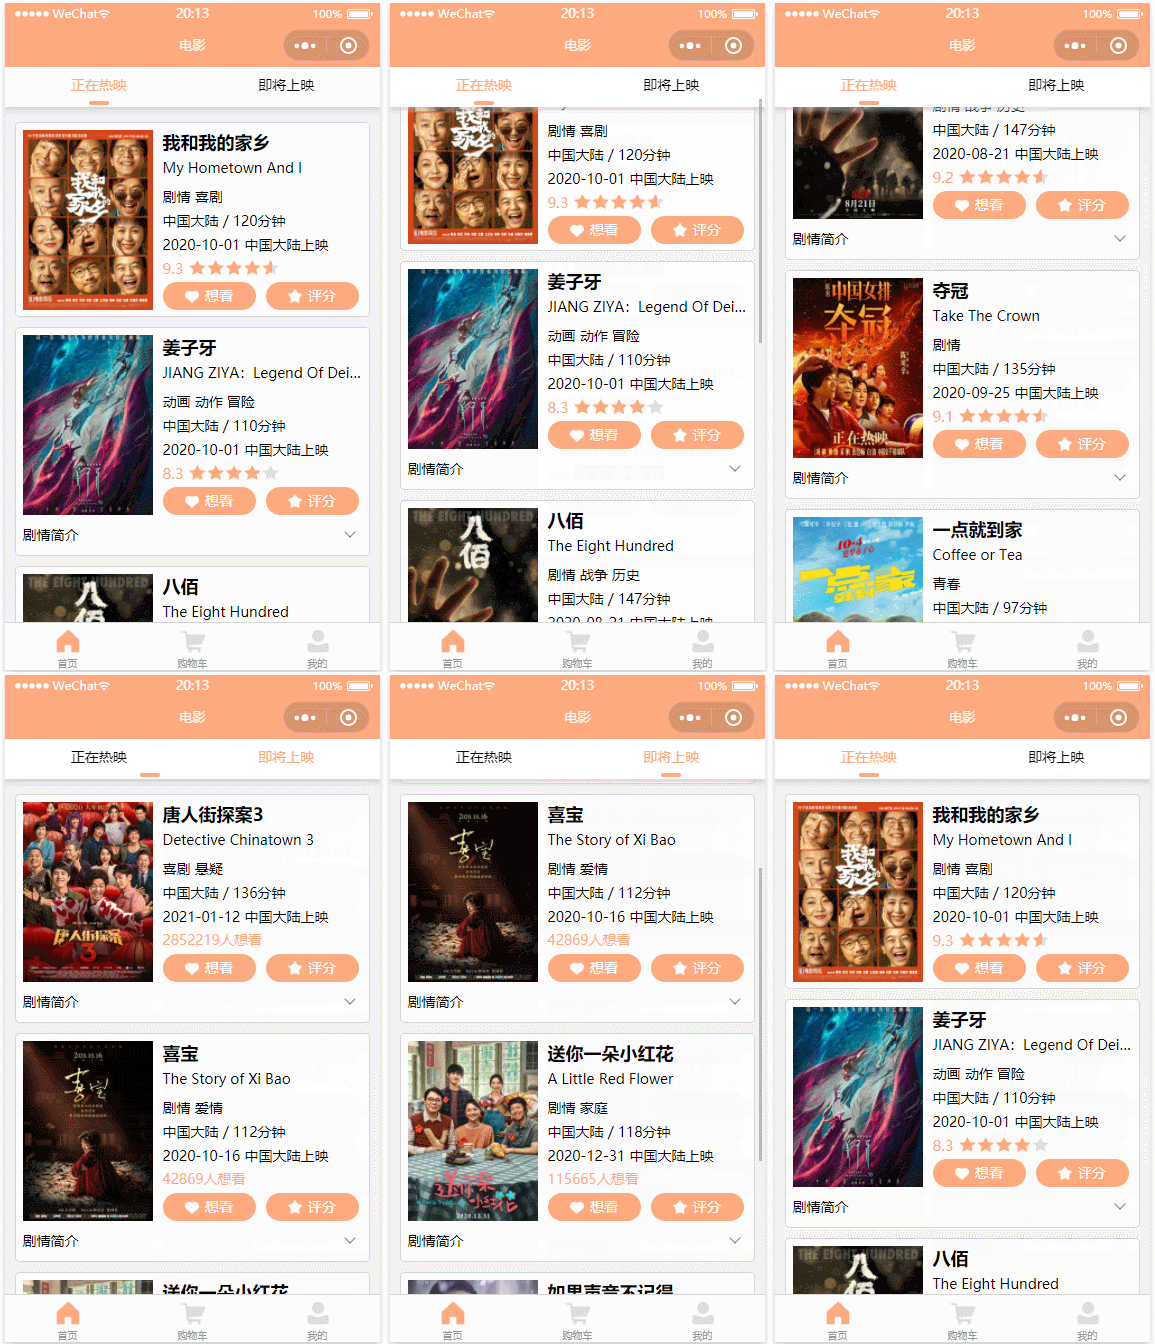
效果

在这里插入图片描述

子组件WXML

<view class="tabs">
  <view class="tab-item" 
  		wx:for="{{tabList}}" 
  		wx:key="index"
  		data-index="{{index}}"
  		data-value="{{item}}"
  		bindtap="changeTab">
    <text class="tab-text {{currentIndex == index ? 'active' : ''}}">{{item.name}}</text>
  </view>
  <view class="line" wx:if="{{show}}" style="left:{{left}}px"></view>
</view>

子组件JS

Component({
  data: {
    currentIndex: 0, // 当前选中项的索引
    left: '', // 选中项的下划线的位置
    show: false
  },
  properties: {
    tabList: {
      type: Array,
      value: []
    }
  },
  observers: {
    'tabList'(val) {
      if (val && val.length) {
        this.changeline()
      }
    }
  },
  methods: {
    changeTab(e) {
      let index = e.currentTarget.dataset.index
      let value = e.currentTarget.dataset.value
      this.setData({
        currentIndex: e.currentTarget.dataset.index
      })
      // 自定义组件触发事件时,需要使用 triggerEvent 方法,指定事件名、detail对象和事件选项
      // this.triggerEvent(事件名, detail对象, 事件选项),
      // detail对象可以是基本数据类型值,也可以是一个对象
      this.triggerEvent("getCurrentValue", value)
      this.changeline()
    },
    // 渲染横线位置的方法
    changeline() {
      let _this = this
      // SelectorQuery.in(Component component): 将选择器的选取范围更改为自定义组件 component 内
      let query = wx.createSelectorQuery().in(this)
      // select() 在当前页面下选择第一个匹配选择器 selector 的节点
      // boundingClientRect() 添加节点的布局位置的查询请求。相对于显示区域,以像素为单位
      query.select(".active").boundingClientRect()
      // SelectorQuery.exec(function callback) 执行所有的请求
      // 请求结果按请求次序构成数组,在callback的第一个参数中返回
      query.exec(function (res) {
        _this.setData({
          left: res && res[0].left + res[0].width / 2 - 10,
          show: true
        })
      })
    }
  }
})

子组件JSON

{
  "component": true,
  "usingComponents": {}
}

子组件WXSS

.tabs {
  display: flex;
  flex-direction: row;
  width: 100%;
  height: 80rpx;
  justify-content: space-around;
  position: relative;
  background-color: #fff;
  overflow-x: auto;
  white-space: nowrap;
}

.tab-text {
  font-size: 28rpx;
  line-height: 70rpx;
  font-weight: 400;
  text-align: center;
}

.line {
  background: #ffaa7f;
  border-radius: 4rpx;
  height: 8rpx;
  width: 40rpx;
  position: absolute;
  bottom: 4rpx;
  transition: all 0.3s linear;
}

.active {
  color: #ffaa7f;
  border-color: #ffaa7f;
}

父组件WXML

<view class="container">
  <view class="switch-tab">
    <tabs tabList="{{tabList}}" bind:getCurrentValue="handleSwitch"></tabs>
  </view>
</view>

父组件JS

//获取应用实例
const app = getApp()

Page({
  data: {
    // 传入 tabs 组件的数据
    tabList: [
      { name: '正在热映', type: 1 },
      { name: '即将上映', type: 0 }
    ]
  },
  /**
  * 生命周期函数--监听页面加载
  */
  onLoad: function (options) {
    
  },
  /**
   * 生命周期函数--监听页面显示
  */
  onShow: function () {

  },
  // 选择电影上映类型
  handleSwitch(e) {
    console.log(e) // { name: '即将上映', type: 0}
  },
})

父组件JSON

{
  "navigationBarTitleText": "电影",
  "usingComponents": {
    "tabs": "../../components/tabs/index"
  }
}

父组件WXSS

page {
  background: #f2f2f2;
}
.container {
  width: 100%;
}
.switch-tab {
  width: 100%;
  background: #fff;
  box-shadow: 0rpx 9rpx 9rpx 0rpx rgba(194, 190, 190, 0.5);
  position: fixed;
  top: 0;
  left: 0;
  z-index: 1000;
}
  • 5
    点赞
  • 10
    收藏
    觉得还不错? 一键收藏
  • 打赏
    打赏
  • 4
    评论
要在微信小程序实现选项卡(tabs)效果,可以使用小程序的 `scroll-view` 组件和 `swiper` 组件。 使用 `scroll-view` 组件可以实现横向滚动的效果,而 `swiper` 组件可以实现左右滑动的效果。可以将 `swiper` 组件放在 `scroll-view` 组件中,这样就可以实现选项卡的效果了。 具体实现步骤如下: 1. 在 `wxml` 文件中定义一个 `scroll-view` 组件,并设置 `scroll-x` 属性为 true,表示横向滚动。 ``` <scroll-view class="tab-bar" scroll-x="{{true}}"> <!-- 这里放置选项卡的内容 --> </scroll-view> ``` 2. 在 `scroll-view` 组件中放置 `swiper` 组件,设置 `current` 属性为当前选中的选项卡索引,可以通过 `bindchange` 事件获取用户点击的选项卡索引。 ``` <scroll-view class="tab-bar" scroll-x="{{true}}"> <swiper current="{{current}}" bindchange="swiperChange"> <swiper-item>选项卡1</swiper-item> <swiper-item>选项卡2</swiper-item> <swiper-item>选项卡3</swiper-item> </swiper> </scroll-view> ``` 3. 在 `js` 文件中定义 `swiperChange` 方法,获取用户点击的选项卡索引,并更新 `current` 变量的值,以便在页面中显示当前选中的选项卡。 ``` Page({ data: { current: 0, // 当前选中的选项卡索引 }, swiperChange: function(e) { // 获取用户点击的选项卡索引 var index = e.detail.current; // 更新当前选中的选项卡索引 this.setData({ current: index, }); }, }); ``` 4. 根据当前选中的选项卡索引,动态显示对应的内容。 ``` <swiper-item> <!-- 这里放置选项卡1的内容 --> </swiper-item> <swiper-item> <!-- 这里放置选项卡2的内容 --> </swiper-item> <swiper-item> <!-- 这里放置选项卡3的内容 --> </swiper-item> ``` 以上就是在微信小程序实现选项卡效果的基本步骤。

“相关推荐”对你有帮助么?

  • 非常没帮助
  • 没帮助
  • 一般
  • 有帮助
  • 非常有帮助
提交
评论 4
添加红包

请填写红包祝福语或标题

红包个数最小为10个

红包金额最低5元

当前余额3.43前往充值 >
需支付:10.00
成就一亿技术人!
领取后你会自动成为博主和红包主的粉丝 规则
hope_wisdom
发出的红包

打赏作者

半度℃温热

你的鼓励将是我创作的最大动力

¥1 ¥2 ¥4 ¥6 ¥10 ¥20
扫码支付:¥1
获取中
扫码支付

您的余额不足,请更换扫码支付或充值

打赏作者

实付
使用余额支付
点击重新获取
扫码支付
钱包余额 0

抵扣说明:

1.余额是钱包充值的虚拟货币,按照1:1的比例进行支付金额的抵扣。
2.余额无法直接购买下载,可以购买VIP、付费专栏及课程。

余额充值