


我的博客:http://blog.csdn.net/dawn_moon
上一节讲了一个loading的动画界面,其实没有loading资源。
怎么样loading资源,如何预加载资源呢。
直接上代码
 // 创建一个一直重复的动画
    loading->runAction(RepeatForever::create(Sequence::create(fadeIn, fadeIn->reverse() ,NULL)));

    // loading resources
    {
        // 帧缓存
        auto spriteFrameCache = SpriteFrameCache::getInstance();
        // 纹理缓存
        auto textureCache = Director::getInstance()->getTextureCache();
        textureCache->addImage(s_backgound);
        textureCache->addImage(s_backgound_cloud1);
        textureCache->addImage(s_backgound_cloud2);
        textureCache->addImage(s_backgound_sea1);
        textureCache->addImage(s_backgound_sea2);
        textureCache->addImage(s_beach_adornment);
        textureCache->addImage(s_island);

        spriteFrameCache->addSpriteFramesWithFile(s_boat_plist);

        // 加载声音资源
        SimpleAudioEngine::getInstance()->preloadBackgroundMusic(s_music_Back2new);
        SimpleAudioEngine::getInstance()->preloadBackgroundMusic(s_music_Back3new);
        SimpleAudioEngine::getInstance()->preloadBackgroundMusic(s_music_class);
        SimpleAudioEngine::getInstance()->preloadBackgroundMusic(s_music_mainmenu);
        SimpleAudioEngine::getInstance()->preloadEffect(s_music_2);
        SimpleAudioEngine::getInstance()->preloadEffect(s_music_3);
        SimpleAudioEngine::getInstance()->preloadEffect(s_music_4);
        SimpleAudioEngine::getInstance()->preloadEffect(s_music_12);
        SimpleAudioEngine::getInstance()->preloadEffect(s_music_14);
        SimpleAudioEngine::getInstance()->preloadEffect(s_music_15);
        SimpleAudioEngine::getInstance()->preloadEffect(s_music_16);
        SimpleAudioEngine::getInstance()->preloadEffect(s_music_19);

    }
这段预加载资源是写在init()函数里面的,接着上一章讲的代码。
可以看出,这里的加载资源是同步加载。就是init以后,一个一个去加载资源,一个加载完了加载另一个。
可以在开始加载的地方打个时间,加载完的地方再打个时间,算一下加载资源需要多少时间。
获取系统时间,单位秒
utils::gettime();这个加载资源比较快,不到一秒就加载完毕了。
加载完毕以后需要进入场景了,就是开始场景。
那这里如何实现这个机制。
scheduleOnce(SEL_SCHEDULE(&StartGame::initUi), 2);加载完以后直接用一个自定义调度器,调了一个函数,initUi,延迟2秒调用。
简单粗暴。
在这个initUi()函数里面,我会把游戏开始前的场景实现完成。大概有一个海洋背景,几片云朵,倒影,岛屿,船等。
void StartGame::initUi(float t)
{
    removeAllChildren();

    auto textureCache = Director::getInstance()->getTextureCache();

    auto spriteFrameCache = SpriteFrameCache::getInstance();

    {// 加载背景
        auto background = Sprite::createWithTexture(textureCache->getTextureForKey(s_backgound));

        background->setPosition(wSize.width / 2, wSize.height / 2);

        addChild(background);
    }

    {   // 白云1
        auto cloud1 = Sprite::createWithTexture(textureCache->getTextureForKey(s_backgound_cloud1));
        // 设置锚点,左下角
        cloud1->setAnchorPoint(Vec2(0, 0));

        cloud1->setPosition(0, wSize.height - cloud1->getContentSize().height);

        addChild(cloud1);

        // 白云倒影
        auto cloudShadow = Sprite::createWithTexture(textureCache->getTextureForKey(s_backgound_cloud1));

        cloudShadow->setAnchorPoint(Vec2(0, 0));

        cloudShadow->setFlippedY(true);

        cloudShadow->setOpacity(40);

        cloudShadow->setPosition(40, wSize.height - cloud1->getContentSize().height * 2);

        addChild(cloudShadow);

        // 白云2
        auto cloud2 = Sprite::createWithTexture(textureCache->getTextureForKey(s_backgound_cloud2));
        // 设置锚点,左下角
        cloud2->setAnchorPoint(Vec2(0, 0));

        cloud2->setPosition(cloud1->getContentSize().width, wSize.height - cloud2->getContentSize().height);

        addChild(cloud2);

        // 岛
        auto land = Sprite::createWithTexture(textureCache->getTextureForKey(s_island));

        land->setAnchorPoint(Vec2(1, 0));

        land->setPosition(wSize.width - 40, wSize.height - land->getContentSize().height - 47 * 2);

        addChild(land);

        // 岛倒影
        auto landShadow = Sprite::createWithTexture(textureCache->getTextureForKey(s_island));

        landShadow->setAnchorPoint(Vec2(1, 0));

        landShadow->setFlippedY(true);

        landShadow->setOpacity(40);

        landShadow->setPosition(wSize.width - 40, wSize.height - land->getContentSize().height - 78 * 2);

        addChild(landShadow);

        // 取第一帧
        auto frame = spriteFrameCache->getSpriteFrameByName("sailing_boat1.png");
        auto boat = Sprite::createWithSpriteFrame(frame);
        boat->setPosition(wSize.width - boat->getContentSize().width-50*2,230*2);

        // 创建一个帧动画
        auto animation = Animation::create();
        for (int i = 1; i < 4; i++) {
            char bname[64] = {0};
            sprintf(bname, "sailing_boat%d.png", i);
            animation->addSpriteFrame(spriteFrameCache->getSpriteFrameByName(bname));
        }
        animation->setDelayPerUnit(0.5);
        animation->setRestoreOriginalFrame(true);
        addChild(boat);
        auto animate = Animate::create(animation);
        boat->runAction(RepeatForever::create(animate));

        // 船来回游荡,并会掉头
        auto flipxAction = FlipX::create(true);
        auto moveBy = MoveBy::create(10, Vec2(-240, 0));
        auto action = Sequence::create(moveBy, flipxAction, moveBy->reverse(), flipxAction->reverse(), NULL);
        boat->runAction(RepeatForever::create(action));

        // 第二条船
        auto boat2 = Sprite::createWithSpriteFrame(frame);
        boat2->setFlippedX(true);
        boat2->setPosition(100, 400);
        addChild(boat2);
        boat2->runAction(animate->clone());
        auto moveBy2 = MoveBy::create(12, Vec2(300, 0));
        auto action2 = Sequence::create(moveBy2, flipxAction->clone()->reverse(), moveBy2->reverse(), flipxAction->clone(), NULL);
        boat2->runAction(RepeatForever::create(action2));
    }

}
3.x版的动作系统和2.x有很大区别,比如MoveTo动作没有reverse()方法了,就是说MoveTo不能直接逆动作了。还有帧动画简化了很多。
大概会是这么个样子:
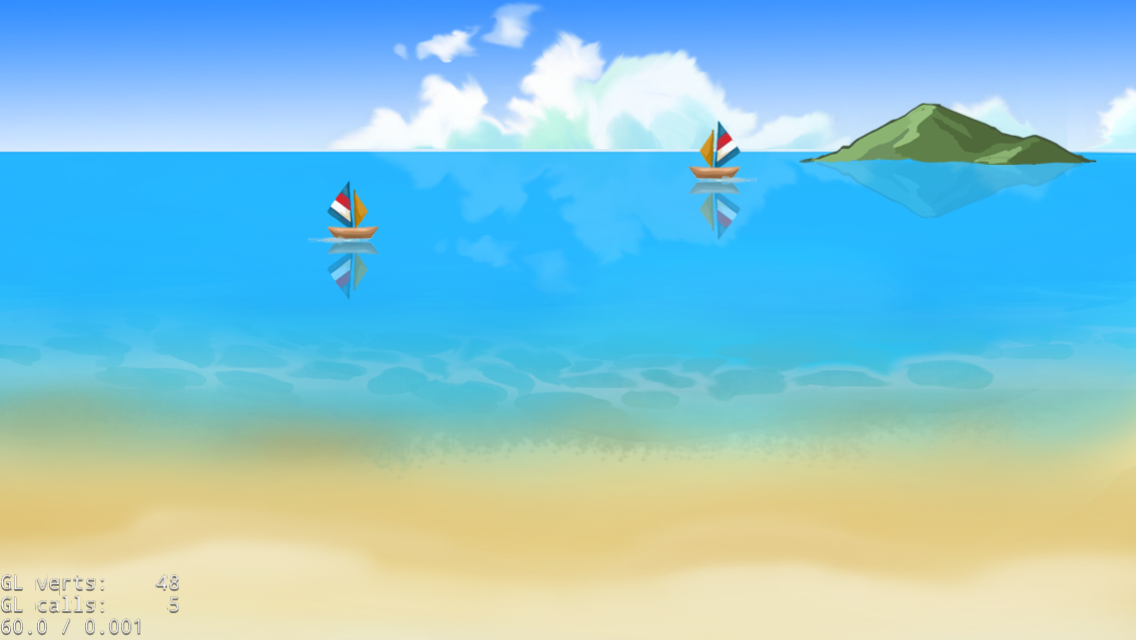
还有一些元素,下一张再来说明。
早上起来又加了一些注释,这样看起来清楚一些。
void StartGame::initUi(float t)
{
    // 干掉所有的子节点,这里主要是要干掉loading的精灵和其动作
    removeAllChildren();

    // 纹理缓存,预加载的资源可以直接从缓存取出来
    auto textureCache = Director::getInstance()->getTextureCache();

    // 帧缓存,直接从缓存取帧
    auto spriteFrameCache = SpriteFrameCache::getInstance();

    {// 加载背景
        auto background = Sprite::createWithTexture(textureCache->getTextureForKey(s_backgound));

        background->setPosition(wSize.width / 2, wSize.height / 2);

        addChild(background);
    }

    {   // 白云1
        auto cloud1 = Sprite::createWithTexture(textureCache->getTextureForKey(s_backgound_cloud1));
        // 设置锚点,左下角
        cloud1->setAnchorPoint(Vec2(0, 0));

        cloud1->setPosition(0, wSize.height - cloud1->getContentSize().height);

        addChild(cloud1);

        // 白云倒影
        auto cloudShadow = Sprite::createWithTexture(textureCache->getTextureForKey(s_backgound_cloud1));

        cloudShadow->setAnchorPoint(Vec2(0, 0));

        // 垂直翻转
        cloudShadow->setFlippedY(true);

        // 设置透明度
        cloudShadow->setOpacity(40);

        cloudShadow->setPosition(40, wSize.height - cloud1->getContentSize().height * 2);

        addChild(cloudShadow);

        // 白云2
        auto cloud2 = Sprite::createWithTexture(textureCache->getTextureForKey(s_backgound_cloud2));
        // 设置锚点,左下角
        cloud2->setAnchorPoint(Vec2(0, 0));

        cloud2->setPosition(cloud1->getContentSize().width, wSize.height - cloud2->getContentSize().height);

        addChild(cloud2);

        // 岛
        auto land = Sprite::createWithTexture(textureCache->getTextureForKey(s_island));

        // 设置锚点,右下角
        land->setAnchorPoint(Vec2(1, 0));

        land->setPosition(wSize.width - 40, wSize.height - land->getContentSize().height - 47 * 2);

        addChild(land);

        // 岛倒影
        auto landShadow = Sprite::createWithTexture(textureCache->getTextureForKey(s_island));

        landShadow->setAnchorPoint(Vec2(1, 0));

        landShadow->setFlippedY(true);

        landShadow->setOpacity(40);

        landShadow->setPosition(wSize.width - 40, wSize.height - land->getContentSize().height - 78 * 2);

        addChild(landShadow);

        // 取第一帧
        auto frame = spriteFrameCache->getSpriteFrameByName("sailing_boat1.png");

        // 用帧创建一个船精灵
        auto boat = Sprite::createWithSpriteFrame(frame);
        boat->setPosition(wSize.width - boat->getContentSize().width-50*2,230*2);

        // 创建一个帧动画
        auto animation = Animation::create();

        // 循环取船的序列帧
        for (int i = 1; i < 4; i++) {

            char bname[64] = {0};

            sprintf(bname, "sailing_boat%d.png", i);

            animation->addSpriteFrame(spriteFrameCache->getSpriteFrameByName(bname));
        }

        // 设置每一个动画帧的间隔
        animation->setDelayPerUnit(0.5);

        // 动画完毕后保持第一帧
        animation->setRestoreOriginalFrame(true);

        addChild(boat);

        // 创建一个动作
        auto animate = Animate::create(animation);

        boat->runAction(RepeatForever::create(animate));

        // 向左移动
        auto moveBy = MoveBy::create(10, Vec2(-240, 0));

        // 水平翻转,船掉头
        auto flipxAction = FlipX::create(true);

        // 组合动画,船来回游荡,并会掉头
        auto action = Sequence::create(moveBy, flipxAction, moveBy->reverse(), flipxAction->reverse(), NULL);

        boat->runAction(RepeatForever::create(action));

        // 第二条船,动画同上,不过是在左边
        auto boat2 = Sprite::createWithSpriteFrame(frame);

        boat2->setFlippedX(true);

        boat2->setPosition(100, 400);

        addChild(boat2);

        // 这里不能直接用animate,因为boat1已经使用,这里必须要用另一个动作,所以clone一下
        boat2->runAction(animate->clone());

        auto moveBy2 = MoveBy::create(12, Vec2(300, 0));

        // 这里的flipx跟boat1相反,所以这里先reverse一下,后面不reverse
        auto action2 = Sequence::create(moveBy2, flipxAction->clone()->reverse(), moveBy2->reverse(), flipxAction->clone(), NULL);

        boat2->runAction(RepeatForever::create(action2));
    }

}
这段代码其实很清晰了。不过这里有很多知识点,比如纹理缓存,组合动作,帧动画,锚点等,后面一一讲解,这里先看代码吧。


 7845
7845

 被折叠的 条评论
为什么被折叠?
被折叠的 条评论
为什么被折叠?
 到【灌水乐园】发言


