


之前安装过一次,奈何没记录。导致现在系统崩溃,重新安装。这次要记录下过程。
一,安装虚拟机:
我是在win10系统上,安装VMware12,Ubuntu 16.04.3 LTS

虚拟机和Ubuntu系统安装过程略。
1,Ubuntu系统安装好之后,配置好静态IP
auto ens33
iface ens33 inet static
address 192.168.0.220
netmask 255.255.255.0
gateway 192.168.0.1
dns-nameservers 192.168.0.1
2,重启虚拟机,遇到了第一个问题,虚拟机可以联网,可以ping通主机,但是主机ping不同虚拟机。
解决办法:
a,设置虚拟网络编辑器

但是,点击”确定“之后,再次打开虚拟网络编辑器,依旧看不到刚刚编辑的内容,不晓得有没有成功。
b,关闭windows防火墙,重启主机。问题解决。
备注:我用的笔记本,无线网卡,所以需要这么折腾。如果是有线的环境,选择桥接模式之后,就不会出现这个问题。
3,安装ssh,以保证ssh可以连接;重装vim,保证小键盘的上下左右键可以正常使用。命令如下:
sudo apt-get install openssh-server

sudo apt-get remove vim-common

sudo apt-get install vim
4,至此虚拟机基本环境搭建完毕。
5,设置虚拟机的本地时间(12.09更新)
date -R可以查询出当前的时区。
sudo tzselect用来选择当前的时区,一步一步选择:Asia、China、BeiJingTime(对应每一步的数字为4、9、1)
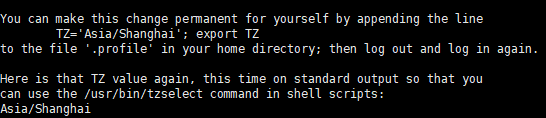
按照提示,将~/.profile中新增了两行

之后运行
sudo cp /usr/share/zoneinfo/Asia/Shanghai /etc/localtime验证时间结果:date

搞定~
待优化:vim的显示风格
二,安装GitLab
网上的安装方式五花八门,但是我觉得最靠谱的还是官网给的方式
我就直接粘贴过来了:
1. Install and configure the necessary dependencies
sudo apt-get update
sudo apt-get install -y curl openssh-server ca-certificates
Next, install Postfix to send notification emails. If you want to use another solution to send emails please skip this step and configure an external SMTP server after GitLab has been installed.
sudo apt-get install -y postfix
During Postfix installation a configuration screen may appear. Select 'Internet Site' and press enter. Use your server's external DNS for 'mail name' and press enter. If additional screens appear, continue to press enter to accept the defaults.
(备注:这里我输入的是“myGitlab”,应该是发邮件相关的,我没有配置邮件服务器。毕竟目前只有我一个人在用。)
2. Add the GitLab package repository and install the package
Add the GitLab package repository.
curl https://packages.gitlab.com/install/repositories/gitlab/gitlab-ee/script.deb.sh | sudo bash
Next, install the GitLab package. Change `http://gitlab.example.com` to the URL at which you want to access your GitLab instance. Installation will automatically configure and start GitLab at that URL. HTTPS requires additional configuration after installation.
sudo EXTERNAL_URL="http://gitlab.example.com" apt-get install gitlab-ee
3. Browse to the hostname and login
On your first visit, you'll be redirected to a password reset screen. Provide the password for the initial administrator account and you will be redirected back to the login screen. Use the default account's username root to login.
See our documentation for detailed instructions on installing and configuration.
好了,至此,Gitlab也安装好了,直接在虚拟机上localhost访问,或者在主机上访问:gitlab.example.com,当然需要配置hosts。
备注:第一次访问页面,会出现一个设置新密码的界面,默认的用户名是:root。设置好密码之后,进入到登陆的页面,登陆进去之后,就好了。

明天再继续搞artifactory


 4508
4508


 被折叠的 条评论
为什么被折叠?
被折叠的 条评论
为什么被折叠?
 到【灌水乐园】发言


