


之前记录过跨应用绑定service:http://blog.csdn.net/gaopeng0071/article/details/46049929,那么绑定后如何进行通信呢,下面我们就来学习下。
第一步,
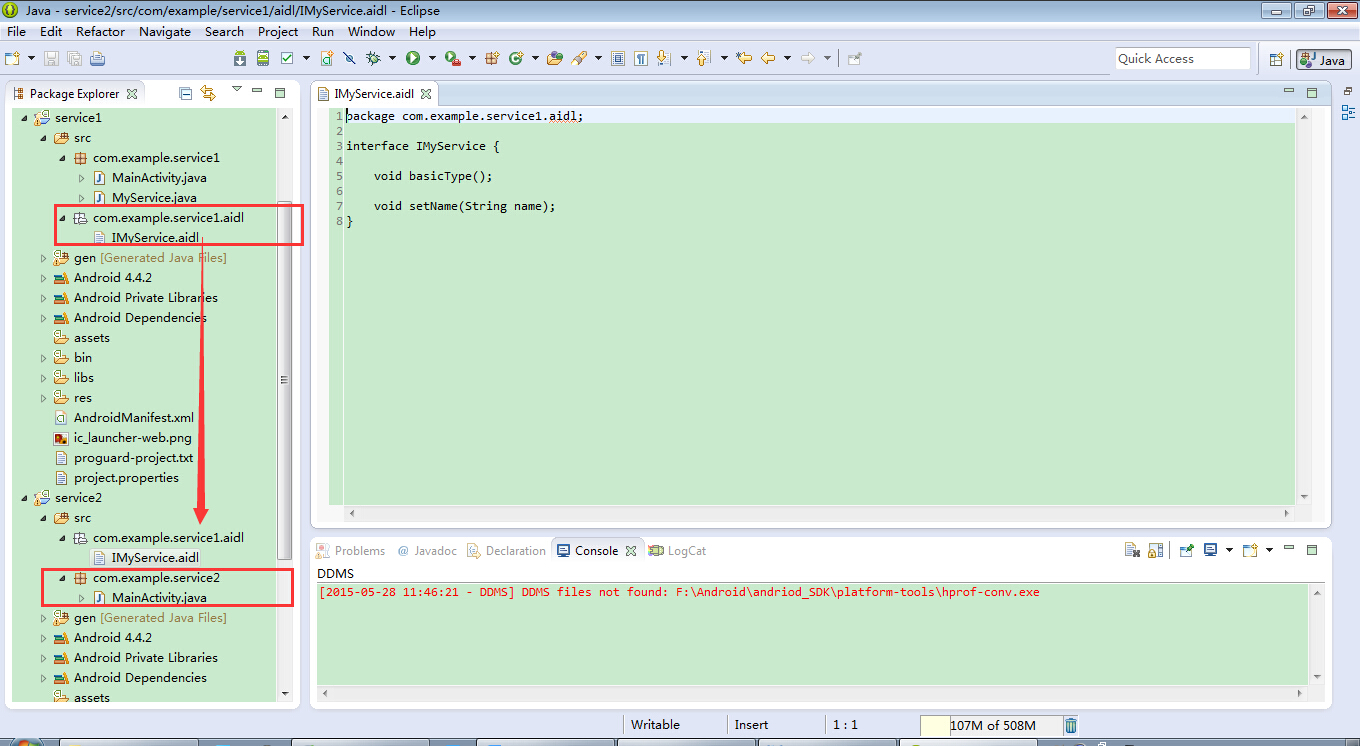
需要修改service1项目中aidl,增加一个方法。
package com.example.service1.aidl;

interface IMyService {

    void basicType();

    void setName(String name);
}
setName用于存储name的方法。
然后clear项目
第二步,
此时,我们service类中的onBind方法需要实现新接口。
package com.example.service1;
import android.app.Service;
import android.content.Intent;
import android.os.IBinder;
import android.os.RemoteException;
import com.example.service1.aidl.IMyService;
public class MyService extends Service {
private String serviceName = "默认名字";
private boolean running;
@Override
public IBinder onBind(Intent intent) {
// TODO Auto-generated method stub
return new IMyService.Stub() {
@Override
public void basicType() throws RemoteException {
// TODO Auto-generated method stub
}
@Override
public void setName(String name) throws RemoteException {
serviceName = name;
}
};
}
@Override
public void onCreate() {
running = true;
new Thread() {
public void run() {
while (running) {
try {
Thread.sleep(1000);
} catch (InterruptedException e) {
// TODO Auto-generated catch block
e.printStackTrace();
}
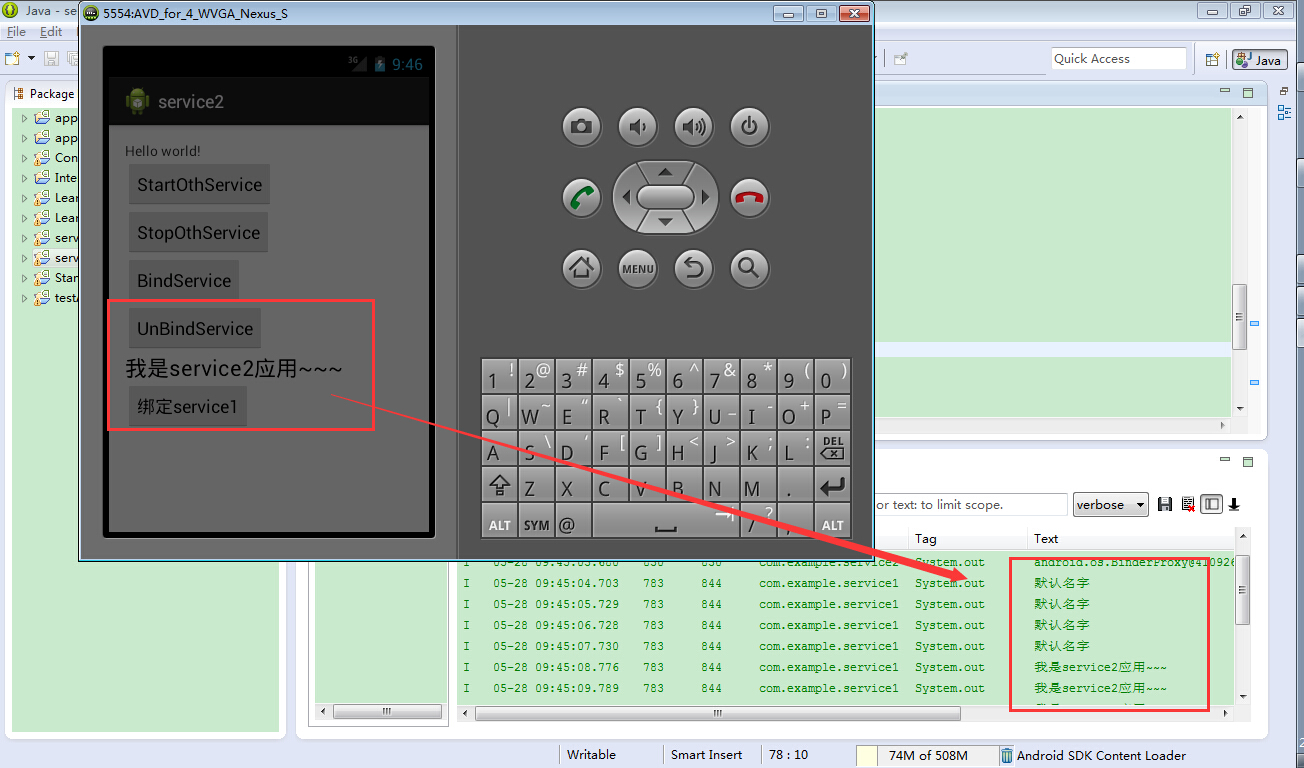
System.out.println(serviceName);
}
};
}.start();
super.onCreate();
}
@Override
public void onDestroy() {
super.onDestroy();
running = false;
}
}
代码27到29行,接收到name并且放入全局变量中,提供给onCreate方法输出。
第三步,
将service1项目中aidl拷贝到service2项目中,并且包名要一致,
第四步,
修改service2应用activity布局,增加一个text域,和一个按钮。用于将text中的信息提交到service1项目的service中。

第五步,
修改service2项目中activity,增加与service1的通信,
package com.example.service2;

import com.example.service1.aidl.IMyService;

import android.app.Activity;
import android.content.ComponentName;
import android.content.Context;
import android.content.Intent;
import android.content.ServiceConnection;
import android.os.Bundle;
import android.os.IBinder;
import android.os.RemoteException;
import android.view.Menu;
import android.view.View;
import android.view.View.OnClickListener;
import android.widget.TextView;

public class MainActivity extends Activity implements OnClickListener,
        ServiceConnection {

    Intent serviceIntent;

    private IMyService imyService = null;

    TextView t;

    @Override
    protected void onCreate(Bundle savedInstanceState) {
        super.onCreate(savedInstanceState);
        setContentView(R.layout.activity_main);

        serviceIntent = new Intent();
        serviceIntent.setComponent(new ComponentName("com.example.service1",
                "com.example.service1.MyService"));

        findViewById(R.id.button1).setOnClickListener(this);
        findViewById(R.id.button2).setOnClickListener(this);
        findViewById(R.id.button3).setOnClickListener(this);
        findViewById(R.id.button4).setOnClickListener(this);

        findViewById(R.id.button5).setOnClickListener(this);

        t = (TextView) findViewById(R.id.textView1);
    }

    @Override
    public boolean onCreateOptionsMenu(Menu menu) {
        // Inflate the menu; this adds items to the action bar if it is present.
        getMenuInflater().inflate(R.menu.main, menu);
        return true;
    }

    @Override
    public void onClick(View v) {
        switch (v.getId()) {
        case R.id.button1:
            startService(serviceIntent);
            break;
        case R.id.button2:
            stopService(serviceIntent);
            break;
        case R.id.button3:
            bindService(serviceIntent, this, Context.BIND_AUTO_CREATE);
            break;
        case R.id.button4:
            unbindService(this);
            imyService = null;
            break;
        case R.id.button5:
            if (imyService != null) {
                try {
                    imyService.setName(t.getText().toString());
                } catch (RemoteException e) {
                    // TODO Auto-generated catch block
                    e.printStackTrace();
                }
            }
        }

    }

    @Override
    public void onServiceConnected(ComponentName name, IBinder service) {
        imyService = IMyService.Stub.asInterface(service);
        System.out.println("onServiceConnected");
        System.out.println(service);

    }

    @Override
    public void onServiceDisconnected(ComponentName name) {
        // TODO Auto-generated method stub

    }

}
代码72行,传输数据
代码84行用法imyService = IMyService.Stub.asInterface(service);
运行结果,如图,


 1904
1904


 被折叠的 条评论
为什么被折叠?
被折叠的 条评论
为什么被折叠?
 到【灌水乐园】发言


