


一:ubuntu1604安装!
a.选择开机引导盘.Device for boot loader installation: stdb. stdb:500g固态盘 stda:3.6t机械盘
b.将需要安装的盘stdb进行格式化删除,成为free space.
Mount point Size Type for the new partition Location for the new partition
分五个区:
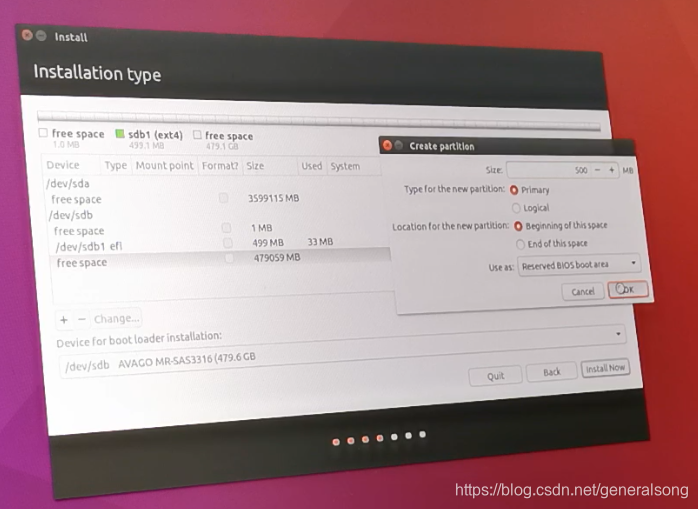
1. EFI System Partition 500m Primary Beginning of this space
2. Reserved BIOS boot area 500m Primary Beginning of this space
一般只分以下三个即可了
3. swap area 16384m Primary End of this space (一般内存两倍)
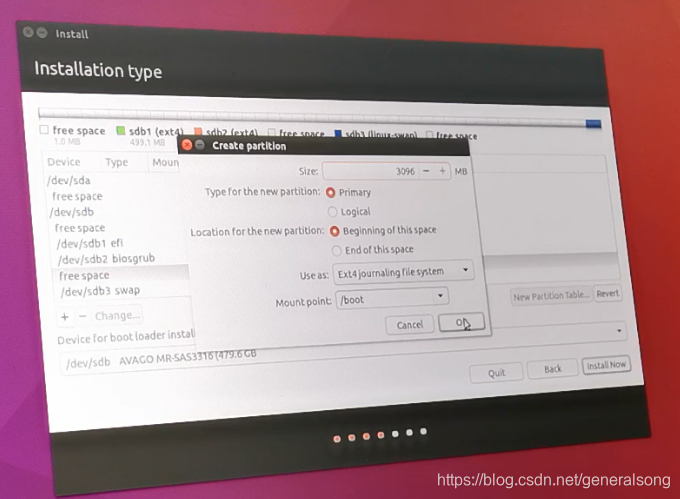
4. /boot 3096M Primary Beginning of this space (一般只要300M就够了)
5. / 459079M Primary Beginning of this space (剩下的全分到这个就行了)
1.选择语言.英语

2.安装第三方包.本人多次遇坑经验:最好选上,不然后面安装依赖包可能会有影响,或者装不上.

3.如果自己对硬盘分区,需要选择: Somethin else

4. a.选择开机引导盘.Device for boot loader installation: stdb. stdb:500g固态盘 stda:3.6t机械盘
- 选择window所在的盘符,则是从ubuntu引导windows,没有额外操作了,故选择这种配置引导方式了
- #选择/boot 所在的逻辑盘,则是从windows引导ubuntu,还需在windows中下载软件EasyBCD将ubuntu的引导区加进去
b.将需要安装的盘stdb进行格式化删除,成为free space.

#############后来实践中发现,一般不需要以下efi和bios这两步的分区,后来就不用了 begin!#########
5.开始创建分区:EFI System Partition 500m Primary Beginning of this space

6. Reserved BIOS boot area 500m Primary Beginning of this space
#############后来实践中发现,一般不需要以下efi和bios这两步的分区,后来就不用了 end!#########
7.swap area 16384m Primary End of this space (一般内存两倍,这是分的16G)
- 一般内存1-8G, swap 为内存两倍 2-16G
- 内存16-32G, swap 8G
- 内存大于32,不用设置swap了

8. /boot 3096M Primary Beginning of this space(一般只要300M就够了,此服务器硬盘大就直接3g)
9./ 459079M Primary Beginning of this space (剩下的全分到这个就行了)

10,分区完毕,点击 install now

11,继续,下一步


12.等待安装完毕即可.
13.ubuntu1604系统安装完毕!

二 新装ubuntu1604 系统,需安装软件以及相关设置!
一:磁盘挂载,将机械盘挂载到/home下
1.可视化格式化磁盘工具 gparted
sudo apt-get install gparted


点击绿色对号,进行保存


需要先到文件管理器中进行点击一下,相当于挂载一下磁盘.

2. 将用户 /home/secuone 备份到 /media/secuone/f285-947b 下了.系统会在/media生成一个同名用户文件夹/home/secuone,然后将/home/secuone 备份到这个目录下.然后生成这样/media/secuone/f285-947b/secuone
然后将机械盘/media/secuone/f285-947b 挂载到/home, 然后就有secuone用户了!
sudo cp -avf /home/secuone /media/secuone/f285b64-a3c947b/


sudo cp /etc/fstab /etc/fstab.bak
sudo blkid

sudo vim /etc/fstab
UUID=f285-947b /home ext4 defaults 0 0

sudo mount -a
========
sudo apt-get install vim htop git openssh-server git
cp ~/.vimrc
cp ~/.bashrc
================
设置root用户
sudo -i 切换root用户
passwd root
===============
sudo cp /etc/sshd_config sshd_config.bak
sudo vim /etc/sshd_config
末尾添加:
MaxAuthTries 20
禁用密码登录:
PasswordAuthentication no
port 7622
===============
ssh-keygen -t rsa -C "youremail@example.com"
生成id_rsa id_rsa.pub
.ssh 下vim ~/.ssh/config (600)
host general
hostname 192.168.3.3
port 22
user songsl
identityfile /home/xx/.ssh/id_rsa
host目标机设置:
vim ~/.ssh/authorized_keys (600)
将id_rsa.pub内容添加进去即可.
sudo service sshd restart
/etc/init.d/ssh restart
.ssh文件夹700
===========
Grub Customizer工具的使用
sudo add-apt-repository ppa:danielrichter2007/grub-customizer
sudo apt-get update
sudo apt-get install grub-customizer

sudo grub-customizer
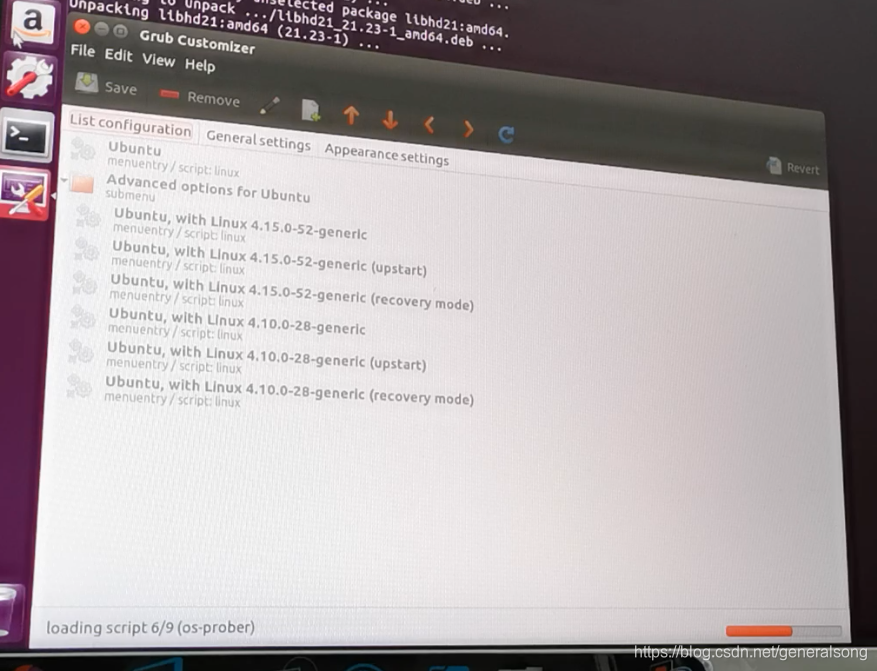

点击 Ubuntu menuentry/script:linux 编辑

在装gpu显卡的时候,在这里加上一个nomodeset
即禁止系统自带的nvidia的显卡驱动


 385
385


 被折叠的 条评论
为什么被折叠?
被折叠的 条评论
为什么被折叠?
 到【灌水乐园】发言


