


一、手写生产者与消费者
1.2.0与1.0比较
- Lock 替代 synchronized
- lock.await() 替代 object.wait()
- lock.signalAll() 替代 object.notifyAll()
2.2.0版代码
/**
 * 题目:一个初始值为0的变量,两个线程对其交替操作,一个加1,一个减1,来5轮
 *
 * 口诀:
 *  1.线程操作资源类     --> 编写方法
 *  2.判断 干活 通知     --> await() 和 signalAll()
 *  3.防止虚假唤醒机制   --> 使用 while 判断,而不是 if
 */
public class ProdConsumer_TraditionDemo {
    public static void main(String[] args) {
        ShareData shareData = new ShareData();

        new Thread(() -> {
            for (int i = 1; i <= 5; i++) {
                try {
                    shareData.increment();
                } catch (Exception e) {
                    e.printStackTrace();
                }
            }
        }, "AAA").start();

        new Thread(() -> {
            for (int i = 1; i <= 5; i++) {
                try {
                    shareData.decrement();
                } catch (Exception e) {
                    e.printStackTrace();
                }
            }
        }, "BBB").start();
    }
}

// 资源类
class ShareData {
    private int number = 0;
    private Lock lock = new ReentrantLock();
    private Condition condition = lock.newCondition();

    public void increment() throws InterruptedException {
        lock.lock();
        try {
            //1 判断
            while (number == 1) {
                //等待,不能生产
                condition.await();
            }
            //2 干活
            number++;
            System.out.println(Thread.currentThread().getName() + "\t" + number);
            //3 通知唤醒
            condition.signalAll();
        } catch (Exception e) {
            e.printStackTrace();
        } finally {
            lock.unlock();
        }
    }

    public void decrement() throws InterruptedException {
        lock.lock();
        try {
            //1 判断
            while (number == 0) {
                //等待,不能生产
                condition.await();
            }
            //2 干活
            number--;
            System.out.println(Thread.currentThread().getName() + "\t" + number);
            //3 通知唤醒
            condition.signalAll();
        } catch (Exception e) {
            e.printStackTrace();
        } finally {
            lock.unlock();
        }
    }
}
(3).synchronized与Lock的差别
1)实现方式:
- synchronized是关键字属天JVM层面,synchronized的语义底层是通过一个monitor的对象来完成,其实wait()、notify()等方法也依赖于monitor对象,这就是为什么只有在同步的块或者方法中才能调用wait()、notify()等方法,否则会抛出java.lang.IllegalMonitorStateException的异常的原因
- Lock是具体类(java.util.concurrent.Locks.Lock)是api层面的锁
2)使用方法
- synchronized 不需要用户去手动释放锁,当synchronized代码执行完后系统会自动让线程释放对锁的占用
- ReentrantLock则需要用户去手动释放锁着没有主动放锁,就有可能导致出现死锁现象。需要lock()和unlock()方法配合try{ }finally{ }语句块来完成。
3)等待是否可中断
synchronized不可中断,除非抛出异常或者正常运行完成
ReentrantLock 可中断
- 设置超时方法 trylock(long timeout,TimeUnit unit)
- LockInterruptibly()放代码块中,调用interrupt()方法可中断
4)加锁是否公平
- synchronized非公平锁
- ReentrantLock两者都可以,默认公平锁,构造方法可以传入boolean值,true为公平锁,false为非公平锁
5)精准唤醒
ReentrantLock用来实现分组唤醒需要唤醒的线程们,可以精确唤醒,而不是像synchronized要么随机唤醒一个线程要么唤醒全部线程
2、阻塞队列版
(1)为什么用阻塞队列
- 不需要手动进行wait()、notify()
- flag为true就生产和消费,为false就停止生产和消费
(2)代码
/**
 * volatile/CAS/atomicInteger/BlockQueue/线程交互/原子引用
 */
public class ProdConsumer_BlockQueueDemo {
    public static void main(String[] args) throws Exception {
        MyResource myResource = new MyResource(new ArrayBlockingQueue<>(10));

        new Thread(() -> {
            System.out.println(Thread.currentThread().getName() + "\t 生产线程启动");
            try {
                myResource.myProd();
            } catch (Exception e) {
                e.printStackTrace();
            }
        }, "Prod").start();

        new Thread(() -> {
            System.out.println(Thread.currentThread().getName() + "\t 消费线程启动");
            try {
                myResource.myConsumer();
            } catch (Exception e) {
                e.printStackTrace();
            }
        }, "Consumer").start();

        try {
            TimeUnit.SECONDS.sleep(5);
        }catch (InterruptedException e){

        }

        System.out.println("5秒钟到,main停止");
        myResource.stop();
    }
}

class MyResource {
    private volatile boolean FLAG = true; // 默认开启,进行生产 + 消费
    private AtomicInteger atomicInteger = new AtomicInteger();

    BlockingQueue<String> blockingQueue = null; // 通配、适用:传接口,不能传具体实现类

    public MyResource(BlockingQueue<String> blockingQueue) {
        this.blockingQueue = blockingQueue;
        System.out.println(blockingQueue.getClass().getName()); // 查看接口具体的落地实现类名称
    }

    public void myProd() throws Exception {
        String data = null;
        boolean retValue;
        while (FLAG) {
            data = atomicInteger.incrementAndGet() + ""; // 原子整形对象加 1
            retValue = blockingQueue.offer(data, 2L, TimeUnit.SECONDS); // 将数据放入阻塞队列
            if (retValue) {
                System.out.println(Thread.currentThread().getName() + "\t插入队列" + data + "成功");
            } else {
                System.out.println(Thread.currentThread().getName() + "\t插入队列" + data + "失败");
            }
            TimeUnit.SECONDS.sleep(1);
        }
        System.out.println(Thread.currentThread().getName() + "\t生产停止");
    }

    public void myConsumer() throws Exception {
        String result = null;
        while (FLAG) {
            result = blockingQueue.poll(2L, TimeUnit.SECONDS); // 从阻塞队列中取出数据
            if (null == result || result.equalsIgnoreCase("")) {
                FLAG = false;
                System.out.println(Thread.currentThread().getName() + "\t 超过2秒,消费退出");
                return;
            }
            System.out.println(Thread.currentThread().getName() + "\t消费队列" + result + "成功");
        }
        System.out.println(Thread.currentThread().getName() + "\t消费停止");
    }

    public void stop() throws Exception {
        this.FLAG = false; // 停止生产与消费
    }
}
二、手写自旋
/**
 * 写一个自旋锁
 * 自旋锁的好处:循环比较获取直到成功为止,没有类似wait的阻塞。
 *  * 通过CAS操作完成自旋锁:
 *  A线程先进来调用myLock方法自已持有锁5秒钟
 *  B随后进来后发现当前有线程持有锁,不是null,
 *  所以只能通过自旋等待,直至A释放锁后B随后抢到
 */
public class SpinLockDemo {
    // 泛型为 Thread
    AtomicReference<Thread> atomicReference = new AtomicReference<>();

    public void myLock() {
        // 获取当前线程
        Thread thread = Thread.currentThread();
        System.out.println(Thread.currentThread().getName() + "\t come in ");
        /*
         自旋:
            期望值为 null 表示当前没有线程
            新值为 thread ,即 Thread.currentThread()
          */
        while (!atomicReference.compareAndSet(null, thread)) {

        }
    }

    public void myUnLock() {
        // 获取当前线程
        Thread thread = Thread.currentThread();
        // 解锁当前线程
        atomicReference.compareAndSet(thread, null);
        System.out.println(Thread.currentThread().getName() + "\t invoked myUnLock()");
    }

    public static void main(String[] args) {
        // 原子引用线程
        SpinLockDemo spinLockDemo = new SpinLockDemo();

        new Thread(() -> {
            spinLockDemo.myLock(); // 加锁
            try {
                TimeUnit.SECONDS.sleep(5);
            } catch (InterruptedException e) {
                e.printStackTrace();
            }
            spinLockDemo.myUnLock(); // 解锁
        }, "AA").start();

        try {
            TimeUnit.SECONDS.sleep(1);
        } catch (InterruptedException e) {
            e.printStackTrace();
        }

        new Thread(() -> {
            spinLockDemo.myLock(); // 加锁
            try {
                TimeUnit.SECONDS.sleep(1);
            } catch (InterruptedException e) {
                e.printStackTrace();
            }
            spinLockDemo.myUnLock(); // 解锁
        }, "BB").start();
    }
}
结果:
AA	 come in
BB	 come in
AA	 invoked myUnLock()
BB	 invoked myUnLock()
流程:
- 程序运行结果:核心为 CAS 算法
线程 A 先执行,此时期望值为 null ,线程 A 将获得锁,并将期望值设置为线程 A 自身
线程B 尝试获取锁,发现期望值并不是 null ,就在那儿原地自旋
线程 A 释放锁之后,将期望值设置为 null ,此时线程 B
获得锁,将期望值设置为线程 B 自身 最后线程 B 释放锁
三、手写线程池
- JDK 自带线程池的缺陷:底层使用了 LinkedBlockingQueue
阻塞队列,该阻塞队列默认是无界的,允许的请求队列长度为Integer.MAX_VALUE
/**
 * 第四种使用Java多线程的方式:线程池
 */
public class MyThreadPoolDemo {
    public static void main(String[] args) {
        System.out.println("Custom Thread Pool\n");
        customThreadPool();

    }

    private static void customThreadPool() {
        ExecutorService threadPool =
                new ThreadPoolExecutor(2,
                        5,
                        1L,
                        TimeUnit.SECONDS,
                        new LinkedBlockingQueue<>(3),
                        Executors.defaultThreadFactory(),
                        new ThreadPoolExecutor.AbortPolicy()
                );
        try {
            for (int i = 1; i <= 8; i++) {
                final int temp = i;
                threadPool.execute(() -> {
                    System.out.println(Thread.currentThread().getName() + "\t办理业务" + temp);
                });
            }

        } catch (Exception e) {
            e.printStackTrace();
        } finally {
            threadPool.shutdown();
        }
    }
}
四、类比较器
 @Test
    public void t3(){
        Goods[] all = new Goods[4];
        all[0] = new Goods("War and Peace", 100);
        all[1] = new Goods("Childhood", 80);
        all[2] = new Goods("Scarlet and Black", 140);
        all[3] = new Goods("Notre Dame de Paris", 120);
        Arrays.sort(all, new Comparator() {
            @Override
            public int compare(Object o1, Object o2) {
                Goods g1 = (Goods) o1;
                Goods g2 = (Goods) o2;
                return g1.getName().compareTo(g2.getName());
            }
        });
        System.out.println(Arrays.toString(all));
    }
五、用数组实现栈
要求:
- 使用泛型
- 自动扩容
1.创建Stack类
public class ArrayStack<T> {
    /**
     * 数据
     */
    private Object[] datas;
    /**
     * 容量
     */
    private int  capacity;
    /**
     * 当前数据大小
     */
    private int size;
    /**
     * 扩增系数
     */
    private int alpha = 2;
    /**
     * 当前指针位置,永远指向空位置
     */
    private int cur;
    /**
     * 指向首位置
     */
    private int start;

    public ArrayStack() {
        this.cur = 0;
        this.start = 0;
        this.capacity = 2;
        datas = new Object[2];
    }


    public ArrayStack(int capacity) {
        this.cur = 0;
        this.start = 0;
        this.capacity = capacity;
        datas = new Object[capacity];
    }

    /**
     * 添加元素
     * @param o
     * @return
     */
    public boolean push(T o) {
        if(cur == capacity){
            // 进行扩容
            resize();

        }
        datas[cur] = o;
        cur++;
        size++;
        return true;
    }

    /**
     * 推出最后一个元素
     * @return
     */
    public T pop() {
        if(size==0){
            return null;
        }else{
            cur--;
            size--;
            return (T) datas[cur];
        }
    }

    /**
     * 查询最后一个元素
     * @return
     */
    public T peek() {
        if(size==0){
            return null;
        }else{
            return (T) datas[cur-1];
        }
    }

    public int size(){
        return size;
    }

    /**
     * 扩增容量
     */
    private void resize(){
        // 扩增
        capacity = capacity * alpha;
        Object[] temp = new Object[capacity];
        // 复制原来的内容
        for (int i = 0; i < datas.length; i++) {
            temp[i] = datas[i];
        }
        datas = temp;
    }
}
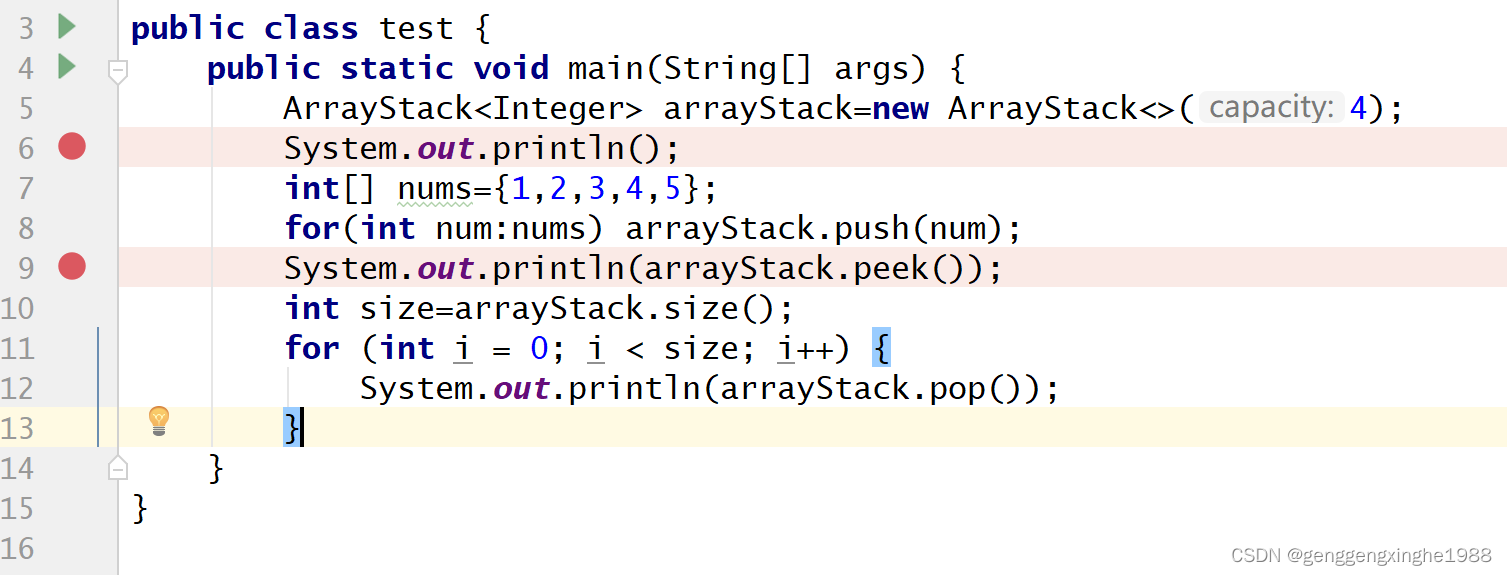
2.测试代码
public class test {
    public static void main(String[] args) {
        ArrayStack<Integer> arrayStack=new ArrayStack<>(4);
        System.out.println();
        int[] nums={1,2,3,4,5};
        for(int num:nums) arrayStack.push(num);
        System.out.println();
        int size=arrayStack.size();
        for (int i = 0; i < size; i++) {
            System.out.println(arrayStack.pop());
        }
        System.out.println();
    }
}
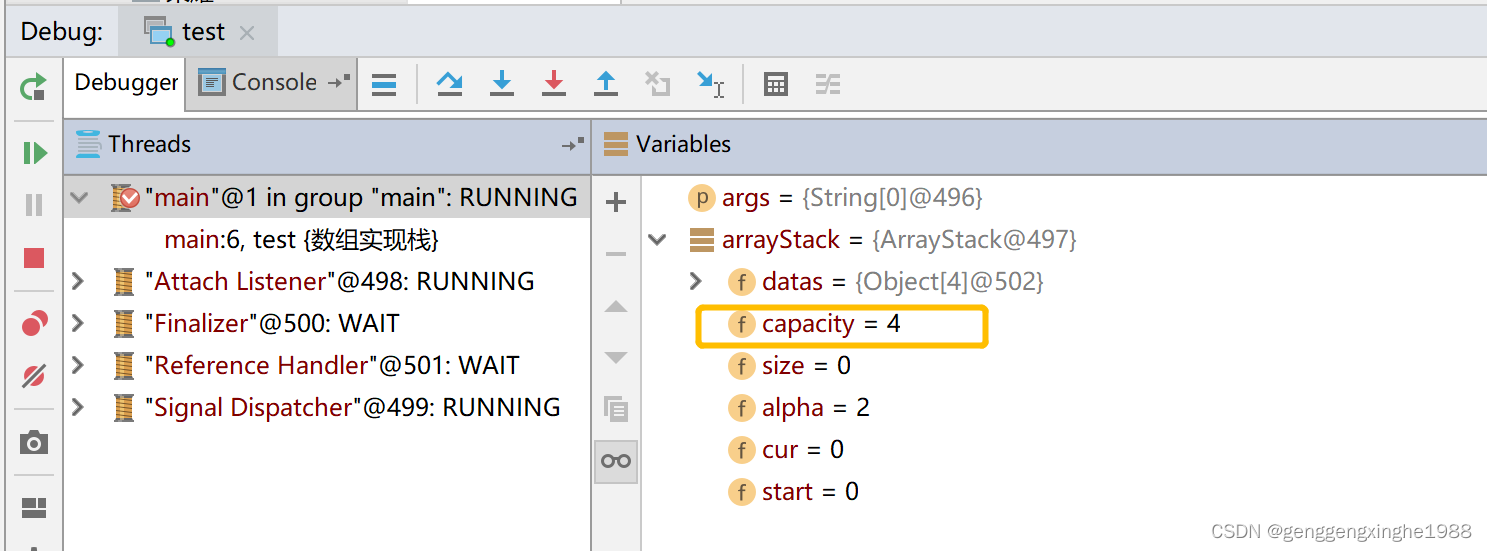
3.断点情况
(1)第一个断点处,可以看出容量为4
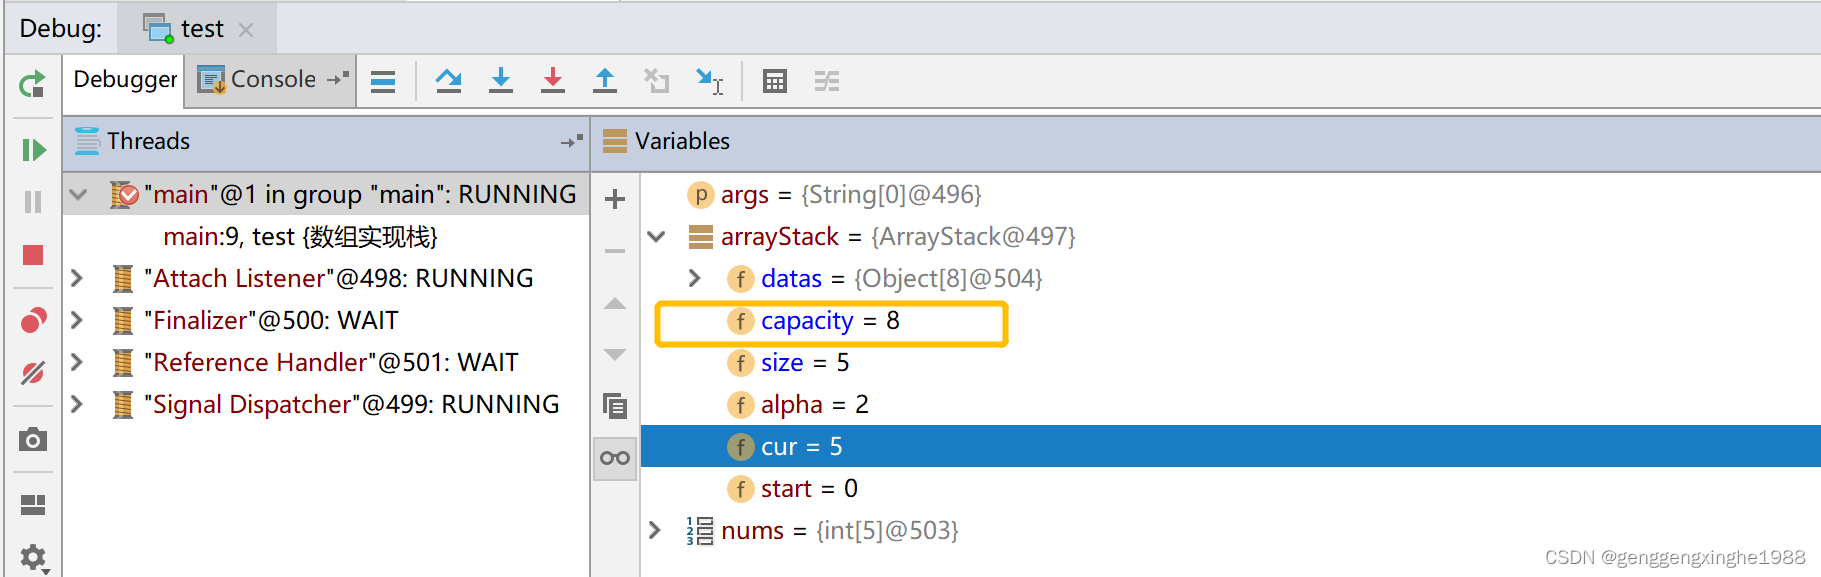
(2)第二个断点,在push进大于原本容量的基础上,进行了自动扩容,扩容系数alpha设置为2,所以此时capacity为8。
(3)最后 根据控制台的输出可以看出push、pop和peek方法正确


 1364
1364


 被折叠的 条评论
为什么被折叠?
被折叠的 条评论
为什么被折叠?
 到【灌水乐园】发言


