


本文参考了https://www.jianshu.com/p/06ab9daf921d,在此感谢作者的分享!
① 简介:
redis哨兵模式是一种特殊的模式,首先Redis提供了哨兵的命令,哨兵是一个独立的进程,作为进程,它会独立运行。其原理是哨兵通过发送命令,等待Redis服务器响应,从而监控运行的多个Redis实例。
这里的哨兵有两个作用
-
通过发送命令,让Redis服务器返回监控其运行状态,包括主服务器和从服务器。
-
当哨兵监测到master宕机,会自动将slave切换成master,然后通过发布订阅模式通知其他的从服务器,修改配置文件,让它们切换主机。
然而一个哨兵进程对Redis服务器进行监控,可能会出现问题,为此,我们可以使用多个哨兵进行监控。各个哨兵之间还会进行监控,这样就形成了多哨兵模式。
② redis配置哨兵模式
基于docker配置了3个哨兵和1主2从的redis服务器,位于同一台虚拟机上
| 服务类型 | 是否是主服务器 | IP地址 | 端口 |
|---|---|---|---|
| Redis | 是 | 192.168.44.129 | 6379 |
| Redis | 否 | 192.168.44.129 | 6380 |
| Redis | 否 | 192.168.44.129 | 6381 |
| Sentinel | - | 192.168.44.129 | 26379 |
| Sentinel | - | 192.168.44.129 | 26380 |
| Sentinel | - | 192.168.44.129 | 26381 |
步骤:1) 从远程仓库拉取redis镜像

2)启动镜像
sudo docker run -d -p 6379:6379 -p 26379:26379 //注释:对外映射的端口号
-v /etc/opt/redis/redis-6379.conf:/usr/local/etc/redis/redis.conf //挂载redis配置文件
-v /etc/opt/redis/sentinel-6379.conf:/usr/local/etc/redis/sentinel.conf //挂载sentinel配置文件
-v /etc/opt/data-6379:/data/:rw //挂载存数据文件
--name redis-6379 bb0ab8a99fe6 /usr/local/etc/redis/redis.conf --appendonly yes
// 用/usr/local/etc/redis/redis.conf 配置启动 appendonly yes 开启持久化
ps:docker的redis镜像里没有redis.conf,可以从官网里或者下载的包里拷贝份,放到挂载目录下(这里就是/etc/opt/redis/),
3)修改配置文件
redis.conf
# 使得Redis服务器可以跨网络访问
bind 0.0.0.0
# 设置密码
requirepass "123456"
# 指定主服务器,注意:有关slaveof的配置只是配置从服务器,主服务器不需要配置
slaveof 192.168.44.129 6379
# 主服务器密码,注意:有关slaveof的配置只是配置从服务器,主服务器不需要配置
masterauth 123456
这里需注意,bind后的ip地址得有 0.0.0.0,不然外部访问不了redis服务器,笔者此次是本地尝试,就没有设置密码了,
另外两台按如上配置;
sentinel.conf
# 禁止保护模式
protected-mode no
# 配置监听的主服务器,这里sentinel monitor代表监控,bigdata-senior01.bocom.com代表服务器的名称,可以自定义,192.168.11.128代表监控的主服务器,6379代表端口,2代表只有两个或两个以上的哨兵认为主服务器不可用的时候,才会进行failover操作。
sentinel monitor mymaster 192.168.44.129 6379 2
# sentinel author-pass定义服务的密码,bigdata-senior01.bocom.com是服务名称,123456是Redis服务器密码
# sentinel auth-pass <master-name> <password>
sentinel auth-pass bigdata-senior01.bocom.com 123456
上述关闭了保护模式,便于测试,三台哨兵都配置一样即可。
4)启动docker容器

进入各个容器,启动sentinel
redis-sentinel /usr/local/etc/redis/sentinel.conf

注意启动顺序:首先启动主机的redis服务进程,然后是从机,最后启动3个哨兵的服务进程。
③ java使用哨兵模式代码实现
1) 配置类
pom.xml 依赖
<dependency>
    <groupId>org.springframework.boot</groupId>
    <artifactId>spring-boot-starter-data-redis</artifactId>
</dependency>
package com.alibaba.ghs.task.config;

import org.springframework.context.annotation.Bean;
import org.springframework.context.annotation.Configuration;
import org.springframework.data.redis.connection.RedisConnectionFactory;
import org.springframework.data.redis.connection.RedisNode;
import org.springframework.data.redis.connection.RedisSentinelConfiguration;
import org.springframework.data.redis.core.RedisTemplate;
import org.springframework.data.redis.serializer.StringRedisSerializer;

import java.util.HashSet;

/**
 * @author james.geng
 * @date 2019/07/05
 */
@Configuration
public class RedisConfig {

    @Bean(name = "redisSentinelConfiguration")
    public RedisSentinelConfiguration redisSentinelConfiguration() {
        RedisSentinelConfiguration configuration = new RedisSentinelConfiguration();
        RedisNode redisNode = new RedisNode("192.168.44.129", 6379);
        redisNode.setName("bigdata-senior01.bocom.com");
        configuration.setMaster(redisNode); //服务名称
        RedisNode sn1 = new RedisNode("192.168.44.129", 26379);
        RedisNode sn2 = new RedisNode("192.168.44.129", 26380);
        RedisNode sn3 = new RedisNode("192.168.44.129", 26381);
        Iterable<RedisNode> sentinels = new HashSet<>();
        ((HashSet<RedisNode>) sentinels).add(sn1);
        ((HashSet<RedisNode>) sentinels).add(sn2);
        ((HashSet<RedisNode>) sentinels).add(sn3);
        configuration.setSentinels(sentinels);   //哨兵IP和端口号
        return configuration;
    }

    @Bean
    public RedisTemplate redisTemplate(RedisConnectionFactory connectionFactory) {
        RedisTemplate redisTemplate = new RedisTemplate();
        redisTemplate.setConnectionFactory(connectionFactory);
        redisTemplate.setValueSerializer(new StringRedisSerializer());
        redisTemplate.setKeySerializer(new StringRedisSerializer());
        redisTemplate.setDefaultSerializer(new StringRedisSerializer());
        return redisTemplate;
    }
}
2) 测试
@Autowired
private RedisTemplate redisTemplate;
@Test
public void test02() {
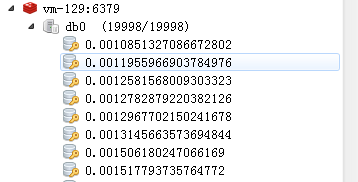
for (int i=1; i<10000; i++) {
redisTemplate.opsForValue().set(Math.random() + "", "valueone");
}
System.out.println();
}
若有疑问,欢迎交流指正!


 1024
1024


 被折叠的 条评论
为什么被折叠?
被折叠的 条评论
为什么被折叠?
 到【灌水乐园】发言


