


前言
最近在做一个electron生态相关的项目,由于要做一些项目初始化的功能,所以就写了一个脚手架来做这件事情,然后详细了解和实践了一番脚手架相关的功能,最后成功做出来我想要的脚手架,在这里把相关的经验分享出来。
我们先来看下vite的官网。
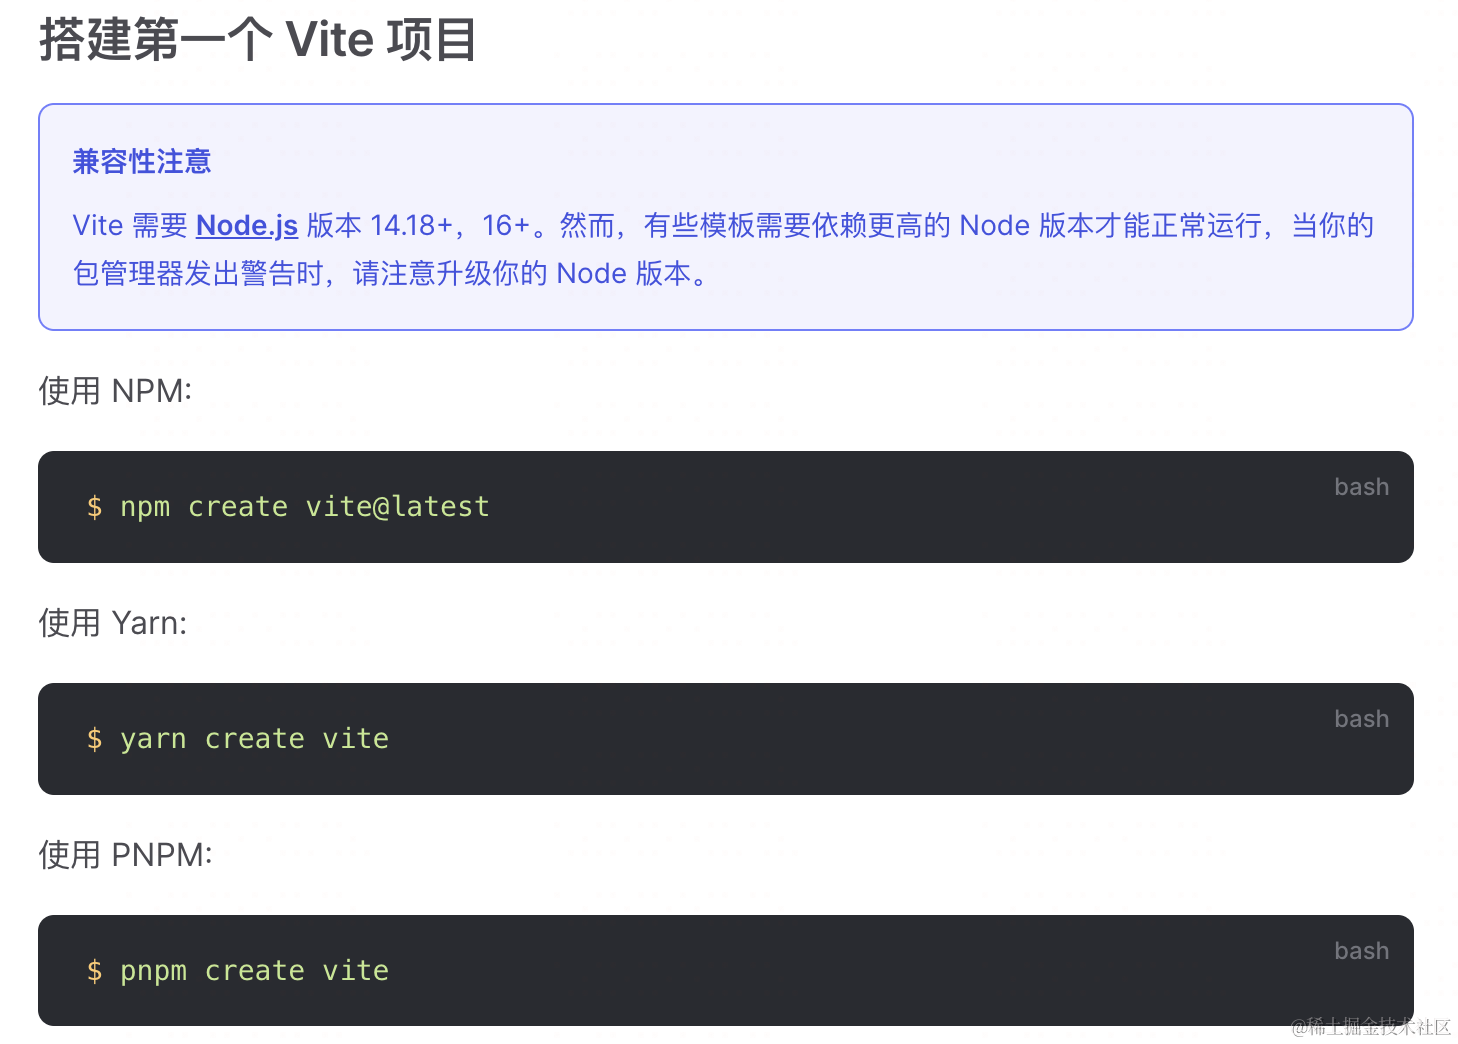
我们要实现的目标也是这样,yarn create electron-prokit myapp 直接快速搭建一个electron的项目。
npm create是什么
命令行运行一下就知道了
npm create --help

也就是说npm create其实就是npm init的别名
在node版本>=6.10时可以使用该方法构建app
npm 将在你提供的初始项前拼接 create- 然后使用npx工具下载并执行该方法,也就是说
npm create vite
// 等同于
npm init vite
// 等同于
npx create-vite
// 等同于
npm install create-vite -g && create-vite
所以npm create vite也就是使用create-vite脚手架创建vite项目。
yarn也是一样: https://classic.yarnpkg.com/en/docs/cli/create
搞清楚这个了可以开始设计脚手架了。
脚手架功能
我们的脚手架起名为 create-electron-prokit,顾名思义,这是一个 electron-prokit系列项目的生成器,主要功能是生产 electron-prokit 相关项目,拆分细节,我们的功能点有以下这些。
- 接收用户输入的项目名称、描述等,用于确定目录名称和修改
package.json文件。 - 接收用户的输入,定制项目内容(比如对框架的选择)。
- 下载 electron-prokit 模板代码到本地。
- 对创建进度和创建结果,给出反馈。
技术选型
知道功能了,我们需要做一下技术选型,读了create-vite的源码,我们也可以借鉴相关的技术工具。
- 开发语言工具:
typescript、ts-node - 处理命令:
commander - 处理交互:
inquirer - 下载git仓库模版:
git-clone - 语义化模板:
handlebars - 命令行美化:
ora - 文件相关插件:
fs-extra
开发步骤
下面我们就开始具体说说如何开发,一共分为下面6个步骤
初始化项目
命令行运行
npm i -g pnpm
pnpm init
然后补充必要的信息,其中 main 是入口文件,bin 用于引入一个全局的命令,映射到 dist/index.js,有了 bin 字段后,我们就可以直接运行 create-electron-prokit命令,而不需要 node dist/index.js了。
{
  "name": "create-electron-prokit",
  "version": "0.0.1",
  "description": "A cli to create a electron prokit project",
  "main": "dist/index.js",
  "type": "module",
  "bin": {
    "create-electron-prokit": "dist/index.js"
  },
  "keywords": [
    "Electron",
    "electron",
    "electron-prokit",
    "electron prokit",
    "Electron Prokit",
    "Prokit",
    "prokit",
    "create-electron-prokit"
  ],
  "author": "Xutaotaotao",
  "license": "MIT",
}
让项目支持TS
安装 typescript 和 @types/node。
pnpm add typescript @types/node -D
初始化 tsconfig.json
tsc --init
{
  "compilerOptions": {
    "target": "es2016",
    "module": "ESNext",
    "moduleResolution": "node",
    "esModuleInterop": true,
    "forceConsistentCasingInFileNames": true,
    "strict": true,
    "sourceMap": true,
    "outDir": "./dist",
    "importHelpers": true
  },
  "include": ["src/**/*"],
  "exclude": ["node_modules", "dist/**/*"],
}
npm link本地调试
我们在 src/index.ts 写个 hello world,测试下 ts 编译是否正常。
- src/index.ts
#!/usr/bin/env node --experimental-specifier-resolution=node
const msg: string = 'Hello World'
console.log(msg)
在package.json文件的scripts中加上dev选项
"dev": "node --experimental-specifier-resolution=node --loader ts-node/esm src/index.ts"
运行npm run dev可看到Hello World就成功一半了,有了上面的准备,我们就可以本地调试了。但是要达到命令行一样的效果还需npm link。
记得我们前面在 package.json中有个 bin 配置吗,我们如果在项目里面执行了npm link的命令,你就可以运行create-electron-prokit这个命令了。但是这个命令是指向dist/index.js这个文件的,这个明显是编译之后的文件,所以我们需要在package.json中加一些scripts选项,让我开发起来更加的丝滑!
"scripts": {
    "dev": "node --experimental-specifier-resolution=node --loader ts-node/esm src/index.ts",
    "build": "tsc",
    "start": "node --experimental-specifier-resolution=node dist/index.js"
  },
npm run build 之后你再运行create-electron-prokit这个命令,你就可以看到hello world啦!是不是很开心,这个项目你已经完成一半了,万事开头难,后面的就是一些逻辑功能的开发。
命令处理功能开发
我们先从最简单的开始,接收命令行参数。
- src/index.ts
#!/usr/bin/env node --experimental-specifier-resolution=node

const name = process.argv[2];
if (!name) {
  log.warn("The project name cannot be empty!");
  process.exit(1);
} else {
  init(name);
}

function init(name: string) {
    console.log(name)
}
就这么简单,我们第一个功能开发完了,下面就是对init函数进行扩充
交互处理功能开发
到这一步我们就需要打印日志,然后询问用户相应的意见,然后获得用户的输入和选择项。
安装inquirer,ora,fs-extra。
pnpm add inquirer ora fs-extra
添加项目的描述和作者输入询问以及框架的选择
#!/usr/bin/env node --experimental-specifier-resolution=node
import type { QuestionCollection } from "inquirer";
import inquirer from "inquirer";
import ora from "ora";
import fs from "fs-extra";

const log = ora("modify");

async function init(name: string) {
  const InitPrompts: QuestionCollection = [
    {
      name: "description",
      message: "please input description",
      default: "",
    },
    {
      name: "author",
      message: "please input author",
      default: "",
    },
  ];

  const FrameworkOptions: QuestionCollection = {
    type: "list",
    name: "framework",
    message: "Select a framework",
    choices: [
      {
        name: "React",
        value: "React",
      },
      {
        name: "Vue",
        value: "Vue",
      },
    ],
  };
  if (fs.existsSync(name)) {
    log.warn(`Has the same name project,please create another project!`);
    return;
  }
  log.info(`Start init create-electron-prokit project: ${name}`);
  const initOptions = await inquirer.prompt(InitPrompts);
  const frameworkOptions = await inquirer.prompt(FrameworkOptions);
}

function main() {
  const name = process.argv[2];
  if (!name) {
    log.warn("The project name cannot be empty!");
    process.exit(1);
  } else {
    init(name);
  }
}

main()
这里我们把代码优化和整合了一下,更加清晰了。我们用ora来美化控制台的输出,fs-extra检测文件夹是否存在,用inquirer来接收用户的输入和选择。这一步我们把最基本的用户的input获取到了,后面就是通过用户的输入来下载相应的模版,然后更改一些模版信息。
下载模版功能开发
安装git-clone
pnpm add git-clone
在src/download.ts实现下载逻辑
- src/download.ts
import path from "path"
import gitclone from "git-clone"
import fs from "fs-extra"
import ora from "ora"

export const downloadTemplate = (
  templateGitUrl: string,
  downloadPath: string
):Promise<any> =>  {
  const loading = ora("Downloadimg template")
  return new Promise((resolve, reject) => {
    loading.start("Start download template")
    gitclone(templateGitUrl, downloadPath, {
      checkout: "master",
      shallow: true,
    },(error:any) => {
      if (error) {
        loading.stop()
        loading.fail("Download fail")
        reject(error)
      } else {
        fs.removeSync(path.join(downloadPath, ".git"))
        loading.succeed("Download success")
        loading.stop()
        resolve("Download success")
      }
    })
  })
}
很简单,实现了。我们在init方法引用一下,并定义好相应的模版地址
#!/usr/bin/env node --experimental-specifier-resolution=node
import * as tslib from "tslib";
import type { QuestionCollection } from "inquirer";
import inquirer from "inquirer";
import ora from "ora";
import fs from "fs-extra";
import { downloadTemplate } from "./download";

const log = ora("modify");

async function init(name: string) {
  const ReactTemplateGitUrl =
    "https://github.com/Xutaotaotao/ep-vite-react-electron-template";

  const VueTemplateGitUrl =
    "https://github.com/Xutaotaotao/ep-vite-vue3-electron-template";

  const InitPrompts: QuestionCollection = [
    {
      name: "description",
      message: "please input description",
      default: "",
    },
    {
      name: "author",
      message: "please input author",
      default: "",
    },
  ];

  const FrameworkOptions: QuestionCollection = {
    type: "list",
    name: "framework",
    message: "Select a framework",
    choices: [
      {
        name: "React",
        value: "React",
      },
      {
        name: "Vue",
        value: "Vue",
      },
    ],
  };
  if (fs.existsSync(name)) {
    log.warn(`Has the same name project,please create another project!`);
    return;
  }
  log.info(`Start init create-electron-prokit project: ${name}`);
  const initOptions = await inquirer.prompt(InitPrompts);
  const frameworkOptions = await inquirer.prompt(FrameworkOptions);
  const templateGitUrl =
    frameworkOptions.framework === "React"
      ? ReactTemplateGitUrl
      : VueTemplateGitUrl;
  try {
    const downloadPath = `./${name}`;
    // 下载
    await downloadTemplate(templateGitUrl, downloadPath);
  } catch (error) {
    console.error(error);
  }
}

function main() {
  const name = process.argv[2];
  if (!name) {
    log.warn("The project name cannot be empty!");
    process.exit(1);
  } else {
    init(name);
  }
}

main()
哇哦!我们离成功只剩一步了,就是修改package.json了。
修改package.json功能开发
在替换前,我们需要修改模板的 package.json,添加一些插槽,方便后面替换。
{
  "name": "{{name}}",
  "version": "1.0.0",
  "description": "{{description}}",
  "author": "{{author}}"
}
安装handlebars
pnpm add handlebars
在src/modify.ts实现修改逻辑
- src/modify.ts
import path from "path"
import fs from "fs-extra"
import handlebars from "handlebars"
import ora from "ora"

const log = ora("modify")

export const modifyPackageJson = function (downloadPath: string, options: any):void {
  const packagePath = path.join(downloadPath, "package.json")
  log.start("start modifying package.json")
  if (fs.existsSync(packagePath)) {
    const content = fs.readFileSync(packagePath).toString()
    const template = handlebars.compile(content)

    const param = {
      name: options.name,
      description: options.description,
      author: options.author,
    }

    const result = template(param)
    fs.writeFileSync(packagePath, result)
    log.stop()
    log.succeed("This project has been successfully created! ")
    log.info(`Install dependencies:

      cd ${downloadPath} && yarn install
    `)
    log.info(`Run project:

      yarn run dev
    `)
  } else {
    log.stop()
    log.fail("modify package.json fail")
    throw new Error("no package.json")
  }
}
这里我们就完成了修改逻辑的函数,然后在init函数里面导入并使用。
 try {
    const downloadPath = `./${name}`;
    await downloadTemplate(templateGitUrl, downloadPath);
    modifyPackageJson(downloadPath, { name, ...initOptions } as Options);
  } catch (error) {
    console.error(error);
  }
OK,到这里我们就大功告成了!接下来发布NPM
发布NPM
本地发布NPM很简单,分三步,构建,登录npm, 然后publish
构建
构建直接运行
npm run build
登录&publish
先在npm官网注册一个账号。
在项目根目录下,登录npm账号,输入用户名、密码、邮箱。
npm login
登录成功之后直接执行npm publish即可。
可以看我这篇文章,从零构建一个Vue UI组件库(三)——发布第一个npm包
验证
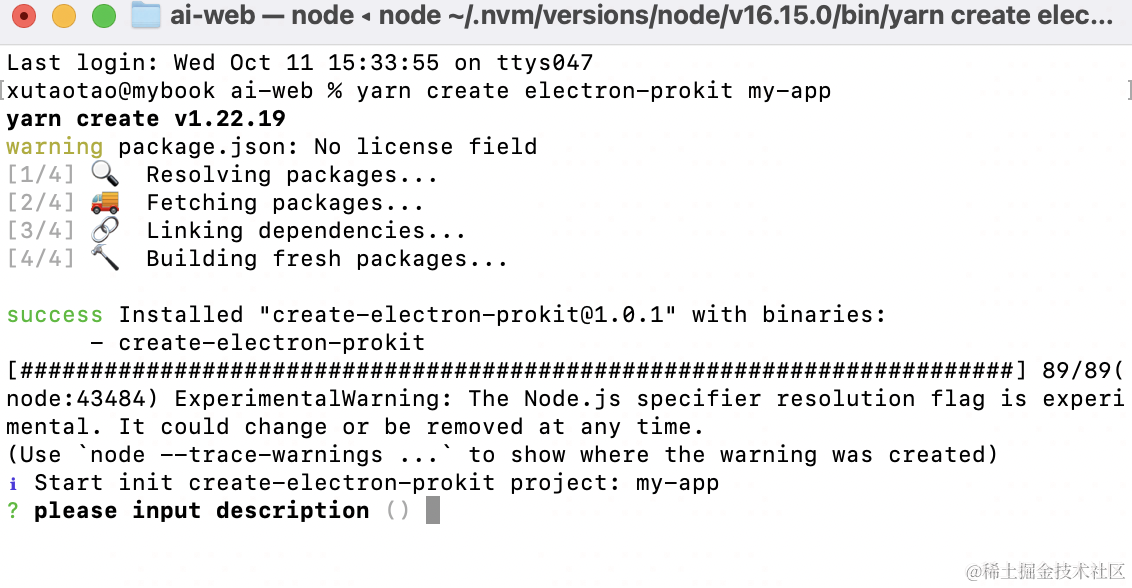
我们发布成功了之后就可以去本地验证了,我们直接运行
yarn create electron-prokit my-app
或者
npm create electron-prokit my-app
就可以看到效果了!

结束语
本篇文章用最简单的方式了一个脚手架,中间的功能其实还可以丰富,但是核心流程实现了,后面的功能扩展也只是逻辑上的补充和变更,主要是让大家快速上手!!!
项目源码:https://github.com/Xutaotaotao/electron-prokit
本篇文章如果对你有帮助,欢迎给我的项目给个小小的star✨


 1194
1194


 被折叠的 条评论
为什么被折叠?
被折叠的 条评论
为什么被折叠?
 到【灌水乐园】发言


