


本次主要围绕Elasticsearch安装展开,包含安装常遇到的问题,比如ES登陆用户的用户名和密码设置、ES中文分词器、head插件在设置了ES密码之后如何能够继续正常使用、head插件经常自动挂了的解决、Kibana和ES的集成和安装,Kibana 白银License认证、ES开启TLS等。
目录
- 1 ES 安装
- 2 head 插件安装
- 2.1 npm安装
- 2.2 如果没有安装 Git 先安装 Git
- 2.3 下载
elasticsearch-head - 2.4 安装head插件
- 2.5 配置 Gruntfile.js
- 2.6 配置 _site/app.js
- 2.7 启动&访问
- 2.8 关闭elasticsearch-head 服务
- 2.9 定时监控head插件
- 3 关于用户名和密码的设置
- 3.1 ES用户名和密码的设置
- 3.1.1 安装x-pack插件
- 3.1.2 启动trial license
- 3.1.3 获取源码
- 3.1.4 修改LicenseVerifier.java源码
- 3.1.5 修改XPackBuild.java源码
- 3.1.6 替换ES环境中的文件
- 3.1.7 修改elasticsearch.yml配置文件
- 3.1.8 重启ES
- 3.1.9 设置用户名和密码
- 3.1.10 测试
- 3.2 hdead插件中的ES用户名和密码的设置
- 3.1 ES用户名和密码的设置
- 4 kibana 工具安装
1. ES 安装
本次以 Elasticsearch 6.8.0 安装示例。可以打开连接选择对应版本 Past Releases。安装或升级更高版本方法也基本使用。
1.1 下载解压
打开官网 Elasticsearch 6.8.0,下载对应版本。例如下载 Linux版: MACOS/LINUX
解压
tar -zxf elasticsearch-6.8.0.tar.gz -C /usr/local/
cd /usr/local
mv elasticsearch-6.8.0 elasticsearch
创建新用户
# 添加用户
adduser es
# 设定密码
passwd es
配置 sysctl.conf 限制一个进程可以拥有的VMA(虚拟内存区域)的数量。虚拟内存区域是一个连续的虚拟地址空间区域。在进程的生命周期中,每当程序尝试在内存中映射文件,链接到共享内存段,或者分配堆空间的时候,这些区域将被创建。调优这个值将限制进程可拥有VMA的数量。限制一个进程拥有VMA的总数可能导致应用程序出错,因为当进程达到了VMA上线但又只能释放少量的内存给其他的内核进程使用时,操作系统会抛出内存不足的错误。如果你的操作系统在NORMAL区域仅占用少量的内存,那么调低这个值可以帮助释放内存给内核用。
#修改sysctl配置
vim /etc/sysctl.conf
#添加如下配置,默认值的4倍
vm.max_map_count=262144
#让配置生效
sysctl -p
#查看配置的数目
sysctl -a|grep vm.max_map_count
配置 limits.conf
vim /etc/security/limits.conf

# 是用户名
es  hard    nofile  65536
es  soft    nofile  65536

#重新登录 yellowcong 账户,查看是否生效
su es
#查看配置是否生效
ulimit -Hn
1.2 配置
创建存储目录和日志目录
mkdir /home/es/es-data
mkdir /home/es/es-log
修改文件权限
chown -R es:es  /usr/local/elasticsearch
chown -R es:es  /home/es/es-data
chown -R es:es  /home/es/es-log
配置 elasticsearch.yml 修改 config/elasticsearch.yml 文件,
- es-node1节点修改如下配置项:
cluster.name: yg-es
node.name: es-node1
node.master: true
path.data: /home/es/es-data
path.logs: /home/es/es-log
node.data: true
network.host: es-node1
http.port: 9200

discovery.zen.minimum_master_nodes: 1
discovery.zen.ping.unicast.hosts: ["es-node1", "es-node2"]
# 是否支持跨域
http.cors.enabled: true
# *表示支持所有域名
http.cors.allow-origin: "*"
http.cors.allow-headers: Authorization
- es-node2节点修改如下配置项:
cluster.name: yg-es
node.name: es-node2
node.master: false
path.data: /home/es/es-data
path.logs: /home/es/es-log
node.data: true
network.host: es-node2
http.port: 9200

discovery.zen.minimum_master_nodes: 1
discovery.zen.ping.unicast.hosts: ["es-node1", "es-node2"]
# 是否支持跨域
http.cors.enabled: true
# *表示支持所有域名
http.cors.allow-origin: "*"
xpack.security.enabled: false
1.3 启动
一定切换到es用户启动ES
# 切换用户
su es
# 查看当前用户
who am i

# 启动服务
bin/elasticsearch -d
1.4 验证
查看日志/home/es/es-log下的日志,没有发现错误,然后请求es端口的数据可以获取到信息,则 elasticsearch 启动成功。
curl http://es-node1:9200
curl http://es-node2:9200
{
  "name" : "es-node1",
  "cluster_name" : "yg-es",
  "cluster_uuid" : "Lm0AfXYiQ5OO5NAFewq-SQ",
  "version" : {
    "number" : "6.8.0",
    "build_flavor" : "default",
    "build_type" : "tar",
    "build_hash" : "65b6179",
    "build_date" : "2019-05-15T20:06:13.172855Z",
    "build_snapshot" : false,
    "lucene_version" : "7.7.0",
    "minimum_wire_compatibility_version" : "5.6.0",
    "minimum_index_compatibility_version" : "5.0.0"
  },
  "tagline" : "You Know, for Search"
}
1.5 中文分词
常用的中文分词器由 IK 、Hanlp等 medcl/elasticsearch-analysis-ik 、KennFalcon/elasticsearch-analysis-hanlp
1.5.1 安装 IK 分词器
下载的版本和安装的 elasticsearch 版本一致。例如这里下载 v6.8.0
elasticsearch-analysis-ik-6.8.0.zip
安装插件:
[es@es-node1 elasticsearch]$ elasticsearch-plugin install https://github.com/medcl/elasticsearch-analysis-ik/releases/download/v6.8.0/elasticsearch-analysis-ik-6.8.0.zip
-> Downloading https://github.com/medcl/elasticsearch-analysis-ik/releases/download/v6.8.0/elasticsearch-analysis-ik-6.8.0.zip
[=================================================] 100%
@@@@@@@@@@@@@@@@@@@@@@@@@@@@@@@@@@@@@@@@@@@@@@@@@@@@@@@@@@@
@     WARNING: plugin requires additional permissions     @
@@@@@@@@@@@@@@@@@@@@@@@@@@@@@@@@@@@@@@@@@@@@@@@@@@@@@@@@@@@
* java.net.SocketPermission * connect,resolve
See http://docs.oracle.com/javase/8/docs/technotes/guides/security/permissions.html
for descriptions of what these permissions allow and the associated risks.
Continue with installation? [y/N]y
-> Installed analysis-ik
1.5.2 查看安装的插件
[es@es-node1 elasticsearch]$ elasticsearch-plugin list
analysis-ik
1.5.3 配置 IK 分词器(没特殊要求可以先不用配置)
到 elasticsearch/config/analysis-ik/ 下配置 IKAnalyzer.cfg.xml
<?xml version="1.0" encoding="UTF-8"?>
<!DOCTYPE properties SYSTEM "http://java.sun.com/dtd/properties.dtd">
<properties>
	<comment>IK Analyzer 扩展配置</comment>
    <!--用户可以在这里配置自己的扩展字典,使用相对路径,多个词典使用逗号分隔,比如:custom/mydict1.dic,custom/mydict2.dic -->
	<entry key="ext_dict">custom/myDic.txt</entry>
	<!--用户可以在这里配置自己的扩展停止词字典,使用相对路径,多个词典使用逗号分隔,比如:custom/mydict1.dic,custom/mydict2.dic -->
	<entry key="ext_stopwords"></entry>
    <!--用户可以在这里配置远程扩展字典,配置远程扩展字典,多个词典使用逗号分隔,比如: http://xxx.xx.com/xxx -->
	<!-- <entry key="remote_ext_dict">words_location</entry> -->
	<!--用户可以在这里配置远程扩展停止词字典,多个词典使用逗号分隔,比如: http://xxx.xx.com/xxx -->
	<!-- <entry key="remote_ext_stopwords">words_location</entry> -->
</properties>
添加自定义词典文件
vim custom/myDic.txt 添加:
中华人民共和国
1.5.4 使用
不指定分析类型 analyzer 时使用的是默认的分词器,
- 1 POST http://cdh2:9200/yg/_analyze/
{
 "text":"中华人民共和国"
}
指定分词器类型
- 2 POST http://cdh2:9200/yg/_analyze/
{
 "text":"中华人民共和国",
 "analyzer":"ik_smart"
}
- 3 POST http://cdh2:9200/yg/_analyze/
{
  "text":"中华人民共和国",
  "analyzer":"ik_max_word"
}
1.6 服务关闭
关闭es服务。可以通过查看进程,获取进程号,然后关闭
# cd到es的目录
cd /usr/local/elasticsearch
# 查看进程信息
ps -ef | grep `pwd`
kill -9 es进程号
2 head 插件安装
其源码可以访问 mobz/elasticsearch-head
2.1 npm安装
curl --silent --location https://rpm.nodesource.com/setup_10.x | bash -
yum install -y nodejs
npm install -g cnpm --registry=https://registry.npm.taobao.org
npm install
npm run build
npm -v
2.2 如果没有安装 Git 先安装 Git
yum install –y git
git --version
2.3 下载 elasticsearch-head
git clone https://github.com/mobz/elasticsearch-head.git
cd elasticsearch-head
2.4 安装head插件
npm install -g grunt --registry=https://registry.npm.taobao.org

npm install
# 如果 elasticsearch-head/node_modules/grunt 下没有文件,在执行
npm install grunt --save
2.5 配置 Gruntfile.js
大概在92行左右,修改:
		connect: {
			server: {
				options: {
				    hostname: 'es-node1',
					port: 9100,
					base: '.',
					keepalive: true
				}
			}
		}
2.6 配置 _site/app.js
大概在4361行左右,修改
		init: function(parent) {
			this._super();
			this.prefs = services.Preferences.instance();
			this.base_uri = this.config.base_uri || this.prefs.get("app-base_uri") || "http://es-node1:9200" || "http://es-node2:9201";
			if( this.base_uri.charAt( this.base_uri.length - 1 ) !== "/" ) {
				// XHR request fails if the URL is not ending with a "/"
				this.base_uri += "/";
			}
2.7 启动&访问
npm run start 2>&1 &

# 或者通过grun运行
grunt server &
浏览器打开 http://es-node1:9100/ 这里已经创建了一个索引

2.8 关闭elasticsearch-head 服务
#查看9100端口的pid
[root@es-node1 elasticsearch-head]# lsof -i:9100
COMMAND   PID USER   FD   TYPE    DEVICE SIZE/OFF NODE NAME
grunt   26232 root   22u  IPv4 441471220      0t0  TCP mongo1:jetdirect (LISTEN)
kill -9 PID
2.9 定时监控head插件
在实际环境中使用,可能因为网络和资源问题,head插件经常的挂掉,为了不影响head的使用,这里对head插件做一个监控,当head插件挂了之后,用脚本自动启动。
例如在/usr/local/elasticsearch-head下新建一个脚本文件es-head-monitoring.sh,内容如下
#!/bin/bash

# 监控某个进程的脚本
#######

ps -fe|grep grunt |grep -v grep
if [ $? -ne 0 ]
then
	now_date=`date +"%Y-%m-%d %H:%M:%S"`
	echo -e "$now_date \t elasticsearch-head 挂起,尝试重启"
	# 必须带这个目录下执行,否则启动失败。
	cd /usr/local/elasticsearch-head
	npm run start >/dev/null 2>&1 &
#else
#echo "runing....."
fi

#####
# grunt 表示进程特征字符串,能够查询到唯一进程的特征字符串
# 0表示存在的
# $? -ne 0 不存在,$? -eq 0 存在
执行定时任务,例如没3分钟,执行一次上述脚本
crontab -e
# 插入如下命令
*/3 * * * * /bin/bash /usr/local/elasticsearch-head/es-head-monitoring.sh >> /var/log/es/monitoring.log
3 关于用户名和密码的设置
3.1 ES用户名和密码的设置
3.1.1 安装x-pack插件(默认情况下已包含这个插件)
bin/elasticsearch-plugin install x-pack
3.1.2 启动trial license(30天试用)
一下3.1.3、3.1.4、3.1.5、3.1.6不是必须的,这个Kibana是完全免费的,只是它的铂金级别的功能是有免费使用30天的限制,之后就会是普通版的使用,但是这个功能依然很强大,受影响的是一些比较高级部分的功能,比如机器学习等其它的功能,有需要的可以订阅其提供的高级服务 https://www.elastic.co/cn/subscriptions

#会返回 {"acknowledged":true,"trial_was_started":true,"type":"trial"}
curl -H "Content-Type:application/json" -XPOST  http://es-node1:9200/_xpack/license/start_trial?acknowledge=true
3.1.3 获取源码
这一步主要是在License验证时可以没有那么严格。这里最好下载对应版本源码,例如下载elasticsearch 6.8.0版本
wget https://github.com/elastic/elasticsearch/archive/v6.8.0.tar.gz
# 解压后文件名为 elasticsearch-6.8.0
tar -zxf v6.8.0.tar.gz
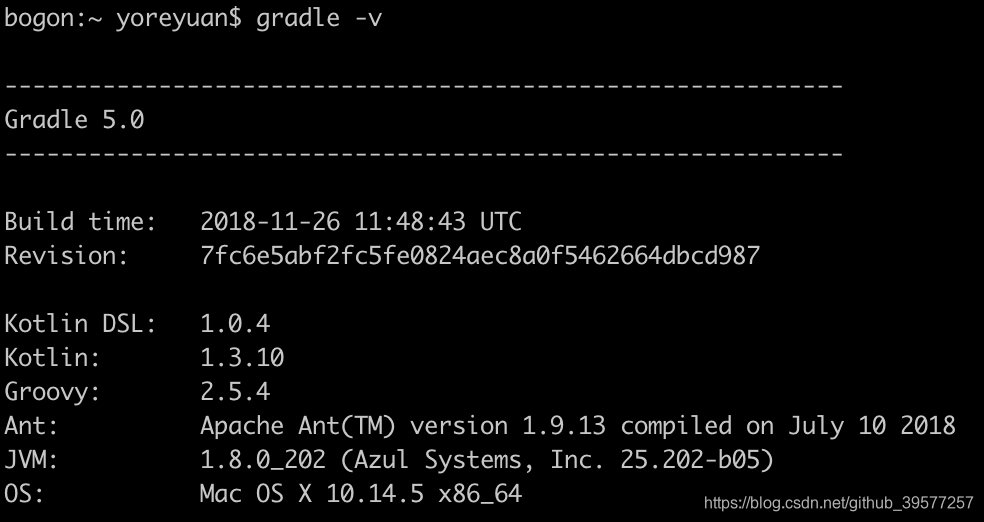
解压后的源码我们直接用IntelliJ IDEA,因为elasticsearch源码是用Gradle构建的,因此环境中需要安装好Gradle,例如我这里安装的是 5.0 的版本,同时需要环境中有更高版本的JDK,可以在项目中引入JDK 12
下面的3.1.4和3.1.5步骤需要下载源码,稍作修改。如果是其它版本,可以按照同样的方法对源码修改和编译。如果是相同的版本,也可以直接下载我编译之后的完整包 x-pack-core-6.8.0-SNAPSHOT.jar
3.1.4 修改LicenseVerifier.java源码
将源码x-pack/plugin/core/src/main/java/org/elasticsearch/license/LicenseVerifier.java修改为:
package org.elasticsearch.license;

/**
 * Responsible for verifying signed licenses
 */
public class LicenseVerifier {

    /**
     * verifies the license content with the signature using the packaged
     * public key
     * @param license to verify
     * @return true if valid, false otherwise
     */
    public static boolean verifyLicense(final License license, byte[] publicKeyData) {
        return true;
    }

    public static boolean verifyLicense(final License license) {
        return true;
    }
}
3.1.5 修改XPackBuild.java源码
将源码x-pack/plugin/core/src/main/java/org/elasticsearch/xpack/core/XPackBuild.java修改为:
package org.elasticsearch.xpack.core;

import org.elasticsearch.common.SuppressForbidden;
import org.elasticsearch.common.io.PathUtils;
import java.net.URISyntaxException;
import java.net.URL;
import java.nio.file.Path;

/**
 * Information about the built version of x-pack that is running.
 */
public class XPackBuild {
    public static final XPackBuild CURRENT;
    private String shortHash;
    private String date;
    @SuppressForbidden(reason = "looks up path of xpack.jar directly") static Path getElasticsearchCodebase() {
        final URL url = XPackBuild.class.getProtectionDomain().getCodeSource().getLocation();
        try { return PathUtils.get(url.toURI()); }
        catch (URISyntaxException bogus) {
            throw new RuntimeException(bogus); }
    }

    XPackBuild(final String shortHash, final String date) {
        this.shortHash = shortHash;
        this.date = date;
    }

    public String shortHash() {
        return this.shortHash;
    }
    public String date(){
        return this.date;
    }

    static {
        final Path path = getElasticsearchCodebase();
        String shortHash = null;
        String date = null;
        Label_0157: { shortHash = "Unknown"; date = "Unknown";
        }

        CURRENT = new XPackBuild(shortHash, date);
    }
}
3.1.6 替换ES环境中的文件
方式一:替换原x-pack-core-6.8.0.jar文件的LicenseVerifier.class、XPackBuild.class
然后用Grande编译`x-pack:plugin:core。编译后的这两个类可以到一下路径找到
- x-pack/plugin/core/build/classes/java/main/org/elasticsearch/license/LicenseVerifier.class
- x-pack/plugin/core/build/classes/java/main/org/elasticsearch/xpack/core/XPackBuild.class
mkdir ~/x-pack-tmp
cp /usr/local/elasticsearch/modules/x-pack-core/x-pack-core-6.8.0.jar ~/x-pack-tmp
cd ~/x-pack-tmp
jar -xf ~/x-pack-tmp/x-pack-core-6.8.0.jar
# 将LicenseVerifier.class拷贝到org/elasticsearch/license/下
# 将XPackBuild.class拷贝到org/elasticsearch/xpack/core/下
rm -rf x-pack-core-6.8.0.jar
jar -cvf x-pack-core-6.8.0.jar *
#覆盖之前的jar包
cp x-pack-core-6.8.0.jar /usr/local/elasticsearch/modules/x-pack-core/
rm -rf ~/x-pack-tmp
方式二: 直接将grande编译后的jar覆盖es环境的
编译后的jar包在 x-pack/plugin/core/build/distributions/x-pack-core-6.8.0-SNAPSHOT.jar,或者重名为为x-pack-core-6.8.0.jar,
或者直接上传到es环境覆盖掉/usr/local/elasticsearch/modules/x-pack-core/下的x-pack-core-6.8.0.jar

3.1.7 修改elasticsearch.yml配置文件
#添加如下代码打开x-pack安全验证
xpack.security.enabled: true
3.1.8 重启ES
#切换到es用户
su es
cd /usr/local/elasticsearch/
# 查看es进程
ps -ef | grep `pwd`
# 启动 es
bin/elasticsearch -d
3.1.9 设置用户名和密码
# 不推荐使用 bin/x-pack/setup-passwords interactive
#自动生成
#bin/elasticsearch-setup-passwords auto
#手动生成
bin/elasticsearch-setup-passwords interactive
如下会分别对elasticsearch、logstash、kibana分别设置登录密码(默认es用户名为elastic,logstash用户名为logstash_system,kibana用户名为kibana)
[es@es-node1 elasticsearch]$ bin/elasticsearch-setup-passwords interactive
Initiating the setup of passwords for reserved users elastic,apm_system,kibana,logstash_system,beats_system,remote_monitoring_user.
You will be prompted to enter passwords as the process progresses.
Please confirm that you would like to continue [y/N]y
Enter password for [elastic]:
Reenter password for [elastic]:
Enter password for [apm_system]:
Reenter password for [apm_system]:
Enter password for [kibana]:
Reenter password for [kibana]:
Enter password for [logstash_system]:
Reenter password for [logstash_system]:
Enter password for [beats_system]:
Reenter password for [beats_system]:
Enter password for [remote_monitoring_user]:
Reenter password for [remote_monitoring_user]:
Changed password for user [apm_system]
Changed password for user [kibana]
Changed password for user [logstash_system]
Changed password for user [beats_system]
Changed password for user [remote_monitoring_user]
Changed password for user [elastic]
如果需要修改密码可以用下面命令
# 将elastic密码修改为 123456 。输入旧的 elastic 用户密码即可修改
curl -H "Content-Type:application/json" -XPOST -u elastic 'http://es-node1:9200/_xpack/security/user/elastic/_password' -d '{ "password" : "123456" }'
3.1.10 测试
# 先测试不用密码时,会提示如下401的错误(表示发送的请求需要有通过 HTTP 认证的认证信息)
[es@cdh2 elasticsearch]$ curl http://es-node1:9200
{"error":{"root_cause":[{"type":"security_exception","reason":"missing authentication token for REST request [/]","header":{"WWW-Authenticate":"Basic realm=\"security\" charset=\"UTF-8\""}}],"type":"security_exception","reason":"missing authentication token for REST request [/]","header":{"WWW-Authenticate":"Basic realm=\"security\" charset=\"UTF-8\""}},"status":401}

#使用刚才设置的密码请求,此时可以看到请求成功
[es@es-node1 elasticsearch]$ curl http://es-node1:9200 -u elastic:123456
{
  "name" : "es-node1",
  "cluster_name" : "yg-es",
  "cluster_uuid" : "Lm0AfXYiQ5OO5NAFewq-SQ",
  "version" : {
    "number" : "6.8.0",
    "build_flavor" : "default",
    "build_type" : "tar",
    "build_hash" : "65b6179",
    "build_date" : "2019-05-15T20:06:13.172855Z",
    "build_snapshot" : false,
    "lucene_version" : "7.7.0",
    "minimum_wire_compatibility_version" : "5.6.0",
    "minimum_index_compatibility_version" : "5.0.0"
  },
  "tagline" : "You Know, for Search"
}
3.2 hdead插件中的ES用户名和密码的设置
如果是浏览器查看ES信息,访问:http://es-node1:9200,根据提示输入用户名和密码即可,但是如果ES开启用户名和密码,那么head插件插件直接访问就会获取不到ES信息,因此需要将es的用户名和密码信息配置进来。
修改elasticsearch-head/_site/app.js大概4368行左右
//if( this.config.auth_user ) {
if( true ) {
    //var credentials = window.btoa( this.config.auth_user + ":" + this.config.auth_password );
    var credentials = window.btoa( "elastic:123456" );
    $.ajaxSetup({
        headers: {
            "Authorization": "Basic " + credentials
        }
    });
}
如果不想暴露的这么明显可以使用如下方法,在浏览器控制台执行,获取es用户名和密码base64加密后的字符串。配置到上面的Authorization。
function b64EncodeUnicode(str) {
    return btoa(encodeURIComponent(str).replace(/%([0-9A-F]{2})/g, function(match, p1) {
            return String.fromCharCode('0x' + p1);
            }
        ));
}

//调用这个方法,生成base64加密的值,例如执行下面可以得到 ZWxhc3RpYzoxMjM0NTY= ,将这个值填入上面的 "Authorization": "Basic " + "ZWxhc3RpYzoxMjM0NTY="
b64EncodeUnicode("elastic:123456")
- 完整版可以访问我的Github上文档 es+kibana+head


 3748
3748


 被折叠的 条评论
为什么被折叠?
被折叠的 条评论
为什么被折叠?
 到【灌水乐园】发言


