


目录
摘要
卷积的基本元素有着input size、kernel size、stride、padding、group以及dilation等等。在卷积中有着卷积(convolution)和转置卷积(transpose convolution)。其中卷积常常用于局部建模和下采样,而转置卷积则多用于上采用。本次学习针对二者的具体代码展开,并分别对官方api和手动复现进行学习比对。
卷积(convolution)
1、pytorch实现
在pytorch中有两个实现卷积的方法。一种是以类的形式,另外一种是以函数的进行进行调用。二者区别则为,以函数的进行调用无需手动化实例kernel,若以类的形式进行调用的话,则需自己手动将相关张量实例化。
首先对一些张量进行初始化,在二维的卷积中,input_size一搬是四维的张量。
import torch
import torch.nn as nn
import torch.nn.functional as F
import math
in_channels = 1 #输入的通道数
out_channels = 1 #输出的通道数
kernel_size = 3 #卷积核大小
batch_size = 1 #样本的数目
bias = False
input_size = [batch_size, in_channels, 4, 4]通过类进行实现。首先实例化二维卷积对象,其次生成输入、调用正态分布随机函数,最后将将input_feature_map作为conv_layer的输入得到output_feature_map。
conv_layer = torch.nn.Conv2d(in_channels,out_channels,kernel_size,bias=bias)#实例化二维卷积的对象
input_feature_map = torch.randn(input_size) #生成输入,调用正态分布的随机函数
output_feature_map = conv_layer(input_feature_map) #将input_feature_map作为conv_layer的输入
通过函数进行实现,直接传入input,和kernel张量。
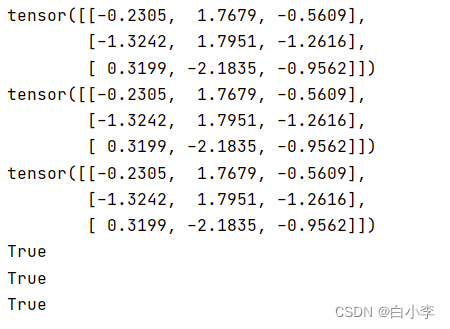
output_feature_map1 = F.conv2d(input_feature_map, conv_layer.weight)最后来看二者的结果是否相同。
print(output_feature_map)
print(output_feature_map1)
print(torch.allclose(output_feature_map,output_feature_map1))
经验证二者结果是相同的。

2、对input展开矩阵相乘
将每次滑动相乘区域的input拉直,然后将这些向量拼凑成一个矩阵,之后和kernel矩阵进行矩阵相乘。在这里即可以手动写,也可以通过调用torch.Unfold完成。
先对一些张量进行初始化。
input = torch.randn(5,5)   #卷积输入特征图
kernel = torch.randn(3,3)   #卷积核
bias = torch.randn(1)       #卷积偏置,默认输出通道数目等于一,长度为1的随机量
step1: 用原始的矩阵运算来实现二维卷积,先不考虑batchsize维度和channels维度。pytorch中的维度是反过来的,从里到外,即从左到右,从上到下进行填充。
def matrix_multiplication_for_conv2d(input, kernel, bias=0, stride=1, padding=0):
    if padding > 0:
        input = F.pad(input, (padding, padding, padding, padding)) #对input进行填充操作

    input_h, input_w = input.shape
    kernel_h, kernel_w = kernel.shape

    output_h = (math.floor((input_h - kernel_h)/stride) + 1)    #卷积输出的高度
    output_w = (math.floor((input_w - kernel_w)/stride) + 1)    #卷积输出的宽度
    output = torch.zeros(output_h, output_w)    #初始化输出矩阵

    for i in range(0, input_h-kernel_h+1,stride):     #对高度进行遍历
        for j in range(0, input_w-kernel_w+1,stride):     #对宽度进行遍历
            region=input[i:i+kernel_h, j:j+kernel_w]    #取出被核滑动到的区域
            output[int(i/stride), int(j/stride)] = torch.sum(region * kernel) +bias     #点乘,并赋值给输出位置的元素

    return output
step2: 用原始的矩阵运算来实现二维卷积,先不考虑batchsize维度和channels维度,flatten input版本。
def matrix_multiplication_for_conv2d_flatten(input, kernel, bias=0, stride=1, padding=0):
    if padding>0:
        input = F.pad(input,(padding, padding, padding, padding))

    input_h, input_w = input.shape
    kernel_h, kernel_w = kernel.shape

    output_h = (math.floor((input_h-kernel_h)/stride)+1)    #卷积输出的高度
    output_w = (math.floor((input_w-kernel_w)/stride)+1)    #卷积输出的高度
    output = torch.zeros(output_h,output_w)     #初始化输出矩阵

    region_matrix = torch.zeros(output.numel(), kernel.numel())  #存储着所有的拉平后特征区域
    kernel_matrix = kernel.reshape((kernel.numel(), 1))     #kernel的列向量(矩阵)形式
    row_index = 0
    for i in range(0,input_h-kernel_h+1,stride):    #对高度维进行遍历
        for j in range(0,input_w-kernel_w+1,stride):    #对宽度维进行遍历
            region = input[i:i+kernel_h,j:j+kernel_w]   #取出被核滑动到的区域
            region_vector = torch.flatten(region)
            region_matrix[row_index] = region_vector
            row_index +=1

    output_matrix = region_matrix @ kernel_matrix
    output=output_matrix.reshape(output_h, output_w) +bias

    return  output
对三者的结果进行验证。
#矩阵运算实现卷积的结果
mat_mul_conv_output = matrix_multiplication_for_conv2d(input, kernel, bias=bias, padding=1, stride=2)
#调用PyTorch API卷积的结果
pytorch_api_conv_output = F.conv2d(input.reshape((1,1,input.shape[0],input.shape[1])),\ kernel.reshape((1,1,kernel.shape[0],kernel.shape[1])),\ padding=1,\
bias=bias, stride=2).squeeze(0).squeeze(0)
#矩阵运算实现卷积的结果,flatten input版本
mat_mul_conv_output_flatten = matrix_multiplication_for_conv2d_flatten(input, kernel, bias=bias, padding=1, stride=2)
#验证flatten版本卷积、非flatten版本卷积与PyTorch官方的卷积结果
print(mat_mul_conv_output_flatten)
print(mat_mul_conv_output)
print(pytorch_api_conv_output)
flag1 = torch.allclose(mat_mul_conv_output_flatten, pytorch_api_conv_output)
flag2 = torch.allclose(mat_mul_conv_output, pytorch_api_conv_output)
flag3 = torch.allclose(mat_mul_conv_output_flatten,mat_mul_conv_output)
print(flag1)
print(flag2)
print(flag3)验证结果为三者一致。
step3: 用原始的矩阵运算来实现二维卷积,考虑batchsize维度和channels维度
def matrix_multiplication_for_conv2d_full(input, kernel, bias=0, stride=1, padding=0):
    #input、kernel都是思维张量
    if padding > 0:
        input = F.pad(input, (padding, padding, padding, padding, 0, 0, 0, 0))

    bs ,in_channel, input_h ,input_w = input.shape
    out_channel, in_channel, kernel_h ,kernel_w = kernel.shape
    if bias is None:
        bias = torch.zeros(out_channel)

    output_h = (math.floor((input_h - kernel_h) / stride) + 1)  # 卷积输出的高度
    output_w = (math.floor((input_w - kernel_w) / stride) + 1)  # 卷积输出的宽度
    output = torch.zeros(bs, out_channel, output_h, output_w)   #初始化输出矩阵

    for ind in range(bs):
        for oc in range(out_channel):
            for ic in range(in_channel):
                for i in range(0, input_h-kernel_h+1,stride):   #对高度进行遍历
                    for j in range(0, input_w-kernel_w+1,stride):   #对宽度进行遍历
                        region = input[ind, ic, i:i+kernel_h,j:j+kernel_w]  #取出被核滑动到的区域
                        output[ind, oc, int(i/stride), int(j/stride)] +=torch.sum(region * kernel[oc, ic])   #点乘,并赋值给输出位置的元素
            output[ind,oc] +=bias[oc]

    return output
验证matrix_multiplication_for_conv2d_full与pytorch官方API是否一致
input = torch.randn(2, 2, 5, 5)
kernel = torch.randn(3, 2, 3, 3)
bias = torch.randn(3)
pytorch_conv2d_api_output = F.conv2d(input, kernel ,bias=bias, padding=1, stride=2)
mm_conv2d_full_output = matrix_multiplication_for_conv2d_full(input, kernel ,bias=bias, padding=1, stride=2)
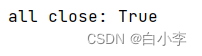
flag = torch.allclose(pytorch_conv2d_api_output,mm_conv2d_full_output)
print("all close:", flag)结果为二者一致
3、对kernel展开以及矩阵相乘
将每一步滑动相乘看作是把kernel填充到跟input一样大小的矩阵,然后将这个新的矩阵拉直,之后将每一步拉直后的向量堆叠起来构成一个kernel矩阵,再用这个kernel矩阵和input矩阵进行矩阵相乘。
def get_kernel_matrix(kernel, input_size):
    #基于kenerl和输入特征图的大小来得到填充拉直后的kernel堆叠后的矩阵
    kernel_h, kernel_w = kernel.shape
    input_h, input_w = input_size
    num_out_feat_map = (input_h-kernel_h + 1) * (input_w-kernel_w + 1)
    result = torch.zeros((num_out_feat_map, input_h*input_w))   #初始化结果矩阵,输出特征图元素个数*输入特征图元素个数
    count = 0
    for i in range(0,input_h-kernel_h+1, 1):
        for j in range(0,input_w-kernel_w+1, 1):
            padded_kernel = F.pad(kernel, (j,input_w-kernel_w-j, i, input_h-kernel_h-i))    #填充成跟输入特征图一样大小
            result[count] = padded_kernel.flatten()
            count += 1
    return result
result是基于kenerl和输入特征图的大小来得到填充拉直后的kernel堆叠后的矩阵
对结果和官方api进行验证。
kernel = torch.randn(3,3)
input = torch.randn(4,4)
kernel_matrix = get_kernel_matrix(kernel, input.shape) #4*16
mm_conv2d_full_output = kernel_matrix @ input.reshape((-1, 1)) #通过矩阵乘积来计算卷积
pytorch_conv2d_output = F.conv2d(input.unsqueeze(0).unsqueeze(0), kernel.unsqueeze(0).unsqueeze(0))
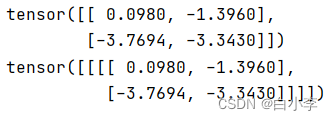
print(mm_conv2d_full_output.reshape((2,2)))
print(pytorch_conv2d_output) #2*2可见二者是一致的。
转置卷积
将kernel矩阵转置再和卷积的输出进行相乘,即实现了上采样效果。同样的在转置卷积中,可以通过调用api和手写完成。
1、API实现
kernel = torch.randn(3,3)
input = torch.randn(4,4)

pytorch_transposed_conv2d_output = F.conv_transpose2d(pytorch_conv2d_output, kernel.unsqueeze(0).unsqueeze(0))
2、对kernel矩阵转置+矩阵相乘
转置就是将kernel_matrix矩阵的负一维和负二维交换一下再与mm_conv2d_full_output矩阵相乘得出,即反向运算。
mm_conv2d_full_output = kernel_matrix @ input.reshape((-1, 1))
mm_transposed_conv2d_output = kernel_matrix.transpose(-1, -2) @ mm_conv2d_full_output
对于手算和调用api结果进行验证,结论一致。
print(mm_transposed_conv2d_output.reshape((4,4)))
print(pytorch_transposed_conv2d_output) 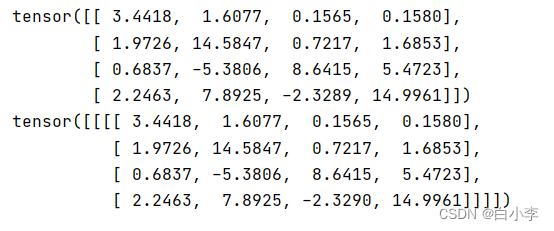
总结
在对卷积的相关代码进行学习后,对于卷积的原理认识更加深刻了,在当前的大部分程序中,对于卷积大部分都是调用官方api,但通过手写卷积代码可以加深对其的理解,,手写框架代码也尤为重要。通过上手,对于PyTorch的许多方法不是很熟悉,因此下周准备对PyTorch的相关知识进行系统的学习。


 5320
5320


 被折叠的 条评论
为什么被折叠?
被折叠的 条评论
为什么被折叠?
 到【灌水乐园】发言


