


目录
文章内容
本文介绍Ubuntu 22.04.3 Server系统通过修改yaml配置文件配置静态 ip 的方法。
1.查看网卡信息
使用ifconfig命令查看网卡信息获取网卡名称

如果出现Command 'ifconfig' not found, but can be installed with:apt install net-tools
使用下面命令安装net-tools
# 先更新下资源列表

sudo apt-get update

# 在线安装net-tools

sudo apt-get install net-tools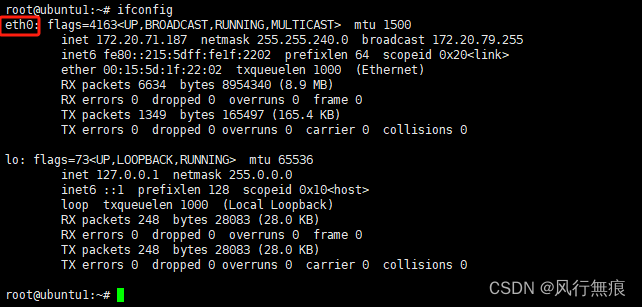
2.修改yaml配置文件
查看配置文件
root@ubuntu1:~# cd /etc/netplan
root@ubuntu1:/etc/netplan#
root@ubuntu1:/etc/netplan# ls -lh
total 4.0K
-rw-r--r-- 1 root root 363 Dec 22 16:55 00-installer-config.yaml
root@ubuntu1:/etc/netplan#
这里编辑配置文件 00-installer-config.yaml
sudo vi /etc/netplan/00-installer-config.yaml
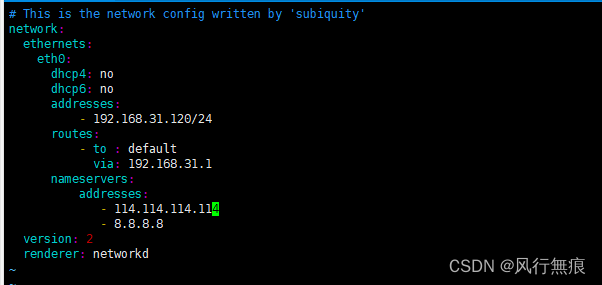
ubuntu22.04 参考以下配置模板如下
# This is the network config written by 'subiquity'
network:
  ethernets:
    eth0: # 网卡名称
      dhcp4: no #关闭ipv4动态分配ip地址
      dhcp6: no #关闭ipv6动态分配ip地址
      addresses:
          - 192.168.31.120/24  # 设置的子网IP和子网掩码,192.168.31.200代表IP /24代表掩码255.255.255.0
      routes:
          - to : default
            via: 192.168.31.1   # 网关
      nameservers:
          addresses:  # DNS服务器
             - 114.114.114.114
             - 8.8.8.8
  version: 2
  renderer: networkd
更新后如下图
保存更改并关闭文件。
如果没有就新建,新建后权限需要添加600 否则apply命令出现以下警告:
# 配置文件权限警告
** (generate:1170): WARNING **: 10:48:44.225: Permissions for /etc/netplan/00-installer-config.yaml are too open. Netplan configuration should NOT be accessible by others.
sudo chmod 600 /etc/netplan/00-installer-config.yaml3.应用新的网络配置
修改好网卡配置文件后通过下面命令生效
sudo netplan apply4.重新启动网络服务
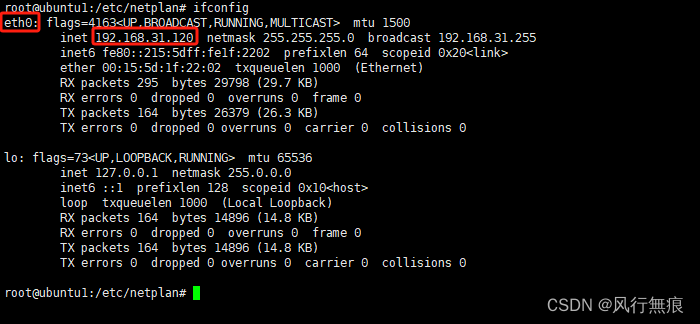
sudo systemctl restart systemd-networkd5.查看配置是否生效
通过ifconfig命令查看配置的新ip地址是否生效
6.跳过clond init
无网络等情况启动虚拟机,在console界面可能会出现以下提醒信息,但是不影响ssh登录。
cloud-init [1781]: YYYY-MM-DD HH:MM:SS,182 - cc_final_message.py[WARNING]: Used fallback datasource

可以通过下面命令关闭cloud init
sudo touch /etc/cloud/cloud-init.disabled


 3149
3149

 被折叠的 条评论
为什么被折叠?
被折叠的 条评论
为什么被折叠?
 到【灌水乐园】发言


