


简单实现微信录音+转码(.MP3)
录音
主界面很简单,就是一个自定义的录音的按钮,当点击按钮时会弹出对话框
<RelativeLayout xmlns:android="http://schemas.android.com/apk/res/android"
    xmlns:tools="http://schemas.android.com/tools"
    android:layout_width="match_parent"
    android:layout_height="match_parent"
    tools:context=".MainActivity">

    <com.gmy.voicerecord.view.RecordButton
        android:id="@+id/record"
        android:layout_width="match_parent"
        android:layout_height="wrap_content"
        android:layout_alignParentBottom="true"
        android:layout_centerHorizontal="true"
        android:layout_marginBottom="40dip"
        android:layout_marginLeft="40dip"
        android:layout_marginRight="40dip"
        android:gravity="center"
        android:paddingBottom="10dip"
        android:paddingTop="10dip"
        android:text="开始录音"
        android:textSize="14sp" />

</RelativeLayout>
核心接口
public interface IRecordButton {
    /**
     * 录音准备工作,重置录音文件名等
     */
    public void ready();

    /**
     * 开始录音
     */
    public void start();

    /**
     * 完成完整录音操作
     */
    public void complite(float time);

    /**
     * 录音结束
     */
    public void stop();

    /**
     * 录音失败时删除原来的旧文件
     */
    public void deleteOldFile();

    /**
     * 获取录音音量的大小
     *
     * @return
     */
    public double getAmplitude();

    /**
     * 返回录音文件完整路径
     *
     * @return
     */
    public String getFilePath();
}
首页图片点击按钮
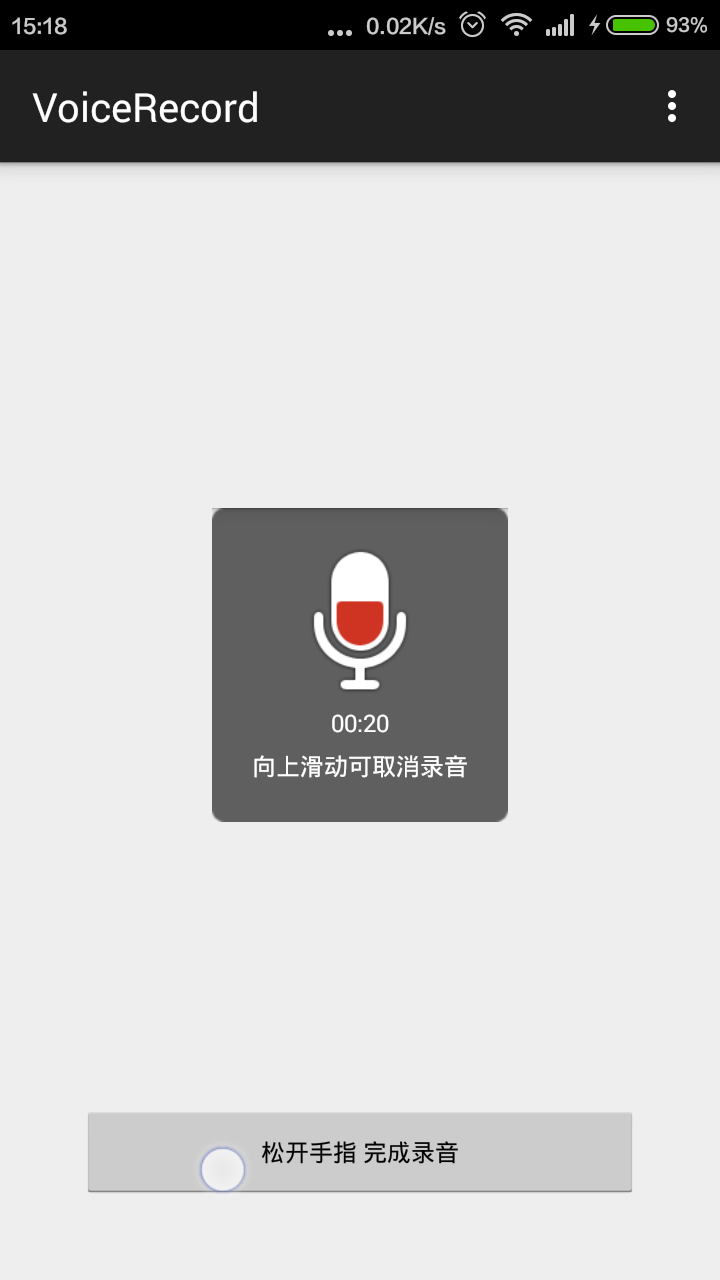
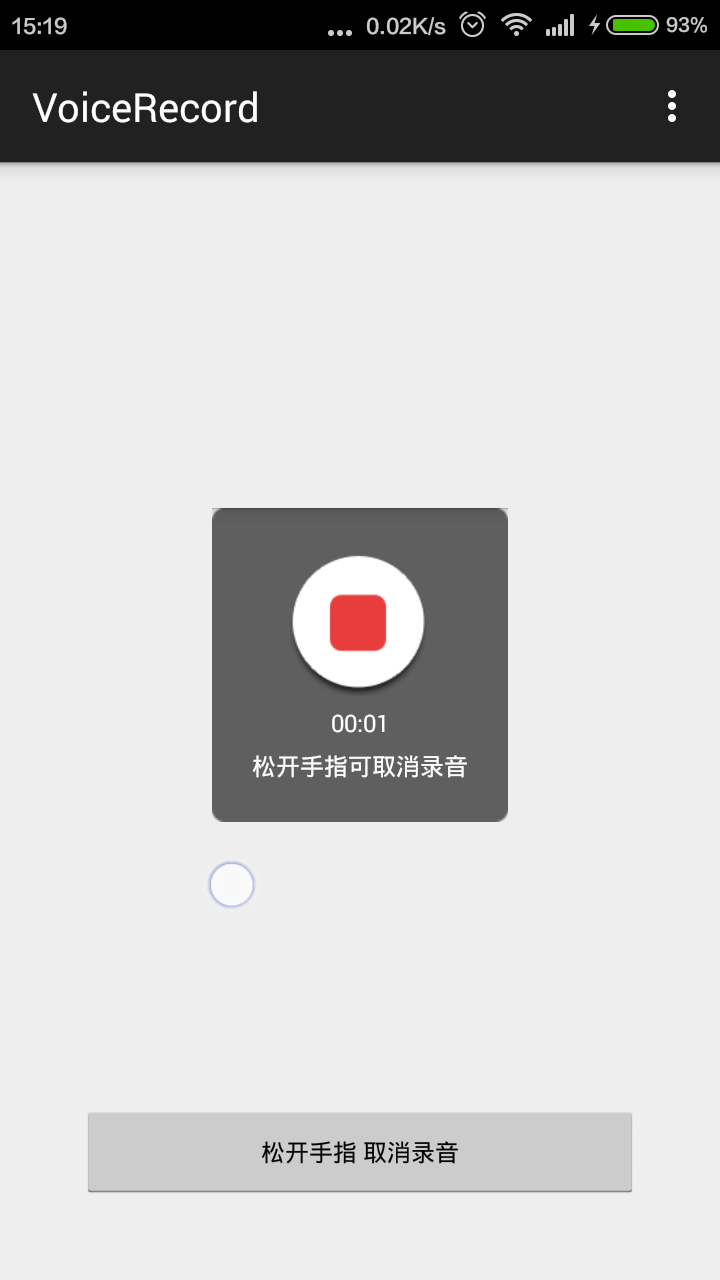
上滑可以取消录音
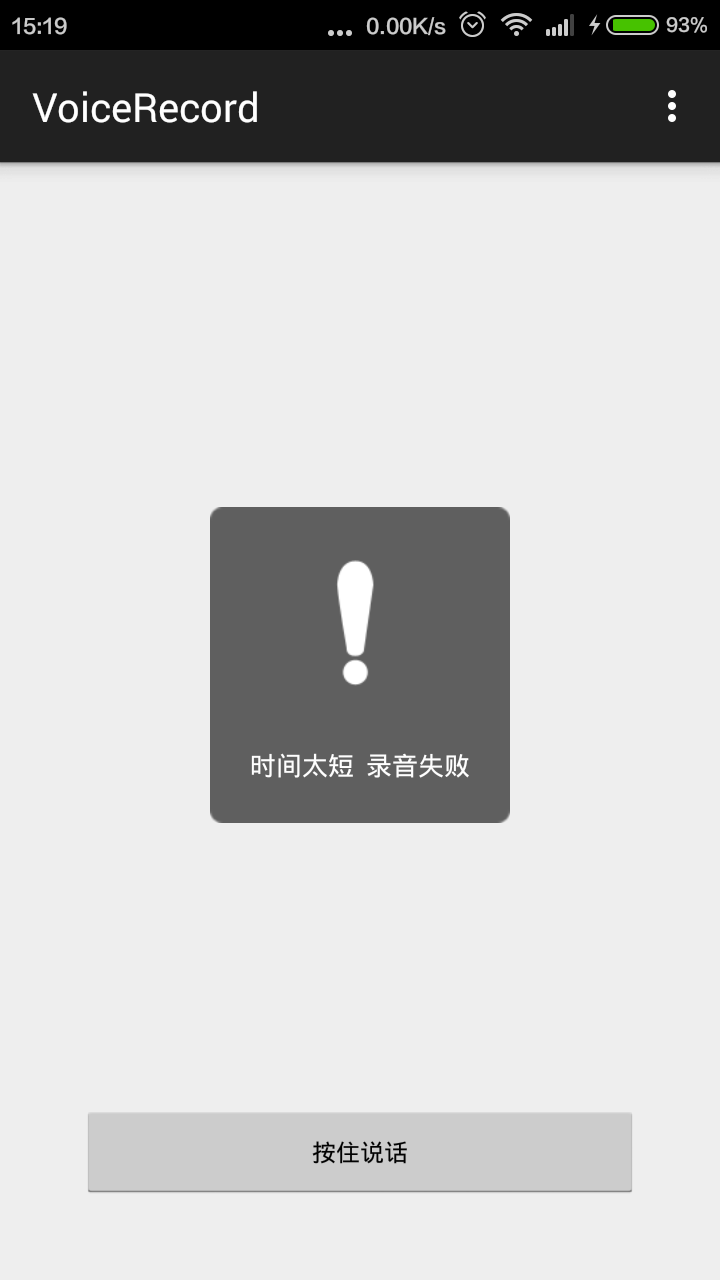
录音时间太短提示
转码
这里用到了AudioRecorder2Mp3Util,这是一个raw转标准MP3格式的简单的工具,不过之前要导入flame.jar,armeabi下导入libmp3lame.so的核心so文件。之后就涉及到转码的具体操作:
// 录音事件监听
voiceButton.setAudioRecord(new IRecordButton() {
private String fileName;
private AudioRecorder2Mp3Util audioRecoder;
private boolean canClean = false;
/**
* 释放资源
*/
@Override
public void stop() {
Log.d("gmyboy", "------------stop-------------");
audioRecoder.stopRecordingAndConvertFile();
audioRecoder.cleanFile(AudioRecorder2Mp3Util.RAW);
audioRecoder.close();
audioRecoder = null;
}
/**
* 开始录音
*/
@Override
public void start() {
Log.d("gmyboy", "------------start-------------");
if (canClean) {
audioRecoder.cleanFile(AudioRecorder2Mp3Util.MP3
| AudioRecorder2Mp3Util.RAW);
}
audioRecoder.startRecording();
canClean = true;
}
/**
* 准备工作
*/
@Override
public void ready() {
Log.d("gmyboy", "------------ready-------------");
File file = new File(BasePath);
if (!file.exists()) {
file.mkdir();
}
fileName = getCurrentDate();
if (audioRecoder == null) {
audioRecoder = new AudioRecorder2Mp3Util(null,
getFilePath() + fileName + ".raw", getFilePath()
+ fileName + ".mp3");
}
}
/**
* 获取保存路径
*/
@Override
public String getFilePath() {
return BasePath + "/";
}
@Override
public double getAmplitude() {
//这里就放了一个随机数
return Math.random() * 20000;
}
/**
* 删除本地保存文件
*/
@Override
public void deleteOldFile() {
Log.d("gmyboy", "------------deleteOldFile-------------");
File file = new File(getFilePath() + fileName + ".mp3");
if (file.exists())
file.delete();
}
/**
* 录音完成,执行后面操作(发送)
*/
@Override
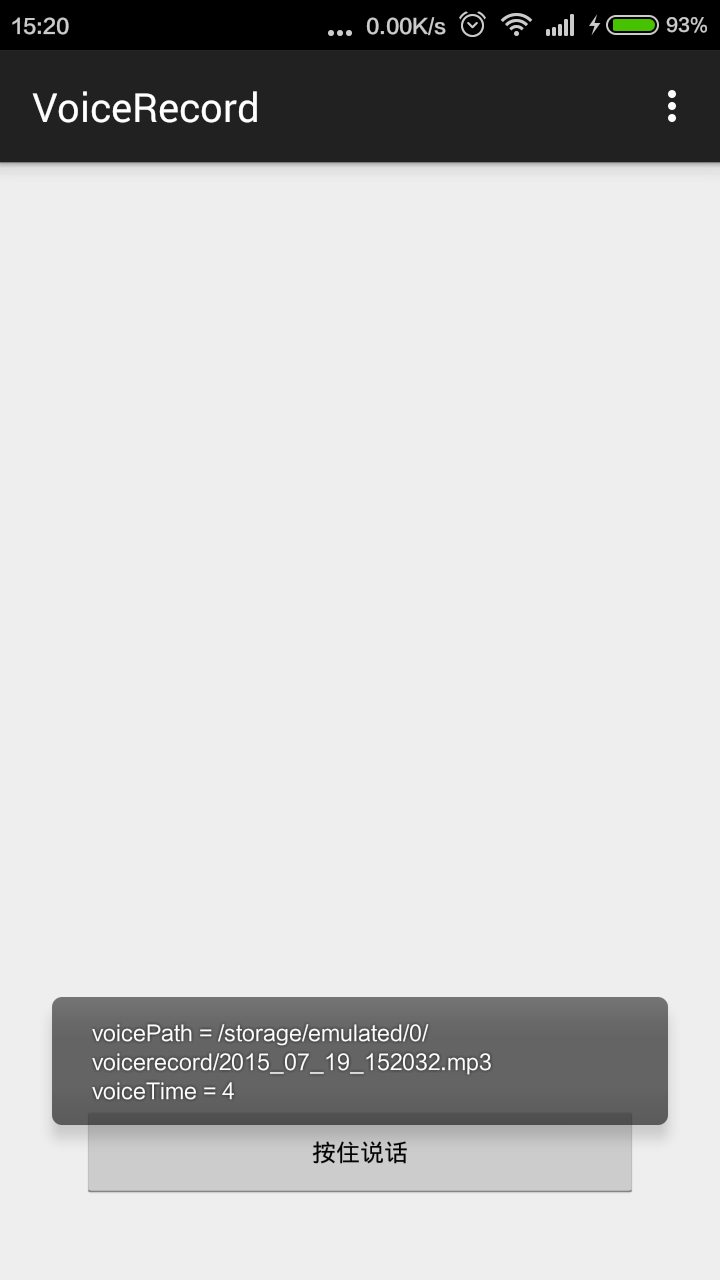
public void complite(float time) {
Log.d("gmyboy", "------------complite-------------");
Toast.makeText(MainActivity.this, "voicePath = " + getFilePath() + fileName + ".mp3" + "\n" + "voiceTime = " + String.valueOf((int) time), Toast.LENGTH_LONG).show();
}
});在ready中初始化一个AudioRecorder2Mp3Util,参数包括raw缓冲文件的保存路径和目标MP3文件的保存路径,然后再onstart中开启录音线程即可,最后提示保存成功。


 730
730

 被折叠的 条评论
为什么被折叠?
被折叠的 条评论
为什么被折叠?
 到【灌水乐园】发言


