


概述
- 演示一下在不同的设置情况下导航栏的状态
- 导航控制器控制视图控制器切换
示例
- 导航栏透明度属性,导航栏底色和文字颜色;
- 导航栏视图控制器管理视图控制器(页面跳转);
两个示例代码都放在一起了,第一个示例放在VCRoot.m视图控制器中,仔细看注释
第一个示例:导航栏透明度属性,导航栏底色和文字颜色
看图如下
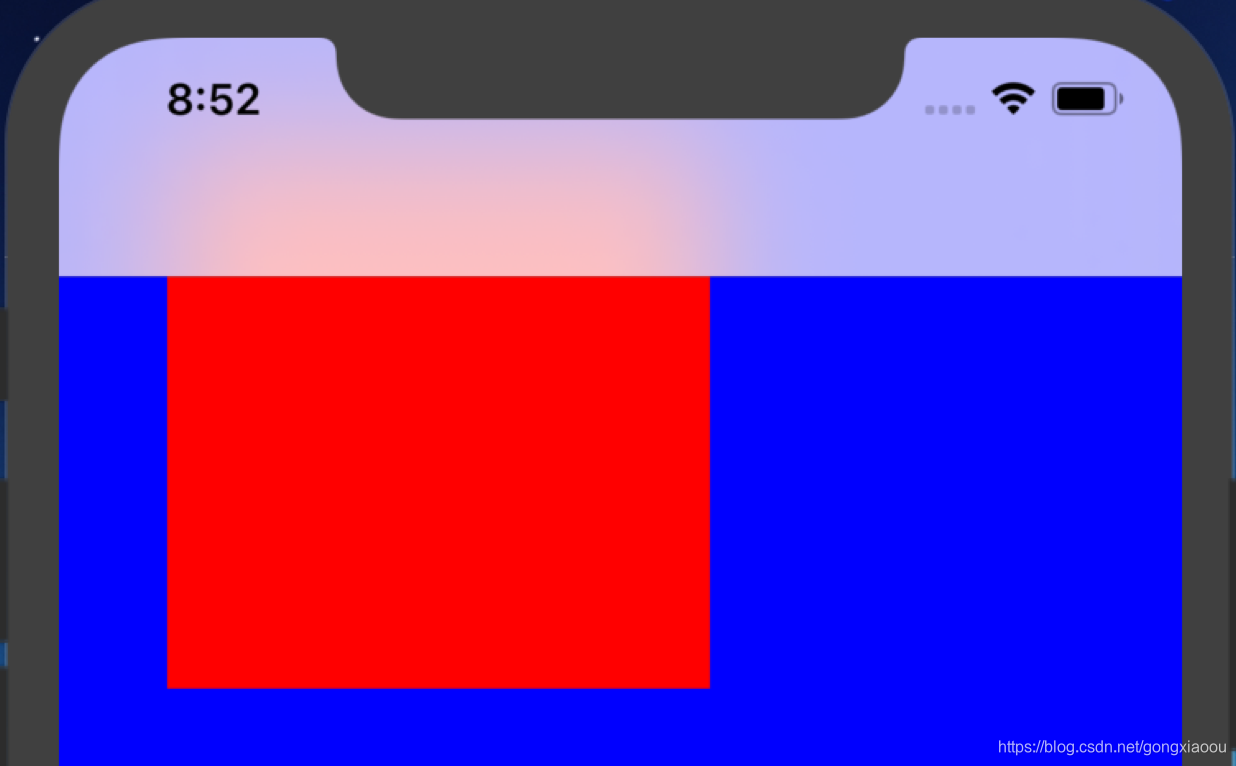
VCRoot中设置self.navigationController.navigationBar.translucent = YES;
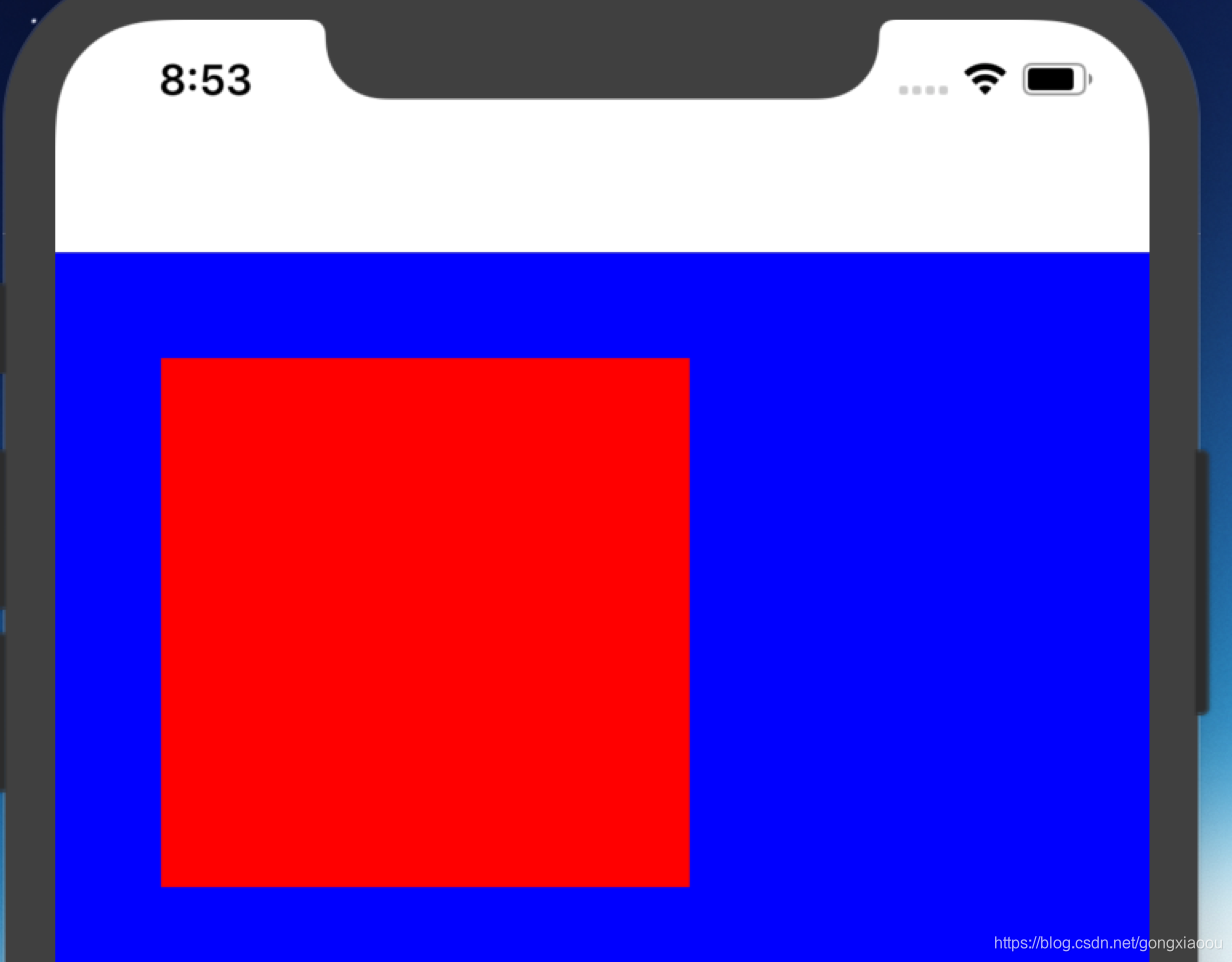
设置为self.navigationController.navigationBar.translucent = NO;
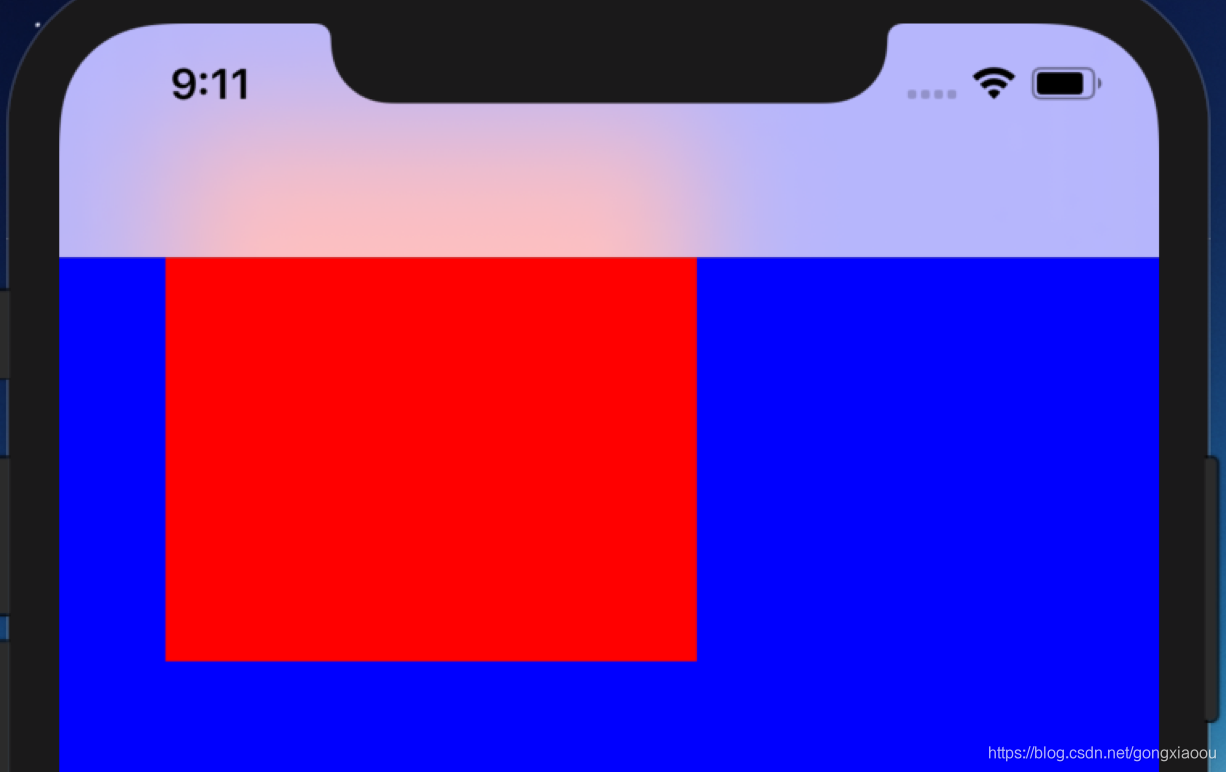
self.navigationController.navigationBar.barStyle = UIBarStyleDefault;
self.navigationController.navigationBar.barStyle = UIBarStyleBlack;

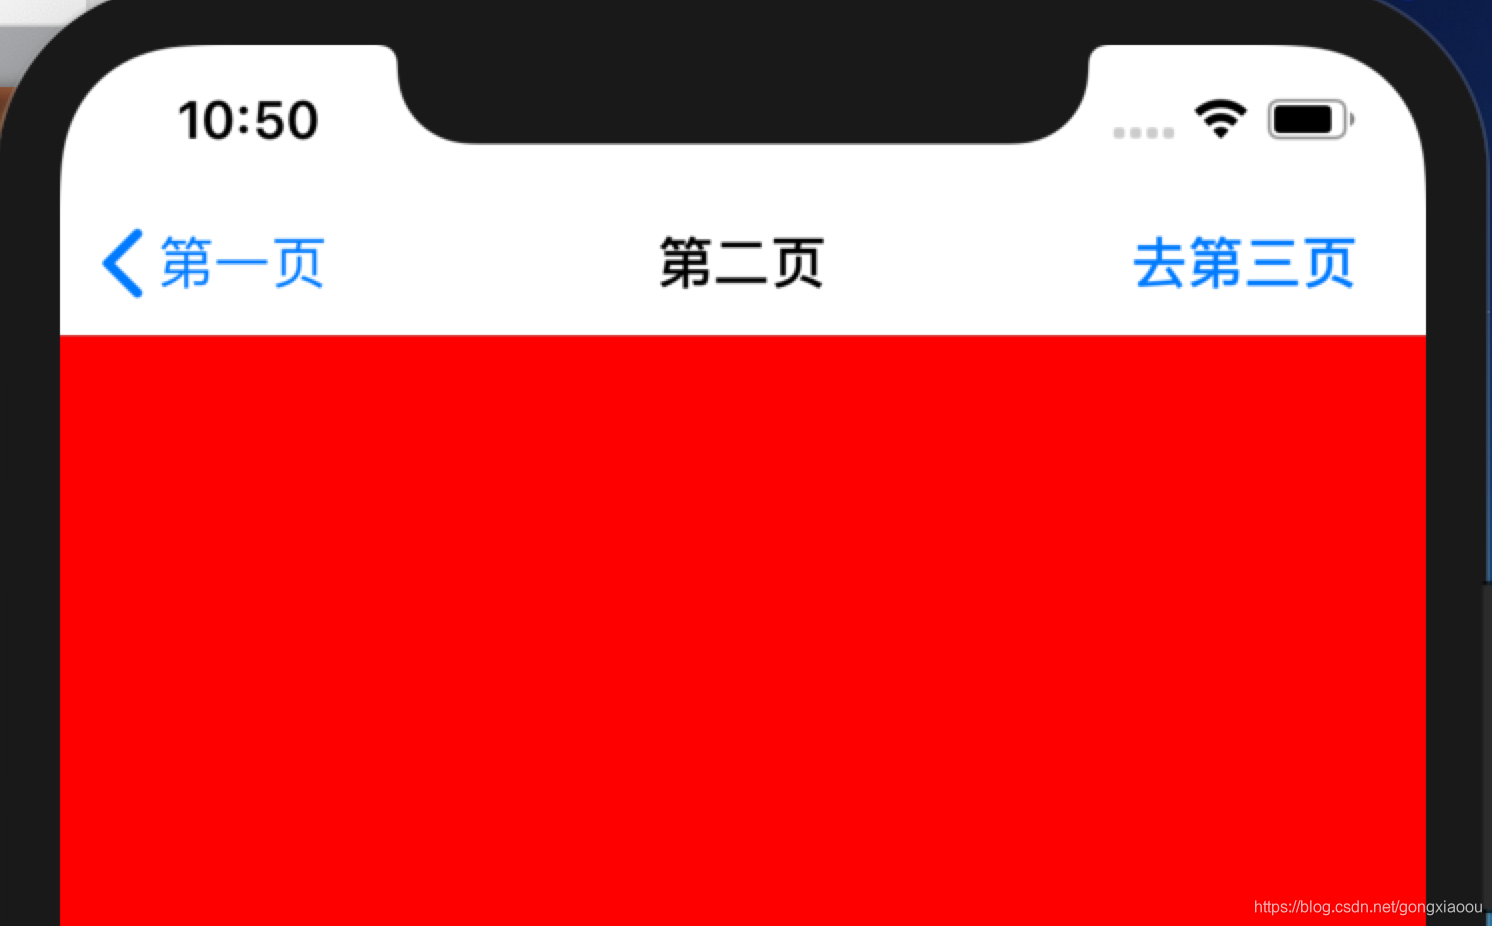
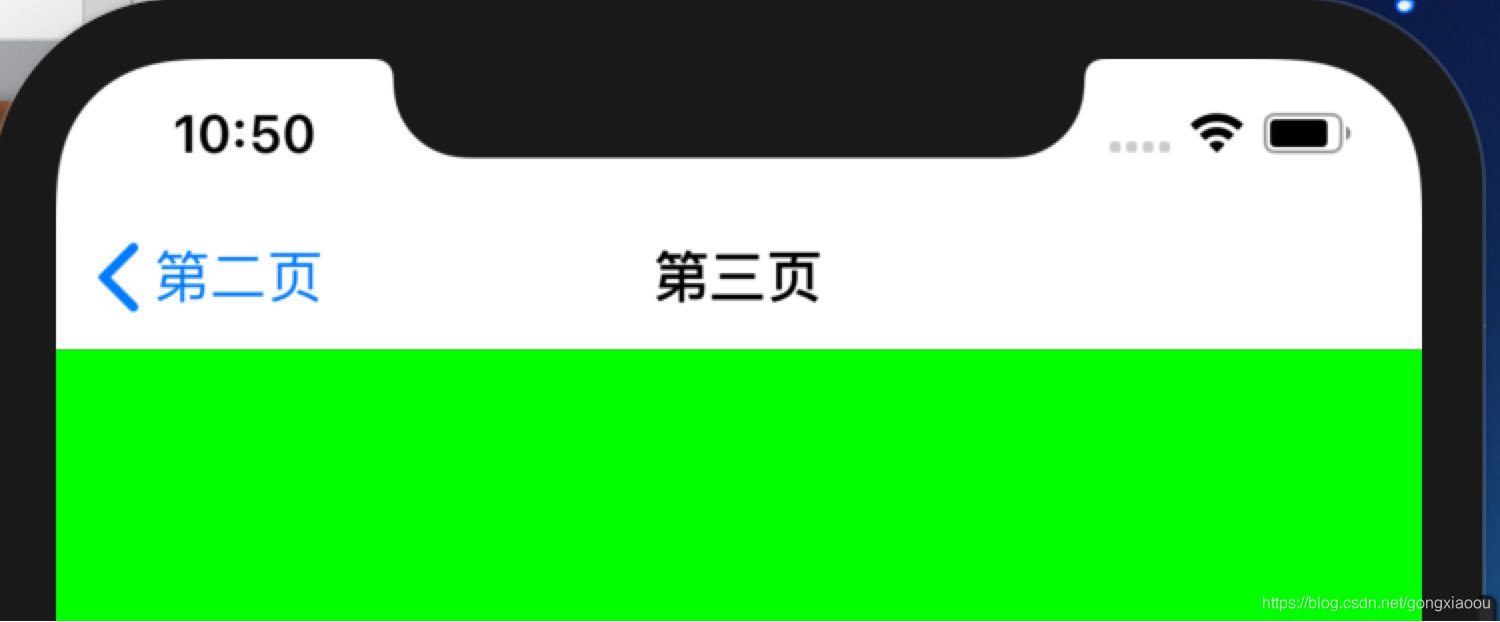
第二示例:导航栏视图控制器管理视图控制器(页面跳转)
示例就是演示页面三连跳
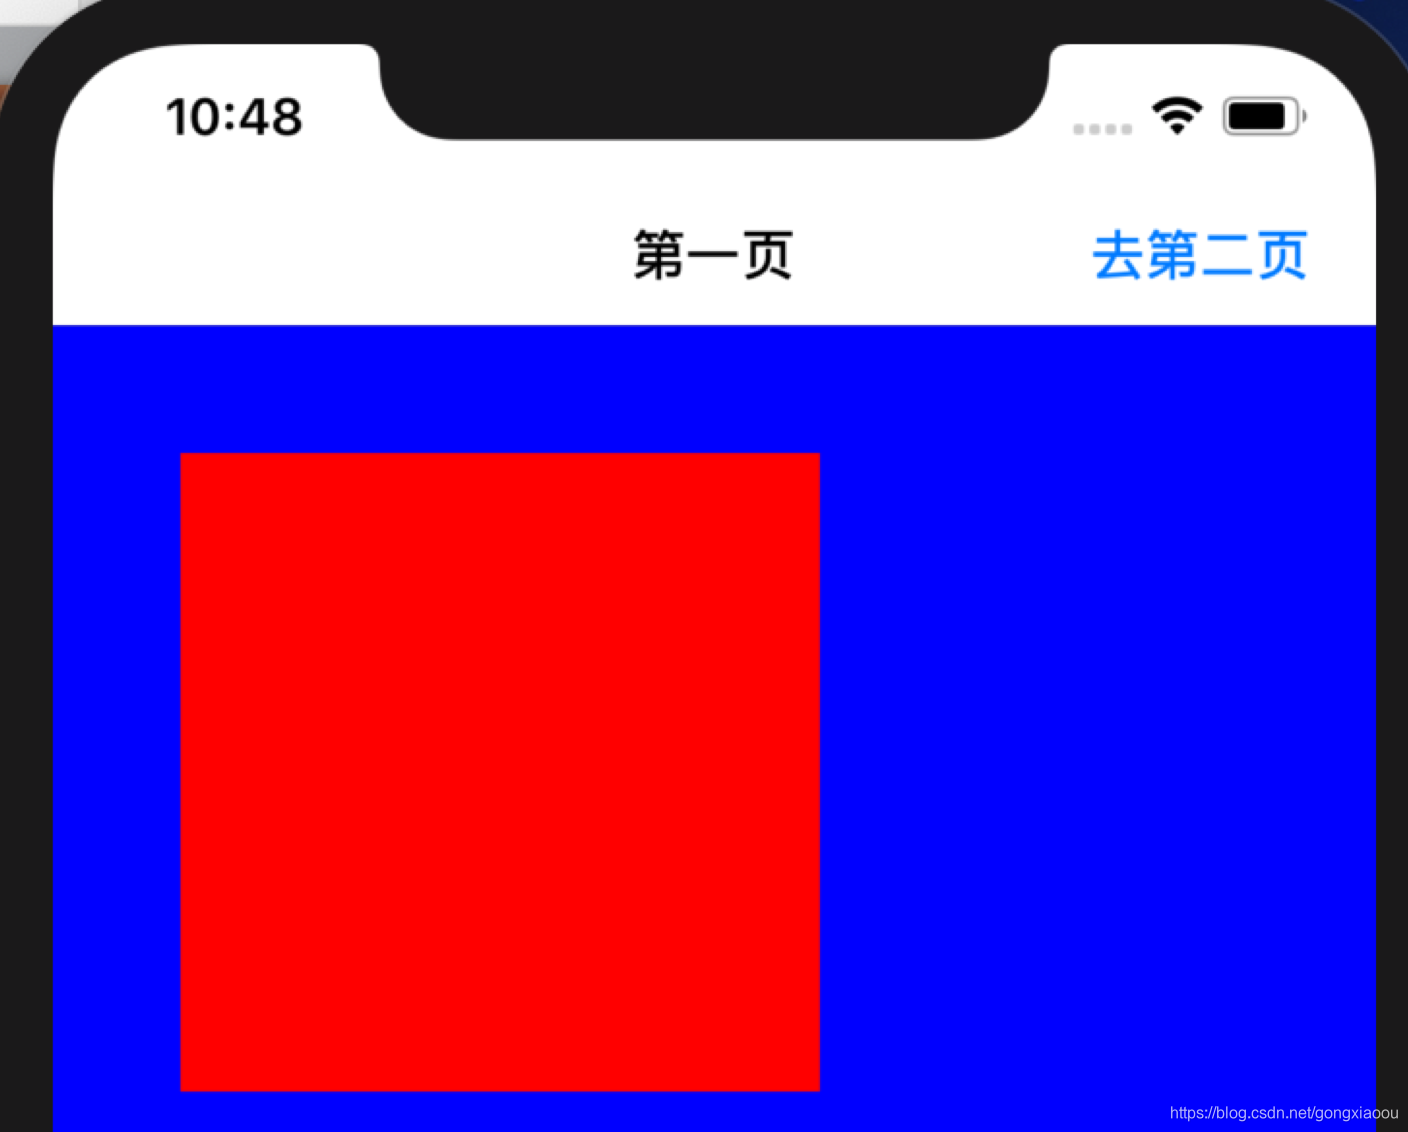
默认情况下,非根视图控制器左上角有一个返回键并带名称,名称是上一个页面的title
涉及到添加自己的UIWindow的知识参考前面的UIWindow
先看图:
示例代码
先看一下工程目录结构
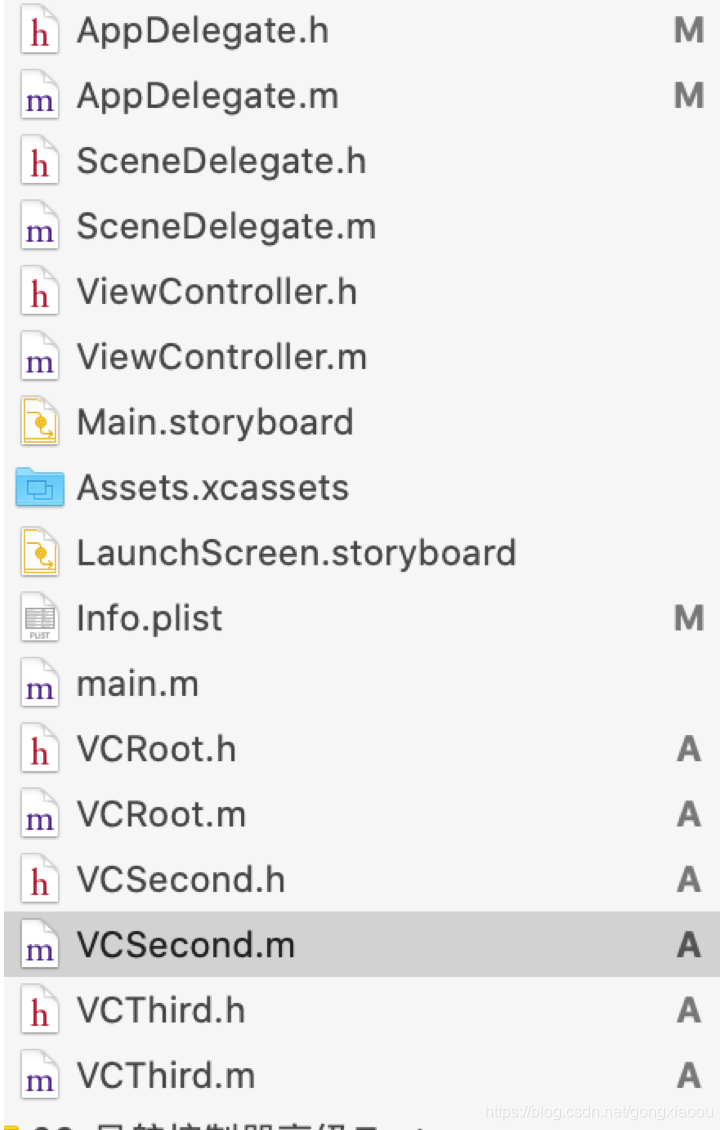
涉及到并做了修改的的文件写在下面,没用或者不做特殊处理的不贴出来了
AppDelegate.h
#import <UIKit/UIKit.h>

@interface AppDelegate : UIResponder <UIApplicationDelegate>

@property (retain,nonatomic) UIWindow* window;

@end
AppDelegate.m
#import "AppDelegate.h"
#import "VCRoot.h"

@interface AppDelegate ()

@end

@implementation AppDelegate


- (BOOL)application:(UIApplication *)application didFinishLaunchingWithOptions:(NSDictionary *)launchOptions {
    // Override point for customization after application launch.

    self.window = [[UIWindow alloc] initWithFrame:[UIScreen mainScreen].bounds];

    VCRoot* root = [VCRoot new];

    UINavigationController* nav = [[UINavigationController alloc] initWithRootViewController:root];

    self.window.rootViewController = nav;

    [self.window makeKeyAndVisible];
    return YES;
}


@end
VCRoot
#import "VCRoot.h"
#import "VCSecond.h"

@interface VCRoot ()

@end

@implementation VCRoot

- (void)viewDidLoad {
    [super viewDidLoad];
    // Do any additional setup after loading the view.

    //添加一个红色view
    UIView* v = [UIView new];
    v.frame = CGRectMake(40, 40, 200, 200);
    v.backgroundColor = [UIColor redColor];
    [self.view addSubview:v];

    self.navigationItem.title = @"第一页";
    //导航栏透明度
    //YES:透明
    //NO:不透明
    self.navigationController.navigationBar.translucent = NO;

    //导航栏样式,分白底黑字,黑底白字两种
    //UIBarStyleDefault:白底黑字
    //UIBarStyleBlack:黑底白字
    self.navigationController.navigationBar.barStyle = UIBarStyleDefault;

    //导航栏右侧添加一个按钮,点击跳转到第二页
    UIBarButtonItem* item = [[UIBarButtonItem alloc] initWithTitle:@"去第二页" style:UIBarButtonItemStyleDone target:self action:@selector(toSecond)];

    self.navigationItem.rightBarButtonItem = item;

    //视图控制器本身设置为蓝色
    self.view.backgroundColor = [UIColor blueColor];
}

-(void) toSecond{
    //跳转到第二个视图控制器
    VCSecond* second = [VCSecond new];
    //跳转方法
    //p1:视图控制器对象
    //p2:是否带动画
    [self.navigationController pushViewController:second animated:YES];
}

/*
#pragma mark - Navigation

// In a storyboard-based application, you will often want to do a little preparation before navigation
- (void)prepareForSegue:(UIStoryboardSegue *)segue sender:(id)sender {
    // Get the new view controller using [segue destinationViewController].
    // Pass the selected object to the new view controller.
}
*/

@end
VCSecond.m
#import "VCSecond.h"
#import "VCThird.h"

@interface VCSecond ()

@end

@implementation VCSecond

- (void)viewDidLoad {
    [super viewDidLoad];
    // Do any additional setup after loading the view.

    self.navigationItem.title = @"第二页";

    UIBarButtonItem* rightBtn = [[UIBarButtonItem alloc] initWithTitle:@"去第三页" style:UIBarButtonItemStyleDone target:self action:@selector(toThird)];

    self.navigationItem.rightBarButtonItem = rightBtn;

    self.view.backgroundColor = [UIColor redColor];
}

-(void) toThird{
    //跳到第三个视图控制器
    VCThird* third = [VCThird new];

    [self.navigationController pushViewController:third animated:YES];
}

/*
#pragma mark - Navigation

// In a storyboard-based application, you will often want to do a little preparation before navigation
- (void)prepareForSegue:(UIStoryboardSegue *)segue sender:(id)sender {
    // Get the new view controller using [segue destinationViewController].
    // Pass the selected object to the new view controller.
}
*/

@end
VCThird.m
#import "VCThird.h"

@interface VCThird ()

@end

@implementation VCThird

- (void)viewDidLoad {
    [super viewDidLoad];
    // Do any additional setup after loading the view.

    self.navigationItem.title = @"第三页";

    self.view.backgroundColor = [UIColor greenColor];
}

/*
#pragma mark - Navigation

// In a storyboard-based application, you will often want to do a little preparation before navigation
- (void)prepareForSegue:(UIStoryboardSegue *)segue sender:(id)sender {
    // Get the new view controller using [segue destinationViewController].
    // Pass the selected object to the new view controller.
}
*/

@end


 137
137


 被折叠的 条评论
为什么被折叠?
被折叠的 条评论
为什么被折叠?
 到【灌水乐园】发言


