


前言
APP的版本升级主要分为两种方式:
1.应用市场升级
2.应用内升级
而应用内升级的方式是目前大多数APP采用的升级更新方式。
应用内升级的模式
按照不同的业务需求又可以分为两种:
1,强制性更新
如果APP有更新,那么则弹出更新提示对话框,并且该对话框上只有一个升级按钮,并且按返回键该对话框不会消失,用户想要继续使用APP,必须等完成升级覆盖安装之后。
2,选择性更新
如果APP有更新,那么则弹出更新提示对话框,并且该对话框上同时包含升级按钮和暂不升级按钮。
APP的更新方式
1,APP内下载更新
这时我们必须等下载安装完全后才能进行操作
2,通知栏下载更新
这种情况是不在应用内更新,放在通知栏并不会影响当前app的使用
APP的下载方式
Android中下载的方式很多种:HttpUrlConnection,Retrofit,okHttp,以及android原生的下载工具类DownLoadManager 等等。本篇我们采用的方式是Google推荐的下载工具类DownLoadManager。
APP升级更新流程
1,获取当前应用的版本号
2,获取服务器端的apk的版本号
3,对比两个版本号,如果服务器端版本号大于当前版本号,说明有新版本,则弹出更新对话框
4,点击立即更新按钮,开始更新安装
优化:
在apk下载之前我们需要先判断本地是否已经存在之前下载没有安装的apk,并获取该apk的版本号,与当前App进行包名和版本号的对比,当包名相同,并且当前版本号是小于下载的Apk版本号两个条件同时成立时,直接执行安装操作。否则,执行remove,通过downloadId删除下载任务以及文件,继续执行下载。
如何判断本地是否存在已经下载的apk:
1,如果是使用系统的DownloadManager,我们可以通过downloadId来判断,如果存在downloadId,那么我们通过downloadId获取当前下载的状态status。status分为成功,失败两种状态,成功代表本地存在已经下载完整的apk文件,此时我们可以进一步分析该apk的版本号等,失败代表本地存在未下载完成的apk文件,直接删除开启新的下载即可。如果不存在downloadId那就代表没有下载过,直接开启下载即可,具体参考博客:https://www.cnblogs.com/zhujiabin/p/7384902.html
2,如果是使用第三方网络框架下载的,那么只需判断对应的目录下是否存在同名的文件,然后获取该apk文件,同时拿到其版本信息,执行后续操作即可,关于获取apk文件对应的版本信息,可查看博客:https://blog.csdn.net/centralperk/article/details/8293898
案例一:仅仅使用系统DownloadManager在通知栏更新下载
1.请求接口,获取服务器端的json格式的新版本信息
private void JudgeVersion() {
            String path = GlobalUrl.BASE_URL + GlobalUrl.VERSION_UPDATE;
            RequestParams params = new RequestParams(path);
            x.http().get(params, new Callback.CommonCallback<String>() {
                @Override
                public void onSuccess(String result) {
//  {"versionName":"asdfasfasddf","versionCode":123,"versionSize":"123M","versionDesc":"<p>123123123<\/p>","downloadUrl":"upload\/apk\/20170509\/17101494317003.apk"}
                   //将json字符串转换为Bean对象
                    versionBean = new Gson().fromJson(result, VersionBean.class);
                    // 获取当前应用的版本号
                    int versionCode = AppUtils.getVersionCode(mActivity);
                    // 比较版本号
                    if(versionBean.getVersionCode() > versionCode && versionBean.getVersionCode() != PrefUtils.getInt(mActivity,"ignoreVersion",0)){
                        // 说明有新版本存在,弹出版本升级提示对话框
                        showUpdateDialog();
                    }
                }

                @Override
                public void onError(Throwable ex, boolean isOnCallback) {
//                    Toast.makeText(mActivity, "版本检测失败,请稍后重试!", Toast.LENGTH_SHORT).show();
                }

                @Override
                public void onCancelled(CancelledException cex) {

                }

                @Override
                public void onFinished() {

                }
            });
    }
以上演示为使用xUtils请求版本更新接口获取新版本信息,此处只是提供演示,当然你也可以使用其他的网络框架,比如Retrofit 和 OkGo都是可以的。
2,versionBean的代码如下:
public class VersionBean {

    private String versionName; // 版本名称
    private int versionCode;    // 版本号
    private String versionSize; //版本大小
    private String versionDesc; //版本描述
    private String downloadUrl; //下载地址

    // 各个属性对应的getter和setter方法

}
3,AppUtils工具类代码:
public class AppUtils {
    /**
     * 获取版本名称
     *
     * @return
     */
    public static String getVersionName(Context context) {
        PackageManager packageManager = context.getPackageManager();
        try {
            PackageInfo packageInfo = packageManager.getPackageInfo(
                    context.getPackageName(), 0);// 获取包的信息

            int versionCode = packageInfo.versionCode;
            String versionName = packageInfo.versionName;

            System.out.println("versionName=" + versionName + ";versionCode="
                    + versionCode);

            return versionName;
        } catch (PackageManager.NameNotFoundException e) {
            // 没有找到包名的时候会走此异常
            e.printStackTrace();
        }

        return "";
    }

    /**
     * 获取app的版本号
     *
     * @return
     */
    public static int getVersionCode(Context context) {
        PackageManager packageManager = context.getPackageManager();
        try {
            PackageInfo packageInfo = packageManager.getPackageInfo(
                    context.getPackageName(), 0);// 获取包的信息

            int versionCode = packageInfo.versionCode;
            return versionCode;
        } catch (PackageManager.NameNotFoundException e) {
            // 没有找到包名的时候会走此异常
            e.printStackTrace();
        }

        return -1;
    }
}
DisplayUtil 代码:
public class DisplayUtil {

    public static int dp2px(Context context, float dipValue){
        final float scale = context.getResources().getDisplayMetrics().density;
        return (int)(dipValue * scale + 0.5f);
    }
    public static int px2dp(Context context, float pxValue){
        final float scale = context.getResources().getDisplayMetrics().density;
        return (int)(pxValue / scale + 0.5f);
    }

    /**
     * 将px值转换为sp值,保证文字大小不变
     *
     * @param pxValue
     * @param fontScale
     *            (DisplayMetrics类中属性scaledDensity)
     * @return
     */
    public static int px2sp(Context context, float pxValue) {
        final float fontScale = context.getResources().getDisplayMetrics().scaledDensity;
        return (int) (pxValue / fontScale + 0.5f);
    }


    public static int sp2px(Context context, float pxValue) {
        final float fontScale = context.getResources().getDisplayMetrics().scaledDensity;
        return (int) (pxValue * fontScale + 0.5f);
    }
}
4,弹出更新对话框的方法如下:
// 弹出版本更新对话框
    private void showUpdateDialog() {
        AlertDialog.Builder builder = new AlertDialog.Builder(mActivity);
        View v = View.inflate(mActivity, R.layout.update_view, null);
        TextView tvNum1 = (TextView) v.findViewById(R.id.tvNum1);
        TextView tvNum2 = (TextView) v.findViewById(R.id.tvNum2);
        TextView tvNum3 = (TextView) v.findViewById(R.id.tvNum3);
        CheckBox ignore = (CheckBox) v.findViewById(R.id.ignore);
        // 为忽略此版本添加选中监听
        ignore.setOnCheckedChangeListener(new CompoundButton.OnCheckedChangeListener() {
            @Override
            public void onCheckedChanged(CompoundButton compoundButton, boolean b) {
                // 获取到当前的版本号,此处选择保存版本号而非版本名称是因为判断是否有新版本时使用的是版本号来进行比较,保存在SharedPreference里面
                if(b){
                    // 被选中
                    // 保存当前版本号
                    PrefUtils.setInt(mActivity,"ignoreVersion",versionBean.getVersionCode());
                }else{
                    // 取消选中
                    PrefUtils.setInt(mActivity,"ignoreVersion",0);
                }
            }
        });
        TextView tvDesc = (TextView) v.findViewById(R.id.tvDesc);
        tvNum1.setText("v"+AppUtils.getVersionName(mActivity));
        tvNum2.setText(versionBean.getVersionName());
        tvNum3.setText(versionBean.getVersionSize());
        tvDesc.setText(Html.fromHtml(versionBean.getVersionDesc()));  // 显示带html标签的更新描述
        TextView tvCancel = (TextView) v.findViewById(R.id.tvCancel);
        TextView tvOk = (TextView) v.findViewById(R.id.tvOk);
        tvCancel.setOnClickListener(new View.OnClickListener() {
            @Override
            public void onClick(View view) {
                dialog.dismiss();
            }
        });
        tvOk.setOnClickListener(new View.OnClickListener() {
            @Override
            public void onClick(View view) {
                dialog.dismiss();
                dialog = null;
                // 执行下载更新,建议将工具类的调用逻辑封装进一个方法,然后需要添加6.0的SD卡写入权限,此处省略。。。
                // 调用下载工具类
                DownLoadUtils downloadUtils =   new DownLoadUtils(getContext());
                        downloadUtils.downloadAPK("http://ip地址:端口/服务名/resources/app/app-release.apk", "smartonet.apk");
            }
        });
        builder.setView(v, 0, 0, 0, 0); // 设置内容试图并去除边框
        builder.setCancelable(false);
        dialog = builder.create();
        dialog.show();
        // 设置AlertDialog的宽高
        WindowManager.LayoutParams params = dialog.getWindow().getAttributes();
        params.width = DisplayUtil.dp2px(mActivity,350);
        params.height = DisplayUtil.dp2px(mActivity,345);
        dialog.getWindow().setAttributes(params);
    }
5,dialog的自定义View的布局代码:
<?xml version="1.0" encoding="utf-8"?>
<!--aa-->
<LinearLayout xmlns:android="http://schemas.android.com/apk/res/android"
    android:layout_width="match_parent"
    android:layout_height="match_parent"
    android:paddingLeft="15dp"
    android:paddingTop="15dp"
    android:paddingRight="15dp"
    android:paddingBottom="10dp"
    android:background="@mipmap/update_bg"
    android:orientation="vertical">
    <TextView
        android:layout_width="wrap_content"
        android:layout_height="wrap_content"
        android:textSize="17sp"
        android:paddingBottom="13dp"
        android:textColor="#000"
        android:layout_gravity="center_horizontal"
        android:text="发现新版本"/>
    <View
        android:layout_width="match_parent"
        android:layout_height="1dp"
        android:visibility="gone"
        android:layout_marginBottom="10dp"
        android:background="#eeeff3"></View>
    <RelativeLayout
        android:layout_width="match_parent"
        android:paddingBottom="5dp"
        android:layout_height="wrap_content"
        android:layout_marginLeft="5dp">
    <TextView
        android:id="@+id/tv1"
        android:layout_width="wrap_content"
        android:layout_height="wrap_content"
        android:layout_marginLeft="5dp"
        android:textSize="14sp"
        android:visibility="gone"
        android:text="当前版本:"/>
    <TextView
        android:id="@+id/tvNum1"
        android:layout_width="wrap_content"
        android:layout_height="wrap_content"
        android:layout_toRightOf="@id/tv1"
        android:textSize="14sp"
        android:visibility="gone"
        android:text="v0.1"/>
    <TextView
        android:id="@+id/tv2"
        android:layout_width="wrap_content"
        android:layout_height="wrap_content"
        android:layout_toRightOf="@id/tvNum1"
        android:textSize="15sp"
        android:textColor="#474747"
        android:text="最新版本:"/>
    <TextView
        android:id="@+id/tvNum2"
        android:layout_width="wrap_content"
        android:layout_height="wrap_content"
        android:layout_toRightOf="@id/tv2"
        android:textColor="#474747"
        android:textSize="15sp"
        android:text="v0.2"/>
    <TextView
        android:id="@id/tv3"
        android:layout_width="wrap_content"
        android:layout_height="wrap_content"
        android:layout_below="@id/tv2"
        android:textSize="15sp"
        android:paddingTop="3dp"
        android:textColor="#474747"
        android:paddingBottom="3dp"
        android:text="新版本大小:"/>
    <TextView
        android:id="@+id/tvNum3"
        android:layout_width="wrap_content"
        android:layout_height="wrap_content"
        android:layout_below="@id/tv2"
        android:layout_toRightOf="@id/tv3"
        android:paddingTop="3dp"
        android:paddingBottom="10dp"
        android:textColor="#474747"
        android:textSize="15sp"
        android:text="40.0M"/>
    </RelativeLayout>
    <!--<WebView
        android:id="@+id/webView"
        android:layout_below="@id/tvNum3"
        android:layout_marginTop="5dp"
        android:layout_width="match_parent"
        android:layout_height="wrap_content">
    </WebView>-->

    <ScrollView
        android:layout_width="match_parent"
        android:layout_height="120dp"
        android:scrollbars="none"
        >
        <RelativeLayout
            android:layout_width="match_parent"
            android:paddingBottom="10dp"
            android:layout_height="match_parent"
            android:layout_marginLeft="6dp">
            <TextView
                android:id="@+id/tvDesc"
                android:layout_width="match_parent"
                android:layout_height="wrap_content"
                android:textColor="#000"
                android:textSize="15sp"
                android:lineSpacingExtra="4dp"
                android:text="更新描述"/>
        </RelativeLayout>
    </ScrollView>
    <CheckBox
        android:id="@+id/ignore"
        style="@style/mycheckbox"
        android:layout_width="wrap_content"
        android:layout_height="wrap_content"
        android:textSize="13sp"
        android:layout_marginLeft="5dp"
        android:padding="5dp"
        android:textColor="#474747"
        android:layout_marginTop="15dp"
        android:layout_marginBottom="5dp"
        android:text="忽略此版本"/>
    <View
        android:layout_width="match_parent"
        android:layout_height="1dp"
        android:background="#eeeff3"></View>
    <LinearLayout
        android:layout_width="match_parent"
        android:layout_gravity="right"
        android:orientation="horizontal"
        android:layout_height="wrap_content">
        <TextView
            android:id="@+id/tvCancel"
            android:layout_width="0dp"
            android:layout_weight="1"
            android:layout_height="wrap_content"
            android:textSize="16sp"
            android:textColor="#000"
            android:gravity="center"
            android:paddingTop="10dp"
            android:clickable="true"
            android:text="以后再说"/>
        <View
            android:layout_width="1dp"
            android:layout_height="match_parent"
            android:layout_marginTop="10dp"
            android:background="#eeeff3"></View>
        <TextView
            android:id="@+id/tvOk"
            android:layout_width="0dp"
            android:layout_weight="1"
            android:paddingTop="10dp"
            android:layout_height="match_parent"
            android:textSize="16sp"
            android:textColor="@color/title"
            android:gravity="center"
            android:clickable="true"
            android:text="立即更新"/>
    </LinearLayout>
</LinearLayout>
6,app版本更新的工具类
public class DownLoadUtils {
    //下载器
    private DownloadManager downloadManager;
    //上下文
    private Context mContext;
    //下载的ID
    private long downloadId;

    public  DownLoadUtils(Context context){
        this.mContext = context;
    }

    //下载apk
    public void downloadAPK(String url, String name) {
        //创建下载任务
         DownloadManager.Request request = new DownloadManager.Request(Uri.parse(url));
         //设置用于下载时的网络类型,默认任何网络都可以下载,提供的网络常量有:NETWORK_BLUETOOTH、NETWORK_MOBILE、NETWORK_WIFI
         // 一般不配置该句,以默认任何网络都可以下载
        // request.setAllowedNetworkTypes(Request.NETWORK_WIFI);
        // 设置漫游状态下是否可以下载
        request.setAllowedOverRoaming(false);
        // 下载过程和下载完成后通知栏有通知消息
        request.setNotificationVisibility(DownloadManager.Request.VISIBILITY_VISIBLE | DownloadManager.Request.VISIBILITY_VISIBLE_NOTIFY_COMPLETED);
        request.setTitle("新版本Apk");
        request.setDescription("apk正在下载");
        //此句配置不配置都可以
        request.setVisibleInDownloadsUi(true);
        //设置下载的路径
        //设置文件的保存的位置[三种方式],setDestinationInExternalFilesDir、setDestinationInExternalPublicDir、 setDestinationUri等方法用于设置下载文件的存放路径,
        //注意如果将下载文件存放在默认路径,那么在空间不足的情况下系统会将文件删除,所以使用上述方法设置文件存放目录是十分必要的。
        //第一种 //file:///storage/emulated/0/Android/data/your-package/files/Download/update.apk
        //request.setDestinationInExternalFilesDir(context, Environment.DIRECTORY_DOWNLOADS, name);
        //第二种 //file:///storage/emulated/0/Download/update.apk
        //request.setDestinationInExternalPublicDir(Environment.DIRECTORY_DOWNLOADS, name);
        //第三种 自定义文件路径
        //request.setDestinationUri()
        // 此处使用该句设置保存路径
        request.setDestinationInExternalPublicDir(Environment.getExternalStorageDirectory().getAbsolutePath() , name);
        //获取DownloadManager
        downloadManager = (DownloadManager) mContext.getSystemService(Context.DOWNLOAD_SERVICE);
        //将下载请求加入下载队列,加入下载队列后会给该任务返回一个long型的id,通过该id可以取消任务,重启任务、获取下载的文件等等
        downloadId = downloadManager.enqueue(request);
        //注册广播接收者,监听下载状态
        mContext.registerReceiver(receiver,
                new IntentFilter(DownloadManager.ACTION_DOWNLOAD_COMPLETE));
    }

    //广播监听下载的各个状态
    private BroadcastReceiver receiver = new BroadcastReceiver() {
        @Override
        public void onReceive(Context context, Intent intent) {
            checkStatus(context,intent);
        }
    };


    //检查下载状态
    private void checkStatus(Context context, Intent intent) {
        DownloadManager.Query query = new DownloadManager.Query();
        //通过下载的id查找
        query.setFilterById(downloadId);
        Cursor c = downloadManager.query(query);
        if (c.moveToFirst()) {
            int status = c.getInt(c.getColumnIndex(DownloadManager.COLUMN_STATUS));
            switch (status) {
                //下载暂停
                case DownloadManager.STATUS_PAUSED:
                    break;
                //下载延迟
                case DownloadManager.STATUS_PENDING:
                    break;
                //正在下载
                case DownloadManager.STATUS_RUNNING:
                    break;
                //下载完成
                case DownloadManager.STATUS_SUCCESSFUL:
                    //下载完成安装APK
                    installAPK(context,intent);
                    break;
                //下载失败
                case DownloadManager.STATUS_FAILED:
                    Toast.makeText(mContext, "下载失败", Toast.LENGTH_SHORT).show();
                    break;
            }
        }
        c.close();
    }

    //下载到本地后执行安装
    private void installAPK(Context context, Intent intent) {
        //获取下载文件的Uri
        Uri downloadFileUri = downloadManager.getUriForDownloadedFile(downloadId);
        if (downloadFileUri != null) {
            Intent intent= new Intent(Intent.ACTION_VIEW);
            intent.setDataAndType(downloadFileUri, "application/vnd.android.package-archive");
            intent.addFlags(Intent.FLAG_ACTIVITY_NEW_TASK);
            mContext.startActivity(intent);
            mContext.unregisterReceiver(receiver);
        }
    }

}
为了适配安卓7.0,将上面的installAPK()方法修改如下:
//下载到本地后执行安装
    private void installAPK(Context context, Intent intent) {
        long longExtra = intent.getLongExtra(DownloadManager.EXTRA_DOWNLOAD_ID, -1);
                if (id == longExtra){
//                    Uri downloadUri = mDownloadManager.getUriForDownloadedFile(id);
                    Intent install = new Intent(Intent.ACTION_VIEW);
                    File apkFile = getExternalFilesDir("DownLoad/jiaogeyi.apk");
                    if (Build.VERSION.SDK_INT >= Build.VERSION_CODES.N){
                        install.setFlags(Intent.FLAG_GRANT_READ_URI_PERMISSION);
                        Uri uriForFile = FileProvider.getUriForFile(context, "com.example.administrator.updateapkdemo.fileprovider", apkFile);
                        install.setDataAndType(uriForFile,"application/vnd.android.package-archive");
                    }else {
                        install.setDataAndType(Uri.fromFile(apkFile),"application/vnd.android.package-archive");
                    }

                    install.addFlags(Intent.FLAG_ACTIVITY_NEW_TASK);
                    mContext.startActivity(install);
                    mContext.unregisterReceiver(receiver);
                }
    }
注意在适配7.0时安装的方法中获取file对象和前面设置apk下载保存路径时的对应关系,比如:
//设置文件存放路径和文件名
request.setDestinationInExternalPublicDir(  Environment.DIRECTORY_DOWNLOADS  , "app-release.apk" ) ;
安装时:
private void installAPK() {

            Intent install = new Intent(Intent.ACTION_VIEW);
            // 找到下载好的apk, 注意文件名与上面保存时保持一致
            File apkFile=new File(Environment.getExternalStoragePublicDirectory(Environment.DIRECTORY_DOWNLOADS),"app-release.apk");
            if (Build.VERSION.SDK_INT >= Build.VERSION_CODES.N){
                install.setFlags(Intent.FLAG_GRANT_READ_URI_PERMISSION);
                Uri uriForFile = FileProvider.getUriForFile(this, "com.example.fileProvider", apkFile);
                install.setDataAndType(uriForFile,"application/vnd.android.package-archive");
            }else {
                install.setDataAndType(Uri.fromFile(apkFile), "application/vnd.android.package-archive");
            }

            install.addFlags(Intent.FLAG_ACTIVITY_NEW_TASK);
            startActivity(install);
    }
或者直接修改工具类中的代码如下:去掉检查更新状态的那部分代码。
//广播监听下载的各个状态
    private BroadcastReceiver receiver = new BroadcastReceiver() {
        @Override
        public void onReceive(Context context, Intent intent) {
            long longExtra = intent.getLongExtra(DownloadManager.EXTRA_DOWNLOAD_ID, -1);
                if (id == longExtra){
//                    Uri downloadUri = mDownloadManager.getUriForDownloadedFile(id);
                    Intent install = new Intent(Intent.ACTION_VIEW);
                    File apkFile = getExternalFilesDir("DownLoad/jiaogeyi.apk");
                    if (Build.VERSION.SDK_INT >= Build.VERSION_CODES.N){
                        install.setFlags(Intent.FLAG_GRANT_READ_URI_PERMISSION);
                        Uri uriForFile = FileProvider.getUriForFile(context, "com.example.administrator.updateapkdemo.fileprovider", apkFile);
                        install.setDataAndType(uriForFile,"application/vnd.android.package-archive");
                    }else {
                        install.setDataAndType(Uri.fromFile(apkFile),"application/vnd.android.package-archive");
                    }

                    install.addFlags(Intent.FLAG_ACTIVITY_NEW_TASK);
                    mContext.startActivity(install);
                    mContext.unregisterReceiver(receiver);
                }
        }
    };
Android 7.0 的文件权限变得尤为严格,所以之前的一些代码在高一点的系统可能导致崩溃,如果不做版本判断,在7.0的手机就会抛出FileUriExposedException异常,说app不能访问你的app以外的资源。官方文档建议的做法,是用FileProvider来实现文件共享,即使用FileProvider来间接的获取文件。也就是说在你项目的src/res新建个xml文件夹再自定义一个文件,并在清单文件里面进行相关的配置。
这里首先需要做的是在manifests中声明FileProvider:
<provider
    android:name="android.support.v4.content.FileProvider"
    android:authorities="com.example.administrator.updateapkdemo.fileprovider"
    /**注意参数统一性 FileProvider.getUriForFile(appContext, "com.example.administrator.updateapkdemo.fileprovider", apkFile);*/
    android:exported="false"
    android:grantUriPermissions="true">
    <meta-data
        android:name="android.support.FILE_PROVIDER_PATHS"
        android:resource="@xml/file_paths" />
</provider>
其中authorities是需要注意的地方,这个属性的值最好让他独一无二,所以我这里采用包名加fileprovider来设置,你如果非要设置成xxx.ooo也不是不可以,但是必须和以下这行代码中的第二个参数一致:
Uri uriForFile = FileProvider.getUriForFile(context, "com.example.administrator.updateapkdemo.fileprovider", apkFile);
其次就是在res下的xml文件夹下创建file_paths.xml文件:
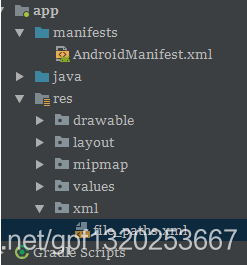 其中file_paths.xml代码如下:
<?xml version="1.0" encoding="utf-8"?>
<paths>
    <!--path:需要临时授权访问的路径(.代表所有路径) name:就是你给这个访问路径起个名字-->
    <external-path
        name="external_files"
        path="." />
</paths>
当然还有在清单中声明一些权限:
 即可。
即可。
使用okhttp,retrofit等下载apk到SD卡指定位置,下载完成后执行自动安装
1,首先判断SD卡是否可用
if(Environment.getExternalStorageState().equals(Environment.MEDIA_MOUNTED)) {
    // SD卡可用
} else {
    Toast.makeText(MainActivity.this,"SD卡不可用,请检查SD卡",Toast.LENGTH_LONG).show();
}
2,执行网络下载操作,将服务器apk文件下载保存在sd卡的指定位置
3,执行自动安装,适配android 7.0
Intent intent = new Intent(Intent.ACTION_VIEW);
      File file = new File(Environment.getExternalStorageDirectory(), "name.apk");
      if (Build.VERSION.SDK_INT >= Build.VERSION_CODES.N) { //aandroid N的权限问题
          intent.setFlags(Intent.FLAG_GRANT_READ_URI_PERMISSION);
          // 这个字符串可以自己定义,只要唯一即可,记得与清单文件中配置的保持一致。
          String authority = getApplicationContext().getPackageName() + ".fileProvider";
          Uri contentUri = FileProvider.getUriForFile(MainActivity.this, authority, file );
          intent.setDataAndType(contentUri, "application/vnd.android.package-archive");
       } else {
          intent.setDataAndType(Uri.fromFile(file), "application/vnd.android.package-archive");
          intent.setFlags(Intent.FLAG_ACTIVITY_NEW_TASK);
       }

 startActivity(intent);
 //弹出安装窗口把原程序关闭,避免安装完毕点击打开时没反应
 killProcess(android.os.Process.myPid());
最后别忘了android7.0适配的配置,配置方式和上面一致。
注意:在适配7.0时安装的方法中获取file对象和前面设置apk下载保存路径时的对应关系,比如:
//设置文件存放路径和文件名
request.setDestinationInExternalPublicDir(  Environment.DIRECTORY_DOWNLOADS  , "app-release.apk" ) ;
安装时:
private void installAPK() {

            Intent install = new Intent(Intent.ACTION_VIEW);
            // 找到下载好的apk, 注意文件名与上面保存时保持一致
            File apkFile=new File(Environment.getExternalStoragePublicDirectory(Environment.DIRECTORY_DOWNLOADS),"app-release.apk");
            if (Build.VERSION.SDK_INT >= Build.VERSION_CODES.N){
                install.setFlags(Intent.FLAG_GRANT_READ_URI_PERMISSION);
                Uri uriForFile = FileProvider.getUriForFile(this, "com.example.aa.fileProvider", apkFile);
                install.setDataAndType(uriForFile,"application/vnd.android.package-archive");
            }else {
                install.setDataAndType(Uri.fromFile(apkFile), "application/vnd.android.package-archive");
            }

            install.addFlags(Intent.FLAG_ACTIVITY_NEW_TASK);
            startActivity(install);
    }
如果是使用OkGo等网络框架执行下载,FileCallback构造方法中参数1为文件下载保存位置,参数2为保存的文件名,如果不设置框架均有提供默认值,那么如果下载文件时指定的保存路径如下所示,我们可以通过progress.filePath获取到下载的apk文件的保存路径,有了该路径就可以直接用于在适配7.0时构造File对象了:File file = new File(progress.filePath);关于网络框架OkGo的使用,大家可以参考我的OkGo系列博客,OkGo比Retrofit使用更加方便,也是基于RestFul风格设计的,同时也完美支持Rxjava,只是目前还不支持注解方式:
public void downloadApk(){
        OkGo.<File>get("http://ucdl.25pp.com/fs08/2017/01/20/2/2_87a290b5f041a8b512f0bc51595f839a.apk")
                .tag(this)
                .execute(new FileCallback(Environment.getExternalStorageDirectory().getPath(),"updateDemo.apk") {
            @Override
            public void onStart(Request<File, ? extends Request> request) {
                // 开始下载
                setNotification();
            }

            @Override
            public void onSuccess(Response<File> response) {
                // 下载成功
            }

            @Override
            public void downloadProgress(Progress progress) {
                // 下载的apk文件的保存路径
                filePath = progress.filePath;
                // OkGo框架返回的下载进度,float类型的,值介于0~1之间,1代表下载完成
                float currentSize = progress.fraction;
                // long totalSize = progress.totalSize;
                int progress2 = (int) (currentSize*100);
                mBuilder.setContentTitle("正在下载:新版本...")
                        .setContentText(String.format(Locale.CHINESE,"%d%%",progress2))
                        .setProgress(100,progress2,false)
                        .setWhen(System.currentTimeMillis());
                Notification notification = mBuilder.build();
                notification.flags = Notification.FLAG_AUTO_CANCEL;
                mNotificationManager.notify(NOTIFY_ID,notification);
                // 进度监听
                onTransProgressChangeListener.onProgressChange(currentSize);
            }

            @Override
            public void onFinish() {

                //app运行在界面,直接安装
                //否则运行在后台则通知形式告知完成
                //if (onFront()) {
                    // 下载完成
                    // Toast.makeText(DownloadService.this, "1111111下载完成!"+filePath, Toast.LENGTH_SHORT).show();
                    // mNotificationManager.cancel(NOTIFY_ID);
                //} else {
                    // 下载完成
                    Toast.makeText(DownloadService.this, "2222222下载完成!"+filePath, Toast.LENGTH_SHORT).show();
                    Intent intent = installIntent(filePath);
                    PendingIntent pIntent = PendingIntent.getActivity(getApplicationContext()
                            ,0, intent, PendingIntent.FLAG_UPDATE_CURRENT);
                    mBuilder.setContentIntent(pIntent)
                            .setContentTitle(getPackageName())
                            .setContentText("下载完成,点击安装")
                            .setProgress(0,0,false)
                            .setDefaults(Notification.DEFAULT_ALL);
                    Notification notification = mBuilder.build();
                    notification.flags = Notification.FLAG_AUTO_CANCEL;
                    mNotificationManager.notify(NOTIFY_ID,notification);
                //}
                stopSelf();
            }

            @Override
            public void onError(Response<File> response) {
                mNotificationManager.cancel(NOTIFY_ID);
                Toast.makeText(DownloadService.this, "下载失败!", Toast.LENGTH_SHORT).show();
                stopSelf();
            }
        });
    }
方式二:仅仅使用DownloadManager完成通知栏和界面同时显示下载进度:
思路:DownloadManager是android2.3以后,系统下载的方法,既然系统已经提供了下载,那我们就不用再去额外使用Retrofit或者OkGo去下载了,同样的我们也可以获取到系统DownloadManager在下载过程中的进度,我们的需求可能不只是在Notification 中显示进度就好了,也许,在app中也需要获取实时下载进度。所以Query类就是提供查询的一些方法。
但API中就只有两个方法,原来,他把数据保存在数据库中去了。我们需要获得一个Cursor 结果集,通过结果集获得我们想要的数据。只是该进度的获取需要去每隔一段时间去查询一次数据库得到,我们可以考虑使用Timer来创建一个本地轮询,具体代码如下:
参考博客:https://blog.csdn.net/u012209506/article/details/56012744
1,Activity代码:
public class DownloadActivity extends AppCompatActivity implements View.OnClickListener {

    private TextView down;   // 立即下载
    private TextView progress;  // 百分比进度
    private TextView file_name; // 文件名
    private ProgressBar pb_update;  // 进度条
    private DownloadManager downloadManager;
    private DownloadManager.Request request;
    public static String downloadUrl = "http://ucdl.25pp.com/fs08/2017/01/20/2/2_87a290b5f041a8b512f0bc51595f839a.apk";
    Timer timer;
    long id;
    TimerTask task;
    Handler handler =new Handler(){
        @Override
        public void handleMessage(Message msg) {
            super.handleMessage(msg);
            Bundle bundle = msg.getData();
            int pro = bundle.getInt("pro");
            String name  = bundle.getString("name");
            // 更新UI
            pb_update.setProgress(pro);
            progress.setText(String.valueOf(pro)+"%");
            file_name.setText(name);
        }
    };


    @Override
    protected void onCreate(Bundle savedInstanceState) {
        super.onCreate(savedInstanceState);
        setContentView(R.layout.activity_download);

         // 初始化界面上的组件,并为按钮设置点击事件监听
        down = (TextView) findViewById(R.id.down);
        progress = (TextView) findViewById(R.id.progress);
        file_name = (TextView) findViewById(R.id.file_name);
        pb_update = (ProgressBar) findViewById(R.id.pb_update);
        down.setOnClickListener(this);

// 获取DownloadManager对象来进行下载
        downloadManager = (DownloadManager) getSystemService(DOWNLOAD_SERVICE);
        request = new DownloadManager.Request(Uri.parse(downloadUrl));
        request.setTitle("斗鱼Tv");
        // request.setAllowedNetworkTypes(DownloadManager.Request.NETWORK_WIFI);
        request.setAllowedOverRoaming(false);
        request.setMimeType("application/vnd.android.package-archive");
        request.setNotificationVisibility(DownloadManager.Request.VISIBILITY_VISIBLE_NOTIFY_COMPLETED);
        //创建目录,此处为SD卡8大公有目录的download目录下
        Environment.getExternalStoragePublicDirectory(Environment.DIRECTORY_DOWNLOADS).mkdir() ;
        //设置文件存放路径和文件名
        request.setDestinationInExternalPublicDir(  Environment.DIRECTORY_DOWNLOADS  , "app-release.apk" ) ;
        pb_update.setMax(100); // 设置进度条最大值
        // 获取DownloadManager的Query对象,Query类可查询当前下载的进度,下载地址,文件存放目录等数据。
        final  DownloadManager.Query query = new DownloadManager.Query();
        timer = new Timer();
        task = new TimerTask() {
            @Override
            public void run() {
                // 通过query获得Cursor结果集,然后通过查询数据库获取到我们需要的进度等信息
                // 此处使用Timer进行本地轮询来实时获取更新进度
                Cursor cursor = downloadManager.query(query.setFilterById(id));
                if (cursor != null && cursor.moveToFirst()) {
                    // 下载完成时,设置进度条进度为100,执行安装逻辑,取消轮训任务
                    if (cursor.getInt(
                            cursor.getColumnIndex(DownloadManager.COLUMN_STATUS)) == DownloadManager.STATUS_SUCCESSFUL) {
                        pb_update.setProgress(100);
                        // 注意参数跟上面设置时保持一致
                        installAPK();
                        task.cancel();
                    }
                    // 下载中
                    // Notification标题
                    String title = cursor.getString(cursor.getColumnIndex(DownloadManager.COLUMN_TITLE));
                    // 下载的文件在本地的目录
                    String address = cursor.getString(cursor.getColumnIndex(DownloadManager.COLUMN_LOCAL_URI));
                    // 已经下载的字节数
                    int bytes_downloaded = cursor.getInt(cursor.getColumnIndex(DownloadManager.COLUMN_BYTES_DOWNLOADED_SO_FAR));
                    // 总需下载的字节数
                    int bytes_total = cursor.getInt(cursor.getColumnIndex(DownloadManager.COLUMN_TOTAL_SIZE_BYTES));
                    // 进度百分值
                    int pro =  (bytes_downloaded * 100) / bytes_total;
                    // 后台线程不能直接更新UI,所以此处使用Handler消息传递机制,传递两个数据:标题和进度
                    Message msg =Message.obtain();
                    Bundle bundle = new Bundle();
                    bundle.putInt("pro",pro);  // 进度百分比值
                    bundle.putString("name",title);  // 标题名称
                    msg.setData(bundle);
                    handler.sendMessage(msg);
                }
                cursor.close();
            }
        };
        // 每隔一秒钟去执行TimerTask里面的操作,在按钮的点击事件中去开启该轮询任务
        timer.schedule(task, 0,1000);
    }

    @Override
    public void onClick(View view) {
        id = downloadManager.enqueue(request);
        // 执行本地轮询操作
        task.run();
        // 设置不可点击
        down.setClickable(false);
    }

    private void installAPK() {

            Intent install = new Intent(Intent.ACTION_VIEW);
            // 找到下载好的apk, 注意文件名与上面保存时保持一致
            File apkFile=new File(Environment.getExternalStoragePublicDirectory(Environment.DIRECTORY_DOWNLOADS),"app-release.apk");
            if (Build.VERSION.SDK_INT >= Build.VERSION_CODES.N){
// 这里参数2可以任意设置,但是需要与配置文件中配置的authorities值保持一致
                install.setFlags(Intent.FLAG_GRANT_READ_URI_PERMISSION);
                Uri uriForFile = FileProvider.getUriForFile(this, "com.example.fileProvider", apkFile);
                install.setDataAndType(uriForFile,"application/vnd.android.package-archive");
            }else {
                install.setDataAndType(Uri.fromFile(apkFile), "application/vnd.android.package-archive");
            }

            install.addFlags(Intent.FLAG_ACTIVITY_NEW_TASK);
            startActivity(install);
    }
}
2,布局文件代码:
<?xml version="1.0" encoding="utf-8"?>
<LinearLayout xmlns:android="http://schemas.android.com/apk/res/android"
    android:orientation="vertical" android:layout_width="match_parent"
    android:gravity="center"
    android:layout_height="match_parent">
    <TextView
        android:id="@+id/file_name"
        android:layout_width="wrap_content"
        android:layout_height="wrap_content"
        android:layout_marginBottom="20dp"
        android:text="dxtj.apk"/>
    <ProgressBar
        android:id="@+id/pb_update"
        style="?android:attr/progressBarStyleHorizontal"
        android:layout_width="match_parent"
        android:layout_height="10dp"
        android:layout_marginLeft="10dp"
        android:layout_marginRight="10dp"
        android:layout_gravity="center_horizontal"
        android:layout_marginTop="10dp"
        android:max="100"
        android:progress="0"
        android:progressDrawable="@drawable/progressbar_color"
        android:layout_marginBottom="20dp"
        />

    <TextView
        android:id="@+id/progress"
        android:layout_width="wrap_content"
        android:layout_height="wrap_content"
        android:gravity="center"
        android:layout_marginBottom="20dp"
        android:text="0%"/>
    <TextView
        android:id="@+id/down"
        android:layout_width="wrap_content"
        android:layout_height="wrap_content"
        android:gravity="center"
        android:paddingTop="10dp"
        android:paddingBottom="10dp"
        android:paddingLeft="30dp"
        android:paddingRight="30dp"
        android:textColor="#ff0000"
        android:text="立即下载"/>
</LinearLayout>
3,progressbar_color.xml代码:
<?xml version="1.0" encoding="utf-8"?>
<layer-list xmlns:android="http://schemas.android.com/apk/res/android" >

    <item android:id="@android:id/background">

        <shape>

            <corners android:radius="10dip" />

            <gradient
                android:angle="0"
                android:centerColor="#e4e4e4"
                android:centerY="0.75"
                android:endColor="#e4e4e4"
                android:startColor="#e4e4e4" />
        </shape>
    </item>

    <item android:id="@android:id/secondaryProgress">

        <clip>

            <shape>

                <corners android:radius="10dip" />

                <gradient
                    android:angle="0"
                    android:centerColor="#e4e4e4"
                    android:centerY="0.75"
                    android:endColor="#e4e4e4"
                    android:startColor="#e4e4e4" />
            </shape>
        </clip>
    </item>

    <item android:id="@android:id/progress">

        <clip>

            <shape>

                <corners android:radius="10dip" />

                <gradient
                    android:angle="0"
                    android:endColor="@color/red"
                    android:startColor="@color/red" />
            </shape>
        </clip>
    </item>

</layer-list>
4,适配安卓7.0的配置:
清单文件中:
<provider
            android:name="android.support.v4.content.FileProvider"
            android:authorities="com.example.aa.fileProvider"
            android:exported="false"
            android:grantUriPermissions="true">
        <meta-data
            android:name="android.support.FILE_PROVIDER_PATHS"
            android:resource="@xml/file_paths" />
        </provider>
file_paths.xml文件中:
<?xml version="1.0" encoding="utf-8"?>
<paths>
    <!--path:需要临时授权访问的路径(.代表所有路径) name:就是你给这个访问路径起个名字-->
    <external-path
        name="external_files"
        path="." />
</paths>
方式三:在绑定式service中使用Rtrofit或者OkGo或者Okhttp网络框架下载apk,在app内展示下载进度或者通知栏同时展示下载进度。
其实Retrofit和OkGo都是基于Okhttp进行的封装,本质也是Okhttp。
我们知道如果我们使用DownloadManager和Retrofit同事来使用的话,就相当于下载了两次apk,只是一次使用的是系统提供的下载一次使用的是OkGo等框架提供的下载,这就显得浪费流量了,所以如果我们的需求需要同时在app内和通知栏显示下载进度,那么要么单单使用DownloadManager(上面方式二就是)要么单单使用OkGo等第三方非框架,此处讲解一下单单使用网络框架同时在app内部和通知栏下时下载进度,另外集合服务Service回顾一下相关知识,关于Service的详细实用此处推荐博客:https://blog.csdn.net/javazejian/article/details/52709857 ,:
涉及到的知识点:
1.Service的使用,因为牵扯到和Activity之间的通信,所以选择绑定式Service服务。
2.通知栏的自定义。
3.apk下载的耗时操作是放在Service之中进行的,也就是说获取的下载进度是在Service中,此处使用OkGo框架,而Activity界面的Progress要实时更新就必须拿到该进度值,此处就涉及到了如何将Service中获取到的进度值传递给Activity,也就是组件间通信的部分知识,要解决这个问题我们传统的解决方案就是通过广播或者接口回调的方式,当然了我们也可以使用事件总线EventBus来解决,我们知道EventBus的出现可以使我们很方便的解决线程间通信和组件间通信的问题,具体的关于EventBus的讲解请查看本人最新的文章:最全面的EventBus 3.1的使用教程及官方推荐的结合订阅者索引processor显著提升性能和实际项目中的使用注意事项,此处为了回顾接口回调相关内容,我们采用接口回调的方式来实现组件间通信,对应的DownloadService代码如下:
public class DownloadService extends Service {

    // 使用接口回调实现service更新activity中的进度条
    // 参见博客:https://blog.csdn.net/dodod2012/article/details/79163842
    private OnTransProgressChangeListener onTransProgressChangeListener;

    public void setOnTransProgressChangeListener(OnTransProgressChangeListener onTransProgressChangeListener)
    {
        this.onTransProgressChangeListener=onTransProgressChangeListener;
    }

    //定义notify的id,避免与其它的notification的处理冲突
    private static final int NOTIFY_ID = 0;
    private String filePath; // 下载的apk保存的路径
    private NotificationManager mNotificationManager;
    private NotificationCompat.Builder mBuilder;


    /**
     * 和activity通讯的binder
     */
    public class DownloadBinder extends Binder {
        public DownloadService getService(){
            return DownloadService.this;
        }
    }

    @Nullable
    @Override
    public IBinder onBind(Intent intent) {
        return new DownloadBinder();
    }

    @Override
    public void onCreate() {
        super.onCreate();
        Toast.makeText(this, "onCreate中用于数据初始化操作!", Toast.LENGTH_SHORT).show();
    }

    // 如果访问者希望与正在绑定的服务解除绑定,可以调用unbindService()方法,
    // 调用该方法也会导致系统调用服务的onUnbind()-->onDestroy()方法
    @Override
    public void unbindService(ServiceConnection conn) {
        super.unbindService(conn);
    }

    @Override
    public void onDestroy() {
        mNotificationManager = null;
        super.onDestroy();
    }


    /**
     * 创建通知栏
     */
    private void setNotification() {
        if (mNotificationManager == null)
            mNotificationManager = (NotificationManager) getSystemService(Context.NOTIFICATION_SERVICE);
        mBuilder = new NotificationCompat.Builder(this);
        mBuilder.setContentTitle("开始下载")
                .setContentText("正在连接服务器")
                .setSmallIcon(R.mipmap.ic_launcher)
                .setLargeIcon(BitmapFactory.decodeResource(getResources(), R.mipmap.ic_launcher))
                .setOngoing(true) // 是否可以侧滑取消/删除
                .setAutoCancel(true)  // 是否点击取消
                .setWhen(System.currentTimeMillis());  // 通知产生的时间(系统时间)
        // 参数1为通知的唯一ID标识
        mNotificationManager.notify(NOTIFY_ID, mBuilder.build());
    }

    /**
     * 下载APK的方法
     * 保存路径为SD卡根目录
     * 创建文件名称为 updateDemo.apk
     */
    public void downloadApk(){
        OkGo.<File>get("http://ucdl.25pp.com/fs08/2017/01/20/2/2_87a290b5f041a8b512f0bc51595f839a.apk")
                .tag(this)
                .execute(new FileCallback(Environment.getExternalStorageDirectory().getPath(),"updateDemo.apk") {
            @Override
            public void onStart(Request<File, ? extends Request> request) {
                // 开始下载
                setNotification();
            }

            @Override
            public void onSuccess(Response<File> response) {
                // 下载成功
            }

            @Override
            public void downloadProgress(Progress progress) {
                filePath = progress.filePath;
                // OkGo框架返回的下载进度,float类型的,值介于0~1之间,1代表下载完成
                float currentSize = progress.fraction;
                // long totalSize = progress.totalSize;
                int progress2 = (int) (currentSize*100);
                mBuilder.setContentTitle("正在下载:新版本...")
                        .setContentText(String.format(Locale.CHINESE,"%d%%",progress2))
                        .setProgress(100,progress2,false)
                        .setWhen(System.currentTimeMillis());
                Notification notification = mBuilder.build();
                notification.flags = Notification.FLAG_AUTO_CANCEL;
                mNotificationManager.notify(NOTIFY_ID,notification);
                // 进度监听
                onTransProgressChangeListener.onProgressChange(currentSize);
            }

            @Override
            public void onFinish() {

                //app运行在界面,直接安装
                //否则运行在后台则通知形式告知完成
                //if (onFront()) {
                    // 下载完成
                    // Toast.makeText(DownloadService.this, "1111111下载完成!"+filePath, Toast.LENGTH_SHORT).show();
                    // mNotificationManager.cancel(NOTIFY_ID);
                //} else {
                    // 下载完成
                    Toast.makeText(DownloadService.this, "2222222下载完成!"+filePath, Toast.LENGTH_SHORT).show();
                    Intent intent = installIntent(filePath);
                    PendingIntent pIntent = PendingIntent.getActivity(getApplicationContext()
                            ,0, intent, PendingIntent.FLAG_UPDATE_CURRENT);
                    mBuilder.setContentIntent(pIntent)
                            .setContentTitle(getPackageName())
                            .setContentText("下载完成,点击安装")
                            .setProgress(0,0,false)
                            .setDefaults(Notification.DEFAULT_ALL);
                    Notification notification = mBuilder.build();
                    notification.flags = Notification.FLAG_AUTO_CANCEL;
                    mNotificationManager.notify(NOTIFY_ID,notification);
                //}
                stopSelf();
            }

            @Override
            public void onError(Response<File> response) {
                mNotificationManager.cancel(NOTIFY_ID);
                Toast.makeText(DownloadService.this, "下载失败!", Toast.LENGTH_SHORT).show();
                stopSelf();
            }
        });

    }

    /**
     * 是否运行在用户前面
     */
    private boolean onFront() {
        ActivityManager activityManager = (ActivityManager) getSystemService(Context.ACTIVITY_SERVICE);
        List<ActivityManager.RunningAppProcessInfo> appProcesses = activityManager.getRunningAppProcesses();
        if (appProcesses == null || appProcesses.isEmpty())
            return false;

        for (ActivityManager.RunningAppProcessInfo appProcess : appProcesses) {
            if (appProcess.processName.equals(getPackageName()) &&
                    appProcess.importance == ActivityManager.RunningAppProcessInfo.IMPORTANCE_FOREGROUND) {
                return true;
            }
        }
        return false;
    }


    /**
     * 安装
     * 7.0 以上记得配置 fileProvider
     */
    private Intent installIntent(String path){
        try {
            File file = new File(path);
            String authority = "com.example.aa.fileProvider";  // 跟配置文件里面保持一致
            Uri fileUri = FileProvider.getUriForFile(getApplicationContext(), authority, file);
            Intent intent = new Intent(Intent.ACTION_VIEW);
            intent.setFlags(Intent.FLAG_ACTIVITY_NEW_TASK);
            if (Build.VERSION.SDK_INT >= Build.VERSION_CODES.N) {
                intent.setFlags(Intent.FLAG_GRANT_READ_URI_PERMISSION);
                intent.setDataAndType(fileUri, "application/vnd.android.package-archive");
            } else {
                intent.setDataAndType(Uri.fromFile(file), "application/vnd.android.package-archive");
            }
            return intent;
        } catch (Exception e) {
            e.printStackTrace();
        }
        return null;
    }

    /**
     * 取消下载请求
     */
    public void CanaelRequest(){
        OkGo.getInstance().cancelTag(this);
    }
}
2,Activity代码:
public class UpdateActivity extends AppCompatActivity implements OnTransProgressChangeListener {

    private TextView tvProgress; // 进度展示
    private AlertDialog mDialog; // 更新对话框
    private ServiceConnection conn;
    private DownloadService mService;  // 服务对象

    @Override
    protected void onCreate(Bundle savedInstanceState) {
        super.onCreate(savedInstanceState);
        setContentView(R.layout.activity_update);
        tvProgress = (TextView) findViewById(R.id.tv_progress);
        conn = new ServiceConnection() {
            @Override
            public void onServiceConnected(ComponentName componentName, IBinder iBinder) {
                // 绑定成功时回调
                // 获取service服务传递过来的iBinder对象,通过该iBinder对象在activity中获取到服务的实例,
                // 用该实例就可以去调用service中的方法了
                DownloadService.DownloadBinder binder = (DownloadService.DownloadBinder) iBinder;
                mService = binder.getService();
                //设置进度条更新
                mService.setOnTransProgressChangeListener(UpdateActivity.this);
            }

            @Override
            public void onServiceDisconnected(ComponentName componentName) {
                // 当服务被意外销毁时才会调用,如当内存资源不足时,服务正常销毁不会回调该方法,
                mService = null;
            }
        };
        tvProgress.setOnClickListener(new View.OnClickListener() {
            @Override
            public void onClick(View v) {
                if (tvProgress.getText().toString().equals("下载进度")) {
                    SpUtils.getInstance().putValue("ignore","-1");
                    //MainActivityPermissionsDispatcher.needStorageWithPermissionCheck(MainActivity.this);
                }
            }
        });
        Intent intent = new Intent(context,DownloadService.class);
        context.bindService(intent, conn, Service.BIND_AUTO_CREATE);
        checkUpdate();
        //MainActivityPermissionsDispatcher.needStorageWithPermissionCheck(this);
    }

    private void checkUpdate() {
        try {
            PackageInfo pi = getPackageManager().getPackageInfo(getPackageName(),0);
            // 获取到当前应用的版本名称
            String local = pi.versionName;
            // 检查是否需要弹出更新对话框,对比当前应用版本号,忽略的版本号,服务器最新版本号
            String version = "2.0";  // 此处假设服务器端获取的版本为2.0
            String ignore = (String) SpUtils.getInstance().getValue("ignore","");
            if (!ignore.equals(version) && !ignore.equals(local)) {
                // 需要更新,弹出更新对话框
                showUpdate(version); // 参数为要更新的版本的版本号
            }

        } catch (PackageManager.NameNotFoundException e) {
            e.printStackTrace();
        }
    }

    // 显示更新对话框,参数为当前应用的版本
    public void showUpdate(final String version) {
        if (mDialog == null)
            mDialog = new AlertDialog.Builder(this)
                    .setTitle("检测到有新版本")
                    .setMessage("当前版本:"+version)
                    .setPositiveButton("更新", new DialogInterface.OnClickListener() {
                        @Override
                        public void onClick(DialogInterface dialog, int which) {
                            // 执行下载
                            mService.downloadApk();
                        }
                    })
                    .setNegativeButton("忽略", new DialogInterface.OnClickListener() {
                        @Override
                        public void onClick(DialogInterface dialog, int which) {
                            // 忽略该版本,将该版本忽略的标记添加到sp
                            SpUtils.getInstance().putValue("ignore",version);
                        }
                    })
                    .create();

        //重写这俩个方法,一般是强制更新不能取消弹窗
        mDialog.setCanceledOnTouchOutside(false);
        mDialog.setOnKeyListener(new DialogInterface.OnKeyListener() {
            @Override
            public boolean onKey(DialogInterface dialog, int keyCode, KeyEvent event) {
                return keyCode == KeyEvent.KEYCODE_BACK && mDialog != null && mDialog.isShowing();
            }
        });

        mDialog.show();
    }

    /**
     * activity销毁时销毁服务
     */
    @Override
    protected void onDestroy() {
        mService.unbindService(conn);
        mService.CanaelRequest();
        super.onDestroy();
    }

    // 接口回调
    @Override
    public void onProgressChange(float current) {
        tvProgress.setText("已下载:"+ current*100+ "%");
    }
}
3,接口回调使用的接口定义
因为使用OkGo框架返回的进度值为介于0和1之间的Float值,所以此处只需一个参数。
public interface OnTransProgressChangeListener {
    void onProgressChange(float current);
}
适配7.0规则和上面的一致。


 被折叠的 条评论
为什么被折叠?
被折叠的 条评论
为什么被折叠?
 到【灌水乐园】发言


