


今天是学习第三天,主要学习数据集的加载、迭代、常用操作、自定义数据集四部分内容,虽然看着很吃力,但还得硬着头皮子学吧!
1.数据集加载
加载之前先导入numpy、mindspore.dataset、matplotlib.pyplot模块
import numpy as np
from mindspore.dataset import vision
from mindspore.dataset import MnistDataset, GeneratorDataset
import matplotlib.pyplot as plt
之后开始数据集加载
这里使用Mnist数据集作为样例,介绍使用mindspore.dataset进行加载的方法。
mindspore.dataset提供的接口仅支持解压后的数据文件,因此需要使用download库下载数据集并解压。
# Download data from open datasets
from download import download

url = "https://mindspore-website.obs.cn-north-4.myhuaweicloud.com/" \
      "notebook/datasets/MNIST_Data.zip"
path = download(url, "./", kind="zip", replace=True)
压缩文件删除后,直接加载,可以看到其数据类型为MnistDataset。
train_dataset = MnistDataset("MNIST_Data/train", shuffle=False)
print(type(train_dataset))
2.数据集迭代
数据集加载后,一般以迭代方式获取数据,然后送入神经网络中进行训练。这里可以用create_tuple_iterator或create_dict_iterator接口创建数据迭代器,迭代访问数据。(说实话,我没搞明白为什么以迭代方式获取数据,这里面的迭代是指啥?是一种方案还是一种工具)
访问的数据类型默认为Tensor;若设置output_numpy=True,访问的数据类型为Numpy。
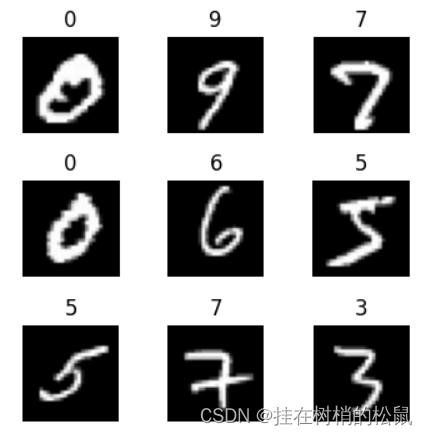
下面定义一个可视化函数,迭代9张图片进行展示。
def visualize(dataset):
    figure = plt.figure(figsize=(4, 4))
    cols, rows = 3, 3

    plt.subplots_adjust(wspace=0.5, hspace=0.5)

    for idx, (image, label) in enumerate(dataset.create_tuple_iterator()):
        figure.add_subplot(rows, cols, idx + 1)
        plt.title(int(label))
        plt.axis("off")
        plt.imshow(image.asnumpy().squeeze(), cmap="gray")
        if idx == cols * rows - 1:
            break
    plt.show()
visualize(train_dataset)
运行后可显示以下9张图片

3.数据集常用操作
Pipeline的设计理念使得数据集的常用操作采用dataset = dataset.operation()的异步执行方式,执行操作返回新的Dataset,此时不执行具体操作,而是在Pipeline中加入节点,最终进行迭代时,并行执行整个Pipeline。(这里面的Pipeline是干啥的?管道还是工作流程??)
下面分别介绍几种常见的数据集操作。
3.1 shuffle
数据集随机shuffle可以消除数据排列造成的分布不均问题。

mindspore.dataset提供的数据集在加载时可配置shuffle=True,或使用如下操作:
train_dataset = train_dataset.shuffle(buffer_size=64)
visualize(train_dataset)
运行后显示以下9个图片
3.2 map
map操作是数据预处理的关键操作,可以针对数据集指定列(column)添加数据变换(Transforms),将数据变换应用于该列数据的每个元素,并返回包含变换后元素的新数据集。
Dataset支持的不同变换类型详见数据变换Transforms。
image, label = next(train_dataset.create_tuple_iterator())
print(image.shape, image.dtype)
这里对Mnist数据集做数据缩放处理,将图像统一除以255,数据类型由uint8转为了float32。
train_dataset = train_dataset.map(vision.Rescale(1.0 / 255.0, 0), input_columns='image')
对比map前后的数据,可以看到数据类型变化。
image, label = next(train_dataset.create_tuple_iterator())
print(image.shape, image.dtype)
3.3 batch
将数据集打包为固定大小的batch是在有限硬件资源下使用梯度下降进行模型优化的折中方法,可以保证梯度下降的随机性和优化计算量。

一般会设置一个固定的batch size,将连续的数据分为若干批(batch)。
train_dataset = train_dataset.batch(batch_size=32)
batch后的数据增加一维,大小为batch_size。
image, label = next(train_dataset.create_tuple_iterator())
print(image.shape, image.dtype)
4.自定义数据集
mindspore.dataset模块提供了一些常用的公开数据集和标准格式数据集的加载API。
对于MindSpore暂不支持直接加载的数据集,可以构造自定义数据加载类或自定义数据集生成函数的方式来生成数据集,然后通过GeneratorDataset接口实现自定义方式的数据集加载。
GeneratorDataset支持通过可随机访问数据集对象、可迭代数据集对象和生成器(generator)构造自定义数据集,下面分别对其进行介绍。
4.1 可随机访问数据集
可随机访问数据集是实现了__getitem__和__len__方法的数据集,表示可以通过索引/键直接访问对应位置的数据样本。
例如,当使用dataset[idx]访问这样的数据集时,可以读取dataset内容中第idx个样本或标签。
# Random-accessible object as input source
class RandomAccessDataset:
    def __init__(self):
        self._data = np.ones((5, 2))
        self._label = np.zeros((5, 1))

    def __getitem__(self, index):
        return self._data[index], self._label[index]

    def __len__(self):
        return len(self._data)
loader = RandomAccessDataset()
dataset = GeneratorDataset(source=loader, column_names=["data", "label"])

for data in dataset:
    print(data)
运行后输出如下:
[Tensor(shape=[2], dtype=Float64, value= [ 1.00000000e+00, 1.00000000e+00]), Tensor(shape=[1], dtype=Float64, value= [ 0.00000000e+00])]
[Tensor(shape=[2], dtype=Float64, value= [ 1.00000000e+00, 1.00000000e+00]), Tensor(shape=[1], dtype=Float64, value= [ 0.00000000e+00])]
[Tensor(shape=[2], dtype=Float64, value= [ 1.00000000e+00, 1.00000000e+00]), Tensor(shape=[1], dtype=Float64, value= [ 0.00000000e+00])]
[Tensor(shape=[2], dtype=Float64, value= [ 1.00000000e+00, 1.00000000e+00]), Tensor(shape=[1], dtype=Float64, value= [ 0.00000000e+00])]
[Tensor(shape=[2], dtype=Float64, value= [ 1.00000000e+00, 1.00000000e+00]), Tensor(shape=[1], dtype=Float64, value= [ 0.00000000e+00])]
# list, tuple are also supported.
loader = [np.array(0), np.array(1), np.array(2)]
dataset = GeneratorDataset(source=loader, column_names=["data"])

for data in dataset:
    print(data)
输出如下:
[Tensor(shape=[], dtype=Int64, value= 0)]
[Tensor(shape=[], dtype=Int64, value= 2)]
[Tensor(shape=[], dtype=Int64, value= 1)]
4.2 可迭代数据集
可迭代的数据集是实现了__iter__和__next__方法的数据集,表示可以通过迭代的方式逐步获取数据样本。这种类型的数据集特别适用于随机访问成本太高或者不可行的情况。
例如,当使用iter(dataset)的形式访问数据集时,可以读取从数据库、远程服务器返回的数据流。
下面构造一个简单迭代器,并将其加载至GeneratorDataset。
# Iterator as input source
class IterableDataset():
    def __init__(self, start, end):
        '''init the class object to hold the data'''
        self.start = start
        self.end = end
    def __next__(self):
        '''iter one data and return'''
        return next(self.data)
    def __iter__(self):
        '''reset the iter'''
        self.data = iter(range(self.start, self.end))
        return self
loader = IterableDataset(1, 5)
dataset = GeneratorDataset(source=loader, column_names=["data"])

for d in dataset:
    print(d)
运行后输出:
[Tensor(shape=[], dtype=Int64, value= 1)]
[Tensor(shape=[], dtype=Int64, value= 2)]
[Tensor(shape=[], dtype=Int64, value= 3)]
[Tensor(shape=[], dtype=Int64, value= 4)]
4.3 生成器
生成器也属于可迭代的数据集类型,其直接依赖Python的生成器类型generator返回数据,直至生成器抛出StopIteration异常。
下面构造一个生成器,并将其加载至GeneratorDataset。
# Generator
def my_generator(start, end):
    for i in range(start, end):
        yield i
# since a generator instance can be only iterated once, we need to wrap it by lambda to generate multiple instances
dataset = GeneratorDataset(source=lambda: my_generator(3, 6), column_names=["data"])

for d in dataset:
    print(d)
运行后输出如下:
[Tensor(shape=[], dtype=Int64, value= 3)]
[Tensor(shape=[], dtype=Int64, value= 4)]
[Tensor(shape=[], dtype=Int64, value= 5)]
这节学的还是比较懵逼,个人认为,要么多练习一下以上的代码,再尝试举一反三;要么就找一下比较好的数据集视频教程,能把原理说清楚。否则,对于没有基础的同学来说,跟看天书似的~~


 831
831


 被折叠的 条评论
为什么被折叠?
被折叠的 条评论
为什么被折叠?
 到【灌水乐园】发言


