


相信大家对OkHttp也是相当的熟悉了,毕竟是Square的东西,对于其种种优点,这里也不再叙说。优秀是优秀,但是毕竟优秀的东西给我们封装了太多,那么问题来了,我们使用OkHttp作为我们的网络层,简单地进行GET/POST请求是毫无问题。近日看了产品的设计稿,毛估估会有文件的上传与下载的需求,如果使用OkHttp作为网络层进行封装,你会惊讶的发现,简直封装的太“完美”了。如果现在有这么一个需求,要求对文件进行上传或下载,但是在上传或者下载前,你需要给用户一个友好的提示,在上传或者下载中,你需要将进度展示给用户,下载或者完成后提示用户下载完成。
但是呢,找啊找,你会发现基本上找不到OkHttp的这种用法,百度是找不到,但是你别忘记了还有谷歌,谷歌一搜,Stackoverflow就全出来了,甚至github上的issue都出来了,可见并不是我们遇到了这么一个问题,还要许许多多的人遇到了这个问题,粗粗看了几个回答,感觉有几个还是比较靠谱的。为了日后的重用,我将其封装为一个OkHttp的扩展库,暂时取名为CoreProgress。
要实现进度的监听,需要使用到OkHttp的依赖包Okio里的两个类,一个是Source,一个是Sink,至于Okio的东西,这里也不多说。
首先我们实现文件下载的进度监听。OkHttp给我们的只是一个回调,里面有Response返回结果,我们需要继承一个类,对结果进行监听,这个类就是ResponseBody,但是如何将它设置到OkHttp中去呢,答案是拦截器。拦截器的部分后面再叙述,这里先实现ResponseBody的子类ProgressResponseBody。
要监听进度,我们必然需要一个监听器,也就是一个接口,在其实现类中完成回调内容的处理,该接口声明如下。
public interface ProgressResponseListener {
    void onResponseProgress(long bytesRead, long contentLength, boolean done);
}
然后会使用到该接口
public class ProgressResponseBody extends ResponseBody {
    //实际的待包装响应体
    private final ResponseBody responseBody;
    //进度回调接口
    private final ProgressResponseListener progressListener;
    //包装完成的BufferedSource
    private BufferedSource bufferedSource;

    /**
     * 构造函数,赋值
     * @param responseBody 待包装的响应体
     * @param progressListener 回调接口
     */
    public ProgressResponseBody(ResponseBody responseBody, ProgressResponseListener progressListener) {
        this.responseBody = responseBody;
        this.progressListener = progressListener;
    }


    /**
     * 重写调用实际的响应体的contentType
     * @return MediaType
     */
    @Override public MediaType contentType() {
        return responseBody.contentType();
    }

    /**
     * 重写调用实际的响应体的contentLength
     * @return contentLength
     * @throws IOException 异常
     */
    @Override public long contentLength() throws IOException {
        return responseBody.contentLength();
    }

    /**
     * 重写进行包装source
     * @return BufferedSource
     * @throws IOException 异常
     */
    @Override public BufferedSource source() throws IOException {
        if (bufferedSource == null) {
            //包装
            bufferedSource = Okio.buffer(source(responseBody.source()));
        }
        return bufferedSource;
    }

    /**
     * 读取,回调进度接口
     * @param source Source
     * @return Source
     */
    private Source source(Source source) {

        return new ForwardingSource(source) {
            //当前读取字节数
            long totalBytesRead = 0L;
            @Override public long read(Buffer sink, long byteCount) throws IOException {
                long bytesRead = super.read(sink, byteCount);
                //增加当前读取的字节数,如果读取完成了bytesRead会返回-1
                totalBytesRead += bytesRead != -1 ? bytesRead : 0;
                //回调,如果contentLength()不知道长度,会返回-1
                progressListener.onResponseProgress(totalBytesRead, responseBody.contentLength(), bytesRead == -1);
                return bytesRead;
            }
        };
    }
}
类似装饰器,我们对原始的ResponseBody 进行了一层包装。并在其读取数据的时候设置了回调,回调的接口由构造函数传入,此外构造函数还传入了原始的ResponseBody,当系统内部调用了ResponseBody 的source方法的时候,返回的便是我们包装后的Source。然后我们还重写了几个方法调用原始的ResponseBody对应的函数返回结果。
同理既然下载是这样,那么上传也应该是这样,我们乘热打铁完成上传的部分,下载是继承ResponseBody ,上传就是继承RequestBody,同时也应该还有一个监听器。
public interface ProgressRequestListener {
    void onRequestProgress(long bytesWritten, long contentLength, boolean done);
}
RequestBody的子类实现类比ResponseBody ,基本上复制一下稍加修改即可使用。
public  class ProgressRequestBody extends RequestBody {
    //实际的待包装请求体
    private final RequestBody requestBody;
    //进度回调接口
    private final ProgressRequestListener progressListener;
    //包装完成的BufferedSink
    private BufferedSink bufferedSink;

    /**
     * 构造函数,赋值
     * @param requestBody 待包装的请求体
     * @param progressListener 回调接口
     */
    public ProgressRequestBody(RequestBody requestBody, ProgressRequestListener progressListener) {
        this.requestBody = requestBody;
        this.progressListener = progressListener;
    }

    /**
     * 重写调用实际的响应体的contentType
     * @return MediaType
     */
    @Override
    public MediaType contentType() {
        return requestBody.contentType();
    }

    /**
     * 重写调用实际的响应体的contentLength
     * @return contentLength
     * @throws IOException 异常
     */
    @Override
    public long contentLength() throws IOException {
        return requestBody.contentLength();
    }

    /**
     * 重写进行写入
     * @param sink BufferedSink
     * @throws IOException 异常
     */
    @Override
    public void writeTo(BufferedSink sink) throws IOException {
        if (bufferedSink == null) {
            //包装
            bufferedSink = Okio.buffer(sink(sink));
        }
        //写入
        requestBody.writeTo(bufferedSink);
        //必须调用flush,否则最后一部分数据可能不会被写入
        bufferedSink.flush();

    }

    /**
     * 写入,回调进度接口
     * @param sink Sink
     * @return Sink
     */
    private Sink sink(Sink sink) {
        return new ForwardingSink(sink) {
            //当前写入字节数
            long bytesWritten = 0L;
            //总字节长度,避免多次调用contentLength()方法
            long contentLength = 0L;

            @Override
            public void write(Buffer source, long byteCount) throws IOException {
                super.write(source, byteCount);
                if (contentLength == 0) {
                    //获得contentLength的值,后续不再调用
                    contentLength = contentLength();
                }
                //增加当前写入的字节数
                bytesWritten += byteCount;
                //回调
                progressListener.onRequestProgress(bytesWritten, contentLength, bytesWritten == contentLength);
            }
        };
    }
}
内部维护了一个原始的RequestBody 以及一个监听器,同样的也是由构造函数传入。当然也是要重写几个函数调用原始的RequestBody 对应的函数,文件的下载是read函数中进行监听的设置,毫无疑问文件的上传就是write函数了,我们在write函数中进行了类似的操作,并回调了接口中的函数。当系统内部调用了RequestBody 的writeTo函数时,我们对BufferedSink 进行了一层包装,即设置了进度监听,并返回了我们包装的BufferedSink 。于是乎,上传于下载的进度监听就完成了。
还有一个重要的问题就是
如何进行使用呢?
如何进行使用呢?
如何进行使用呢?
重要的事要说三遍。
我们还需要一个Helper类,对上传或者下载进行监听设置。文件的上传其实很简单,将我们的原始RequestBody和监听器 传入,返回我们的包装的ProgressRequestBody ,使用包装后的ProgressRequestBody 进行请求即可,但是文件的下载呢,OkHttp给我们返回的是Response,我们如何将我们包装的ProgressResponseBody设置进去呢,答案之前已经说过了,就是拦截器,具体见代码吧。
public class ProgressHelper {
    /**
     * 包装OkHttpClient,用于下载文件的回调
     * @param client 待包装的OkHttpClient
     * @param progressListener 进度回调接口
     * @return 包装后的OkHttpClient,使用clone方法返回
     */
    public static OkHttpClient addProgressResponseListener(OkHttpClient client,final ProgressResponseListener progressListener){
        //克隆
        OkHttpClient clone = client.clone();
        //增加拦截器
        clone.networkInterceptors().add(new Interceptor() {
            @Override
            public Response intercept(Chain chain) throws IOException {
                //拦截
                Response originalResponse = chain.proceed(chain.request());
                //包装响应体并返回
                return originalResponse.newBuilder()
                        .body(new ProgressResponseBody(originalResponse.body(), progressListener))
                        .build();
            }
        });
        return clone;
    }

    /**
     * 包装请求体用于上传文件的回调
     * @param requestBody 请求体RequestBody
     * @param progressRequestListener 进度回调接口
     * @return 包装后的进度回调请求体
     */
    public static ProgressRequestBody addProgressRequestListener(RequestBody requestBody,ProgressRequestListener progressRequestListener){
        //包装请求体
        return new ProgressRequestBody(requestBody,progressRequestListener);
    }
}
对于文件下载的监听器我们为了不影响原来的OkHttpClient 实例,我们调用clone方法进行了克隆,之后对克隆的方法设置了响应拦截,并返回该克隆的实例。而文件的上传则十分简单,直接包装后返回即可。
但是你别忘记了,我们的目的是在UI层进行回调,而OkHttp的所有请求都不在UI层。于是我们还要实现我们写的接口,进行UI操作的回调。由于涉及到消息机制,我们对之前的两个接口回调传的参数进行封装,封装为一个实体类便于传递。
public class ProgressModel implements Serializable {
    //当前读取字节长度
    private long currentBytes;
    //总字节长度
    private long contentLength;
    //是否读取完成
    private boolean done;

    public ProgressModel(long currentBytes, long contentLength, boolean done) {
        this.currentBytes = currentBytes;
        this.contentLength = contentLength;
        this.done = done;
    }

    public long getCurrentBytes() {
        return currentBytes;
    }

    public void setCurrentBytes(long currentBytes) {
        this.currentBytes = currentBytes;
    }

    public long getContentLength() {
        return contentLength;
    }

    public void setContentLength(long contentLength) {
        this.contentLength = contentLength;
    }

    public boolean isDone() {
        return done;
    }

    public void setDone(boolean done) {
        this.done = done;
    }

    @Override
    public String toString() {
        return "ProgressModel{" +
                "currentBytes=" + currentBytes +
                ", contentLength=" + contentLength +
                ", done=" + done +
                '}';
    }
}
再实现我们的UI回调接口,对于文件的上传,我们需要实现的是ProgressRequestListener接口,文件的下载需要实现的是ProgressResponseListener接口,但是内部的逻辑处理是完全一样的。我们使用抽象类,提供一个抽象方法,该抽象方法用于UI层回调的处理,由具体开发去实现。涉及到消息机制就涉及到Handler类,在Handler的子类中维护一个弱引用指向外部类(用到了static防止内存泄露,但是需要调用外部类的一个非静态函数,所以将外部类引用直接由构造函数传入,在内部通过调用该引用的方法去实现),然后将主线程的Looper传入,调用父类构造函数。在onRequestProgress中发送进度更新的消息,在handleMessage函数中回调我们的抽象方法。我们只需要实现抽象方法,编写对应的UI更新代码即可。具体代码如下。
public abstract class UIProgressRequestListener implements ProgressRequestListener {
    private static final int REQUEST_UPDATE = 0x01;

    //处理UI层的Handler子类
    private static class UIHandler extends Handler {
        //弱引用
        private final WeakReference<UIProgressRequestListener> mUIProgressRequestListenerWeakReference;

        public UIHandler(Looper looper, UIProgressRequestListener uiProgressRequestListener) {
            super(looper);
            mUIProgressRequestListenerWeakReference = new WeakReference<UIProgressRequestListener>(uiProgressRequestListener);
        }

        @Override
        public void handleMessage(Message msg) {
            switch (msg.what) {
                case REQUEST_UPDATE:
                    UIProgressRequestListener uiProgressRequestListener = mUIProgressRequestListenerWeakReference.get();
                    if (uiProgressRequestListener != null) {
                        //获得进度实体类
                        ProgressModel progressModel = (ProgressModel) msg.obj;
                        //回调抽象方法
                        uiProgressRequestListener.onUIRequestProgress(progressModel.getCurrentBytes(), progressModel.getContentLength(), progressModel.isDone());
                    }
                    break;
                default:
                    super.handleMessage(msg);
                    break;
            }
        }
    }
    //主线程Handler
    private final Handler mHandler = new UIHandler(Looper.getMainLooper(), this);

    @Override
    public void onRequestProgress(long bytesRead, long contentLength, boolean done) {
        //通过Handler发送进度消息
        Message message = Message.obtain();
        message.obj = new ProgressModel(bytesRead, contentLength, done);
        message.what = REQUEST_UPDATE;
        mHandler.sendMessage(message);
    }

    /**
     * UI层回调抽象方法
     * @param bytesWrite 当前写入的字节长度
     * @param contentLength 总字节长度
     * @param done 是否写入完成
     */
    public abstract void onUIRequestProgress(long bytesWrite, long contentLength, boolean done);
}
另一个实现类代码雷同,不做叙述。
public abstract class UIProgressResponseListener implements ProgressResponseListener {
    private static final int RESPONSE_UPDATE = 0x02;
    //处理UI层的Handler子类
    private static class UIHandler extends Handler {
        //弱引用
        private final WeakReference<UIProgressResponseListener> mUIProgressResponseListenerWeakReference;

        public UIHandler(Looper looper, UIProgressResponseListener uiProgressResponseListener) {
            super(looper);
            mUIProgressResponseListenerWeakReference = new WeakReference<UIProgressResponseListener>(uiProgressResponseListener);
        }

        @Override
        public void handleMessage(Message msg) {
            switch (msg.what) {
                case RESPONSE_UPDATE:
                    UIProgressResponseListener uiProgressResponseListener = mUIProgressResponseListenerWeakReference.get();
                    if (uiProgressResponseListener != null) {
                        //获得进度实体类
                        ProgressModel progressModel = (ProgressModel) msg.obj;
                        //回调抽象方法
                        uiProgressResponseListener.onUIResponseProgress(progressModel.getCurrentBytes(), progressModel.getContentLength(), progressModel.isDone());
                    }
                    break;
                default:
                    super.handleMessage(msg);
                    break;
            }
        }
    }
    //主线程Handler
    private final Handler mHandler = new UIHandler(Looper.getMainLooper(), this);

    @Override
    public void onResponseProgress(long bytesRead, long contentLength, boolean done) {
        //通过Handler发送进度消息
        Message message = Message.obtain();
        message.obj = new ProgressModel(bytesRead, contentLength, done);
        message.what = RESPONSE_UPDATE;
        mHandler.sendMessage(message);
    }

    /**
     * UI层回调抽象方法
     * @param bytesRead 当前读取响应体字节长度
     * @param contentLength 总字节长度
     * @param done 是否读取完成
     */
    public abstract void onUIResponseProgress(long bytesRead, long contentLength, boolean done);
}
最简单的一步就是在我们的程序中使用了。为了方便Android Studio用户使用,我将其发布到了中央库。加入如下依赖即可
dependencies {
  compile 'cn.edu.zafu:coreprogress:0.0.1'
}
注意OkHttp的依赖需要自己手动添加,这个库中OkHttp只是编译时依赖,并没有打包进去。
至于代码,也已经寄托在了github上,如果有bug,欢迎修正。https://github.com/lizhangqu/CoreProgress,具体使用方法github上也已经贴出来了。
如果依赖gradle不能下载的话可以直接从github上下代码。
这里贴一个简单的例子,布局文件,两个进度条用于显示进度
<LinearLayout xmlns:android="http://schemas.android.com/apk/res/android"
              xmlns:tools="http://schemas.android.com/tools"
              android:layout_width="match_parent"
              android:layout_height="match_parent"
              android:orientation="vertical"
              tools:context=".MainActivity">

    <ProgressBar
        android:id="@+id/upload_progress"
        style="?android:attr/progressBarStyleHorizontal"
        android:layout_width="match_parent"
        android:layout_height="wrap_content"
        android:max="100"
        android:progress="0"
        />

    <Button
        android:id="@+id/upload"
        android:layout_width="match_parent"
        android:layout_height="wrap_content"
        android:text="Upload"/>

    <ProgressBar
        android:id="@+id/download_progress"
        style="?android:attr/progressBarStyleHorizontal"
        android:layout_width="match_parent"
        android:layout_height="wrap_content"
        android:max="100"
        android:progress="0"
        />

    <Button
        android:id="@+id/download"
        android:layout_width="match_parent"
        android:layout_height="wrap_content"
        android:text="Download"/>


</LinearLayout>
一个上传操作,一个下载操作,分别提供了UI层与非UI层回调的示例。最终代码中使用的监听器都是UI层的,因为我们要更新进度条。
private void download() {
        //这个是非ui线程回调,不可直接操作UI
        final ProgressResponseListener progressResponseListener = new ProgressResponseListener() {
            @Override
            public void onResponseProgress(long bytesRead, long contentLength, boolean done) {
                Log.e("TAG", "bytesRead:" + bytesRead);
                Log.e("TAG", "contentLength:" + contentLength);
                Log.e("TAG", "done:" + done);
                if (contentLength != -1) {
                    //长度未知的情况下回返回-1
                    Log.e("TAG", (100 * bytesRead) / contentLength + "% done");
                }
                Log.e("TAG", "================================");
            }
        };


        //这个是ui线程回调,可直接操作UI
        final UIProgressResponseListener uiProgressResponseListener = new UIProgressResponseListener() {
            @Override
            public void onUIResponseProgress(long bytesRead, long contentLength, boolean done) {
                Log.e("TAG", "bytesRead:" + bytesRead);
                Log.e("TAG", "contentLength:" + contentLength);
                Log.e("TAG", "done:" + done);
                if (contentLength != -1) {
                    //长度未知的情况下回返回-1
                    Log.e("TAG", (100 * bytesRead) / contentLength + "% done");
                }
                Log.e("TAG", "================================");
                //ui层回调
                downloadProgeress.setProgress((int) ((100 * bytesRead) / contentLength));
                //Toast.makeText(getApplicationContext(), bytesRead + " " + contentLength + " " + done, Toast.LENGTH_LONG).show();
            }
        };

        //构造请求
        final Request request1 = new Request.Builder()
                .url("http://121.41.119.107:81/test/1.doc")
                .build();

        //包装Response使其支持进度回调
        ProgressHelper.addProgressResponseListener(client, uiProgressResponseListener).newCall(request1).enqueue(new Callback() {
            @Override
            public void onFailure(Request request, IOException e) {
                Log.e("TAG", "error ", e);
            }

            @Override
            public void onResponse(Response response) throws IOException {
                Log.e("TAG", response.body().string());
            }
        });
    }

    private void upload() {
        File file = new File("/sdcard/1.doc");
        //此文件必须在手机上存在,实际情况下请自行修改,这个目录下的文件只是在我手机中存在。


        //这个是非ui线程回调,不可直接操作UI
        final ProgressRequestListener progressListener = new ProgressRequestListener() {
            @Override
            public void onRequestProgress(long bytesWrite, long contentLength, boolean done) {
                Log.e("TAG", "bytesWrite:" + bytesWrite);
                Log.e("TAG", "contentLength" + contentLength);
                Log.e("TAG", (100 * bytesWrite) / contentLength + " % done ");
                Log.e("TAG", "done:" + done);
                Log.e("TAG", "================================");
            }
        };


        //这个是ui线程回调,可直接操作UI
        final UIProgressRequestListener uiProgressRequestListener = new UIProgressRequestListener() {
            @Override
            public void onUIRequestProgress(long bytesWrite, long contentLength, boolean done) {
                Log.e("TAG", "bytesWrite:" + bytesWrite);
                Log.e("TAG", "contentLength" + contentLength);
                Log.e("TAG", (100 * bytesWrite) / contentLength + " % done ");
                Log.e("TAG", "done:" + done);
                Log.e("TAG", "================================");
                //ui层回调
                uploadProgress.setProgress((int) ((100 * bytesWrite) / contentLength));
                //Toast.makeText(getApplicationContext(), bytesWrite + " " + contentLength + " " + done, Toast.LENGTH_LONG).show();
            }
        };

        //构造上传请求,类似web表单
        RequestBody requestBody = new MultipartBuilder().type(MultipartBuilder.FORM)
                .addFormDataPart("hello", "android")
                .addFormDataPart("photo", file.getName(), RequestBody.create(null, file))
                .addPart(Headers.of("Content-Disposition", "form-data; name=\"another\";filename=\"another.dex\""), RequestBody.create(MediaType.parse("application/octet-stream"), file))
                .build();

        //进行包装,使其支持进度回调
        final Request request = new Request.Builder().url("http://121.41.119.107:81/test/result.php").post(ProgressHelper.addProgressRequestListener(requestBody, uiProgressRequestListener)).build();
        //开始请求
        client.newCall(request).enqueue(new Callback() {
            @Override
            public void onFailure(Request request, IOException e) {
                Log.e("TAG", "error ", e);
            }

            @Override
            public void onResponse(Response response) throws IOException {
                Log.e("TAG", response.body().string());
            }
        });

    }
需要特别注意的一点是文件的下载中如果文件大小未知,contentLength 会始终返回-1,对于已知文件大小的情况下,它返回的是实际文件大小。但是done只要在文件下载完成后才会返回true,可以使用两者的结合进行判断文件是否下载完成。
当然,我们进行进度的监听,最终还是会回调内部的接口,如果请求成功会回调onResponse,请求失败则回调onFailure,我们可以在onResponse中处理最终的结果。比如提示用户上传完成或者下载完成等等 。
还有一个细节需要注意就是连接的超时,读取与写入数据的超时时间的设置,在读取或者写入一些大文件的时候如果不设置这个参数可能会报异常,这里就随便设置了一下值,设得有点大,实际情况按需设置。
 //设置超时,不设置可能会报异常
    private void initClient() {
        client.setConnectTimeout(1000, TimeUnit.MINUTES);
        client.setReadTimeout(1000, TimeUnit.MINUTES);
        client.setWriteTimeout(1000, TimeUnit.MINUTES);
    }
文件的上传需要服务器的配合,为了证明PHP是世界上最好的语言,服务器的操作使用PHP大法,其实就是简单的输出POST的内容和文件的信息,并将一个文件保存到了服务器当前目录下的file文件夹下。
<?php

//打印POST传递的参数
var_dump($_POST);

//打印文件信息
var_dump($_FILES);

//将文件保存到当前目录下的file文件夹下
move_uploaded_file($_FILES["photo"]["tmp_name"], "./file/".$_FILES["photo"]["name"]);

?>
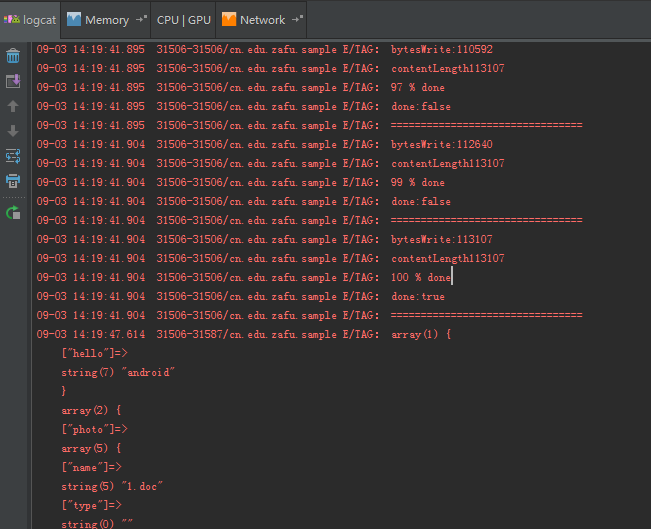
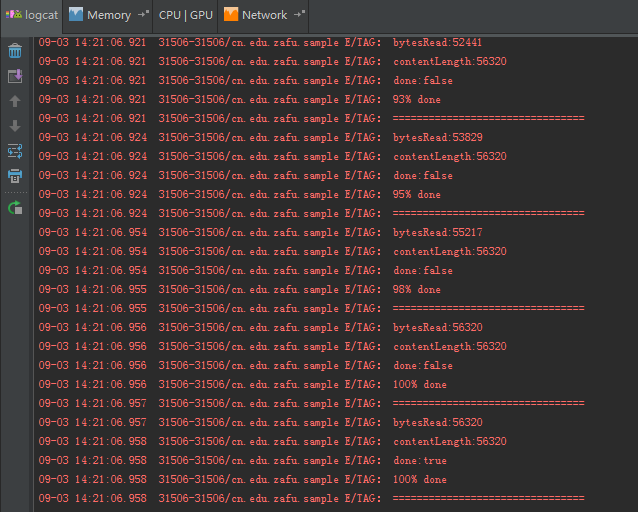
下面是运行结果,可以看到点击了上传或者下载后,进度条在不断更新。
以及对应的日志输出。
文件的上传,用数据说话
文件的下载,同样是数据
如果这篇文章对你有用,那么请点击下方的顶支持一个吧。
源代码什么的就不再贴了,直接从github上下载吧https://github.com/lizhangqu/CoreProgress
转载:https://blog.csdn.net/sbsujjbcy/article/details/48194701


 941
941


 被折叠的 条评论
为什么被折叠?
被折叠的 条评论
为什么被折叠?
 到【灌水乐园】发言


