


前言:本文所使用的工程建立过程如该链接所示:本文工程建立过程
1 guiguider文件安装与下载
安装的话比较简单,去官网下载就好: GUI Guider | NXP Semiconductors ,下载的话需要注册账号的操作。
2 gui_ guider模拟器相关操作
2.1 guiguider界面介绍
模拟器界面如下所示,主要包含组件窗口,模拟器窗口及属性窗口

对guiguider的操作十分简单,主要步骤如下所述:
1️⃣ 在左侧菜单栏寻找想用的组件
2️⃣ 将左侧菜单栏组件拖入中间的模拟器窗口,并调整组件在模拟器窗口的相对位置
3️⃣ 调整右侧的组件属性进行修改,最终得到想要的效果
4️⃣ 点击运行按钮,生成c语言文件
2.2 guiguider文件夹介绍

文件夹及响应特性如下所示:
custom :用户编写的代码,不会被guiguider所覆盖,可以在此文件中编写用户自己的代码
generated :guiduider所自动生成的代码,会被覆盖,所以最好不要修改此文件夹下的代码
imporrt :导入的文件,如导入的图片或者字体等
lib :关于基础平台的一些文件,如x86文件夹
lvgl :lvgl的源码
lvgl-simulator :模拟器相关内容,显示了一些程序运行的框架,也包含一些接口的使用(如触摸屏等),也不会被工程编译覆盖
temp :与nxp相关的文件,暂时用不到
3 实验1:移植一个静态界面
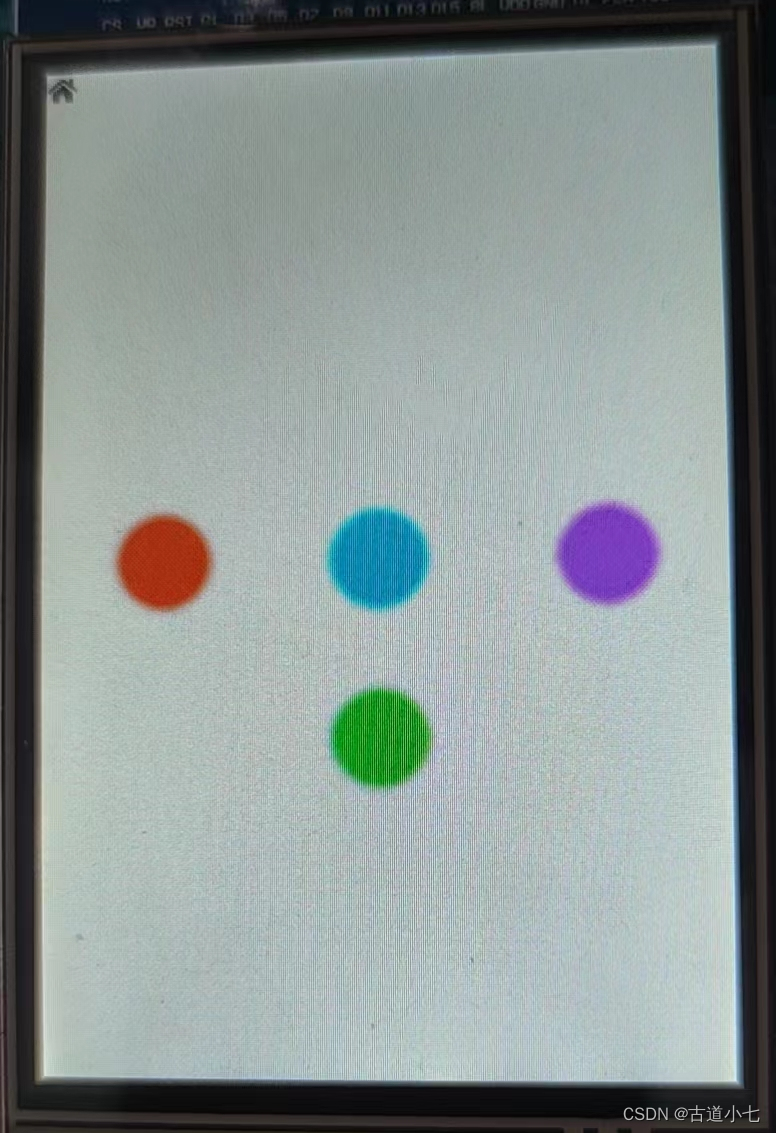
通过前面介绍很容易使用模拟器绘制以下的界面,就是四个不同颜色的led灯。

本实验的界面比较简单,就是一个界面上放置4个led灯,没有任何交互,也没有任何的事件输入,知识一个静态的界面。
通过观察各个文件夹中的文件,我们可以发现核心代码为以下内容:
<gui_guider.h>


typedef struct
{
	lv_obj_t *screen;
	bool screen_del;
	lv_obj_t *screen_led_1;
	lv_obj_t *screen_led_2;
	lv_obj_t *screen_led_3;
	lv_obj_t *screen_led_4;
}lv_ui;
在<gui_guider.h>中,我们发现guiduider所生成的界面代码如上所示:整个界面被封装成一个结构体lv_ui,在这个结构体中screen代表整个屏幕,而后面的screen_led_1等结构体成员表示屏幕上的子对象灯或者其他我们选择的子对象组件。
另一段核心代码如下所示:
void setup_scr_screen(lv_ui *ui){

	//Write codes screen
	ui->screen = lv_obj_create(NULL);
	lv_scr_load(ui->screen);   //注意要加上
	lv_obj_set_scrollbar_mode(ui->screen, LV_SCROLLBAR_MODE_OFF);

	//Write style state: LV_STATE_DEFAULT for style_screen_main_main_default
	static lv_style_t style_screen_main_main_default;
	if (style_screen_main_main_default.prop_cnt > 1)
		lv_style_reset(&style_screen_main_main_default);
	else
		lv_style_init(&style_screen_main_main_default);
	lv_style_set_bg_color(&style_screen_main_main_default, lv_color_make(0xff, 0xff, 0xff));
	lv_style_set_bg_opa(&style_screen_main_main_default, 0);
	lv_obj_add_style(ui->screen, &style_screen_main_main_default, LV_PART_MAIN|LV_STATE_DEFAULT);

	//Write codes screen_led_1
	ui->screen_led_1 = lv_led_create(ui->screen);
	lv_obj_set_pos(ui->screen_led_1, 39, 220);
	lv_obj_set_size(ui->screen_led_1, 40, 40);
	lv_obj_set_scrollbar_mode(ui->screen_led_1, LV_SCROLLBAR_MODE_OFF);
	lv_led_set_brightness(ui->screen_led_1, 255);
	lv_led_set_color(ui->screen_led_1, lv_color_make(0xd6, 0x48, 0x24));
...
}
在上述代码中注意代码lv_scr_load(ui->screen);是模拟器生成时所没有的,需要自己手动添加的,作用是将前面的显示器screen加载成为活动屏幕;余下的代码很简单了,就是根据模拟器中的组件及相应的属性生成的代码。
我们将这些代码一起复制到main.c文件中就可以完成任务:
typedef struct
{
	lv_obj_t *screen;
	...
	lv_obj_t *screen_led_4;
}lv_ui;

lv_ui ui1;

void lv_example_style_1(lv_ui *ui)
{
	//Write codes screen
	ui->screen = lv_obj_create(NULL);
	lv_scr_load(ui->screen);
	lv_obj_set_scrollbar_mode(ui->screen, LV_SCROLLBAR_MODE_OFF);
...
	//Write codes screen_led_4
	ui->screen_led_4 = lv_led_create(ui->screen);
	lv_obj_set_pos(ui->screen_led_4, 140, 303);
	lv_obj_set_size(ui->screen_led_4, 40, 40);
	lv_obj_set_scrollbar_mode(ui->screen_led_4, LV_SCROLLBAR_MODE_ON);
	lv_led_set_brightness(ui->screen_led_4, 255);
	lv_led_set_color(ui->screen_led_4, lv_color_make(0x3f, 0xc8, 0x19));
}

int main(void)
{

	NVIC_PriorityGroupConfig(NVIC_PriorityGroup_2);//设置系统中断优先级分组2
	delay_init(168);  //初始化延时函数
	TIM3_Int_Init(1000-1,84-1);

 	LCD_Init();					//LCD初始化
	tp_dev.init();				//触摸屏初始化

	lv_init();			  // lvgl系统初始化
	lv_port_disp_init();  // lvgl显示接口初始化,放在lv_init()的后面
	lv_port_indev_init(); // lvgl输入接口初始化,放在lv_init()的后面
	lv_example_style_1(&ui1);

	while (1)
	{
		lv_task_handler(); // lvgl的事务处理
		delay_ms(5);
	}
}
最终界面结果如下所示:
4 实验2:移植一个有交互的计数器实验
本节的主要内容是移植有触屏的交互按钮实验:
4.1 触屏程序移植
首先要添加的是触摸屏的程序,触摸屏的接口在文件lv_port_indrv中,它不仅包含触摸屏的程序,也包含鼠标等输入设备。
首先需要倒进所需的头文件
/*********************
 *      INCLUDES
 *********************/
#include "lv_port_indev_template.h"
#include "../../lvgl.h"
#include "touch.h"    //添加头文件
接着看一下函数的声明:可以观察到输入设备的种类有很多,包括触摸板(触屏)、鼠标、键盘、编码器、按键。本文主要讲解触摸屏的移植,相关的程序为touchpad_init touchpad_read touchpad_is_pressed touchpad_get_xy
/**********************
 *  STATIC PROTOTYPES
 **********************/
void lv_port_indev_init(void);
static void touchpad_init(void);
static bool touchpad_read(lv_indev_drv_t * indev_drv, lv_indev_data_t * data);
static bool touchpad_is_pressed(void);
static void touchpad_get_xy(lv_coord_t * x, lv_coord_t * y);

static void mouse_init(void);
static void mouse_read(lv_indev_drv_t * indev_drv, lv_indev_data_t * data);
static bool mouse_is_pressed(void);
static void mouse_get_xy(lv_coord_t * x, lv_coord_t * y);

static void keypad_init(void);
static void keypad_read(lv_indev_drv_t * indev_drv, lv_indev_data_t * data);
static uint32_t keypad_get_key(void);

static void encoder_init(void);
static void encoder_read(lv_indev_drv_t * indev_drv, lv_indev_data_t * data);
static void encoder_handler(void);

static void button_init(void);
static void button_read(lv_indev_drv_t * indev_drv, lv_indev_data_t * data);
static int8_t button_get_pressed_id(void);
static bool button_is_pressed(uint8_t id);
接着时一些结构体的声明:
声明中可以看见有很多indev_touchpad类的lv_indev_t,这些是设备的结构体,表示一个设备;紧接着encoder_diff与编码器有关,本工程未使用;接着tp_dev表示触摸屏的结构体,indev是默认的驱动结构体,可以简单理解为默认的NULL值,不能使用,使用 触摸屏需要我们重新定义一个新的结构体indev_drv1。
/**********************
 *  STATIC VARIABLES
 **********************/
lv_indev_t * indev_touchpad;
lv_indev_t * indev_mouse;
lv_indev_t * indev_keypad;
lv_indev_t * indev_encoder;
lv_indev_t * indev_button;

static int32_t encoder_diff;
static lv_indev_state_t encoder_state;

extern _m_tp_dev tp_dev;
static lv_indev_drv_t indev_drv;
static lv_indev_drv_t indev_drv1;
接下来是初始化函数:
如下所示,你可以很直接的看出来触摸屏的lv_indev_drv_t采用的是indev_drv1,而其他的程序默认的是indev_drv。
/**********************
 *   GLOBAL FUNCTIONS
 **********************/

void lv_port_indev_init(void)
{
    /**
     * Here you will find example implementation of input devices supported by LittelvGL:
     *  - Touchpad
     *  - Mouse (with cursor support)
     *  - Keypad (supports GUI usage only with key)
     *  - Encoder (supports GUI usage only with: left, right, push)
     *  - Button (external buttons to press points on the screen)
     *
     *  The `..._read()` function are only examples.
     *  You should shape them according to your hardware
     */

    //static lv_indev_drv_t indev_drv;

    /*------------------
     * Touchpad
     * -----------------*/

    /*Initialize your touchpad if you have*/
    touchpad_init();

    /*Register a touchpad input device*/
    lv_indev_drv_init(&indev_drv1);
    indev_drv1.type = LV_INDEV_TYPE_POINTER;
    indev_drv1.read_cb = touchpad_read;
    indev_touchpad = lv_indev_drv_register(&indev_drv1);

    /*------------------
     * Mouse
     * -----------------*/

    /*Initialize your mouse if you have*/
    mouse_init();

    /*Register a mouse input device*/
    lv_indev_drv_init(&indev_drv);
    indev_drv.type = LV_INDEV_TYPE_POINTER;
    indev_drv.read_cb = mouse_read;
    indev_mouse = lv_indev_drv_register(&indev_drv);

    /*Set cursor. For simplicity set a HOME symbol now.*/
    lv_obj_t * mouse_cursor = lv_img_create(lv_scr_act());
    lv_img_set_src(mouse_cursor, LV_SYMBOL_HOME);
    lv_indev_set_cursor(indev_mouse, mouse_cursor);

    /*------------------
     * Keypad
     * -----------------*/

    /*Initialize your keypad or keyboard if you have*/
    keypad_init();

    /*Register a keypad input device*/
    lv_indev_drv_init(&indev_drv);
    indev_drv.type = LV_INDEV_TYPE_KEYPAD;
    indev_drv.read_cb = keypad_read;
    indev_keypad = lv_indev_drv_register(&indev_drv);

    /*Later you should create group(s) with `lv_group_t * group = lv_group_create()`,
     *add objects to the group with `lv_group_add_obj(group, obj)`
     *and assign this input device to group to navigate in it:
     *`lv_indev_set_group(indev_keypad, group);`*/

    /*------------------
     * Encoder
     * -----------------*/

    /*Initialize your encoder if you have*/
    encoder_init();

    /*Register a encoder input device*/
    lv_indev_drv_init(&indev_drv);
    indev_drv.type = LV_INDEV_TYPE_ENCODER;
    indev_drv.read_cb = encoder_read;
    indev_encoder = lv_indev_drv_register(&indev_drv);

    /*Later you should create group(s) with `lv_group_t * group = lv_group_create()`,
     *add objects to the group with `lv_group_add_obj(group, obj)`
     *and assign this input device to group to navigate in it:
     *`lv_indev_set_group(indev_encoder, group);`*/

    /*------------------
     * Button
     * -----------------*/

    /*Initialize your button if you have*/
    button_init();

    /*Register a button input device*/
    lv_indev_drv_init(&indev_drv);
    indev_drv.type = LV_INDEV_TYPE_BUTTON;
    indev_drv.read_cb = button_read;
    indev_button = lv_indev_drv_register(&indev_drv);

    /*Assign buttons to points on the screen*/
    static const lv_point_t btn_points[2] = {
        {10, 10},   /*Button 0 -> x:10; y:10*/
        {40, 100},  /*Button 1 -> x:40; y:100*/
    };
    lv_indev_set_button_points(indev_button, btn_points);
}
修改完之后就是修改真正的接口函数了,就是得到触屏产生的x\y坐标值。
/*------------------
 * Touchpad
 * -----------------*/

/*Initialize your touchpad*/
static void touchpad_init(void)
{
    /*Your code comes here*/
}

/*Will be called by the library to read the touchpad*/
static bool touchpad_read(lv_indev_drv_t * indev_drv, lv_indev_data_t * data)
{
    static lv_coord_t last_x = 0;
    static lv_coord_t last_y = 0;
    tp_dev.scan(0);
    if (tp_dev.sta & TP_PRES_DOWN)
    {

        last_x = tp_dev.x[0];
        last_y = tp_dev.y[0];
        data->point.x = last_x;
        data->point.y = last_y;
        data->state = LV_INDEV_STATE_PR;
    }
    else
    {
        data->point.x = last_x;
        data->point.y = last_y;
        data->state = LV_INDEV_STATE_REL;
    }
    //    /*Save the pressed coordinates and the state*/
    //    if(touchpad_is_pressed()) {
    //        touchpad_get_xy(&last_x, &last_y);
    //        data->state = LV_INDEV_STATE_PR;
    //    } else {
    //        data->state = LV_INDEV_STATE_REL;
    //    }
    //    /*Set the last pressed coordinates*/
    //    data->point.x = last_x;
    //    data->point.y = last_y;
    /*Return `false` because we are not buffering and no more data to read*/
    return false;
}

/*Get the x and y coordinates if the touchpad is pressed*/
static void touchpad_get_xy(lv_coord_t * x, lv_coord_t * y)
{
    /*Your code comes here*/

    (*x) = 0;
    (*y) = 0;
}
4.2 移植guiguider的程序
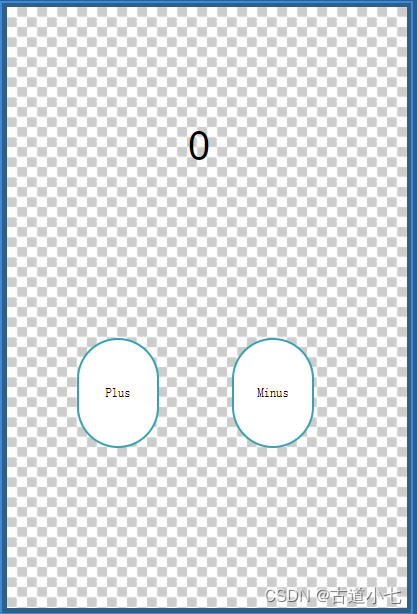
首先这是一个guiguider的程序,就是一个简单的计数器,有两个按钮,一个增加计数值,一个减少计数值。
主要导入前文所说的custom generate文件夹,然后对代码进行观察:
首先仍然是屏幕及其子对象的结构体:
typedef struct
{
	lv_obj_t *screen;
	bool screen_del;
	lv_obj_t *screen_counter;
	lv_obj_t *screen_plus;
	lv_obj_t *screen_plus_label;
	lv_obj_t *screen_minus;
	lv_obj_t *screen_minus_label;
}lv_ui;
接下来是boring的屏幕及其对象的构造环节,由模拟器直接生成,这应该是使用模拟器的一大优势了。
void setup_scr_screen(lv_ui *ui){

	//Write codes screen
	ui->screen = lv_obj_create(NULL);
	lv_scr_load(ui->screen);
	lv_obj_set_scrollbar_mode(ui->screen, LV_SCROLLBAR_MODE_OFF);

	//Write style state: LV_STATE_DEFAULT for style_screen_main_main_default
	static lv_style_t style_screen_main_main_default;
	if (style_screen_main_main_default.prop_cnt > 1)
		lv_style_reset(&style_screen_main_main_default);
	else
		lv_style_init(&style_screen_main_main_default);
	lv_style_set_bg_color(&style_screen_main_main_default, lv_color_make(0xff, 0xff, 0xff));
	lv_style_set_bg_opa(&style_screen_main_main_default, 0);
	lv_obj_add_style(ui->screen, &style_screen_main_main_default, LV_PART_MAIN|LV_STATE_DEFAULT);

	//Write codes screen_counter
	ui->screen_counter = lv_label_create(ui->screen);
	lv_obj_set_pos(ui->screen_counter, 122, 95);
	lv_obj_set_size(ui->screen_counter, 66, 88);
	lv_obj_set_scrollbar_mode(ui->screen_counter, LV_SCROLLBAR_MODE_OFF);
	lv_label_set_text(ui->screen_counter, "0");
	lv_label_set_long_mode(ui->screen_counter, LV_LABEL_LONG_WRAP);

	//Write style state: LV_STATE_DEFAULT for style_screen_counter_main_main_default
	static lv_style_t style_screen_counter_main_main_default;
	if (style_screen_counter_main_main_default.prop_cnt > 1)
		lv_style_reset(&style_screen_counter_main_main_default);
	else
		lv_style_init(&style_screen_counter_main_main_default);
	lv_style_set_radius(&style_screen_counter_main_main_default, 0);
	lv_style_set_bg_color(&style_screen_counter_main_main_default, lv_color_make(0xff, 0xff, 0xff));
	lv_style_set_bg_grad_color(&style_screen_counter_main_main_default, lv_color_make(0xff, 0xff, 0xff));
	lv_style_set_bg_grad_dir(&style_screen_counter_main_main_default, LV_GRAD_DIR_VER);
	lv_style_set_bg_opa(&style_screen_counter_main_main_default, 0);
	lv_style_set_text_color(&style_screen_counter_main_main_default, lv_color_make(0x00, 0x00, 0x00));
	lv_style_set_text_font(&style_screen_counter_main_main_default, &lv_font_arial_32);
	lv_style_set_text_letter_space(&style_screen_counter_main_main_default, 2);
	lv_style_set_text_line_space(&style_screen_counter_main_main_default, 0);
	lv_style_set_text_align(&style_screen_counter_main_main_default, LV_TEXT_ALIGN_CENTER);
	lv_style_set_pad_left(&style_screen_counter_main_main_default, 0);
	lv_style_set_pad_right(&style_screen_counter_main_main_default, 0);
	lv_style_set_pad_top(&style_screen_counter_main_main_default, 0);
	lv_style_set_pad_bottom(&style_screen_counter_main_main_default, 0);
	lv_obj_add_style(ui->screen_counter, &style_screen_counter_main_main_default, LV_PART_MAIN|LV_STATE_DEFAULT);

	//Write codes screen_plus
	ui->screen_plus = lv_btn_create(ui->screen);
	lv_obj_set_pos(ui->screen_plus, 56, 265);
	lv_obj_set_size(ui->screen_plus, 66, 88);
	lv_obj_set_scrollbar_mode(ui->screen_plus, LV_SCROLLBAR_MODE_OFF);

	//Write style state: LV_STATE_DEFAULT for style_screen_plus_main_main_default
	static lv_style_t style_screen_plus_main_main_default;
	if (style_screen_plus_main_main_default.prop_cnt > 1)
		lv_style_reset(&style_screen_plus_main_main_default);
	else
		lv_style_init(&style_screen_plus_main_main_default);
	lv_style_set_radius(&style_screen_plus_main_main_default, 50);
	lv_style_set_bg_color(&style_screen_plus_main_main_default, lv_color_make(0xff, 0xff, 0xff));
	lv_style_set_bg_grad_color(&style_screen_plus_main_main_default, lv_color_make(0xff, 0xff, 0xff));
	lv_style_set_bg_grad_dir(&style_screen_plus_main_main_default, LV_GRAD_DIR_VER);
	lv_style_set_bg_opa(&style_screen_plus_main_main_default, 255);
	lv_style_set_border_color(&style_screen_plus_main_main_default, lv_color_make(0x01, 0xa2, 0xb1));
	lv_style_set_border_width(&style_screen_plus_main_main_default, 2);
	lv_style_set_border_opa(&style_screen_plus_main_main_default, 255);
	lv_style_set_text_color(&style_screen_plus_main_main_default, lv_color_make(0x00, 0x00, 0x00));
	lv_style_set_text_font(&style_screen_plus_main_main_default, &lv_font_simsun_10);
	lv_style_set_text_align(&style_screen_plus_main_main_default, LV_TEXT_ALIGN_CENTER);
	lv_obj_add_style(ui->screen_plus, &style_screen_plus_main_main_default, LV_PART_MAIN|LV_STATE_DEFAULT);
	ui->screen_plus_label = lv_label_create(ui->screen_plus);
	lv_label_set_text(ui->screen_plus_label, "Plus");
	lv_obj_set_style_pad_all(ui->screen_plus, 0, LV_STATE_DEFAULT);
	lv_obj_align(ui->screen_plus_label, LV_ALIGN_CENTER, 0, 0);

	//Write codes screen_minus
	ui->screen_minus = lv_btn_create(ui->screen);
	lv_obj_set_pos(ui->screen_minus, 180, 265);
	lv_obj_set_size(ui->screen_minus, 66, 88);
	lv_obj_set_scrollbar_mode(ui->screen_minus, LV_SCROLLBAR_MODE_OFF);

	//Write style state: LV_STATE_DEFAULT for style_screen_minus_main_main_default
	static lv_style_t style_screen_minus_main_main_default;
	if (style_screen_minus_main_main_default.prop_cnt > 1)
		lv_style_reset(&style_screen_minus_main_main_default);
	else
		lv_style_init(&style_screen_minus_main_main_default);
	lv_style_set_radius(&style_screen_minus_main_main_default, 50);
	lv_style_set_bg_color(&style_screen_minus_main_main_default, lv_color_make(0xff, 0xff, 0xff));
	lv_style_set_bg_grad_color(&style_screen_minus_main_main_default, lv_color_make(0xff, 0xff, 0xff));
	lv_style_set_bg_grad_dir(&style_screen_minus_main_main_default, LV_GRAD_DIR_VER);
	lv_style_set_bg_opa(&style_screen_minus_main_main_default, 255);
	lv_style_set_border_color(&style_screen_minus_main_main_default, lv_color_make(0x01, 0xa2, 0xb1));
	lv_style_set_border_width(&style_screen_minus_main_main_default, 2);
	lv_style_set_border_opa(&style_screen_minus_main_main_default, 255);
	lv_style_set_text_color(&style_screen_minus_main_main_default, lv_color_make(0x00, 0x00, 0x00));
	lv_style_set_text_font(&style_screen_minus_main_main_default, &lv_font_simsun_10);
	lv_style_set_text_align(&style_screen_minus_main_main_default, LV_TEXT_ALIGN_CENTER);
	lv_obj_add_style(ui->screen_minus, &style_screen_minus_main_main_default, LV_PART_MAIN|LV_STATE_DEFAULT);
	ui->screen_minus_label = lv_label_create(ui->screen_minus);
	lv_label_set_text(ui->screen_minus_label, "Minus");
	lv_obj_set_style_pad_all(ui->screen_minus, 0, LV_STATE_DEFAULT);
	lv_obj_align(ui->screen_minus_label, LV_ALIGN_CENTER, 0, 0);

	//Init events for screen
	events_init_screen(ui);
}
然后还有一个是比较重要的envents_init.c文件,注意生成器本来没有guider_UI这个变量,与其相关的代码是需要手动添加的。
#include "events_init.h"
#include <stdio.h>
#include "lvgl.h"
#include "gui_guider.h"

static unsigned int counter = 0;
static lv_ui* guider_ui = NULL;
static char buf[4];


void events_init(lv_ui *ui)
{
}

static void screen_plus_event_handler(lv_event_t *e)
{
	lv_event_code_t code = lv_event_get_code(e);
	switch (code)
	{
	case LV_EVENT_CLICKED:
	{
		lv_obj_t * obj = lv_event_get_target(e);
		counter++;
		sprintf(buf,  "%d" , counter);
		lv_label_set_text(guider_ui->screen_counter, buf);

	}
		break;
	default:
		break;
	}
}

static void screen_minus_event_handler(lv_event_t *e)
{
	lv_event_code_t code = lv_event_get_code(e);
	switch (code)
	{
	case LV_EVENT_CLICKED:
	{
		if(counter) counter--;
		sprintf(buf,  "%d" , counter);
		lv_label_set_text(guider_ui->screen_counter, buf);
	}
		break;
	default:
		break;
	}
}

void events_init_screen(lv_ui *ui)
{
	guider_ui = ui;
	lv_obj_add_event_cb(ui->screen_plus, screen_plus_event_handler, LV_EVENT_ALL, NULL);
	lv_obj_add_event_cb(ui->screen_minus, screen_minus_event_handler, LV_EVENT_ALL, NULL);
}
最后仍然是介绍main.c文件,如下所示:
int main(void)
{

	NVIC_PriorityGroupConfig(NVIC_PriorityGroup_2);//设置系统中断优先级分组2
	delay_init(168);  //初始化延时函数
	uart_init(115200);		//初始化串口波特率为115200

	TIM3_Int_Init(1000-1,84-1);	//定时器时钟84M,分频系数84,所以84M/84=1Mhz的计数频率,计数1000次为1ms

	LED_Init();					//初始化LED
 	LCD_Init();					//LCD初始化
	KEY_Init(); 				//按键初始化
	tp_dev.init();				//触摸屏初始化

	lv_ui ui;

	lv_init();			  // lvgl系统初始化
	lv_port_disp_init();  // lvgl显示接口初始化,放在lv_init()的后面
	lv_port_indev_init(); // lvgl输入接口初始化,放在lv_init()的后面
	setup_scr_screen(&ui);

	while (1)
	{
		lv_task_handler(); // lvgl的事务处理

		delay_ms(5);
	}
}
最后结果展示如下所示:
5 vscode+guiguider+keil综合实验计算器
本节内容主要参考b站up的一个视频,具体链接是:stm32计算器实验
关于实验的整体流程up的视频已经讲的很清楚了,不需要重复,本文对其计算逻辑做了一点点改动,使得计算器得以连续的进行计算,<custom.c>文件代码如下,方便移植,相信如果真正搞清楚了这篇博文,不超两个小时就可以完成这个计算器,具体计算器逻辑未经过长期验证,仅是lvgl移植实验的一个验证。
/**********************
 *  STATIC PROTOTYPES
 **********************/
static lv_ui guider_ui;;
/**********************
 *  STATIC VARIABLES
 **********************/
static int get_result(int old, int oper, int value)
{
    int result = 0;
    switch (oper)
    {
    case 0:
        result = value;
        break;
    case 3:
        result = old + value;
        break;
    case 7:
        result = old - value;
        break;
    case 11:
        result = old * value;
        break;
    case 15:
        result = old / value;
        break;
    case 1:
        result = old;
        break;
    default:
        break;
    }
    return result;
}

static void my_event_handle(lv_event_t *e)
{
    lv_ui* ui = lv_event_get_user_data(e);
    uint32_t id = lv_btnmatrix_get_selected_btn(guider_ui.screen_btnm_1);
    const char *txt =lv_btnmatrix_get_btn_text(guider_ui.screen_btnm_1, id);

    static int old = 0;
    static int oper =0;
    int value = 0;
    static char num[10] ={0};

    switch (id)
    {
    case 3:
        sscanf(num,"%d",&value);
        old = get_result(old, oper, value);
        lv_label_set_text_fmt(guider_ui.screen_label_1,"%d",old);
        oper = id;
        memset(num,0,sizeof(num));
        break;
    case 7:
        sscanf(num,"%d",&value);
        old = get_result(old, oper, value);
        lv_label_set_text_fmt(guider_ui.screen_label_1,"%d",old);
        oper = id;
        memset(num,0,sizeof(num));
        break;
    case 11:
        sscanf(num,"%d",&value);
        old = get_result(old, oper, value);
        lv_label_set_text_fmt(guider_ui.screen_label_1,"%d",old);
        oper = id;
        memset(num,0,sizeof(num));
        break;
    case 15:
        sscanf(num,"%d",&value);
        old = get_result(old, oper, value);
        lv_label_set_text_fmt(guider_ui.screen_label_1,"%d",old);
        oper = id;
        memset(num,0,sizeof(num));
        break;
    case 12:
        lv_label_set_text(guider_ui.screen_label_1,"");
        oper = 0;
        old = 0;
        memset(num,0,sizeof(num));
        break;
    case 14:
        sscanf(num,"%d",&value);
        old = get_result(old, oper, value);
        lv_label_set_text_fmt(guider_ui.screen_label_1,"%d",old);
        oper = 1;
        //old = 0;
        memset(num,0,sizeof(num));
        break;
    default:
        if(strlen(num)<sizeof(num)-1)
        {
            strcat(num,txt);
            lv_label_set_text(guider_ui.screen_label_1,num);
        }
        break;
    }
}
/**
 * Create a demo application
 */

void custom_init(lv_ui *ui)
{
    /* Add your codes here */
		guider_ui = *ui;
    lv_obj_add_event_cb(ui->screen_btnm_1, my_event_handle, LV_EVENT_PRESSED, ui);
}
具体效果展示如下:
好了,本文就介绍到这儿了。
最后的部分写的实在有点累了,有点匆忙,如果有不懂的,欢迎评论区评论,如果没啥想说的,可以点个赞或者收藏,最后点个关注,希望咱们一起变得更强!


 1654
1654

 被折叠的 条评论
为什么被折叠?
被折叠的 条评论
为什么被折叠?
 到【灌水乐园】发言


