


02、商品详情:分析渲染商品详情页需要的数据
分析item.html页面,得到渲染所需要的数据如下:
List categories:三个分类对象的集合
Brand brand:品牌对象
String spuName:spu的名称
String subTitle:spu的副标题
SpuDetail detail:商品详情对象
List skus:spu下对应的sku的对象集合
List specs:规格组对象列表
其中每个规格组对象中包含一个List规格参数集合
分析如何获取上面所需的数据:
现在唯一的条件就是spuId。
第一:根据spuId获取SpuDTO对象,里面要包含SpuDeail对象和sku对象的集合两个属性。(还没有)
第二:根据三个分类id的集合查询分类对象的集合。(已经有了)
第三:根据品牌id查询品牌对象。(还没有)
第四:根据分类id查询出所有的规格组集合,里面包含规格参数集合属性。(还没有)
03、商品详情:提供渲染商品详情所需Feign方法
1) 根据spuId获取SpuDTO对象
GoodsController
    /**
     * 根据spuId查询SpuDTO对象
     */
    @GetMapping("/spu/{id}")
    public ResponseEntity<SpuDto> findSpuDtoById(@PathVariable("id") Long id){
        SpuDto spuDTO = goodsService.findSpuDTOById(id);
        return ResponseEntity.ok(spuDTO);
    }
GoodsService
SpuDto findSpuDTOById(Long id);
GoodsService
	@Override
    public SpuDto findSpuDTOById(Long id) {
        //1.根据spuId查询Spu对象
        TbSpu tbSpu = spuMapper.selectById(id);
        //2.拷贝数据
        SpuDto spuDto = BeanHelper.copyProperties(tbSpu, SpuDto.class);
        //3.查询SpuDetail
        TbSpuDetail spuDetail = spuDetailService.getById(id);
        spuDto.setSpuDetail(spuDetail);
        //4.查询所有Sku对象
        List<TbSku> skus = skuservice.findSkusBySpuId(id);
        spuDto.setSkus(skus);

        return spuDto;
    }
提供feign接口
    /**
     * 根据spuId查询SpuDTO对象
     */
    @GetMapping("/spu/{id}")
    SpuDto findSpuDtoById(@PathVariable("id") Long id);
2) 根据分类id集合查询分类对象的集合。
已经有了
3) 根据品牌id查询品牌对象
直接提供feign接口即可
    @GetMapping("/brand/{id}")
    TbBrand findBrandById(@PathVariable("id") Long id);
4) 根据分类id查询所有规格参数组
提供规格组对象的dto
package com.leyou.item.dto;

import com.leyou.item.pojo.TbSpecGroup;
import com.leyou.item.pojo.TbSpecParam;
import lombok.Data;

import java.util.List;

/**
 * @author yy
 */
@Data
public class SpecGroupDto extends TbSpecGroup {

    private List<TbSpecParam> params;//组内参数

}
SpecController提供处理器方法
    /**
     * 根据分类ID查询规格参数组(包含组内参数)
     */
    @GetMapping("/of/specGroupDto")
    public ResponseEntity<List<SpecGroupDto>> findSpecGroupDtoByCid(@RequestParam("id") Long id){
        List<SpecGroupDto> specGroupDTOS = specGroupService.findSpecGroupDtoByCid(id);
        return ResponseEntity.ok(specGroupDTOS);
    }
SpecService提供service
 @Override
    public List<SpecGroupDto> findSpecGroupDtoByCid(Long id) {
        //1.根据分类ID查询规格组
        List<TbSpecGroup> specGroups = findSpecGroupByCid(id);
        //2.拷贝数据
        List<SpecGroupDto> specGroupDTOS = BeanHelper.copyWithCollection(specGroups, SpecGroupDto.class);
        //3.遍历所有SpecGroupDTO
        specGroupDTOS.forEach(specGroupDTO -> {
            //3.1 根据规格组ID查询规格参数
            List<TbSpecParam> specParams = specParamService.findSpecParams(null, specGroupDTO.getId(), null);
            //设置组内的规格参数
            specGroupDTO.setParams(specParams);
        });
        return specGroupDTOS;
    }
提供feign接口
    /**
     * 根据分类ID查询规格参数组(包含组内参数)
     */
    @GetMapping("/spec/groups/of/specGroupDto")
    List<SpecGroupDto> findSpecGroupDtoByCid(@RequestParam("id") Long id);
04、商品详情:查询item.html模板所需数据
1) 编写处理器PageController
package com.leyou.controller;

import com.leyou.service.impl.PageService;
import org.springframework.beans.factory.annotation.Autowired;
import org.springframework.stereotype.Controller;
import org.springframework.ui.Model;
import org.springframework.web.bind.annotation.GetMapping;
import org.springframework.web.bind.annotation.PathVariable;

import java.util.Map;

/**
 * @author yy
 */

@Controller // 必须是Controller,不能@RestController
public class PageController {
    @Autowired
    private PageService pageService;

    /**
     * 接收商品详情
     */
    @GetMapping("/item/{id}.html")
    public String showGoodsDetail(@PathVariable("id") Long id, Model model){
        //1.调用业务
        Map<String,Object> resultMap = pageService.getDetailData(id);

        //2.把Map集合数据存入Model
        model.addAllAttributes(resultMap);

        //返回th的模板
        return "item";
    }
}
2) 编写PageService
package com.leyou.page.service;

import com.leyou.item.client.ItemClient;
import com.leyou.item.dto.SpecGroupDTO;
import com.leyou.item.dto.SpuDTO;
import com.leyou.item.pojo.Brand;
import com.leyou.item.pojo.Category;
import org.springframework.beans.factory.annotation.Autowired;
import org.springframework.stereotype.Service;

import java.util.Arrays;
import java.util.HashMap;
import java.util.List;
import java.util.Map;

@Service
public class PageService {
    @Autowired
    private ItemClient itemClient;

    public Map<String,Object> getDetailData(Long id) {

      public Map<String,Object> getDetailData(Long id) {
        //1.查询SpuDTO对象
        SpuDto spuDTO = itemClient.findSpuDtoById(id);
        //2.根据分类ID集合查询分类对象集合
        List<TbCategory> categories = itemClient.findCategoriesByIds(Arrays.asList(
                spuDTO.getCid1(),
                spuDTO.getCid2(),
                spuDTO.getCid3()));
        //3.根据品牌ID查询品牌
        TbBrand brand = itemClient.findBrandById(spuDTO.getBrandId());
        //4.根据分类ID查询规格组(包含组内参数)
        List<SpecGroupDto> specGroupDTOList = itemClient.findSpecGroupDtoByCid(spuDTO.getCid3());

        Map<String, Object> resultMap = new HashMap<>();
        resultMap.put("categories",categories);
        resultMap.put("brand",brand);
        resultMap.put("spuName",spuDTO.getName());
        resultMap.put("subTitle",spuDTO.getSubTitle());
        resultMap.put("detail",spuDTO.getSpuDetail());
        resultMap.put("skus",spuDTO.getSkus());
        resultMap.put("specs",specGroupDTOList);
        return resultMap;
    }
}
3)页面测试数据是否可用
我们在item.html模板页面中先写一段JS,把模型中的数据取出观察,看是否成功:
<script th:inline="javascript">
    const categories = /*[[${categories}]]*/ [];
    const brand = /*[[${brand}]]*/ {};
    const spuName = /*[[${spuName}]]*/ "";
    const subTitle = /*[[${subTitle}]]*/ "";
    const detail = /*[[${detail}]]*/ {};
    const skus = /*[[${skus}]]*/ [];
    const specs = /*[[${specs}]]*/ [];
</script>
然后查看页面源码:

数据都成功查到了!
05、商品详情:渲染item.html模块页面
1)分类、品牌、spu名称
<div class="crumb-wrap">
                <ul class="sui-breadcrumb">
                    <li th:each="c :${categories}">
                        <a href="#" th:text="${c.name}">手机</a>
                    </li>
                    <li>
                        <a href="#" th:text="${brand.name}">Apple</a>
                    </li>
                    <li class="active" th:text="${spuName}">Apple iPhone 6s</li>
                </ul>
            </div>
2)副标题
副标题是在spu中,所以我们直接通过Thymeleaf渲染:
在第146行左右:
<div class="sku-name">
                        <h4>Apple iPhone 6s(A1700)64G玫瑰金色 移动通信电信4G手机</h4>
                    </div>
                    <div class="news"><span th:utext="${subTitle}">推荐选择下方[移动优惠购],手机套餐齐搞定,不用换号,每月还有花费返</span></div>
副标题中可能会有超链接(包含HTML标记),因此这里也用th:utext来展示,效果:
在这里插入图片描述
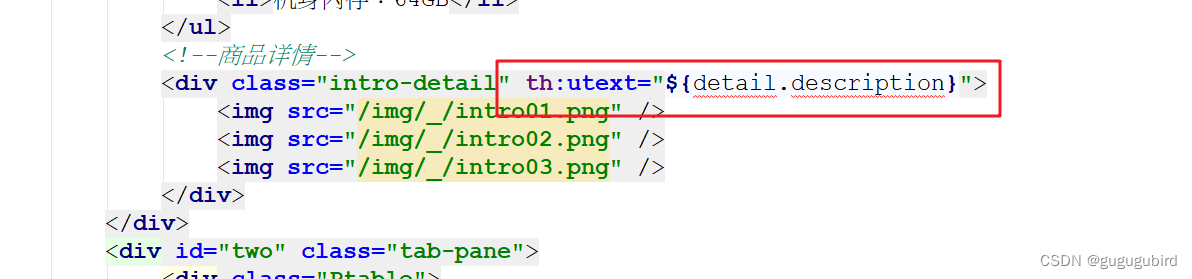
3)商品详情
商品详情是HTML代码,我们不能使用 th:text,应该使用th:utext
大概在页面的第485行左右:
<!--商品详情-->
<div class="intro-detail" th:utext="${detail.description}">
	<img src="/img/_/intro01.png" />
	<img src="/img/_/intro02.png" />
	<img src="/img/_/intro03.png" />
</div>
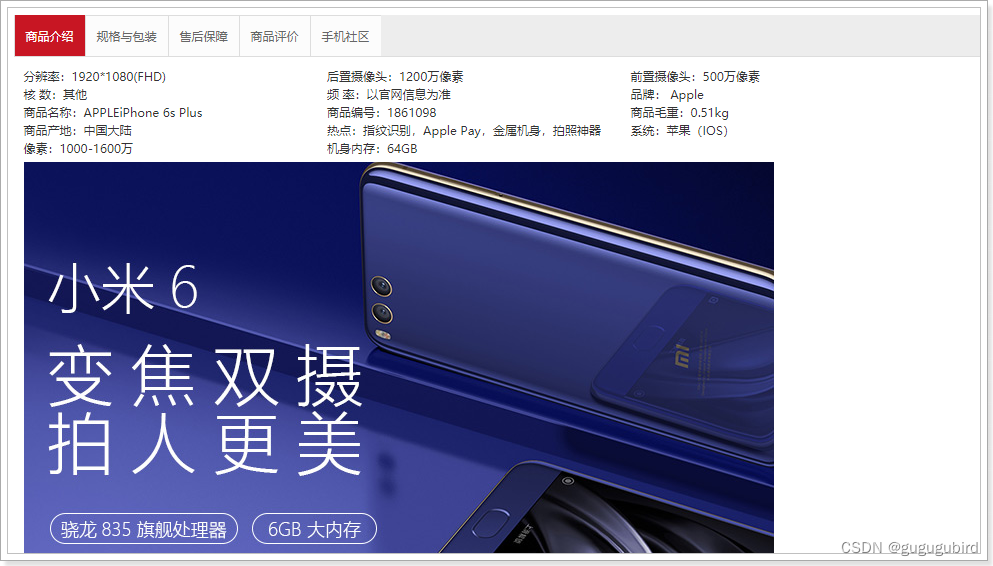
最终展示效果:
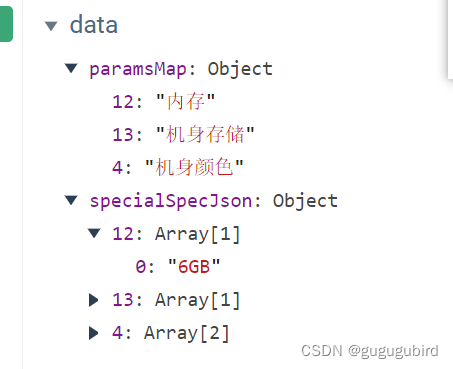
4)展示特有规格参数
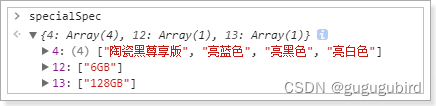
取出当前商品的特殊规格参数 及 该分类下的所有特殊规格参数值,并放入Vue的data中
<script th:inline="javascript">
//取出SpuDetail对象
const detail = /*[[${detail}]]*/ {};
//取出特有规格参数列表
let specialSpec = JSON.parse(detail.specialSpec);
//设计用于存储特有规格参数数据对象,格式:{4:"机身颜色",12:"内存"....}
let params = {};
//取出specs规格组和规格参数
const specs = /*[[${specs}]]*/ [];
specs.forEach(group=>{
group.params.forEach(param=>{
//只取出特有参数
if(!param.generic){
params[param.id] = param.name;
}
});
});
</script>
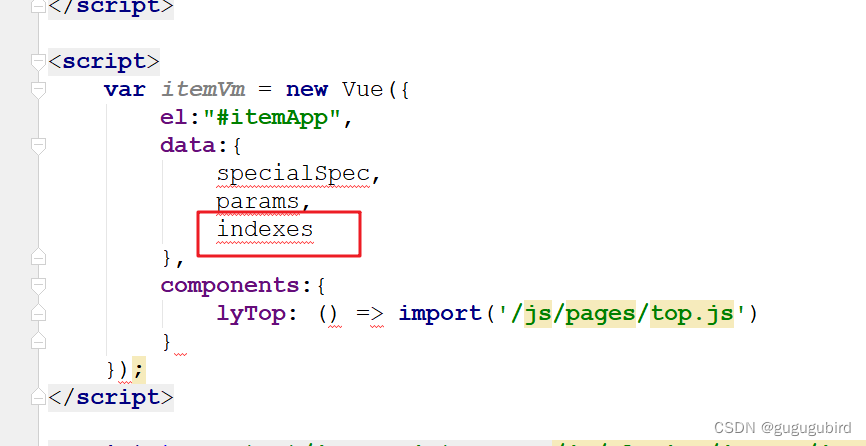
<script>
var itemVm = new Vue({
el:"#itemApp",
data:{
specialSpec,
params,
},
components:{
lyTop: () => import('/js/pages/top.js')
}
});
</script>
调试查看结果如下:
然后,找到页面对应位置渲染数据(大约188行)
<div class="clearfix choose">
<div id="specification" class="summary-wrap clearfix">
<dl v-for="(value,key,index) in specialSpecJson" :key="index">
<dt>
<div class="fl title">
<i>{{paramsMap[key]}}</i>
</div>
</dt>
<dd v-for="(v,i) in value" :key="i">
<a href="javascript:;" class="selected">
{{v}}<span title="点击取消选择"> </span>
</a>
</dd>
</dl>
</div>
结果如下:
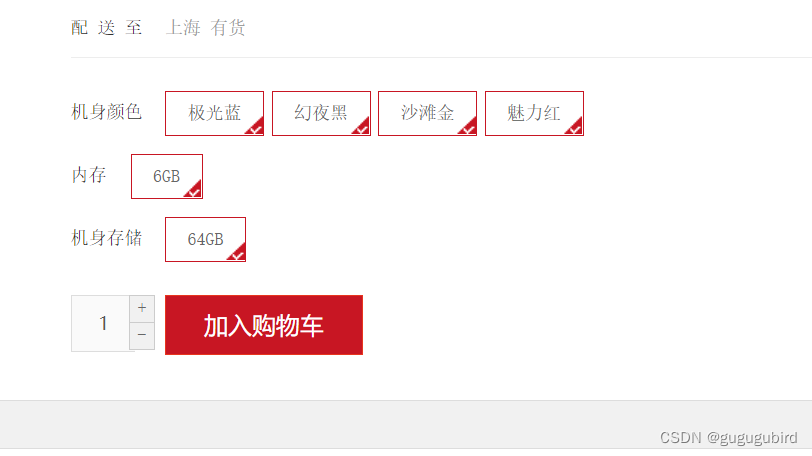
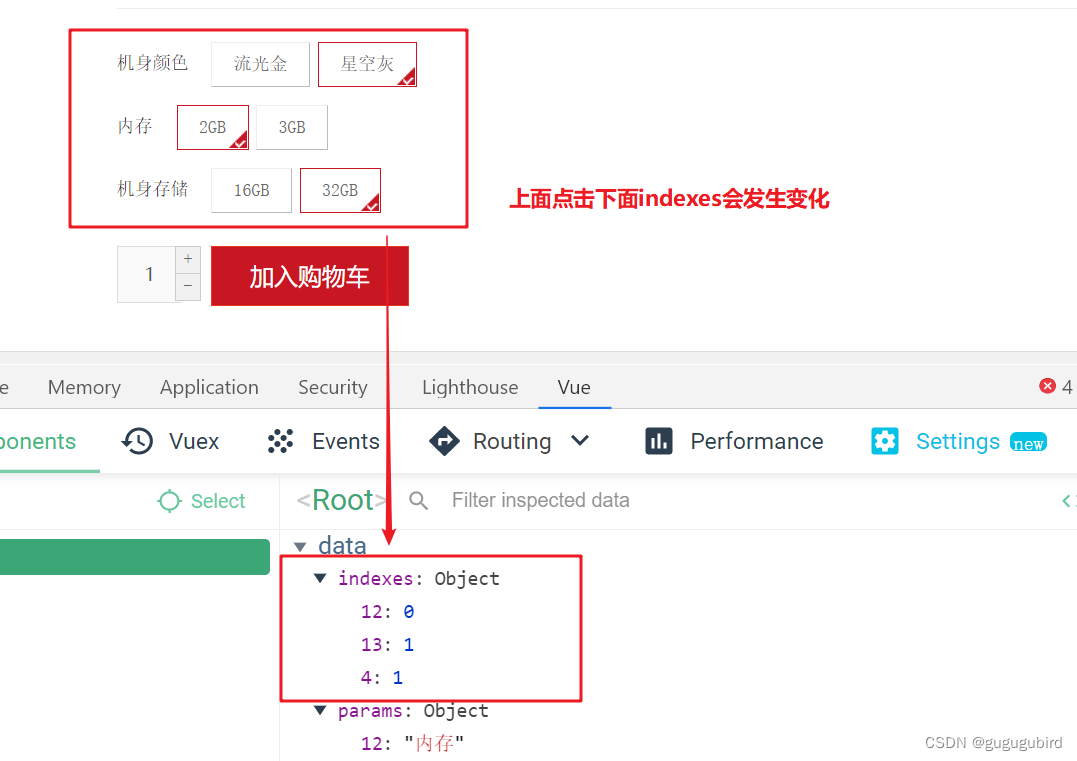
5)记录选中哪个特殊规格参数值
思路分析
规格参数的格式是这样的:
每一个规格项是数组中的一个元素,因此我们只要保存被选择的规格项的索引,就能判断哪个是用户选择的了!
我们需要一个对象indexes来保存用户选择的索引,格式如下:
{
    "4":0,
    "12":0,
    "13":0
}
但问题是,第一次进入页面时,用户并未选择任何参数。因此索引应该有一个默认值,我们将默认值设置为0。
我们在script标签中,对索引对象进行初始化:
<script th:inline="javascript">
    //取出SpuDetail对象
    const detail = /*[[${detail}]]*/ {};

    //取出specialSpec特有参数
    let specialSpec = JSON.parse(detail.specialSpec);

    //定义一个对象存储所有特有参数:格式: {"4":"机身颜色"....}
    let paramJson = {};

    //取出所有参数组
    const specs = /*[[${specs}]]*/ [];
    //遍历参数组
    specs.forEach(specGroup=>{
        //遍历组内参数
        specGroup.params.forEach(specParam=>{
            //只需要取出特有参数
            if(!specParam.generic){
                paramJson[specParam.id] = specParam.name;
            }
        });
    })

    //设计一个对象记录每个特有参数的选中下标值  格式: { "4": 2, "12":0,...}
    let indexes = {};
    //初始化值,全部参数默认第一个选中
    for(let key in specialSpec){
        indexes[key] = 0;
    }
</script>


<script>
    var itemVm = new Vue({
        el:"#itemApp",
        data:{
            specialSpec,
            paramJson,
            indexes,
        },
        components:{
            lyTop: () => import('/js/pages/top.js')
    }
    });
</script>
然后在vue中保存:
添加样式和点击事件代码
我们在页面中,通过判断indexes的值来判断当前规格是否被选中,并且给规格绑定点击事件,点击规格项后,修改indexes中的对应值:
<div id="specification" class="summary-wrap clearfix">
<dl v-for="(value,key,index) in specialSpec" :key="index">
<dt>
<div class="fl title">
<i>{{paramJson[key]}}</i>
</div>
</dt>
<dd v-for="(v,i) in value" :key="i" @click="indexes[key]=i">
<a href="javascript:;" :class="{selected:indexes[key]==i}">
{{v}}<span title="点击取消选择"> </span>
</a>
</dd>
</dl>
</div>
效果:
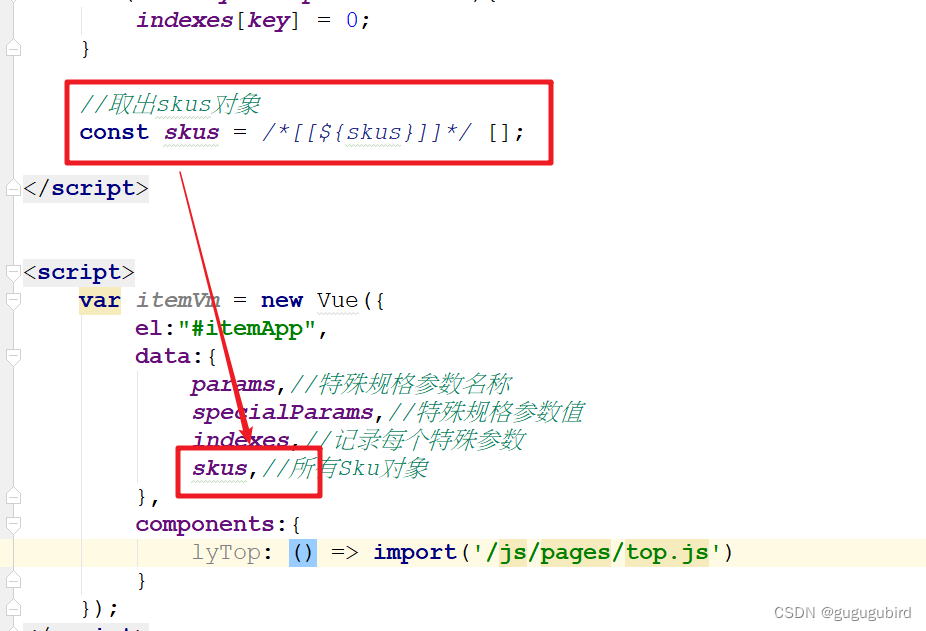
6)如何切换不同的Sku
取出所有Sku对象
我们可以获取skus值,并放入Vue的data中。
使用Vue插件查看数据:
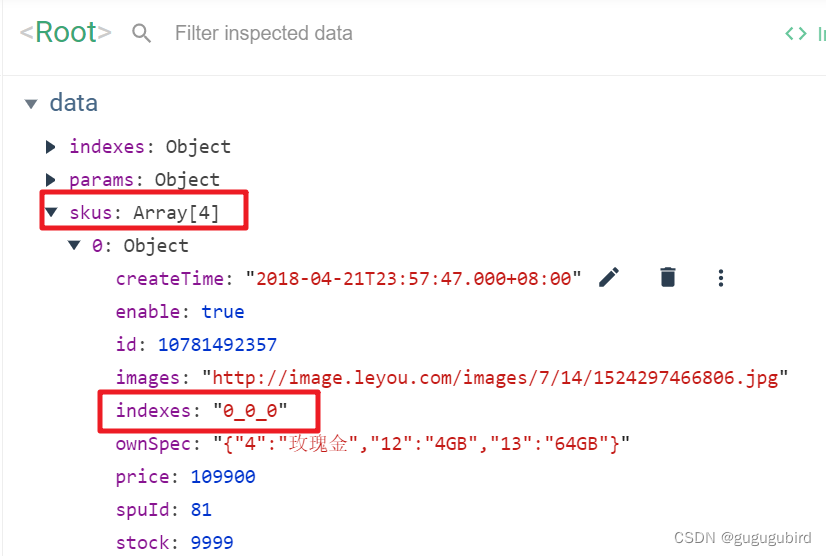
添加计算属性存储选中的Sku对象
现在问题是,如何确定我们选择的规格参数,属于哪个Sku呢?
我们设计sku数据的时候,就已经在tb_sku表添加了一个字段:indexes。这其实就是规格参数的索引组合。
而我们在页面中,用户点击选择规格后,就会把对应的索引保存起来:

因此,我们可以根据这个indexes来确定用户要选择的sku
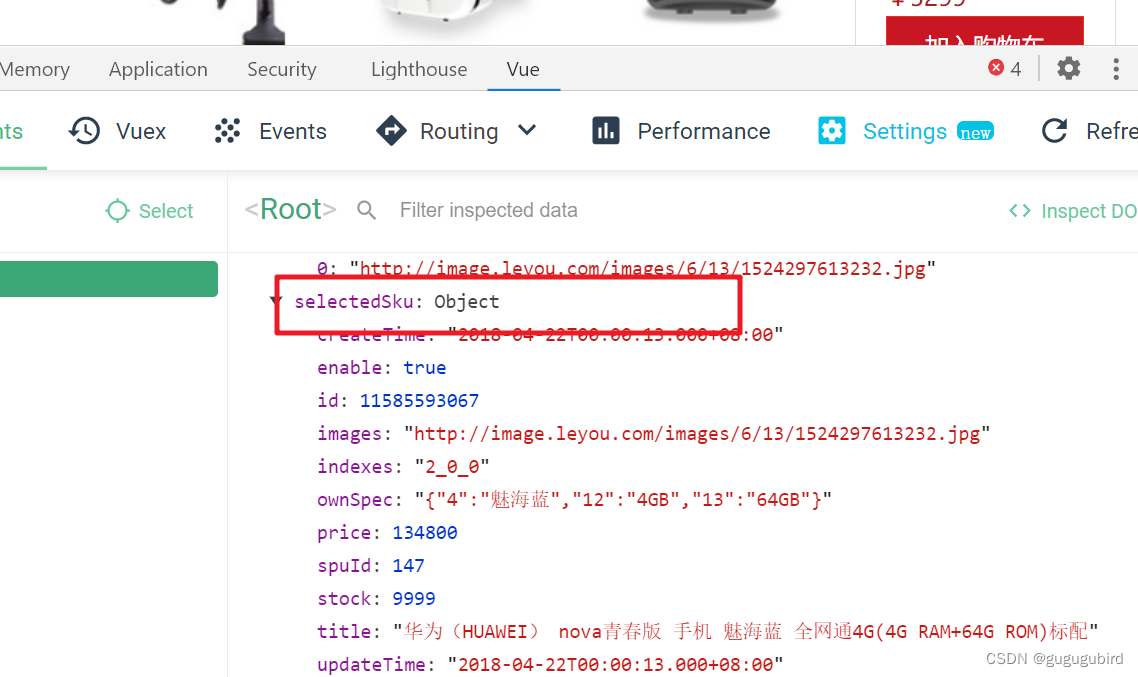
我们在vue中定义一个计算属性,来计算与索引匹配的sku:
<script th:inline="javascript">
//取出SpuDetail对象
const detail = /*[[${detail}]]*/ {};
//取出specialSpec特有参数
let specialSpec = JSON.parse(detail.specialSpec);
//定义一个对象存储所有特有参数:格式: {"4":"机身颜色"....}
let paramJson = {};
//取出所有参数组
const specs = /*[[${specs}]]*/ [];
//遍历参数组
specs.forEach(specGroup=>{
//遍历组内参数
specGroup.params.forEach(specParam=>{
//只需要取出特有参数
if(!specParam.generic){
paramJson[specParam.id] = specParam.name;
}
});
})
//设计一个对象记录每个特有参数的选中下标值 格式: { "4": 2, "12":0,...}
let indexes = {};
//初始化值,全部参数默认第一个选中
for(let key in specialSpec){
indexes[key] = 0;
}
//取出所有Sku
const skus = /*[[${skus}]]*/ [];
</script>
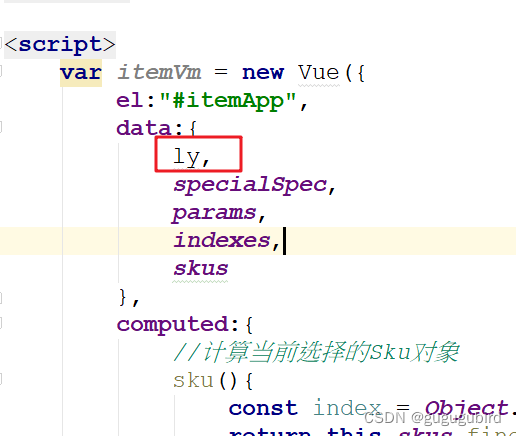
<script>
var itemVm = new Vue({
el:"#itemApp",
data:{
ly,
specialSpec,
paramJson,
indexes,
skus,
},
computed:{
//定义选中的Sku对象
selectedSku(){
//1.把当前选择的indexes下表转换为字符串:0_0_0
//Object.values():取出对象的value值,返回一个数组
//join(): 数组的方法,使用指定分隔符拼接成一个新的字符串
let indexes = Object.values(this.indexes).join("_");
//find()方法: 在数组中查询满足条件的对象
return this.skus.find(sku=>sku.indexes==indexes);
},
//处理多种图片
images(){
return this.selectedSku.images.split(",") || this.selectedSku.images;
}
},
components:{
lyTop: () => import('/js/pages/top.js')
}
});
</script>
在浏览器工具中查看:
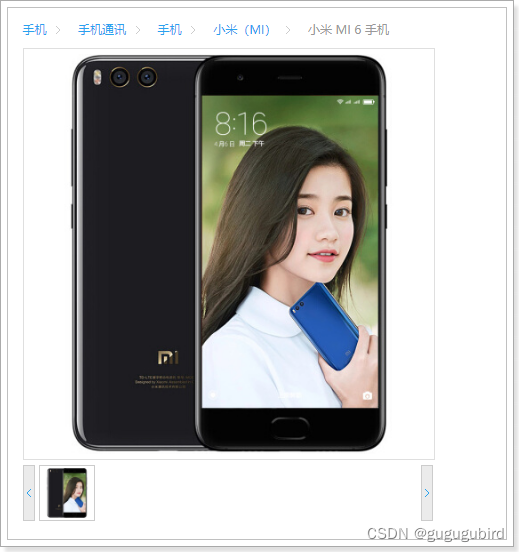
7)展示Sku信息
既然已经拿到了用户选中的sku,接下来,就可以在页面渲染数据了
图片列表
商品图片是一个字符串,以,分割,页面展示比较麻烦,所以我们编写一个**计算属性:**images(),将图片字符串变成数组:
<script th:inline="javascript">
    //取出SpuDetail对象
    const detail = /*[[${detail}]]*/ {};

    //取出specialSpec特有参数
    let specialSpec = JSON.parse(detail.specialSpec);

    //定义一个对象存储所有特有参数:格式: {"4":"机身颜色"....}
    let paramJson = {};

    //取出所有参数组
    const specs = /*[[${specs}]]*/ [];
    //遍历参数组
    specs.forEach(specGroup=>{
        //遍历组内参数
        specGroup.params.forEach(specParam=>{
            //只需要取出特有参数
            if(!specParam.generic){
                paramJson[specParam.id] = specParam.name;
            }
        });
    })

    //设计一个对象记录每个特有参数的选中下标值  格式: { "4": 2, "12":0,...}
    let indexes = {};
    //初始化值,全部参数默认第一个选中
    for(let key in specialSpec){
        indexes[key] = 0;
    }

    //取出所有Sku
    const skus = /*[[${skus}]]*/ [];
</script>


<script>
    var itemVm = new Vue({
        el:"#itemApp",
        data:{
            ly,
            specialSpec,
            paramJson,
            indexes,
            skus,
        },
        computed:{
          //定义选中的Sku对象
            selectedSku(){
                //1.把当前选择的indexes下表转换为字符串:0_0_0
                //Object.values():取出对象的value值,返回一个数组
                //join(): 数组的方法,使用指定分隔符拼接成一个新的字符串
                let indexes = Object.values(this.indexes).join("_");

                //find()方法: 在数组中查询满足条件的对象
                return this.skus.find(sku=>sku.indexes==indexes);
            },
            //处理多种图片
            images(){
                return this.selectedSku.images.split(",") || this.selectedSku.images;
            }
        },
        components:{
            lyTop: () => import('/js/pages/top.js')
    }
    });
</script>
页面改造:
<div class="product-info">
<div class="fl preview-wrap">
<!--放大镜效果-->
<div class="zoom">
<!--默认第一个预览-->
<div id="preview" class="spec-preview">
<span class="jqzoom">
<img :jqimg="images[0] || images" :src="images[0] || images" width="400px" height="400px"/>
</span>
</div>
<!--下方的缩略图-->
<div class="spec-scroll">
<a class="prev"><</a>
<!--左右按钮-->
<div class="items">
<ul>
<li v-for="(img,i) in images" :key="i">
<img :src="img" :bimg="img" onmousemove="preview(this)" />
</li>
</ul>
</div>
<a class="next">></a>
</div>
</div>
</div>
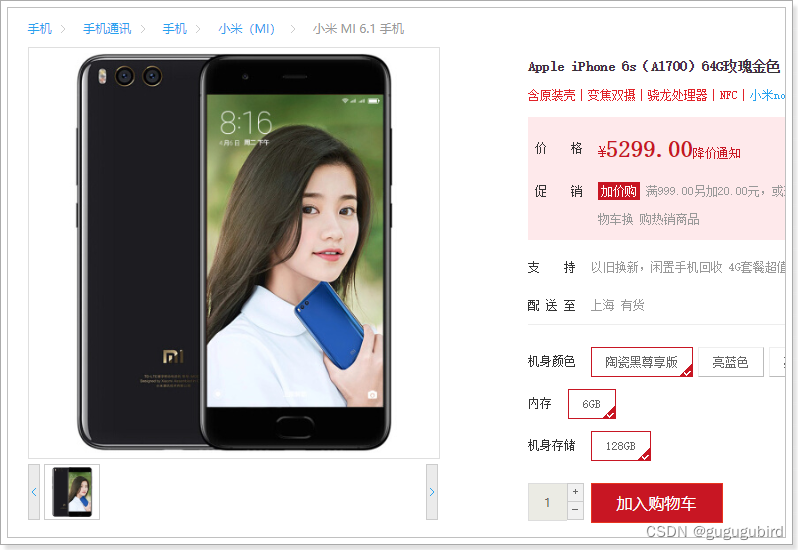
<div class="fr itemInfo-wrap">
<div class="sku-name">
<h4>{{selectedSku.title}}</h4>
</div>
<div class="news"><span th:utext="${subTitle}">推荐选择下方[移动优惠购],手机套餐齐搞定,不用换号,每月还有花费返</span></div>
<div class="summary">
<div class="summary-wrap">
<div class="fl title"><i>价 格</i></div>
<div class="fl price">
<i>¥</i><em>{{ly.formatPrice(selectedSku.price)}}</em><span>降价通知</span>
</div>
<div class="fr remark"><i>累计评价</i><em>612188</em></div>
</div>
<div class="summary-wrap">
<div class="fl title">
<i>促 销</i>
</div>
<div class="fl fix-width">
<i class="red-bg">加价购</i>
<em class="t-gray">满999.00另加20.00元,或满1999.00另加30.00元,或满2999.00另加40.00元,即可在购物车换
购热销商品</em>
</div>
</div>
</div>
<div class="support">
<div class="summary-wrap">
<div class="fl title">
<i>支 持</i>
</div>
<div class="fl fix-width">
<em class="t-gray">以旧换新,闲置手机回收 4G套餐超值抢 礼品购</em>
</div>
</div>
<div class="summary-wrap">
<div class="fl title">
<i>配 送 至</i>
</div>
<div class="fl fix-width">
<em class="t-gray">上海 <span>有货</span></em>
</div>
</div>
</div>
效果:
标题和价格
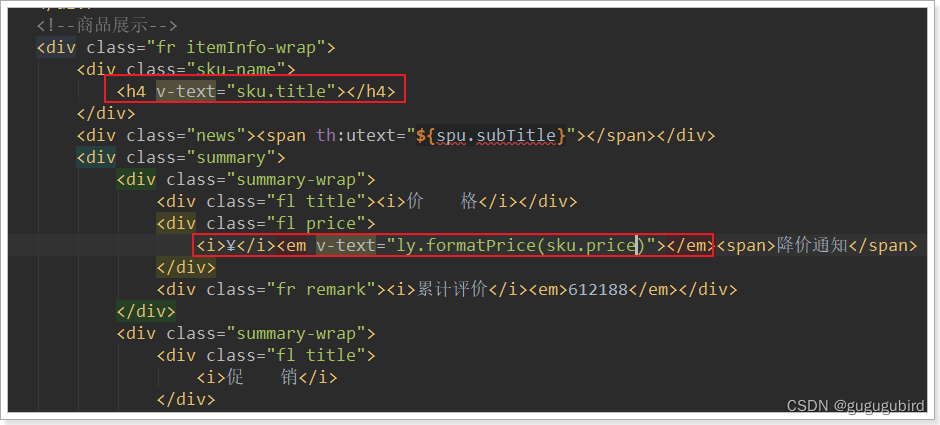
记得在Vue的data加入ly对象,这样才可以使用ly对象的方法
完整效果
8)参考item.html渲染其它数据
我们课堂上只渲染一部分数据,大家可以参考资料提供的item.html抽空再把其他数据进行渲染。
06、页面静态化:实现页面静态化
本次课程我们采用Thymeleaf来实现页面静态化。
1)概念
先说下Thymeleaf中的几个概念:
- Context:运行上下文
- TemplateResolver:模板解析器
- TemplateEngine:模板引擎
Context
上下文: 用来保存模型数据,当模板引擎渲染时,可以从Context上下文中获取数据用于渲染。
当与SpringBoot结合使用时,我们放入Model的数据就会被处理到Context,作为模板渲染的数据使用。
TemplateResolver
模板解析器:用来读取模板相关的配置,例如:模板存放的位置信息,模板文件名称,模板文件的类型等等。
当与SpringBoot结合时,TemplateResolver已经由其创建完成,并且各种配置也都有默认值,比如模板存放位置,其默认值就是:templates。比如模板文件类型,其默认值就是html。
TemplateEngine
模板引擎:用来解析模板的引擎,需要使用到上下文、模板解析器。分别从两者中获取模板中需要的数据,模板文件。然后利用内置的语法规则解析,从而输出解析后的文件。来看下模板引起进行处理的函数:
templateEngine.process("模板名", context, writer);
三个参数:
- 模板名称
- 上下文:里面包含模型数据
- writer:输出目的地的流
在输出时,我们可以指定输出的目的地,如果目的地是Response的流,那就是网络响应。如果目的地是本地文件,那就实现静态化了。
而在SpringBoot中已经自动配置了模板引擎,因此我们不需要关心这个。现在我们做静态化,就是把输出的目的地改成本地文件即可!
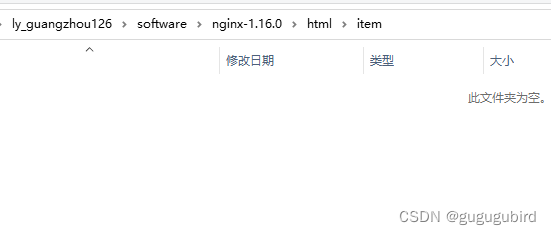
2) 在nginx服务器创建item目录
说明,静态页面服务器一般选择使用nginx。
搭建思路

具体实现就是在nginx的html目录下创建一个item文件夹即可
3) 在配置文件中配置静态化页面的信息
在application.yml中配置生成静态文件的目录:
ly:
  static:
    itemDir: D:\java\nginx-1.21.6\html\item #静态页服务器地址
    itemTemplate: item #模板名称
4) 编写生成静态化页面的service方法
 /**
     * 生成商品的静态页面
     */
    public void createStaticPage(Long spuId){
        //1)创建Context上下文对象(读取模板文件需要的动态数据)
        Context context = new Context();
        //设置动态数据
        context.setVariables(getDetailData(spuId));
        //2)定义静态模板((item.html)
        String tmepName = itemTemplate+".html";
        //3)使用模板引擎对象读取静态目标,把动态数据写入模板,使用IO输出流生成一个静态文件

        //生成 静态页名称
        String fileName = spuId+".html";

        PrintWriter writer = null;

        try {
            writer = new PrintWriter(new File(itemDir,fileName));
            templateEngine.process(tmepName,context,writer);
        } catch (Exception e) {
            e.printStackTrace();
        } finally {
            //注意:一旦涉及自定义输出流,必须关闭输出流,否则后续无法删除该文件
            writer.close();
        }

    }
5) 使用测试类生成静态页
package com.leyou;

import com.leyou.page.service.PageService;
import org.junit.Test;
import org.junit.runner.RunWith;
import org.springframework.beans.factory.annotation.Autowired;
import org.springframework.boot.test.context.SpringBootTest;
import org.springframework.test.context.junit4.SpringJUnit4ClassRunner;

@RunWith(SpringJUnit4ClassRunner.class)
@SpringBootTest(classes = LyPageApplication.class)
public class PageServiceTest {
    @Autowired
    private PageService pageService;

    @Test
    public void testcreateStaticPage(){
        pageService.createStaticPage(113L);
    }
}
效果为
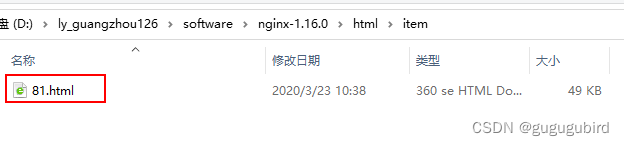
发现请求速度得到了极大提升:
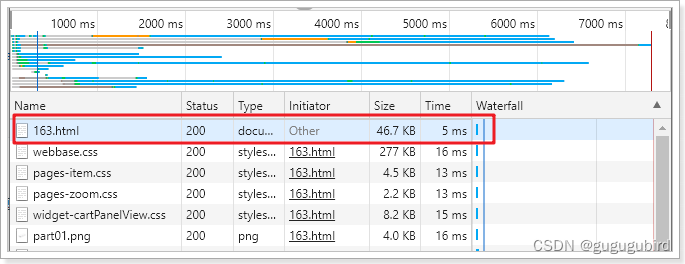
而且你会发现即使停止ly-page微服务也可以访问页面,因为访问的是nginx服务器的静态页面!
07、数据同步:数据同步问题
我们思考这样几个问题:
- 商品详情页应该在什么时候生成呢?不能每次都用单元测试生成吧?
- 如果商品数据修改以后,静态页的内容与商品实际内容不符,该如何完成同步?
- 商品下架后,用户应该不能再搜索该商品,且静态页也不需要了吧,如何处理?
思考上面问题的同时,我们会想起一件事情,其实商品数据如果发生了增、删、改,不仅仅静态页面需要处理,我们的索引库数据也需要同步!!这又该如何解决?
因为商品新增后需要上架用户才能看到,商品修改需要先下架,然后修改,再上架。因此上述问题可以统一的设计成这样的逻辑处理:
- 商品上架:
- 生成静态页
- 新增索引库数据
- 商品下架:
- 删除静态页
- 删除索引库数据
这样既可保证数据库商品与索引库、静态页三者之间的数据同步。
那么,如何实现上述逻辑呢?
先看两种解决方案:
- 方案1:在商品微服务的上下架业务后,加入修改索引库数据及静态页面的代码
- 方案2:搜索服务和静态页服务对外提供操作索引库和静态页接口,商品微服务在商品上下架后,调用接口。
以上两种方式都有同一个严重问题:就是代码耦合,后台服务中需要嵌入搜索和商品页面服务,违背了微服务的独立原则,而且严重违背了开闭原则。
所以,我们会通过另外一种方式来解决这个问题:消息队列
解决方案架构图:

MQ:三大功能,异步化,业务解耦合,提高系统吞吐量,流量削峰。
08、数据同步:RabbitMQ回顾
1)什么是消息队列
消息队列,即MQ,Message Queue。
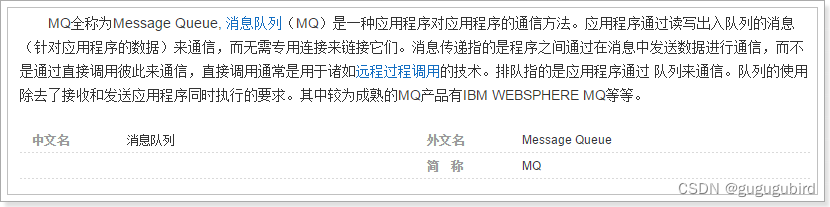
消息队列是典型的:生产者、消费者模型。生产者不断向消息队列中生产消息,消费者不断的从队列中获取消息。因为消息的生产和消费都是异步的,而且只关心消息的发送和接收,没有业务逻辑的侵入,这样就实现了生产者和消费者的解耦。
结合前面所说的问题:
- 商品服务对商品上下架以后,无需去操作索引库或静态页面,只是发送一条消息,也不关心消息被谁接收。
- 搜索服务和静态页面服务接收消息,分别去处理索引库和静态页面。
如果以后有其它系统也依赖商品服务的数据,同样监听消息即可,商品服务无需任何代码修改。
2)AMQP和JMS
MQ是消息通信的模型,并发具体实现。现在实现MQ的有两种主流方式:AMQP、JMS。
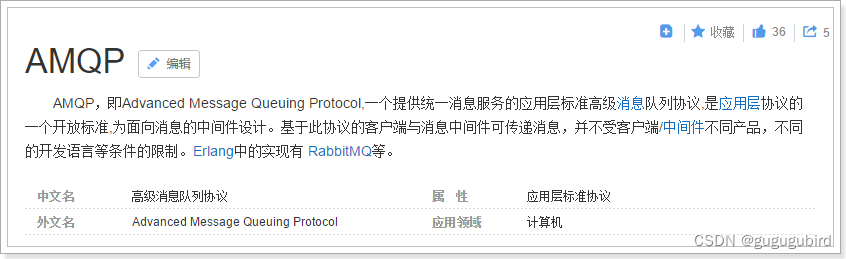

两者间的区别和联系:
- JMS是定义了统一的接口,来对消息操作进行统一,AMQP是通过规定协议来统一数据交互的格式。
- JMS限定了必须使用Java语言,AMQP只是协议,不规定实现方式,因此是跨语言的。
- JMS规定了两种消息模型,分别是点对点和发布订阅两种,而AMQP的消息模型更加丰富。
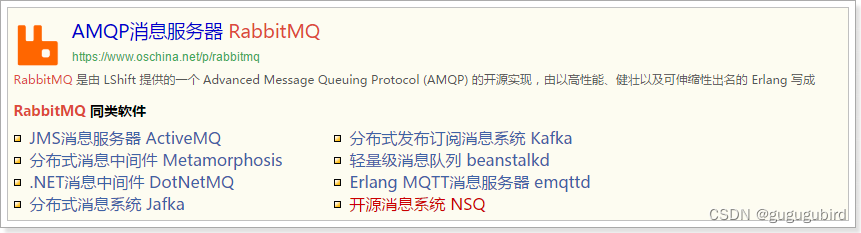
3)常见MQ产品
-
ActiveMQ:基于JMS, Apache
-
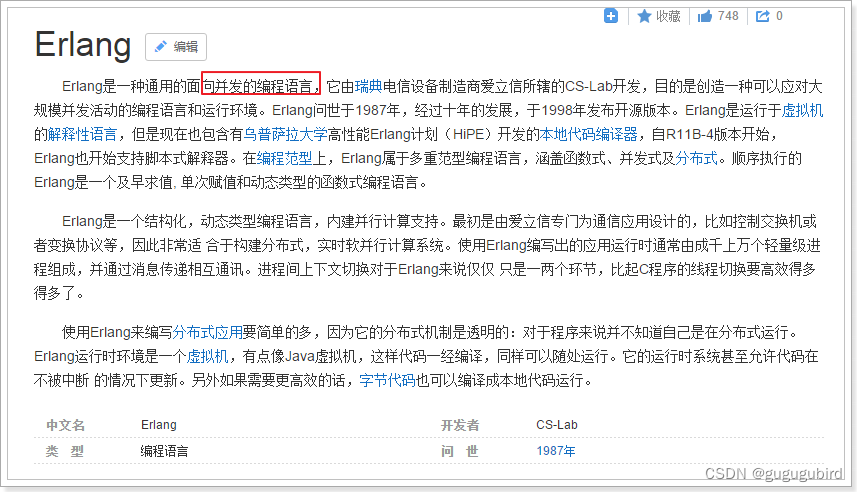
RabbitMQ:基于AMQP协议,erlang语言开发,稳定性好
-
RocketMQ:基于JMS,阿里巴巴产品,目前交由Apache基金会
RabbitMQ vs RocketMQ
Queue Queue
Exchange Topic
Router Tag
-
Kafka:分布式消息系统,高吞吐量
4)RabbitMQ
RabbitMQ是基于AMQP的一款消息管理系统
官网: http://www.rabbitmq.com/
官方教程:http://www.rabbitmq.com/getstarted.html
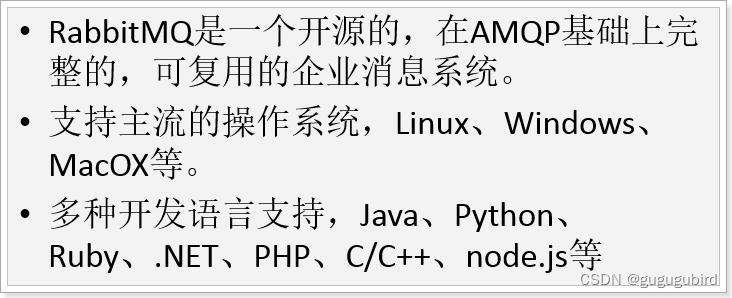
RabbitMQ基于Erlang语言开发:
5)RabbitMQ下载
官网下载地址:http://www.rabbitmq.com/download.html
6)RabbitMQ安装
安装,这里就忽略了。
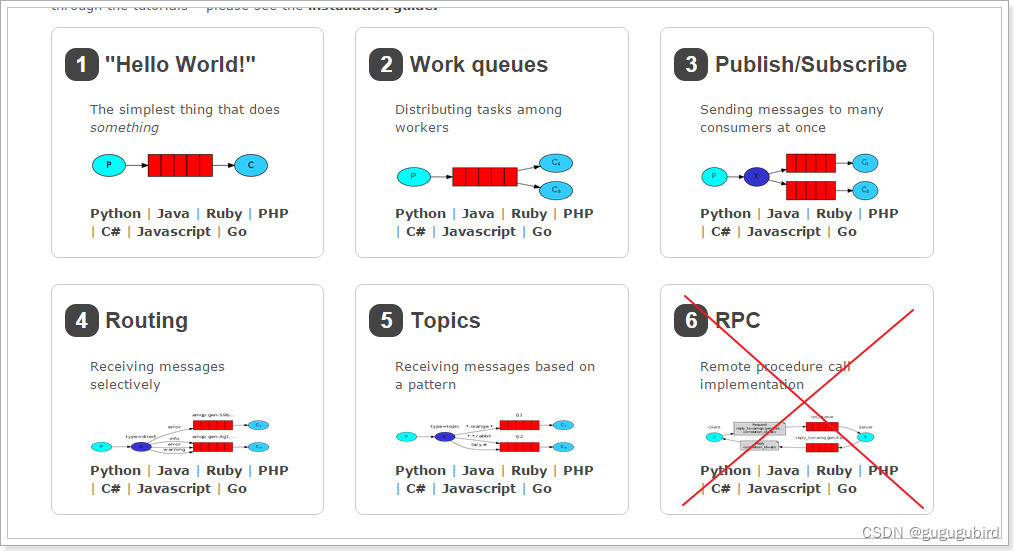
7)RabbitMQ五种模型(*)
RabbitMQ提供了6种消息模型,但是第6种其实是RPC,并不是MQ,因此不予学习。那么也就剩下5种。
但是其实3、4、5这三种都属于订阅模型,只不过进行路由的方式不同。
8)RabbitMQ基本消息模型
说明
官方文档说明:
RabbitMQ是一个消息的代理者(Message Broker):它接收消息并且传递消息。
你可以认为它是一个邮局:当你投递邮件到一个邮箱,你很肯定邮递员会终究会将邮件递交给你的收件人。与此类似,RabbitMQ 可以是一个邮箱、邮局、同时还有邮递员。
不同之处在于:RabbitMQ不是传递纸质邮件,而是二进制的数据
基本消息模型图:
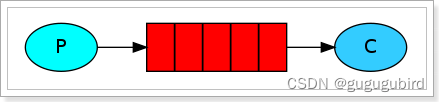
在上图的模型中,有以下概念:
- P:生产者,也就是要发送消息的程序
- C:消费者:消息的接受者,会一直等待消息到来。
- queue:消息队列,图中红色部分。类似一个邮箱,可以缓存消息;生产者向其中投递消息,消费者从其中取出消息。
生产者
连接工具类:
public class ConnectionUtil {
    /**
     * 建立与RabbitMQ的连接
     * @return
     * @throws Exception
     */
    public static Connection getConnection() throws Exception {
        //定义连接工厂
        ConnectionFactory factory = new ConnectionFactory();
        //设置服务地址
        factory.setHost("192.168.56.101");
        //端口
        factory.setPort(5672);
        //设置账号信息,用户名、密码、vhost
        factory.setVirtualHost("/leyou");
        factory.setUsername("leyou");
        factory.setPassword("leyou");
        // 通过工程获取连接
        Connection connection = factory.newConnection();
        return connection;
    }
}
生产者发送消息:
public class Send {

    private final static String QUEUE_NAME = "simple_queue";

    public static void main(String[] argv) throws Exception {
        // 获取到连接
        Connection connection = ConnectionUtil.getConnection();
        // 从连接中创建通道,使用通道才能完成消息相关的操作
        Channel channel = connection.createChannel();
        // 声明(创建)队列
        channel.queueDeclare(QUEUE_NAME, false, false, false, null);
        // 消息内容
        String message = "Hello World!";
        // 向指定的队列中发送消息
        channel.basicPublish("", QUEUE_NAME, null, message.getBytes());

        System.out.println(" [x] Sent '" + message + "'");

        //关闭通道和连接
        channel.close();
        connection.close();
    }
}
控制台:

web控制台查看消息
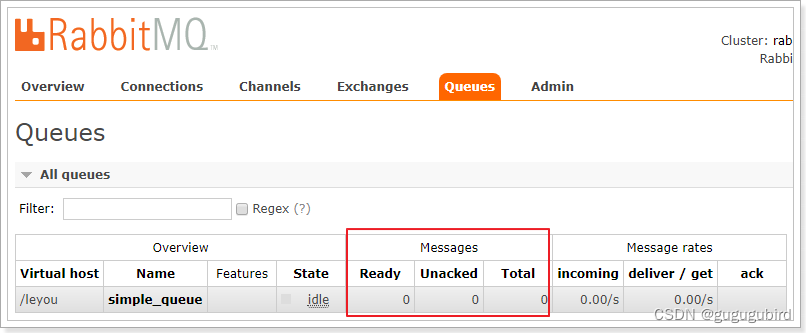
进入队列页面,可以看到新建了一个队列:simple_queue
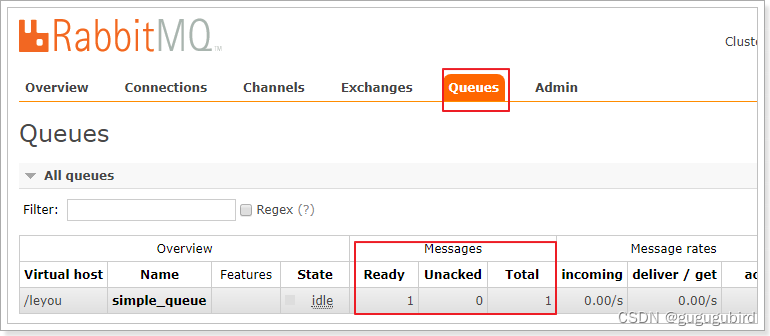
点击队列名称,进入详情页,可以查看消息:
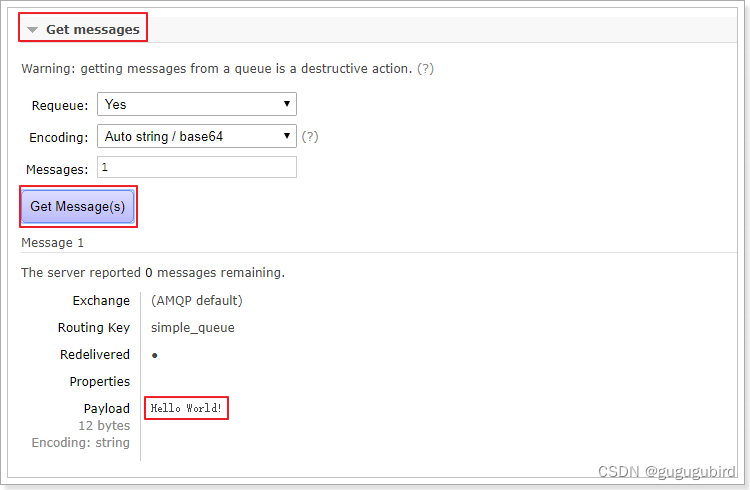
在控制台查看消息并不会将消息消费,所以消息还在。
消费者获取消息
public class Recv {
    private final static String QUEUE_NAME = "simple_queue";

    public static void main(String[] argv) throws Exception {
        // 获取到连接
        Connection connection = ConnectionUtil.getConnection();
        // 创建通道
        Channel channel = connection.createChannel();
        // 声明队列
        channel.queueDeclare(QUEUE_NAME, false, false, false, null);
        // 定义队列的消费者
        DefaultConsumer consumer = new DefaultConsumer(channel) {
            // 获取消息,并且处理,这个方法类似事件监听,如果有消息的时候,会被自动调用
            @Override
            public void handleDelivery(String consumerTag, Envelope envelope, BasicProperties properties,
                    byte[] body) throws IOException {
                // body 即消息体
                String msg = new String(body);
                System.out.println(" [x] received : " + msg + "!");
            }
        };
        // 监听队列,第二个参数:是否自动进行消息确认。
        channel.basicConsume(QUEUE_NAME, true, consumer);
    }
}
控制台:
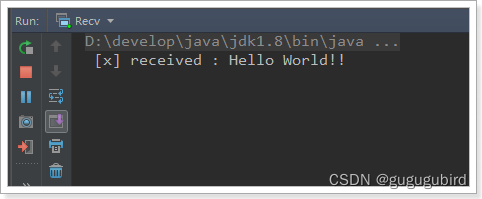
这个时候,队列中的消息就没了:
消费者的消息确认机制
通过刚才的案例可以看出,消息一旦被消费者接收,队列中的消息就会被删除。
那么问题来了:RabbitMQ怎么知道消息被接收了呢?
这就要通过消息确认机制(Acknowlege)来实现了。当消费者获取消息后,会向RabbitMQ发送回执ACK,告知消息已经被接收。不过这种回执ACK分两种情况:
- 自动ACK:消息一旦被接收,消费者自动发送ACK
- 手动ACK:消息接收后,不会发送ACK,需要手动调用
大家觉得哪种更好呢?
这需要看消息的重要性:
- 如果消息不太重要,丢失也没有影响,那么自动ACK会比较方便
- 如果消息非常重要,不容丢失。那么最好在消费完成后手动ACK,否则接收消息后就自动ACK,RabbitMQ就会把消息从队列中删除。如果此时消费者宕机,那么消息就丢失了。
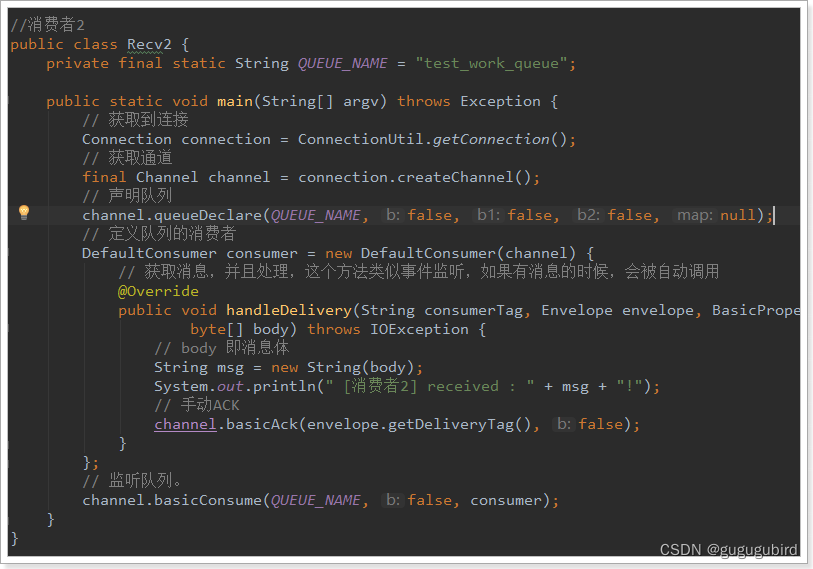
我们之前的测试都是自动ACK的,如果要手动ACK,需要改动我们的代码:
public class Recv2 {
    private final static String QUEUE_NAME = "simple_queue";

    public static void main(String[] argv) throws Exception {
        // 获取到连接
        Connection connection = ConnectionUtil.getConnection();
        // 创建通道
        final Channel channel = connection.createChannel();
        // 声明队列
        channel.queueDeclare(QUEUE_NAME, false, false, false, null);
        // 定义队列的消费者
        DefaultConsumer consumer = new DefaultConsumer(channel) {
            // 获取消息,并且处理,这个方法类似事件监听,如果有消息的时候,会被自动调用
            @Override
            public void handleDelivery(String consumerTag, Envelope envelope, BasicProperties properties,
                    byte[] body) throws IOException {
                // body 即消息体
                String msg = new String(body);
                System.out.println(" [x] received : " + msg + "!");
                // 手动进行ACK
                channel.basicAck(envelope.getDeliveryTag(), false);
            }
        };
        // 监听队列,第二个参数false,手动进行ACK
        channel.basicConsume(QUEUE_NAME, false, consumer);
    }
}
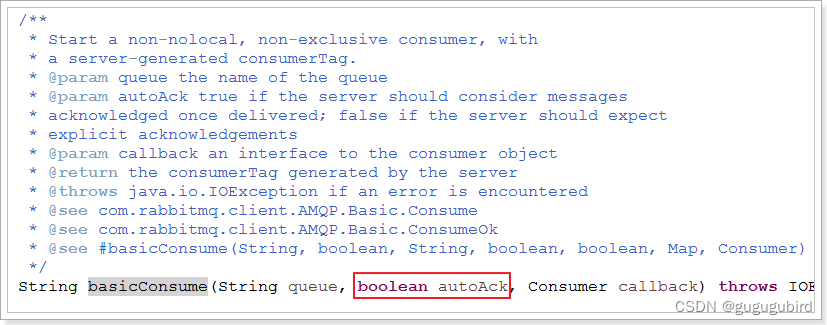
注意到最后一行代码:
channel.basicConsume(QUEUE_NAME, false, consumer);
如果第二个参数为true,则会自动进行ACK;如果为false,则需要手动ACK。方法的声明:
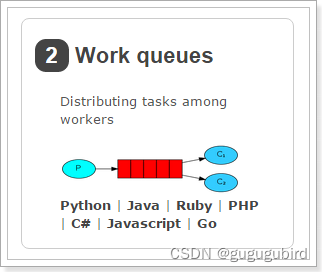
9)RabbitMQ的work消息模型
说明
在刚才的基本模型中,一个生产者,一个消费者,生产的消息直接被消费者消费。比较简单。
Work queues,也被称为(Task queues),任务模型。
当消息处理比较耗时的时候,可能生产消息的速度会远远大于消息的消费速度。长此以往,消息就会堆积越来越多,无法及时处理。此时就可以使用work 模型:让多个消费者绑定到一个队列,共同消费队列中的消息。队列中的消息一旦消费,就会消失,因此任务是不会被重复执行的。
角色:
- P:生产者:任务的发布者
- C1:消费者,领取任务并且完成任务,假设完成速度较慢
- C2:消费者2:领取任务并完成任务,假设完成速度快
生产者
生产者与案例1中的几乎一样:
public class Send {
    private final static String QUEUE_NAME = "test_work_queue";

    public static void main(String[] argv) throws Exception {
        // 获取到连接
        Connection connection = ConnectionUtil.getConnection();
        // 获取通道
        Channel channel = connection.createChannel();
        // 声明队列
        channel.queueDeclare(QUEUE_NAME, false, false, false, null);
        // 循环发布任务
        for (int i = 0; i < 50; i++) {
            // 消息内容
            String message = "task .. " + i;
            channel.basicPublish("", QUEUE_NAME, null, message.getBytes());
            System.out.println(" [x] Sent '" + message + "'");

            Thread.sleep(i * 2);
        }
        // 关闭通道和连接
        channel.close();
        connection.close();
    }
}
不过这里我们是循环发送50条消息。
消费者1
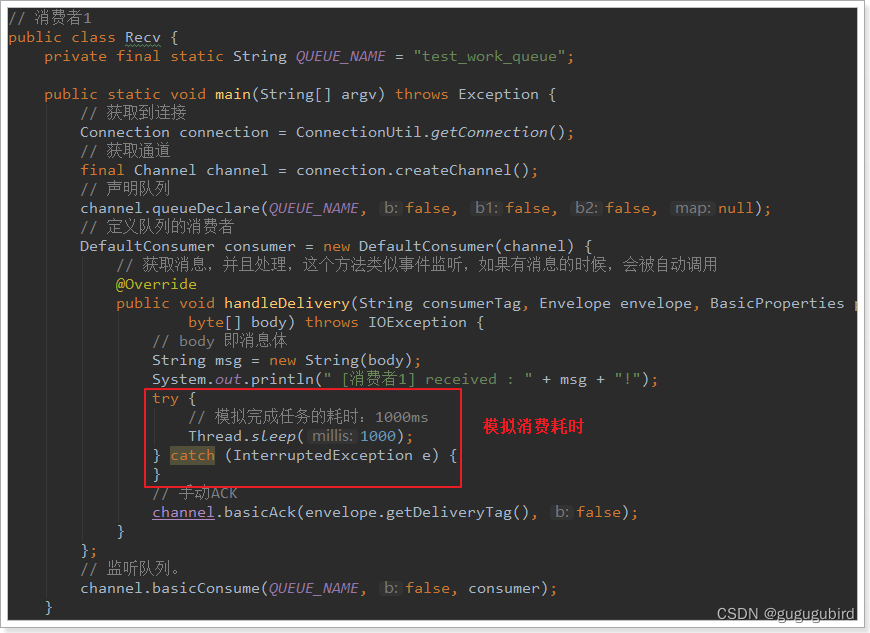
消费者2
与消费者1基本类似,就是没有设置消费耗时时间。
这里是模拟有些消费者快,有些比较慢。
接下来,两个消费者一同启动,然后发送50条消息:
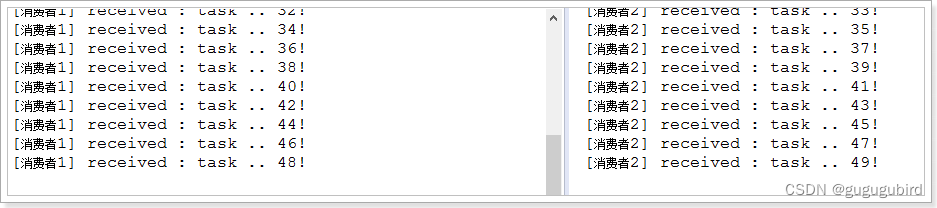
可以发现,两个消费者各自消费了25条消息,而且各不相同,这就实现了任务的分发。
能者多劳
刚才的实现有问题吗?
- 消费者1比消费者2的效率要低,一次任务的耗时较长
- 然而两人最终消费的消息数量是一样的
- 消费者2大量时间处于空闲状态,消费者1一直忙碌
现在的状态属于是把任务平均分配,正确的做法应该是消费越快的人,消费的越多。
怎么实现呢?
我们可以修改设置,让消费者同一时间只接收一条消息,这样处理完成之前,就不会接收更多消息,就可以让处理快的人,接收更多消息 :
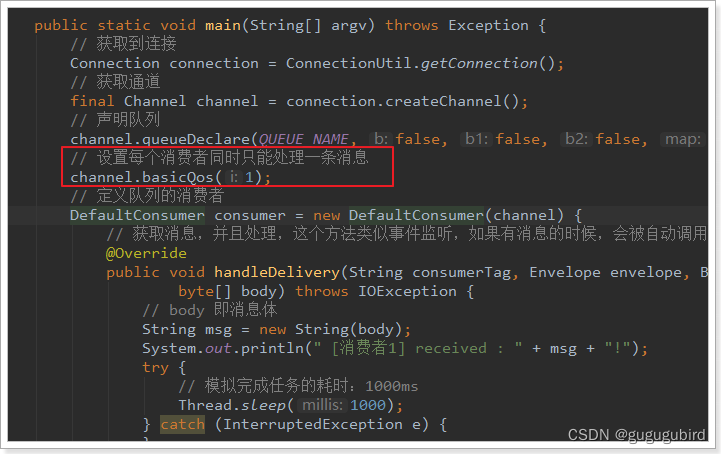
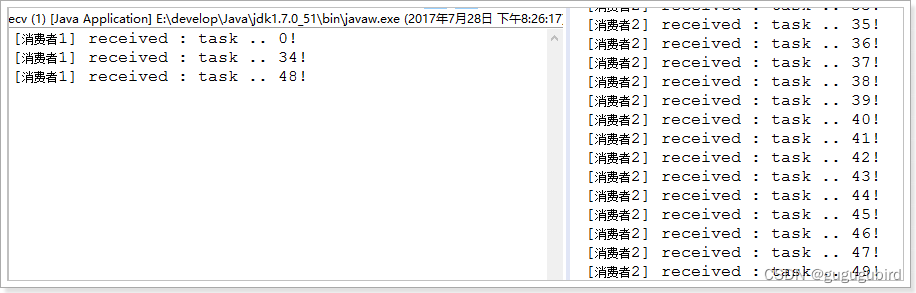
再次测试:
10)RabbitMQ订阅模型分类
订阅模型示意图:
前面2个案例中,只有3个角色:
- P:生产者,也就是要发送消息的程序
- C:消费者:消息的接受者,会一直等待消息到来。
- queue:消息队列,图中红色部分。类似一个邮箱,可以缓存消息;生产者向其中投递消息,消费者从其中取出消息。
而在订阅模型中,多了一个exchange角色,而且过程略有变化:
- P:生产者,也就是要发送消息的程序,但是不再发送到队列中,而是发给X(交换机)
- C:消费者,消息的接受者,会一直等待消息到来。
- Queue:消息队列,接收消息、缓存消息。
- Exchange:交换机,图中的X。一方面,接收生产者发送的消息。另一方面,知道如何处理消息,例如递交给某个特别队列、递交给所有队列、或是将消息丢弃。到底如何操作,取决于Exchange的类型。Exchange有以下3种类型:
- Fanout:广播,将消息交给所有绑定到交换机的队列
- Direct:定向,把消息交给符合指定routing key 的队列
- Topic:通配符,把消息交给符合routing pattern(路由模式) 的队列
Exchange(交换机)只负责转发消息,不具备存储消息的能力,因此如果没有任何队列与Exchange绑定,或者没有符合路由规则的队列,那么消息会丢失!
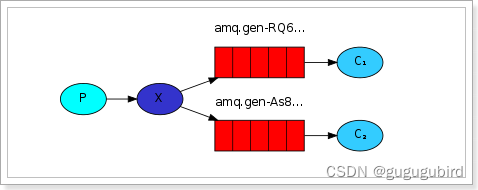
11)RabbitMQ订阅模型-Fanout
Fanout,也称为广播。
流程说明
流程图:
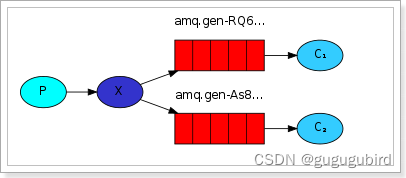
在广播模式下,消息发送流程是这样的:
- 1) 可以有多个消费者
- 2) 每个消费者有自己的queue(队列)
- 3) 每个队列都要绑定到Exchange(交换机)
- 4) 生产者发送的消息,只能发送到交换机,交换机来决定要发给哪个队列,生产者无法决定。
- 5) 交换机把消息发送给绑定过的所有队列
- 6) 队列的消费者都能拿到消息。实现一条消息被多个消费者消费
生产者
两个变化:
- 1) 声明Exchange,不再声明Queue
- 2) 发送消息到Exchange,不再发送到Queue
public class Send {

    private final static String EXCHANGE_NAME = "fanout_exchange_test";

    public static void main(String[] argv) throws Exception {
        // 获取到连接
        Connection connection = ConnectionUtil.getConnection();
        // 获取通道
        Channel channel = connection.createChannel();

        // 声明exchange,指定类型为fanout
        channel.exchangeDeclare(EXCHANGE_NAME, "fanout");

        // 消息内容
        String message = "Hello everyone";
        // 发布消息到Exchange
        channel.basicPublish(EXCHANGE_NAME, "", null, message.getBytes());
        System.out.println(" [生产者] Sent '" + message + "'");

        channel.close();
        connection.close();
    }
}
消费者1
public class Recv {
    private final static String QUEUE_NAME = "fanout_exchange_queue_1";

    private final static String EXCHANGE_NAME = "fanout_exchange_test";

    public static void main(String[] argv) throws Exception {
        // 获取到连接
        Connection connection = ConnectionUtil.getConnection();
        // 获取通道
        Channel channel = connection.createChannel();
        // 声明队列
        channel.queueDeclare(QUEUE_NAME, false, false, false, null);

        // 绑定队列到交换机
        channel.queueBind(QUEUE_NAME, EXCHANGE_NAME, "");

        // 定义队列的消费者
        DefaultConsumer consumer = new DefaultConsumer(channel) {
            // 获取消息,并且处理,这个方法类似事件监听,如果有消息的时候,会被自动调用
            @Override
            public void handleDelivery(String consumerTag, Envelope envelope, BasicProperties properties,
                    byte[] body) throws IOException {
                // body 即消息体
                String msg = new String(body);
                System.out.println(" [消费者1] received : " + msg + "!");
            }
        };
        // 监听队列,自动返回完成
        channel.basicConsume(QUEUE_NAME, true, consumer);
    }
}
要注意代码中:队列需要和交换机绑定
消费者2
public class Recv2 {
    private final static String QUEUE_NAME = "fanout_exchange_queue_2";

    private final static String EXCHANGE_NAME = "fanout_exchange_test";

    public static void main(String[] argv) throws Exception {
        // 获取到连接
        Connection connection = ConnectionUtil.getConnection();
        // 获取通道
        Channel channel = connection.createChannel();
        // 声明队列
        channel.queueDeclare(QUEUE_NAME, false, false, false, null);

        // 绑定队列到交换机
        channel.queueBind(QUEUE_NAME, EXCHANGE_NAME, "");

        // 定义队列的消费者
        DefaultConsumer consumer = new DefaultConsumer(channel) {
            // 获取消息,并且处理,这个方法类似事件监听,如果有消息的时候,会被自动调用
            @Override
            public void handleDelivery(String consumerTag, Envelope envelope, BasicProperties properties,
                    byte[] body) throws IOException {
                // body 即消息体
                String msg = new String(body);
                System.out.println(" [消费者2] received : " + msg + "!");
            }
        };
        // 监听队列,手动返回完成
        channel.basicConsume(QUEUE_NAME, true, consumer);
    }
}
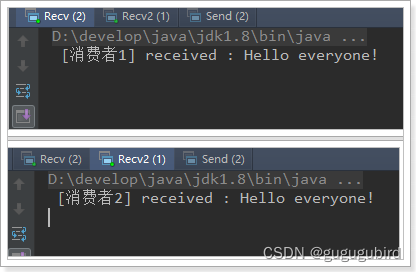
测试
我们运行两个消费者,然后发送1条消息:
12)RabbitMQ订阅模型-Direct
说明
在Fanout模式中,一条消息,会被所有订阅的队列都消费。但是,在某些场景下,我们希望不同的消息被不同的队列消费。这时就要用到Direct类型的Exchange。
在Direct模型下:
- 队列与交换机的绑定,不能是任意绑定了,而是要指定一个
RoutingKey(路由key) - 消息的发送方在 向 Exchange发送消息时,也必须指定消息的
RoutingKey。 - Exchange不再把消息交给每一个绑定的队列,而是根据消息的
Routing Key进行判断,只有队列的Routingkey与消息的Routing key完全一致,才会接收到消息
流程图:
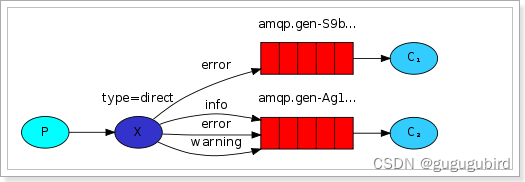
图解:
- P:生产者,向Exchange发送消息,发送消息时,会指定一个routing key。
- X:Exchange(交换机),接收生产者的消息,然后把消息递交给 与routing key完全匹配的队列
- C1:消费者,其所在队列指定了需要routing key 为 error 的消息
- C2:消费者,其所在队列指定了需要routing key 为 info、error、warning 的消息
生产者
此处我们模拟商品的增删改,发送消息的RoutingKey分别是:insert、update、delete
public class Send {
    private final static String EXCHANGE_NAME = "direct_exchange_test";

    public static void main(String[] argv) throws Exception {
        // 获取到连接
        Connection connection = ConnectionUtil.getConnection();
        // 获取通道
        Channel channel = connection.createChannel();
        // 声明exchange,指定类型为direct
        channel.exchangeDeclare(EXCHANGE_NAME, "direct");
        // 消息内容
        String message = "商品新增了, id = 1001";
        // 发送消息,并且指定routing key 为:insert ,代表新增商品
        channel.basicPublish(EXCHANGE_NAME, "insert", null, message.getBytes());
        System.out.println(" [商品服务:] Sent '" + message + "'");

        channel.close();
        connection.close();
    }
}
消费者1
我们此处假设消费者1只接收两种类型的消息:更新商品和删除商品。
public class Recv {
    private final static String QUEUE_NAME = "direct_exchange_queue_1";
    private final static String EXCHANGE_NAME = "direct_exchange_test";

    public static void main(String[] argv) throws Exception {
        // 获取到连接
        Connection connection = ConnectionUtil.getConnection();
        // 获取通道
        Channel channel = connection.createChannel();
        // 声明队列
        channel.queueDeclare(QUEUE_NAME, false, false, false, null);

        // 绑定队列到交换机,同时指定需要订阅的routing key。假设此处需要update和delete消息
        channel.queueBind(QUEUE_NAME, EXCHANGE_NAME, "update");
        channel.queueBind(QUEUE_NAME, EXCHANGE_NAME, "delete");

        // 定义队列的消费者
        DefaultConsumer consumer = new DefaultConsumer(channel) {
            // 获取消息,并且处理,这个方法类似事件监听,如果有消息的时候,会被自动调用
            @Override
            public void handleDelivery(String consumerTag, Envelope envelope, BasicProperties properties,
                    byte[] body) throws IOException {
                // body 即消息体
                String msg = new String(body);
                System.out.println(" [消费者1] received : " + msg + "!");
            }
        };
        // 监听队列,自动ACK
        channel.basicConsume(QUEUE_NAME, true, consumer);
    }
}
消费者2
我们此处假设消费者2接收所有类型的消息:新增商品,更新商品和删除商品。
public class Recv2 {
    private final static String QUEUE_NAME = "direct_exchange_queue_2";
    private final static String EXCHANGE_NAME = "direct_exchange_test";

    public static void main(String[] argv) throws Exception {
        // 获取到连接
        Connection connection = ConnectionUtil.getConnection();
        // 获取通道
        Channel channel = connection.createChannel();
        // 声明队列
        channel.queueDeclare(QUEUE_NAME, false, false, false, null);

        // 绑定队列到交换机,同时指定需要订阅的routing key。订阅 insert、update、delete
        channel.queueBind(QUEUE_NAME, EXCHANGE_NAME, "insert");
        channel.queueBind(QUEUE_NAME, EXCHANGE_NAME, "update");
        channel.queueBind(QUEUE_NAME, EXCHANGE_NAME, "delete");

        // 定义队列的消费者
        DefaultConsumer consumer = new DefaultConsumer(channel) {
            // 获取消息,并且处理,这个方法类似事件监听,如果有消息的时候,会被自动调用
            @Override
            public void handleDelivery(String consumerTag, Envelope envelope, BasicProperties properties,
                    byte[] body) throws IOException {
                // body 即消息体
                String msg = new String(body);
                System.out.println(" [消费者2] received : " + msg + "!");
            }
        };
        // 监听队列,自动ACK
        channel.basicConsume(QUEUE_NAME, true, consumer);
    }
}
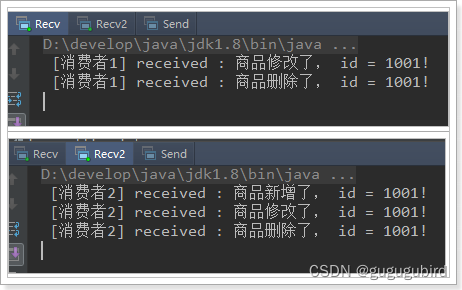
测试
我们分别发送增、删、改的RoutingKey,发现结果:
13)RabbitMQ订阅模型-Topic
说明
Topic类型的Exchange与Direct相比,都是可以根据RoutingKey把消息路由到不同的队列。只不过Topic类型Exchange可以让队列在绑定Routing key 的时候使用通配符!
Routingkey 一般都是有一个或多个单词组成,多个单词之间以”.”分割,例如: item.insert
通配符规则:
#:匹配一个或多个词
*:匹配不多不少恰好1个词
举例:
item.#:能够匹配item.spu.insert 或者 item.spu
item.*:只能匹配item.spu
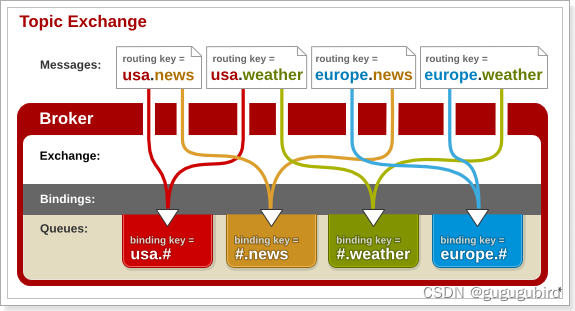
图示:
解释:
- 红色Queue:绑定的是
usa.#,因此凡是以usa.开头的routing key都会被匹配到 - 黄色Queue:绑定的是
#.news,因此凡是以.news结尾的routing key都会被匹配
生产者
使用topic类型的Exchange,发送消息的routing key有3种: item.isnert、item.update、item.delete:
public class Send {
private final static String EXCHANGE_NAME = "topic_exchange_test";
public static void main(String[] argv) throws Exception {
// 获取到连接
Connection connection = ConnectionUtil.getConnection();
// 获取通道
Channel channel = connection.createChannel();
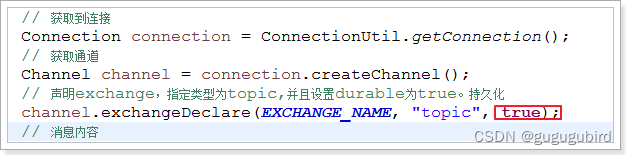
// 声明exchange,指定类型为topic
channel.exchangeDeclare(EXCHANGE_NAME, "topic");
// 消息内容
String message = "新增商品 : id = 1001";
// 发送消息,并且指定routing key 为:insert ,代表新增商品
channel.basicPublish(EXCHANGE_NAME, "item.insert", null, message.getBytes());
System.out.println(" [商品服务:] Sent '" + message + "'");
channel.close();
connection.close();
}
}
消费者1
我们此处假设消费者1只接收两种类型的消息:更新商品和删除商品
public class Recv {
    private final static String QUEUE_NAME = "topic_exchange_queue_1";
    private final static String EXCHANGE_NAME = "topic_exchange_test";

    public static void main(String[] argv) throws Exception {
        // 获取到连接
        Connection connection = ConnectionUtil.getConnection();
        // 获取通道
        Channel channel = connection.createChannel();
        // 声明队列
        channel.queueDeclare(QUEUE_NAME, false, false, false, null);

        // 绑定队列到交换机,同时指定需要订阅的routing key。需要 update、delete
        channel.queueBind(QUEUE_NAME, EXCHANGE_NAME, "item.update");
        channel.queueBind(QUEUE_NAME, EXCHANGE_NAME, "item.delete");

        // 定义队列的消费者
        DefaultConsumer consumer = new DefaultConsumer(channel) {
            // 获取消息,并且处理,这个方法类似事件监听,如果有消息的时候,会被自动调用
            @Override
            public void handleDelivery(String consumerTag, Envelope envelope, BasicProperties properties,
                    byte[] body) throws IOException {
                // body 即消息体
                String msg = new String(body);
                System.out.println(" [消费者1] received : " + msg + "!");
            }
        };
        // 监听队列,自动ACK
        channel.basicConsume(QUEUE_NAME, true, consumer);
    }
}
消费者2
我们此处假设消费者2接收所有类型的消息:新增商品,更新商品和删除商品。
/**
 * 消费者2
 */
public class Recv2 {
    private final static String QUEUE_NAME = "topic_exchange_queue_2";
    private final static String EXCHANGE_NAME = "topic_exchange_test";

    public static void main(String[] argv) throws Exception {
        // 获取到连接
        Connection connection = ConnectionUtil.getConnection();
        // 获取通道
        Channel channel = connection.createChannel();
        // 声明队列
        channel.queueDeclare(QUEUE_NAME, false, false, false, null);

        // 绑定队列到交换机,同时指定需要订阅的routing key。订阅 insert、update、delete
        channel.queueBind(QUEUE_NAME, EXCHANGE_NAME, "item.*");

        // 定义队列的消费者
        DefaultConsumer consumer = new DefaultConsumer(channel) {
            // 获取消息,并且处理,这个方法类似事件监听,如果有消息的时候,会被自动调用
            @Override
            public void handleDelivery(String consumerTag, Envelope envelope, BasicProperties properties,
                    byte[] body) throws IOException {
                // body 即消息体
                String msg = new String(body);
                System.out.println(" [消费者2] received : " + msg + "!");
            }
        };
        // 监听队列,自动ACK
        channel.basicConsume(QUEUE_NAME, true, consumer);
    }
}
14)RabbitMQ持久化
如何避免消息丢失?
1) 消费者的ACK机制。可以防止消费者丢失消息。
2) 但是,如果在消费者消费之前,MQ就宕机了,消息就没了。
所以我们需要将消息持久化到硬盘,以防服务宕机。
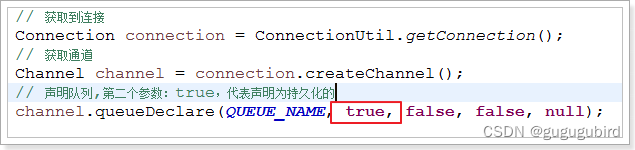
要将消息持久化,前提是:队列、Exchange都持久化
交换机持久化
队列持久化
消息持久化

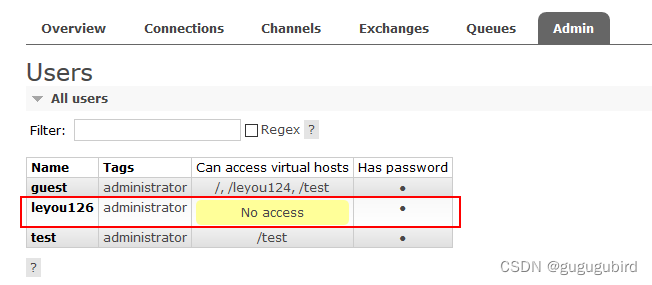
09、数据同步:创建rabbitMQ用户并授权
1) 创建用户
在这里插入图片描述
效果如下
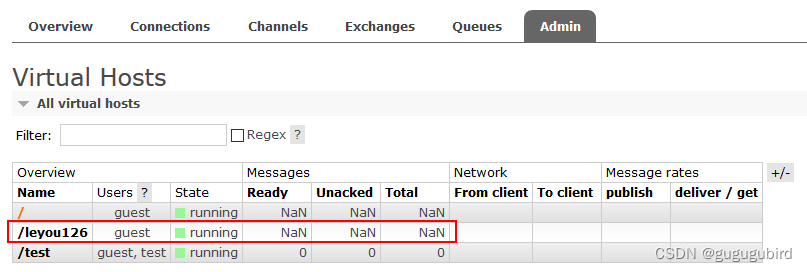
2) 创建虚拟机
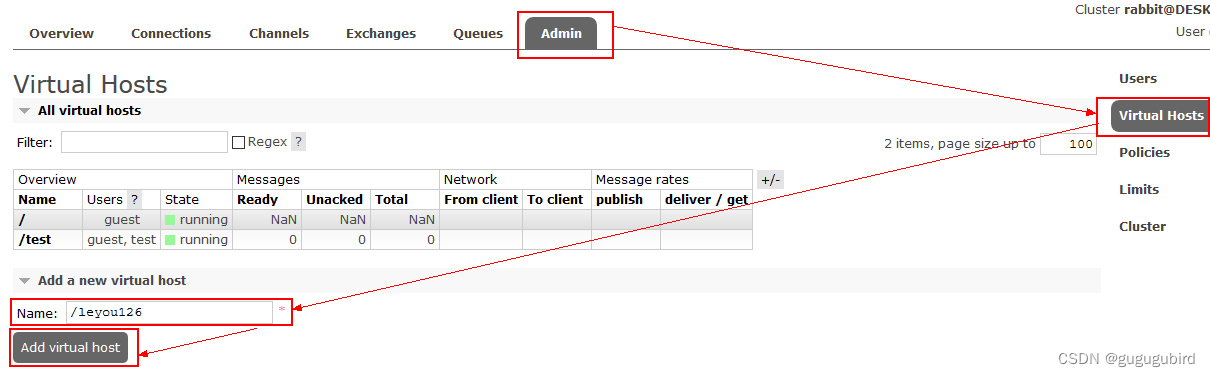
效果如下
3) 给leyouxxx用户授权

效果如下

4) 切换到leyouxxx用户

10、数据同步:SpringAMQP的使用入门
1)简介
Sprin有很多不同的项目,其中就有对AMQP的支持:
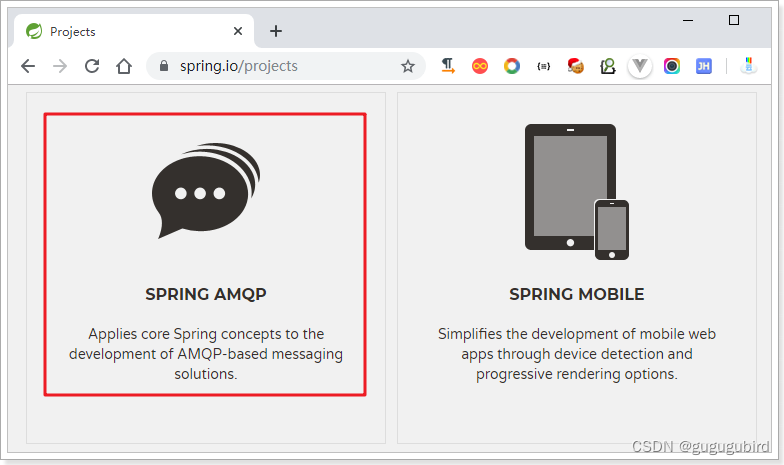
Spring AMQP的页面:http://projects.spring.io/spring-amqp/
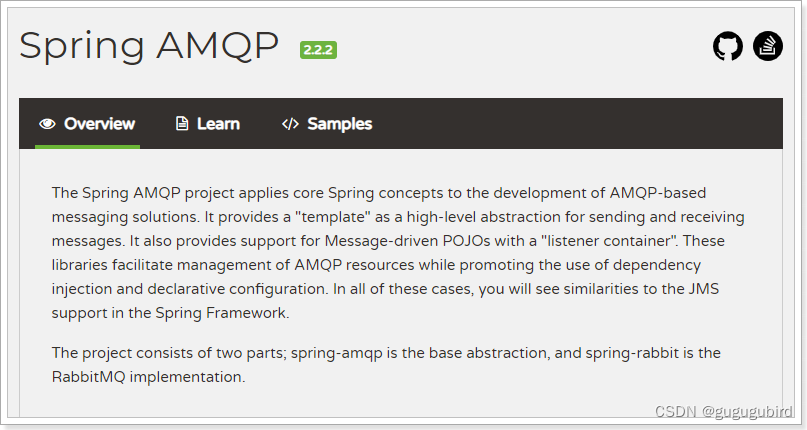
注意这里一段描述:
Spring-amqp是对AMQP协议的抽象实现,而spring-rabbit 是对协议的具体实现,也是目前的唯一实现。底层使用的就是RabbitMQ。
2)依赖和配置
添加AMQP的启动器:
<?xml version="1.0" encoding="UTF-8"?>
<project xmlns="http://maven.apache.org/POM/4.0.0"
         xmlns:xsi="http://www.w3.org/2001/XMLSchema-instance"
         xsi:schemaLocation="http://maven.apache.org/POM/4.0.0 http://maven.apache.org/xsd/maven-4.0.0.xsd">
    <modelVersion>4.0.0</modelVersion>

    <groupId>com.ithiema</groupId>
    <artifactId>spring-boot-rabbitmq</artifactId>
    <version>1.0-SNAPSHOT</version>

    <parent>
        <groupId>org.springframework.boot</groupId>
        <artifactId>spring-boot-starter-parent</artifactId>
        <version>2.1.6.RELEASE</version>
        <relativePath/>
    </parent>

    <dependencies>
        <dependency>
            <groupId>org.springframework.boot</groupId>
            <artifactId>spring-boot-starter-amqp</artifactId>
        </dependency>
        <dependency>
            <groupId>org.springframework.boot</groupId>
            <artifactId>spring-boot-starter-test</artifactId>
        </dependency>
    </dependencies>
</project>
在application.yml中添加RabbitMQ地址:
spring:
  rabbitmq:
    host: 127.0.0.1
    port: 5672
    virtual-host: /leyou
    username: leyou
    password: leyou
编写SpringBoot启动类:
package cn.itcast;

import org.springframework.boot.SpringApplication;
import org.springframework.boot.autoconfigure.SpringBootApplication;

/**
 *
 */
@SpringBootApplication
public class RabbitMQApplication {
    public static void main(String[] args) {
        SpringApplication.run(RabbitMQApplication.class,args);
    }
}
3)监听者
在SpringAmqp中,对消息的消费者进行了封装和抽象,一个普通的JavaBean中的普通方法,只要通过简单的注解,就可以成为一个消费者。
package com.itheima.consumer;

import org.springframework.amqp.core.ExchangeTypes;
import org.springframework.amqp.rabbit.annotation.Exchange;
import org.springframework.amqp.rabbit.annotation.Queue;
import org.springframework.amqp.rabbit.annotation.QueueBinding;
import org.springframework.amqp.rabbit.annotation.RabbitListener;
import org.springframework.stereotype.Component;

/**
 * 消费方
 */
@Component
public class MQListener {

    /**
     * 接收消费的方法
     *   value: 绑定队列信息
     *   exchange: 绑定交换机信息
     *   key: 绑定路由信息
     */
    @RabbitListener(
            bindings = @QueueBinding(
                    value = @Queue(name = "ly_test_queue"),
                    exchange = @Exchange(name = "ly_test_exchange",type = ExchangeTypes.TOPIC),
                    key = "user.#"
            )
    )
    public void retrireMsg(String msg){
        System.out.println("接收的消息:"+msg);
    }

}
@Componet:类上的注解,注册到Spring容器@RabbitListener:方法上的注解,声明这个方法是一个消费者方法,需要指定下面的属性:bindings:指定绑定关系,可以有多个。值是@QueueBinding的数组。@QueueBinding包含下面属性:value:这个消费者关联的队列。值是@Queue,代表一个队列exchange:队列所绑定的交换机,值是@Exchange类型key:队列和交换机绑定的RoutingKey
类似listen这样的方法在一个类中可以写多个,就代表多个消费者。
4)消息发送:AmqpTemplate
Spring最擅长的事情就是封装,把他人的框架进行封装和整合。
Spring为AMQP提供了统一的消息处理模板:AmqpTemplate,非常方便的发送消息,其发送方法:
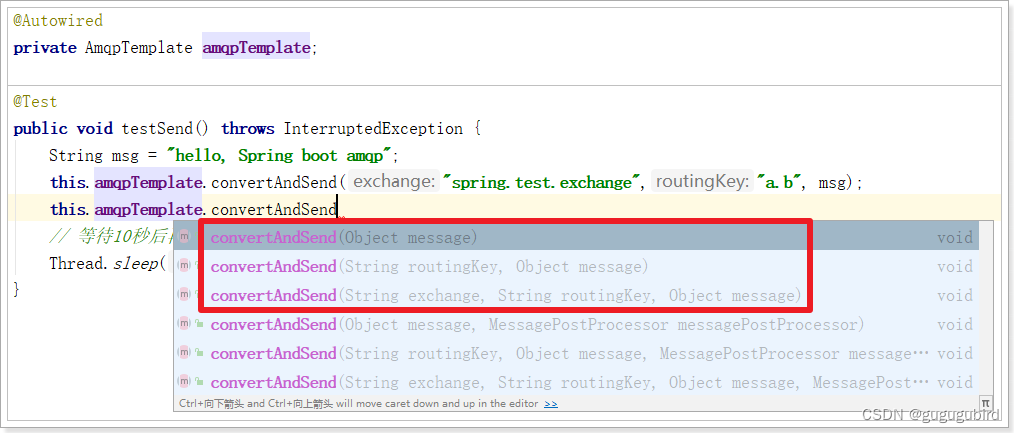
红框圈起来的是比较常用的3个方法,分别是:
- 指定交换机、RoutingKey和消息体
- 指定消息
- 指定RoutingKey和消息,会向默认的交换机发送消息
5)测试代码
package com.itheima;

import org.junit.Test;
import org.junit.runner.RunWith;
import org.springframework.amqp.core.AmqpTemplate;
import org.springframework.beans.factory.annotation.Autowired;
import org.springframework.boot.test.context.SpringBootTest;
import org.springframework.test.context.junit4.SpringRunner;

@RunWith(SpringRunner.class)
@SpringBootTest(classes = RabbitMQApplication.class)
public class MQTest {

    @Autowired
    private AmqpTemplate amqpTemplate;

    @Test
    public void testSendMs(){
        amqpTemplate.convertAndSend(
                "ly_test_exchange",
                "user.insert",
                "测试MQ是否可以发送消息");

        try {
            Thread.sleep(5000);
        } catch (InterruptedException e) {
            e.printStackTrace();
        }
    }

}
运行后查看日志:


 2100
2100


 被折叠的 条评论
为什么被折叠?
被折叠的 条评论
为什么被折叠?
 到【灌水乐园】发言


