


本篇文章主要介绍一下Menu组件和ControlGroup组件的使用。Menu组件是在iOS 14(tvOS 17)推出的一个组件,点击后提供一个可选择的操作列表。ControlGroup组件是一个容器视图,以视觉上适当的方式为给定的上下文显示语义相关的控件,这意味着ControlGroup的外观将取决于视图的上下文。
Menu的使用
Menu组件提供了一个可选择的操作列表。比较常用的初始化方法如下:
init(
    @ViewBuilder content: () -> Content,
    @ViewBuilder label: () -> Label
)
label:该闭包提供一个Menu自身显示的视图内容。
content:该闭包提供点击Menu组件后要显示的视图内容。
下面先看一个使用示例:

var body: some View {
  Menu("Tap me") {
    // Menu 1
    Text("Menu 1")
      .onTapGesture {
        print("Menu 1 clicked")
      }

    // Menu 2
    Button("Menu 2") {
      print("Menu 2 clicked")
    }

    // Menu 3
    Button(action: {
      print("Menu 3 clicked")
    }, label: {
      Label("Menu 3", systemImage: "heart.fill")
    })

    // Menu 4
    Button(action: {
      print("Menu 4 clicked")
    }, label: {
      Text("Menu 4")
        .font(.largeTitle)
        .foregroundColor(.red)
      Image(systemName: "trash")
      Image(systemName: "magnifyingglass")
    })

    // Menu 5
    Menu("Copy") {
      Button("Copy", action: {})
      Button("Copy Formatted", action: {})
      Button("Copy Library Path", action: {})
    }
  }
}
上面代码中,我们创建了一个menu,传入了一个title,并在content闭包内添加了一些组件。Menu的初始化方法很多,这里不过多的介绍了,我们主要看一下content闭包的内容。
content闭包内:
- menu1是一个
Text组件,并且添加了tap手势,不过事实证明,它只会显示出来,并且文字暗灰色,无法点击,应该是被系统disabled了,所以menu1这种无效。 - menu2是一个
Button组件,仅仅设置了一个title和点击事件。title显示正常,点击事件正常。 - menu3是一个
Button组件,不过其显示内容通过Label组件设置了,并带了一个图片。title和image显示都正常,点击事件也正常。 - menu4是一个
Button组件,显示内容没有采用Label组件,而是Text加上Image组合,事实证明,Text和Image都显示正常,多余的Image无法显示,点击事件正常。 - menu5是一个
Menu组件,这属于嵌套了,一切显示都正常。
之前有一篇文章里面也提及到了Menu和Picker的配合使用,感兴趣的朋友可以去看看。SwiftUI中普通Picker的用法
Menu也可以放到导航栏上面,弹出的内容不会超出屏幕。
  var body: some View {
    NavigationStack {
      VStack {
        Color.orange.ignoresSafeArea()
      }
      .toolbar(content: {
        ToolbarItem(placement: .topBarTrailing) {
          Menu("Copy") {
      		Button("Copy", action: {})
      		Button("Copy Formatted", action: {})
      		Button("Copy Library Path", action: {})
      	  }
        }
      })
    }
  }
ControlGroup的使用
ControlGroup视图是一个简单的容器视图,它接受ViewBuilder闭包,并根据当前环境显示它。ControlGroup视图是iOS 14(tvOS 17)推出的一个组件。
让我们看看如何使用它。
ControlGroup {
  Button(action: {}) {
    Label("Decrease", systemImage: "minus")
  }

  Button(action: {}) {
    Label("Increase", systemImage: "plus")
  }
}
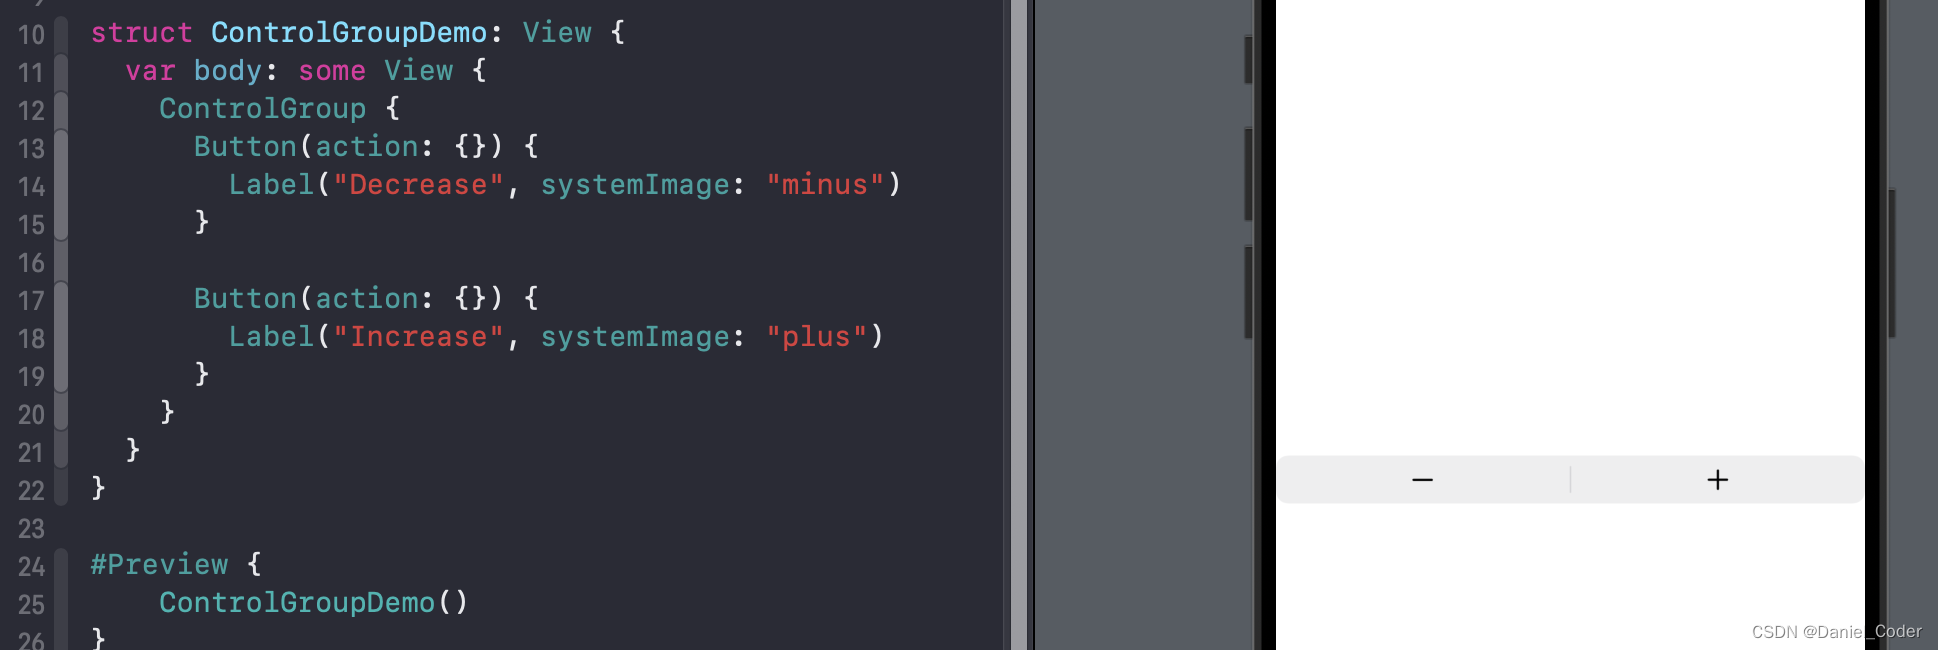
正如在上面的例子中看到的,我们只是在ControlGroup视图中放了两个按钮,就像我们在VStack或HStack中做的那样。但是ControlGroup不是使用垂直或水平轴来布局视图,而是根据视图的上下文添加合适的样式。
样式设置
通过controlGroupStyle修饰符可以添加一些样式,一些主要的样式有:
AutomaticControlGroupStyle:可简写为.automatic。NavigationControlGroupStyle:可简写为.navigation。
具体显示成什么样还得看用在哪里了,比如下面的Demo:
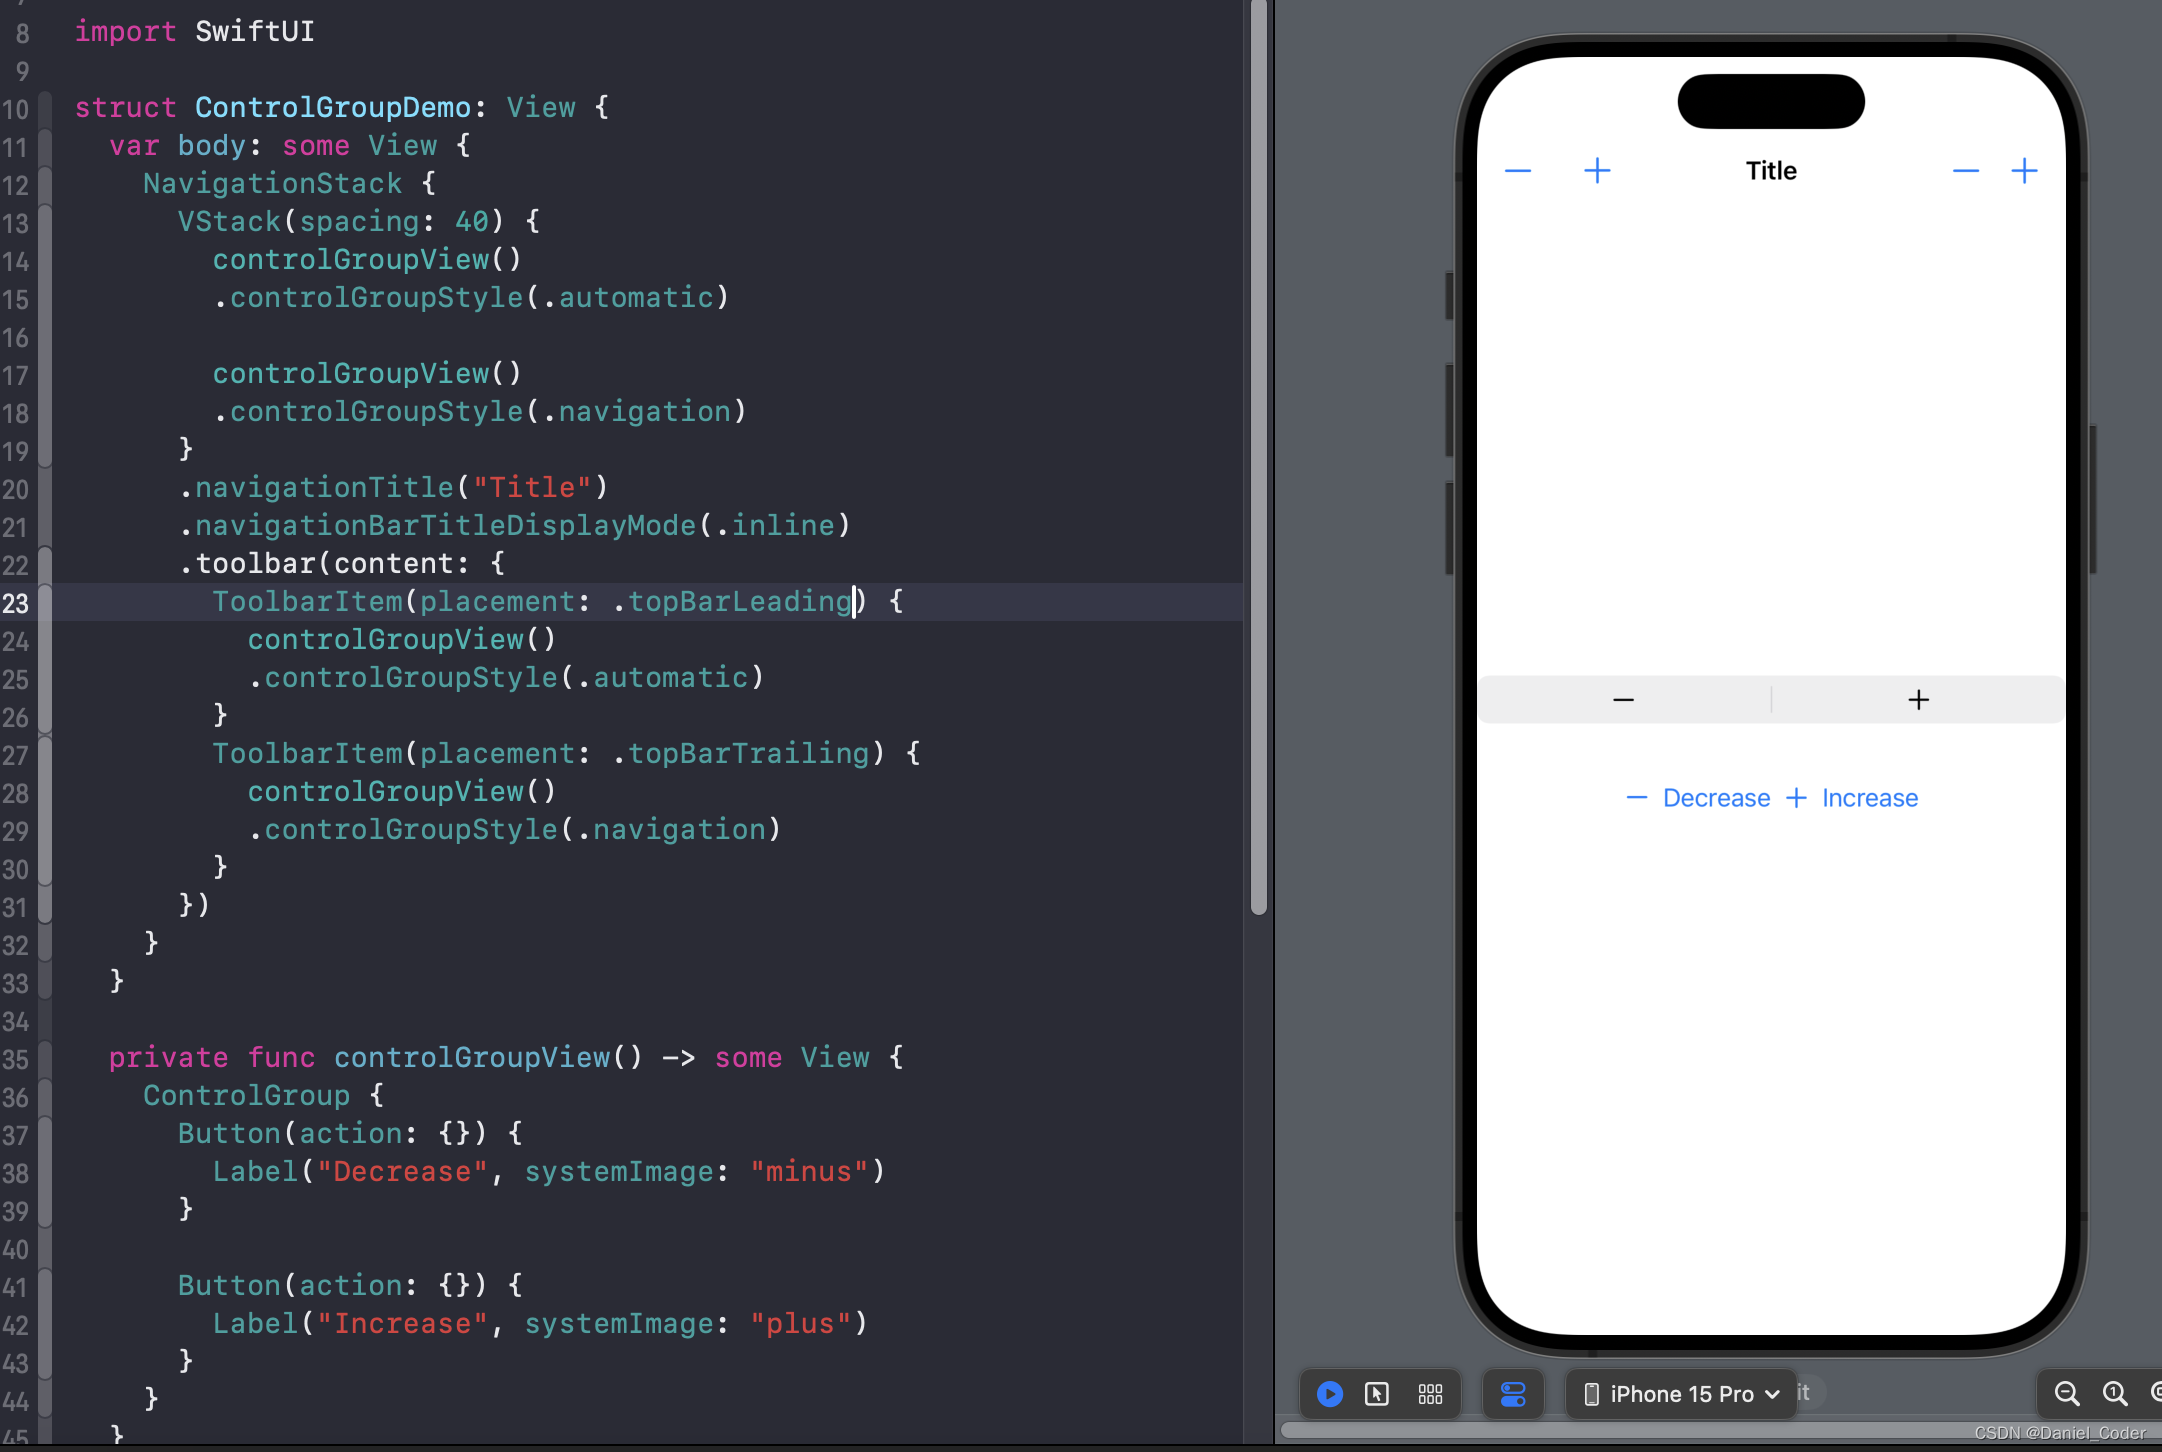
上面的代码中,先在界面中间显示了两个,然后在导航栏上加了两个,具体见代码。
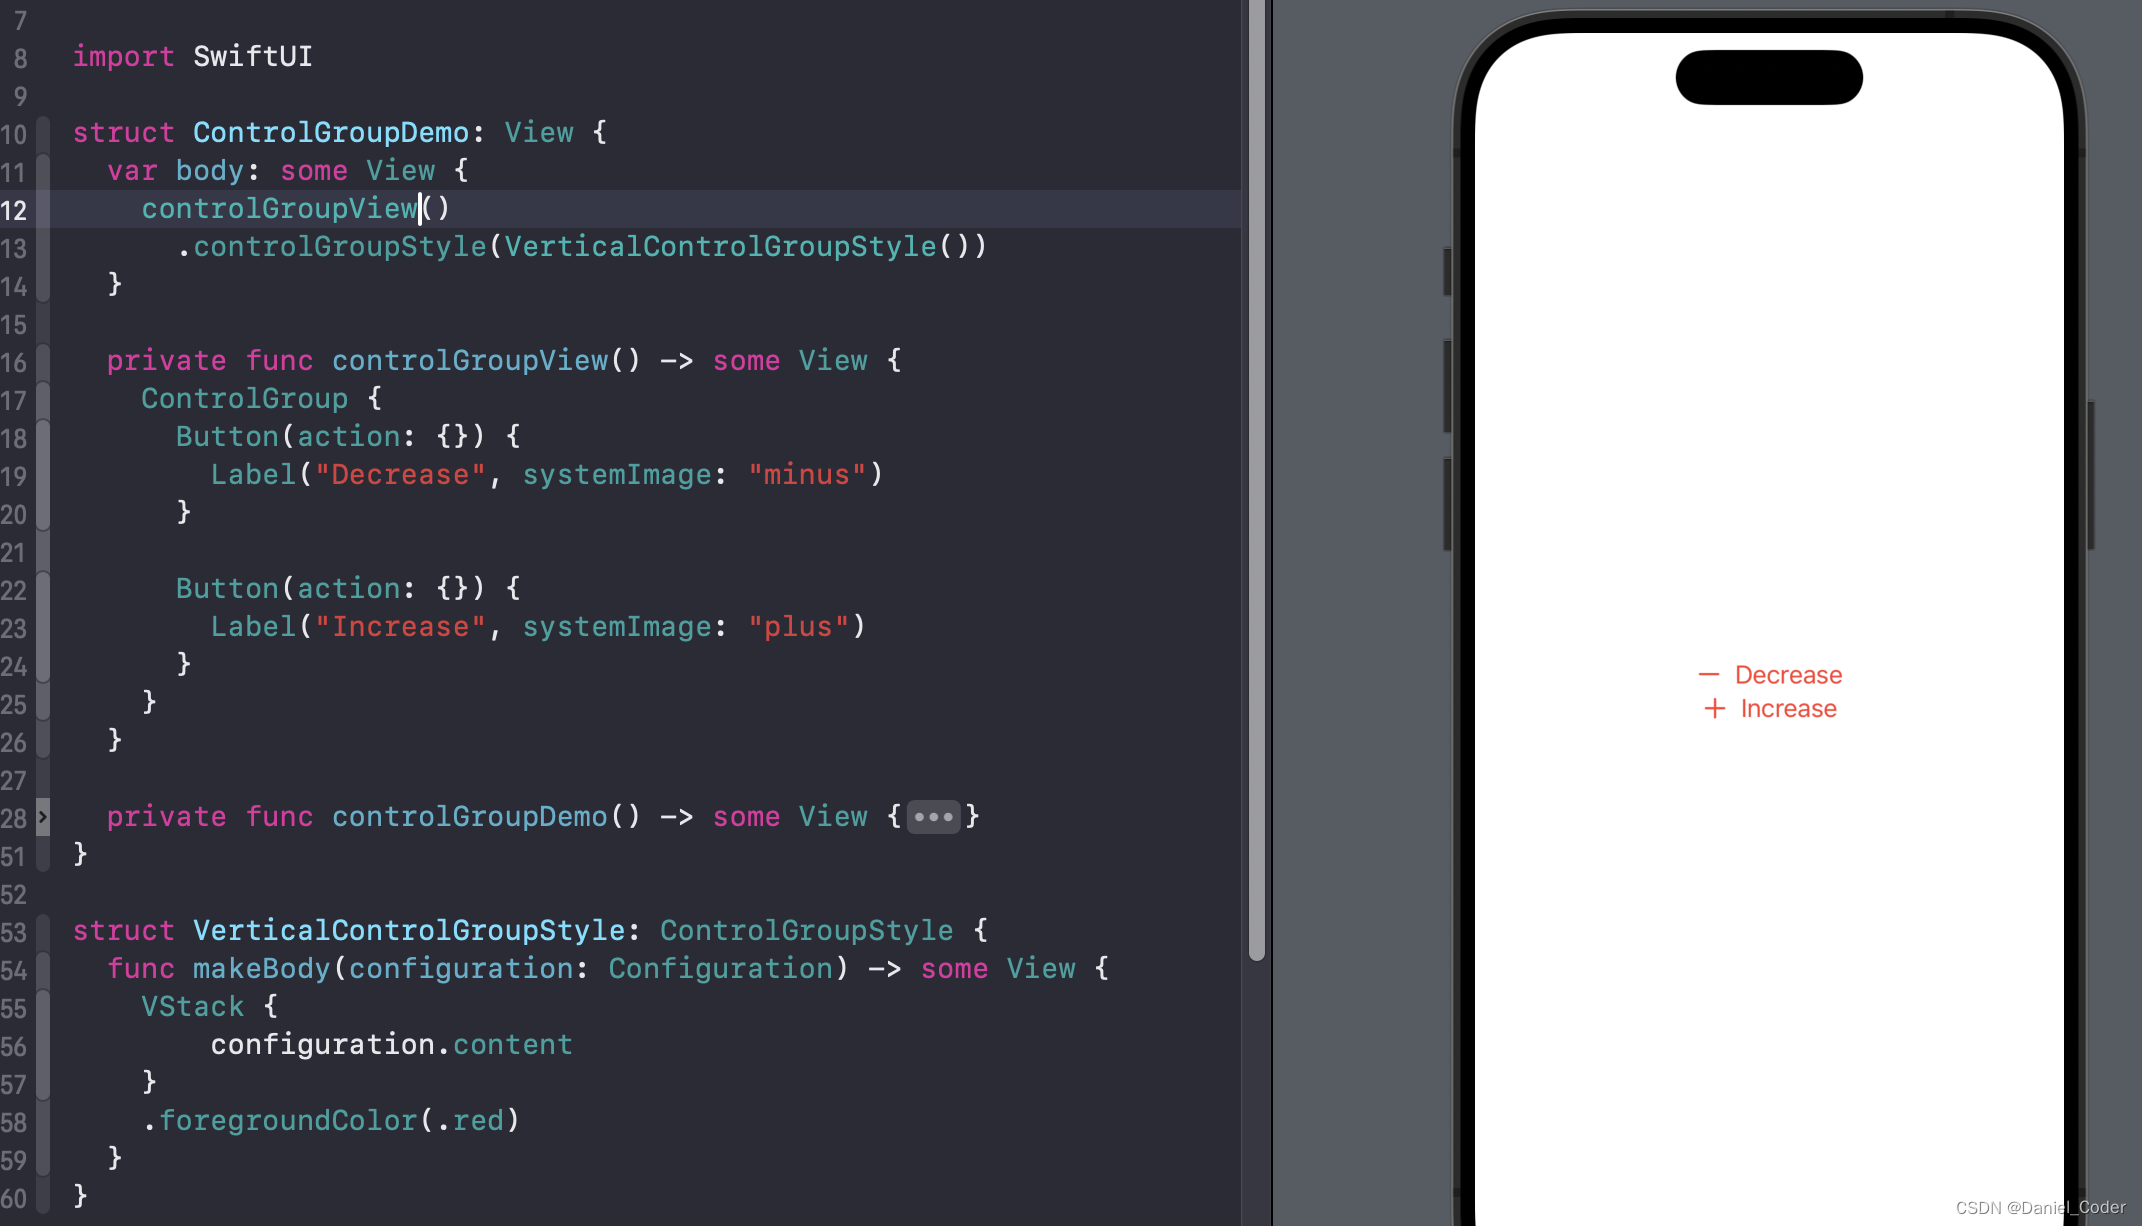
自定义样式
我们可以创建一个符合ControlGroupStyle协议的类型,并实现一个名为makeBody的必需函数。
下面代码创建了一个竖向排列的样式:
struct VerticalControlGroupStyle: ControlGroupStyle {
  func makeBody(configuration: Configuration) -> some View {
    VStack {
        configuration.content
    }
    .foregroundColor(.red)
  }
}
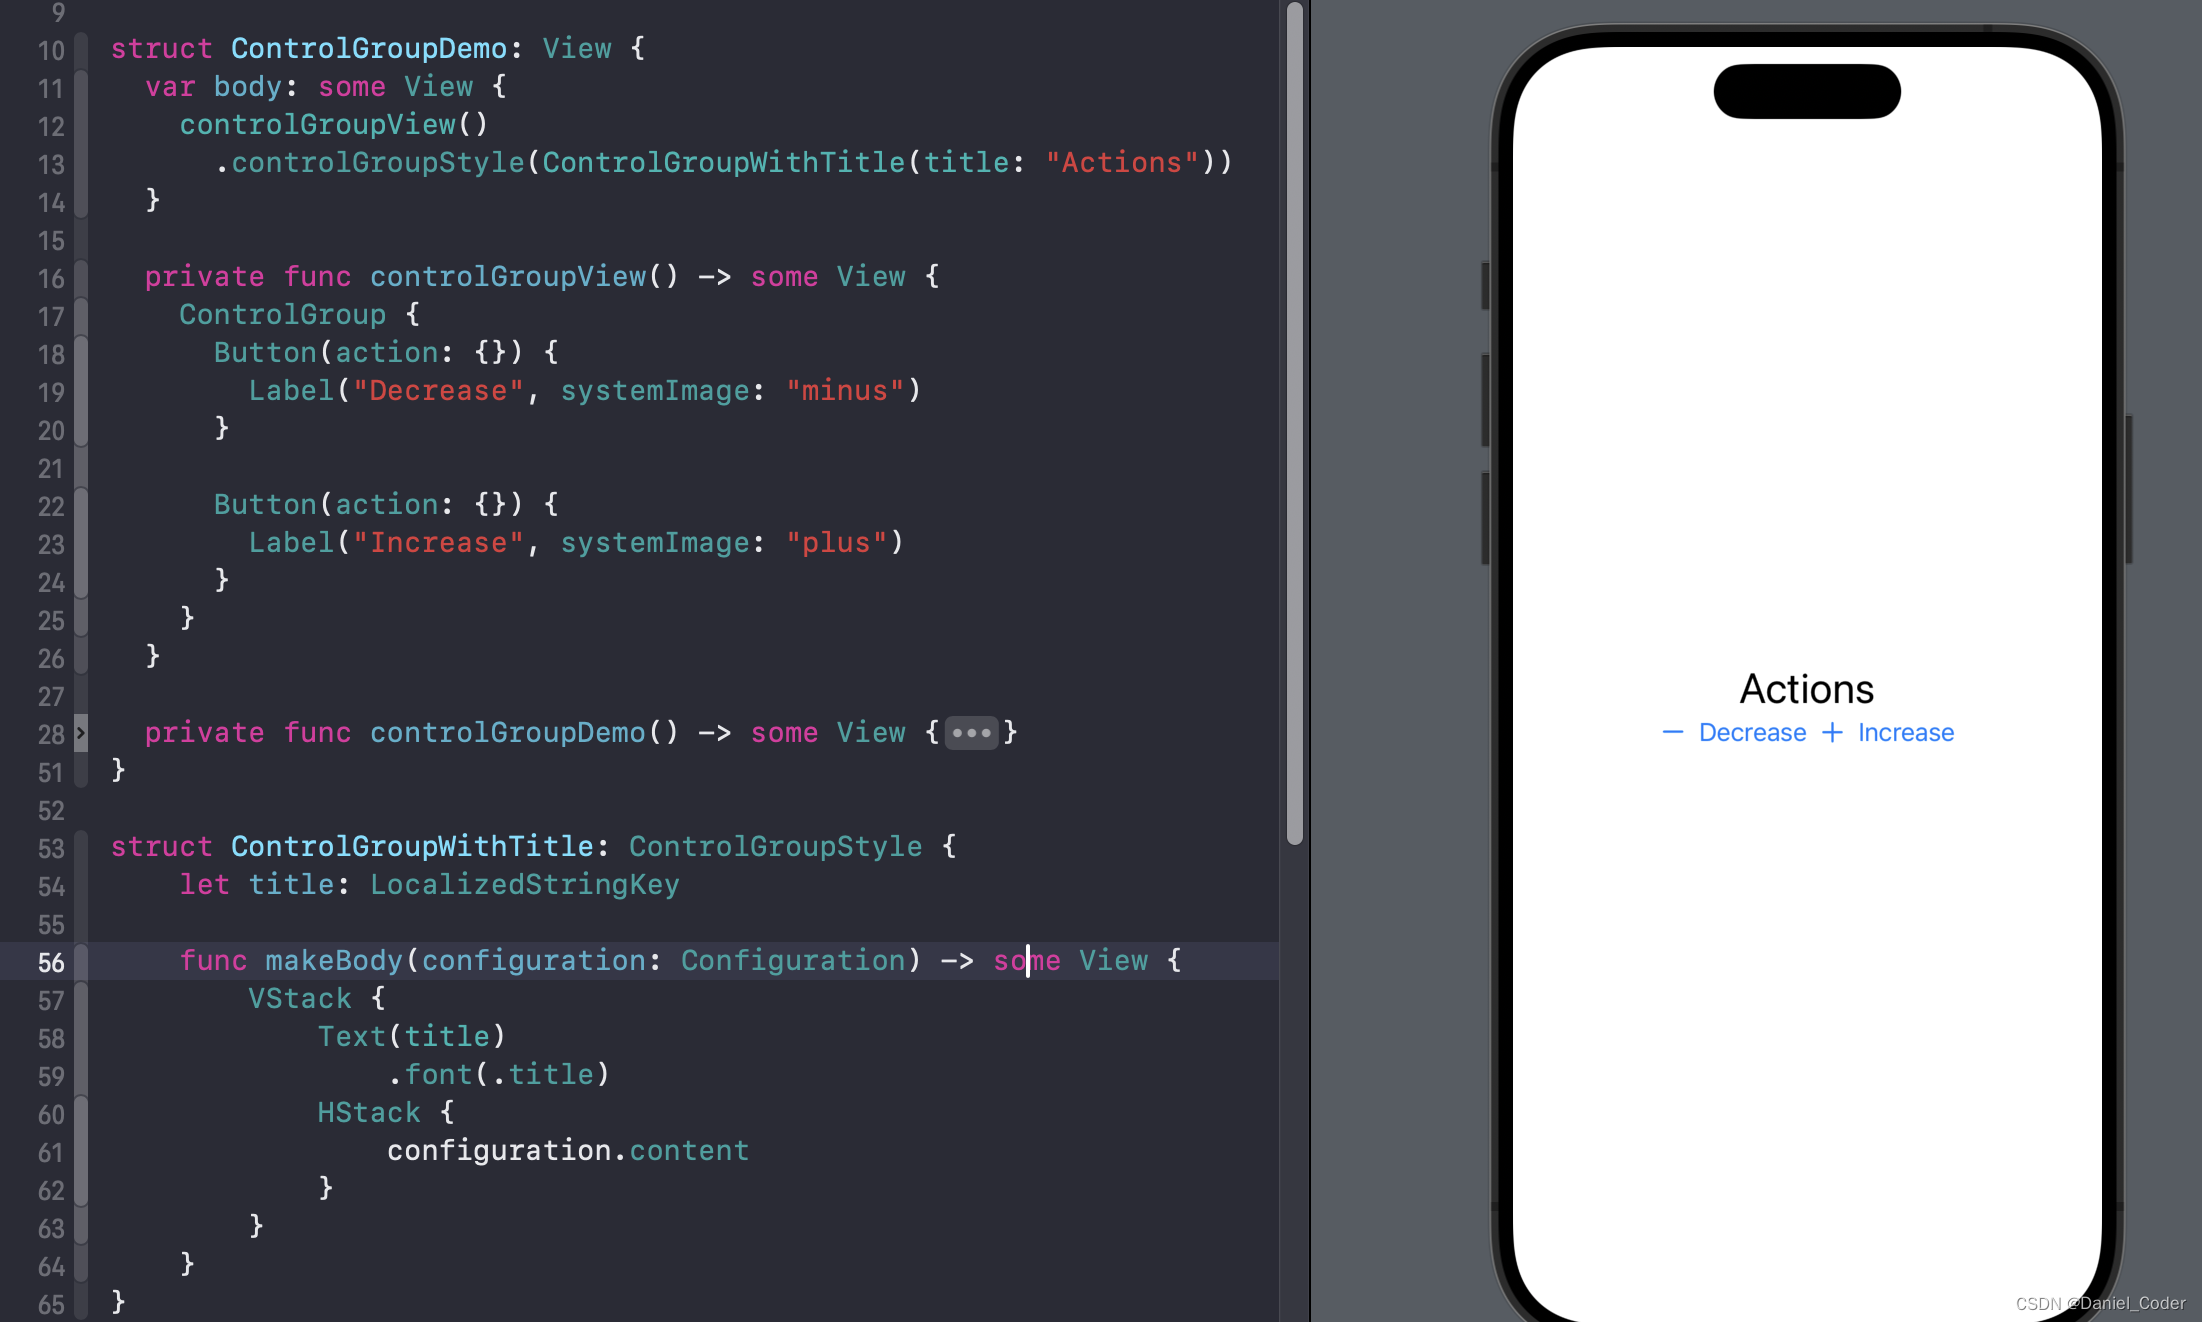
下面这个在ControlGroup组件中添加了一个Title:
struct ControlGroupWithTitle: ControlGroupStyle {
    let title: LocalizedStringKey

    func makeBody(configuration: Configuration) -> some View {
        VStack {
            Text(title)
                .font(.title)
            HStack {
                configuration.content
            }
        }
    }
}
Menu和ControlGroup的混合使用
Menu和ControlGroup也是可以放在一起使用的。
下面代码中将ControlGroup放在Menu中使用,具体看看效果吧。
struct MenuAndControlGroupDemo: View {
  var body: some View {
    VStack {
      Menu("Action 1") {
        Button("Menu 1", action: {})
        Button("Menu 2", action: {})
        ControlGroup {
          Button(action: {}) {
            Label("Decrease", systemImage: "minus")
          }

          Button(action: {}) {
            Label("Increase", systemImage: "plus")
          }
        }
      }

      Spacer()
        .frame(height: 60)

      Menu("Action 2") {
        Button("Menu 1", action: {})
        Button("Menu 2", action: {})
        ControlGroup {
          Button(action: {}) {
            Text("Decrease")
          }

          Button(action: {}) {
            Text("Increase")
          }
        }
      }
    }
    .padding()
  }
}

下面将Menu放到ControlGroup中试试:
  var body: some View {
    VStack {
      ControlGroup {
        Button(action: {}) {
          Text("Decrease")
        }

        Button(action: {}) {
          Text("Increase")
        }

        Menu("Action 1") {
          Button("Menu 1", action: {})
          Button("Menu 2", action: {})
        }
      }
      .controlGroupStyle(.navigation)
    }
    .padding()
  }

这里需要设置.controlGroupStyle(.navigation)才能点击。
如果将整个组合组件放到导航栏里面,那么不设置.controlGroupStyle(.navigation),也是可以点击的。
  var body: some View {
    NavigationStack {
      VStack {
        Color.orange.ignoresSafeArea()
      }
      .toolbar(content: {
        ToolbarItem(placement: .topBarTrailing) {
          ControlGroup {
            Button(action: {}) {
              Text("Decrease")
            }

            Button(action: {}) {
              Text("Increase")
            }

            Menu("Action 1") {
              Button("Menu 1", action: {})
              Button("Menu 2", action: {})
            }
          }
        }
      })
    }
  }

写在最后
本文主要介绍了Menu和ControlGroup的基本使用,都是一些小组件,而且在显示的时候系统也会根据不同平台的上下文语义来决定怎么显示,非常好用,如果用在自己的App中,是不是会增加用户体验呢?
最后,希望能够帮助到有需要的朋友,如果觉得有帮助,还望点个赞,添加个关注,笔者也会不断地努力,写出更多更好用的文章。


 443
443

 被折叠的 条评论
为什么被折叠?
被折叠的 条评论
为什么被折叠?
 到【灌水乐园】发言


