转载自 http://blog.csdn.net/zuiwuyuan/article/details/52198240
1. 道友留步
这位大神的代码封装的很好,把类拿来直接就可以用的了,稍微要注意的有三点
1. 有两个地方使用的是自定义控件,所以要去xml文件中将自定义view的位置改变下,这其实很容易理解。
2. 如果这个popupwindow是在activity中用的话,换句话说如果支付键盘是在你的activity中发生点击事件弹出来的,并且你的需求有在密码输入正确后有跳转页面的需求,需要注意这里的上下文context定义是以
activity定义的,所以在使用Intent进行跳转时注意使用mContext,但是如果你的使Fragment,则一定要将上下文的定义为Context,例如:
3. 第三比较简单,但是比较实用。直接看图吧
最好可以在类里加个方法,用的时候直接调用就可以了

现在很多app的支付、输入密码功能,都已经开始使用自定义数字键盘,不仅更加方便、其效果着实精致。
下面带着大家学习下,如何高仿微信的数字键盘,可以拿来直接用在自身的项目中。
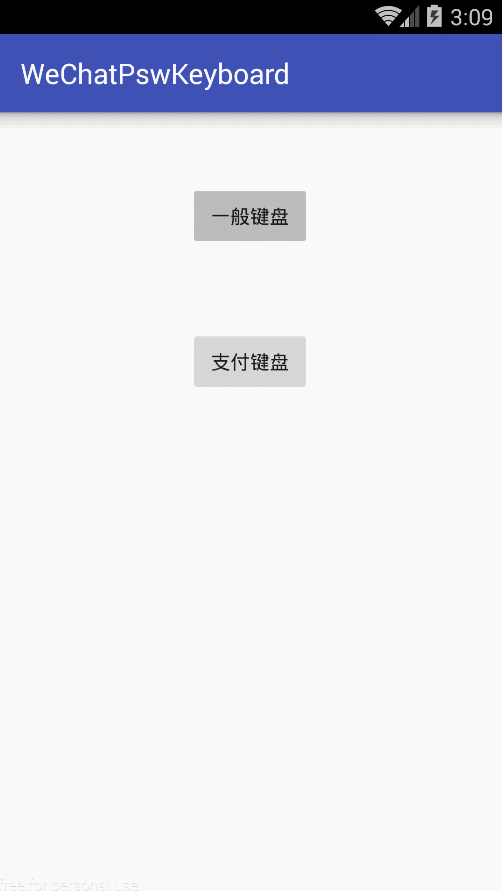
先看下效果图:
1. 自定义布局
<?xml version="1.0" encoding="utf-8"?>
<RelativeLayout xmlns:android="http://schemas.android.com/apk/res/android"
android:layout_width="match_parent"
android:layout_height="wrap_content">
<GridView
android:id="@+id/gv_keybord"
android:layout_width="match_parent"
android:layout_height="wrap_content"
android:layout_alignParentBottom="true"
android:background="#bdbdbd"
android:horizontalSpacing="1px"
android:numColumns="3"
android:verticalSpacing="1px" />
<View
android:id="@+id/line"
android:layout_width="match_parent"
android:layout_height="1px"
android:layout_above="@id/gv_keybord"
android:background="#bdbdbd" />
<RelativeLayout
android:id="@+id/layoutBack"
android:layout_width="match_parent"
android:layout_height="wrap_content"
android:layout_above="@id/line"
android:background="#f5f5f5"
android:padding="10dp">
<ImageView
android:id="@+id/imgBack"
android:layout_width="wrap_content"
android:layout_height="wrap_content"
android:layout_centerInParent="true"
android:src="@mipmap/keyboard_back_img" />
</RelativeLayout>
<View
android:layout_width="match_parent"
android:layout_height="1px"
android:layout_above="@id/layoutBack"
android:layout_marginTop="1dp"
android:background="#bdbdbd" />
</RelativeLayout>
- 1
- 2
- 3
- 4
- 5
- 6
- 7
- 8
- 9
- 10
- 11
- 12
- 13
- 14
- 15
- 16
- 17
- 18
- 19
- 20
- 21
- 22
- 23
- 24
- 25
- 26
- 27
- 28
- 29
- 30
- 31
- 32
- 33
- 34
- 35
- 36
- 37
- 38
- 39
- 40
- 41
- 42
- 43
- 44
- 45
- 46
- 47
- 48
- 1
- 2
- 3
- 4
- 5
- 6
- 7
- 8
- 9
- 10
- 11
- 12
- 13
- 14
- 15
- 16
- 17
- 18
- 19
- 20
- 21
- 22
- 23
- 24
- 25
- 26
- 27
- 28
- 29
- 30
- 31
- 32
- 33
- 34
- 35
- 36
- 37
- 38
- 39
- 40
- 41
- 42
- 43
- 44
- 45
- 46
- 47
- 48
键盘的布局,实质就是一个4X3网格布局的GridView。
2.实现数字键盘内容
import android.content.Context;
import android.util.AttributeSet;
import android.view.View;
import android.widget.GridView;
import android.widget.RelativeLayout;
import com.lnyp.pswkeyboard.R;
import com.lnyp.pswkeyboard.adapter.KeyBoardAdapter;
import java.util.ArrayList;
import java.util.HashMap;
import java.util.Map;
/**
* 虚拟键盘
*/
public class VirtualKeyboardView extends RelativeLayout implements View.OnClickListener {
Context context;
private GridView gridView;
private RelativeLayout layoutBack;
private ArrayList<Map<String, String>> valueList;
public VirtualKeyboardView(Context context) {
this(context, null);
}
public VirtualKeyboardView(Context context, AttributeSet attrs) {
super(context, attrs);
this.context = context;
View view = View.inflate(context, R.layout.layout_virtual_keyboard, null);
valueList = new ArrayList<>();
layoutBack = (RelativeLayout) view.findViewById(R.id.layoutBack);
layoutBack.setOnClickListener(this);
gridView = (GridView) view.findViewById(R.id.gv_keybord);
setView();
addView(view);
}
public RelativeLayout getLayoutBack() {
return layoutBack;
}
public ArrayList<Map<String, String>> getValueList() {
return valueList;
}
public GridView getGridView() {
return gridView;
}
private void setView() {
for (int i = 1; i < 13; i++) {
Map<String, String> map = new HashMap<String, String>();
if (i < 10) {
map.put("name", String.valueOf(i));
} else if (i == 10) {
map.put("name", ".");
} else if (i == 11) {
map.put("name", String.valueOf(0));
} else if (i == 12) {
map.put("name", "");
}
valueList.add(map);
}
KeyBoardAdapter keyBoardAdapter = new KeyBoardAdapter(context, valueList);
gridView.setAdapter(keyBoardAdapter);
}
@Override
public void onClick(View v) {
}
}
- 1
- 2
- 3
- 4
- 5
- 6
- 7
- 8
- 9
- 10
- 11
- 12
- 13
- 14
- 15
- 16
- 17
- 18
- 19
- 20
- 21
- 22
- 23
- 24
- 25
- 26
- 27
- 28
- 29
- 30
- 31
- 32
- 33
- 34
- 35
- 36
- 37
- 38
- 39
- 40
- 41
- 42
- 43
- 44
- 45
- 46
- 47
- 48
- 49
- 50
- 51
- 52
- 53
- 54
- 55
- 56
- 57
- 58
- 59
- 60
- 61
- 62
- 63
- 64
- 65
- 66
- 67
- 68
- 69
- 70
- 71
- 72
- 73
- 74
- 75
- 76
- 77
- 78
- 79
- 80
- 81
- 82
- 83
- 84
- 85
- 86
看下适配器如何处理:KeyBoardAdapter .Java
import android.content.Context;
import android.graphics.Color;
import android.view.View;
import android.view.ViewGroup;
import android.widget.BaseAdapter;
import android.widget.RelativeLayout;
import android.widget.TextView;

import com.lnyp.pswkeyboard.R;

import java.util.ArrayList;
import java.util.Map;

/**
 * 九宫格键盘适配器
 */
public class KeyBoardAdapter extends BaseAdapter {


    private Context mContext;
    private ArrayList<Map<String, String>> valueList;

    public KeyBoardAdapter(Context mContext, ArrayList<Map<String, String>> valueList) {
        this.mContext = mContext;
        this.valueList = valueList;
    }

    @Override
    public int getCount() {
        return valueList.size();
    }

    @Override
    public Object getItem(int position) {
        return valueList.get(position);
    }

    @Override
    public long getItemId(int position) {
        return position;
    }

    @Override
    public View getView(int position, View convertView, ViewGroup parent) {
        ViewHolder viewHolder;
        if (convertView == null) {
            convertView = View.inflate(mContext, R.layout.grid_item_virtual_keyboard, null);
            viewHolder = new ViewHolder();
            viewHolder.btnKey = (TextView) convertView.findViewById(R.id.btn_keys);
            viewHolder.imgDelete = (RelativeLayout) convertView.findViewById(R.id.imgDelete);

            convertView.setTag(viewHolder);
        } else {
            viewHolder = (ViewHolder) convertView.getTag();
        }

        if (position == 9) {
            viewHolder.imgDelete.setVisibility(View.INVISIBLE);
            viewHolder.btnKey.setVisibility(View.VISIBLE);
            viewHolder.btnKey.setText(valueList.get(position).get("name"));
            viewHolder.btnKey.setBackgroundColor(Color.parseColor("#e0e0e0"));
        } else if (position == 11) {
            viewHolder.btnKey.setBackgroundResource(R.mipmap.keyboard_delete_img);
            viewHolder.imgDelete.setVisibility(View.VISIBLE);
            viewHolder.btnKey.setVisibility(View.INVISIBLE);

        } else {
            viewHolder.imgDelete.setVisibility(View.INVISIBLE);
            viewHolder.btnKey.setVisibility(View.VISIBLE);

            viewHolder.btnKey.setText(valueList.get(position).get("name"));
        }

        return convertView;
    }

    /**
     * 存放控件
     */
    public final class ViewHolder {
        public TextView btnKey;
        public RelativeLayout imgDelete;
    }
}
- 1
- 2
- 3
- 4
- 5
- 6
- 7
- 8
- 9
- 10
- 11
- 12
- 13
- 14
- 15
- 16
- 17
- 18
- 19
- 20
- 21
- 22
- 23
- 24
- 25
- 26
- 27
- 28
- 29
- 30
- 31
- 32
- 33
- 34
- 35
- 36
- 37
- 38
- 39
- 40
- 41
- 42
- 43
- 44
- 45
- 46
- 47
- 48
- 49
- 50
- 51
- 52
- 53
- 54
- 55
- 56
- 57
- 58
- 59
- 60
- 61
- 62
- 63
- 64
- 65
- 66
- 67
- 68
- 69
- 70
- 71
- 72
- 73
- 74
- 75
- 76
- 77
- 78
- 79
- 80
- 81
- 82
- 83
- 84
- 85
在看Adapter之前,我们先看下grid_item_virtual_keyboard是如何实现的:
<?xml version="1.0" encoding="utf-8"?>
<RelativeLayout xmlns:android="http://schemas.android.com/apk/res/android"
    android:layout_width="match_parent"
    android:layout_height="match_parent"
    android:background="#e0e0e0">

    <TextView
        android:id="@+id/btn_keys"
        android:layout_width="match_parent"
        android:layout_height="60dp"
        android:layout_centerInParent="true"
        android:background="@drawable/selector_gird_item"
        android:gravity="center"
        android:includeFontPadding="false"
        android:textColor="#333333"
        android:textSize="26sp" />

    <RelativeLayout
        android:id="@+id/imgDelete"
        android:layout_width="wrap_content"
        android:layout_height="60dp"
        android:layout_centerInParent="true">

        <ImageView
            android:layout_width="wrap_content"
            android:layout_height="wrap_content"
            android:layout_centerInParent="true"
            android:src="@mipmap/keyboard_delete_img" />

    </RelativeLayout>


</RelativeLayout>
- 1
- 2
- 3
- 4
- 5
- 6
- 7
- 8
- 9
- 10
- 11
- 12
- 13
- 14
- 15
- 16
- 17
- 18
- 19
- 20
- 21
- 22
- 23
- 24
- 25
- 26
- 27
- 28
- 29
- 30
- 31
- 32
- 33
- 34
- 1
- 2
- 3
- 4
- 5
- 6
- 7
- 8
- 9
- 10
- 11
- 12
- 13
- 14
- 15
- 16
- 17
- 18
- 19
- 20
- 21
- 22
- 23
- 24
- 25
- 26
- 27
- 28
- 29
- 30
- 31
- 32
- 33
- 34
可以看到,我们在item布局文件中,指定了两个view,一个是普通显示数字的TextView, 一个是显示最后删除键的RelativeLayout。
然后,在KeyBoardAdapter 的getView方法中,我们根据position位置,对布局进行不同的处理。当position为9,也就是倒数第三个按键,它的按钮颜色要单独设置。 当position为12也就是最后一个按钮时,需要控制删除按钮显示,数字按钮隐藏。 其余情况则是删除按钮隐藏,数字按钮显示。
3.使用并实现键盘事件逻辑
布局中,可以直接使用自己定义的数字键盘:
<?xml version="1.0" encoding="utf-8"?>
<RelativeLayout xmlns:android="http://schemas.android.com/apk/res/android"
    xmlns:tools="http://schemas.android.com/tools"
    android:layout_width="match_parent"
    android:layout_height="match_parent"
    android:background="#efefef"
    tools:context="com.lnyp.pswkeyboard.NormalKeyBoardActivity">


    <EditText
        android:id="@+id/textAmount"
        android:layout_width="match_parent"
        android:layout_height="50dp"
        android:background="#FFFFFF"
        android:inputType="numberDecimal"
        android:padding="14dp"
        android:textColor="#333333"
        android:textSize="16sp" />

    <com.lnyp.pswkeyboard.widget.VirtualKeyboardView
        android:id="@+id/virtualKeyboardView"
        android:layout_width="match_parent"
        android:layout_height="wrap_content"
        android:layout_gravity="bottom" />

</RelativeLayout>
- 1
- 2
- 3
- 4
- 5
- 6
- 7
- 8
- 9
- 10
- 11
- 12
- 13
- 14
- 15
- 16
- 17
- 18
- 19
- 20
- 21
- 22
- 23
- 24
- 25
- 26
- 27
- 1
- 2
- 3
- 4
- 5
- 6
- 7
- 8
- 9
- 10
- 11
- 12
- 13
- 14
- 15
- 16
- 17
- 18
- 19
- 20
- 21
- 22
- 23
- 24
- 25
- 26
- 27
我们在Activity中,操作数字键盘:
import android.os.Bundle
import android.support.v7.app.AppCompatActivity
import android.text.Editable
import android.view.View
import android.view.animation.Animation
import android.view.animation.AnimationUtils
import android.widget.AdapterView
import android.widget.EditText
import android.widget.GridView
import com.lnyp.pswkeyboard.widget.VirtualKeyboardView
import java.util.ArrayList
import java.util.Map
public class NormalKeyBoardActivity extends AppCompatActivity {
private VirtualKeyboardView virtualKeyboardView
private GridView gridView
private ArrayList<Map<String, String>> valueList
private EditText textAmount
private Animation enterAnim
private Animation exitAnim
@Override
protected void onCreate(Bundle savedInstanceState) {
super.onCreate(savedInstanceState)
setContentView(R.layout.activity_normal_key_board)
valueList = virtualKeyboardView.getValueList()
initAnim()
initView()
}
private void initAnim() {
enterAnim = AnimationUtils.loadAnimation(this, R.anim.push_bottom_in)
exitAnim = AnimationUtils.loadAnimation(this, R.anim.push_bottom_out)
}
private void initView() {
virtualKeyboardView = (VirtualKeyboardView) findViewById(R.id.virtualKeyboardView)
textAmount = (EditText) findViewById(R.id.textAmount)
virtualKeyboardView.getLayoutBack().setOnClickListener(new View.OnClickListener() {
@Override
public void onClick(View v) {
virtualKeyboardView.startAnimation(exitAnim)
virtualKeyboardView.setVisibility(View.GONE)
}
})
gridView = virtualKeyboardView.getGridView()
gridView.setOnItemClickListener(onItemClickListener)
textAmount.setOnClickListener(new View.OnClickListener() {
@Override
public void onClick(View v) {
virtualKeyboardView.setFocusable(true)
virtualKeyboardView.setFocusableInTouchMode(true)
virtualKeyboardView.startAnimation(enterAnim)
virtualKeyboardView.setVisibility(View.VISIBLE)
}
})
}
private AdapterView.OnItemClickListener onItemClickListener = new AdapterView.OnItemClickListener() {
@Override
public void onItemClick(AdapterView<?> adapterView, View view, int position, long l) {
if (position < 11 && position != 9) { //点击0~9按钮
String amount = textAmount.getText().toString().trim()
amount = amount + valueList.get(position).get("name")
textAmount.setText(amount)
Editable ea = textAmount.getText()
textAmount.setSelection(ea.length())
} else {
if (position == 9) { //点击退格键
String amount = textAmount.getText().toString().trim()
if (!amount.contains(".")) {
amount = amount + valueList.get(position).get("name")
textAmount.setText(amount)
Editable ea = textAmount.getText()
textAmount.setSelection(ea.length())
}
}
if (position == 11) { //点击退格键
String amount = textAmount.getText().toString().trim()
if (amount.length() > 0) {
amount = amount.substring(0, amount.length() - 1)
textAmount.setText(amount)
Editable ea = textAmount.getText()
textAmount.setSelection(ea.length())
}
}
}
}
}
}
- 1
- 2
- 3
- 4
- 5
- 6
- 7
- 8
- 9
- 10
- 11
- 12
- 13
- 14
- 15
- 16
- 17
- 18
- 19
- 20
- 21
- 22
- 23
- 24
- 25
- 26
- 27
- 28
- 29
- 30
- 31
- 32
- 33
- 34
- 35
- 36
- 37
- 38
- 39
- 40
- 41
- 42
- 43
- 44
- 45
- 46
- 47
- 48
- 49
- 50
- 51
- 52
- 53
- 54
- 55
- 56
- 57
- 58
- 59
- 60
- 61
- 62
- 63
- 64
- 65
- 66
- 67
- 68
- 69
- 70
- 71
- 72
- 73
- 74
- 75
- 76
- 77
- 78
- 79
- 80
- 81
- 82
- 83
- 84
- 85
- 86
- 87
- 88
- 89
- 90
- 91
- 92
- 93
- 94
- 95
- 96
- 97
- 98
- 99
- 100
- 101
- 102
- 103
- 104
- 105
- 106
- 107
- 108
- 109
- 110
- 111
- 112
- 113
- 114
- 115
- 116
好了,通过以上步骤,我们便可以实现微信支付键盘啦,是不是很easy呢?!
如有疑问或建议,欢迎进QQ群来讨论交流:487786925( Android研发村 )
源码地址:https://github.com/zuiwuyuan/WeChatPswKeyboard


 1323
1323

 被折叠的 条评论
为什么被折叠?
被折叠的 条评论
为什么被折叠?
 到【灌水乐园】发言


