转载请注明出处
本文出自Hansion的博客
本章介绍如何使用GLSurfaceView和GLSurfaceView.Renderer完成在Activity中的最简单实现。
1.在AndroidManifest.xml的manifest节点中声明OpenGL ES的使用
   <!--声明OpenGL ES 2.0版本-->
    <uses-feature android:glEsVersion="0x00020000" android:required="true" />


    <!--如果应用使用纹理压缩,则要纹理压缩格式,确保应用仅安装在可以兼容的设备上-->
    <supports-gl-texture android:name="GL_OES_compressed_ETC1_RGB8_texture" />
    <supports-gl-texture android:name="GL_OES_compressed_paletted_texture" />
纹理压缩相关资料请阅读:https://developer.android.com/guide/topics/graphics/opengl.html#textures
2.构建GLSurfaceView对象
我们一般都会继承GLSurfaceView写一个拓展类,如下:
public class MyGLSurfaceView extends GLSurfaceView {


    public MyGLSurfaceView(Context context) {
        this(context, null);
    }


    public MyGLSurfaceView(Context context, AttributeSet attrs) {
        super(context, attrs);
        init();
    }


    public void init() {
        // 设置EGLContext客户端使用OpenGL ES 2.0 版本
        setEGLContextClientVersion(2);


        MyGLRenderer mRenderer = new MyGLRenderer();


        // 设置渲染器到GLSurfaceView上
        setRenderer(mRenderer);
    }
}
3.构建Renderer类
Renderer渲染器决定着在GLSurfaceView上绘制什么和如何绘制
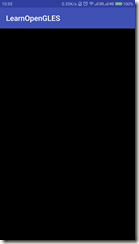
我们在以下渲染器中实现了绘制黑屏
public class MyGLRenderer implements GLSurfaceView.Renderer {
    @Override
    public void onSurfaceCreated(GL10 gl10, EGLConfig eglConfig) {
        //指定刷新颜色缓冲区时所用的颜色
        //需要注意的是glClearColor只起到Set的作用,并不Clear。
        //glClearColor更类似与初始化,如果不做,新的绘制就会绘制在以前的上面,类似于混合,而不是覆盖
        GLES20.glClearColor(0.0f, 0.0f, 0.0f, 1.0f);
    }


    @Override
    public void onSurfaceChanged(GL10 gl10, int width, int height) {
        //glViewport用于告诉OpenGL应把渲染之后的图形绘制在窗体的哪个部位、大小
        GLES20.glViewport(0, 0, width, height);
    }


    @Override
    public void onDrawFrame(GL10 gl10) {
        //glClear表示清除缓冲  传入GL_COLOR_BUFFER_BIT指要清除颜色缓冲
        GLES20.glClear(GLES20.GL_COLOR_BUFFER_BIT);
    }
}
4.在Activity中使用我们定义的MyGLSurfaceView
<?xml version="1.0" encoding="utf-8"?>
<RelativeLayout xmlns:android="http://schemas.android.com/apk/res/android"
    xmlns:tools="http://schemas.android.com/tools"
    android:layout_width="match_parent"
    android:layout_height="match_parent"
    tools:context="com.hansion.learnopengles.MainActivity">


    <com.hansion.learnopengles.opengl.MyGLSurfaceView
        android:layout_width="match_parent"
        android:layout_height="match_parent"/>


</RelativeLayout>
上面的示例代码完成了一个使用OpenGL显示黑屏的简单功能。虽然没有做任何有趣的事情,但通过创建这些类,您已经奠定了开始使用OpenGL绘制图形元素所需的基础。
5.运行效果
参考:


 310
310

 被折叠的 条评论
为什么被折叠?


