


先来代码:
public ConfigurableApplicationContext run(String... args) {
     // 初始并启动StopWatch,用来监控运行时间等,不重要,暂时略过。
		StopWatch stopWatch = new StopWatch();
		stopWatch.start();
	// 该接口为配置应用上下文(ApplicationContext)提供方法
		ConfigurableApplicationContext context = null;
		// 初始化支持报告SpringApplication启动错误的回调接口集合
		Collection<SpringBootExceptionReporter> exceptionReporters = new ArrayList<>();
		// 给系统设置名称为“java.awt.headless”的属性
		configureHeadlessProperty();
		// run方法的监听器是SpringApplicationRunListeners对象
		SpringApplicationRunListeners listeners = getRunListeners(args);
		// 启动该对象,实际拿到的类型是EventPublishingRunListener,用来发布 SpringApplicationEvents(Spring应用事件)
		// 这是第一个需要重点跟踪的方法
		listeners.starting();
		try {
		// 获取应用启动参数的封装对象,args如 --spring.profiles.active=dev
			ApplicationArguments applicationArguments = new DefaultApplicationArguments(args);
			// 这是第二个需要重点跟踪的方法,顾名思义,准备环境
			ConfigurableEnvironment environment = prepareEnvironment(listeners, applicationArguments);
			// 设置忽略属性
			configureIgnoreBeanInfo(environment);
			// 打印banner,通常是控制台,返回SpringApplicationBannerPrinter类的实例对象
			Banner printedBanner = printBanner(environment);
			// 生成一个ConfigurableApplicationContext类型的实例
			context = createApplicationContext();
			// 生成错误报告器,用来汇报启动错误
			exceptionReporters = getSpringFactoriesInstances(SpringBootExceptionReporter.class,
					new Class[] { ConfigurableApplicationContext.class }, context);
			//准备环境
			prepareContext(context, environment, listeners, applicationArguments, printedBanner);
			// 刷新环境
			refreshContext(context);
			// 环境刷新后处理
			afterRefresh(context, applicationArguments);
			stopWatch.stop();
			if (this.logStartupInfo) {
				new StartupInfoLogger(this.mainApplicationClass).logStarted(getApplicationLog(), stopWatch);
			}
			listeners.started(context);
			callRunners(context, applicationArguments);
		}
		catch (Throwable ex) {
			handleRunFailure(context, ex, exceptionReporters, listeners);
			throw new IllegalStateException(ex);
		}

		try {
			listeners.running(context);
		}
		catch (Throwable ex) {
			handleRunFailure(context, ex, exceptionReporters, null);
			throw new IllegalStateException(ex);
		}
		return context;
	}
二、ConfigurableEnvironment environment = prepareEnvironment(listeners, applicationArguments);
SpringApplication类的prepareEnvironment()方法代码如下:
private ConfigurableEnvironment prepareEnvironment(SpringApplicationRunListeners listeners,
			ApplicationArguments applicationArguments) {
		// 创建或配置一个环境对象。这里生成的是StandardServletEnvironment对象
		ConfigurableEnvironment environment = getOrCreateEnvironment();
		// 用args配置刚刚得到的环境对象,需要在下面展开讲
		configureEnvironment(environment, applicationArguments.getSourceArgs());
		// 给相应的环境加上ConfigurationPropertySource支持。
		ConfigurationPropertySources.attach(environment);
		// EventPublishingRunListener发布了一个ApplicationEnvironmentPreparedEvent事件
		listeners.environmentPrepared(environment);
		// 把environment对象同SpringApplication对象绑定
		bindToSpringApplication(environment);
		// 如果不是定制环境
		if (!this.isCustomEnvironment) {
			environment = new
			// 如果type是StandardEnvironment直接返回,如果不是,就新建一个
		EnvironmentConverter(getClassLoader()).convertEnvironmentIfNecessary(environment,
					// 推断环境类型。普通项目是StandardServletEnvironment.class
					deduceEnvironmentClass());
		}
		// 再一次给相应的环境加上ConfigurationPropertySource支持。
		ConfigurationPropertySources.attach(environment);
		return environment;
	}
根据web服务的类型选择环境对象,一般是SERVLET,返回的是StandardServletEnvironment对象:
private ConfigurableEnvironment getOrCreateEnvironment() {
		if (this.environment != null) {
			return this.environment;
		}
		switch (this.webApplicationType) {
		case SERVLET:
			return new StandardServletEnvironment();
		case REACTIVE:
			return new StandardReactiveWebEnvironment();
		default:
			return new StandardEnvironment();
		}
	}
注:
ConversionService接口:
类型转换的服务接口。在转换系统中比较重要。调用类的convert(Object, Class)方法可以使用该系统完成线程安全的类型转换。
ApplicationConversionService类:
默认配置了类型转换器和格式化器,可用于大多数Springboot应用。可以直接实例化,当然也可以用一些工具方法实现线程封闭。
protected void configureEnvironment(ConfigurableEnvironment environment, String[] args) {
		if (this.addConversionService) {
		// 并发情形下获取懒加载的单例,使用DCL,即双重检查锁。
			ConversionService conversionService = ApplicationConversionService.getSharedInstance();
			// 给环境设置转换服务
			environment.setConversionService((ConfigurableConversionService) conversionService);
		}
		// 把我们来自于外部参数这种属性源,经过解析和转换,配置到运行环境中
		configurePropertySources(environment, args);
		// 把来自于外部参数这种profiles属性,经过解析和转换,配置到运行环境中
		configureProfiles(environment, args);
	}
getSharedInstance()方法代码:
public class ApplicationConversionService extends FormattingConversionService {

	private static volatile ApplicationConversionService sharedInstance;
	....
public static ConversionService getSharedInstance() {
		ApplicationConversionService sharedInstance = ApplicationConversionService.sharedInstance;
		if (sharedInstance == null) {
			synchronized (ApplicationConversionService.class) {
				sharedInstance = ApplicationConversionService.sharedInstance;
				if (sharedInstance == null) {
					sharedInstance = new ApplicationConversionService();
					ApplicationConversionService.sharedInstance = sharedInstance;
				}
			}
		}
接下来进入environment.setConversionService()方法。此处environment的实例类型是StandardServletEnvironment。但StandardServletEnvironment类中并没有这个方法,于是在它的父类AbstractEnvironment中找到了这个实现。如下:
	@Override
	public void setConversionService(ConfigurableConversionService conversionService) {
		this.propertyResolver.setConversionService(conversionService);
	}
需要介绍几个类的主要功能:
(1)方法所在的类AbstractEnvironment:Environment类的抽象基类实现。支持spring.profiles.active属性和spring.profiles.default属性。AbstractEnvironment不添加PropertySource对象。而实现此类子类,根据其所添加的PropertySource对象不同而产生区别。子类设置属性源时,应通过由protected修饰的customizePropertySources(MutablePropertySources)实现。
(2)MutablePropertySources类:PropertySources接口的默认实现。可以操作包含属性的资源,并且提供了复制已存在的PropertySources实例的构造方法。
(3)PropertySources接口:持有一个或多个PropertySource对象;
(4)PropertySource对象:代表键值对组成的资源对象。key是属性名,value是一个属性对象。
(5)ConfigurablePropertyResolver:配置属性解析器。用于属性值的转换。其构造方法可根据指定的PropertySource创建对应的解析器对象。
上述方法讲ApplicationConversionService类型的对象conversionService赋值给AbstractPropertyResolver类的conversionService域。回顾一下,这个conversionService就是前文通过DCL拿到的。
总结起来就是,环境需要一个属性解析器,属性解析器有需要一个资源类型转换器,所以这一步就完成了对应的配置。有了合适的属性解析器,环境可以进行下一个操作:configurePropertySources(environment, args)。即配置属性源。
代码如下:
	protected void configurePropertySources(ConfigurableEnvironment environment, String[] args) {

		MutablePropertySources sources = environment.getPropertySources();
		// 先添加默认属性
		if (this.defaultProperties != null && !this.defaultProperties.isEmpty()) {
			sources.addLast(new MapPropertySource("defaultProperties", this.defaultProperties));
		}
		// 如果添加了命令行属性
		if (this.addCommandLineProperties && args.length > 0) {
		// 得到命令行属性值“commandLineArgs”
			String name = CommandLinePropertySource.COMMAND_LINE_PROPERTY_SOURCE_NAME;
			// 如果属性源中已经包含,新建组合属性,对原值进行替换
			if (sources.contains(name)) {
				PropertySource<?> source = sources.get(name);
				CompositePropertySource composite = new CompositePropertySource(name);
				composite.addPropertySource(
						new SimpleCommandLinePropertySource("springApplicationCommandLineArgs", args));
				composite.addPropertySource(source);
				// 这是一个同步操作
				sources.replace(name, composite);
			}
			else {
			/** 未获取就直接添加。new SimpleCommandLinePropertySource(args)这个构造方法里面有
			  * 对逻辑的具体解析。将“--spring.profiles.active=dev”这样的命令进行解析,转换成
			  * CommandLineArgs对象。该对象里面以Map<String, List<String>>类型存储了选项参数
			  *  optionArgs;以List<String>类型存储了非选项参数nonOptionArgs。
			*/
				sources.addFirst(new SimpleCommandLinePropertySource(args));
			}
		}
	}
总之,我们已经实现了把我们来自于外部参数这种属性源,经过解析和转换,配置到运行环境中去了。同理,configureProfiles(environment, args);就不再赘述。接下来到这里:

方法意为:
给相应的环境加上ConfigurationPropertySource支持。附加的解析器将动态跟踪环境属性源的增加和删除行为。
    public static void attach(Environment environment) {
		Assert.isInstanceOf(ConfigurableEnvironment.class, environment);
		MutablePropertySources sources = ((ConfigurableEnvironment) environment).getPropertySources();
		PropertySource<?> attached = sources.get(ATTACHED_PROPERTY_SOURCE_NAME);
		if (attached != null && attached.getSource() != sources) {
			sources.remove(ATTACHED_PROPERTY_SOURCE_NAME);
			attached = null;
		}
		if (attached == null) {
			sources.addFirst(new ConfigurationPropertySourcesPropertySource(ATTACHED_PROPERTY_SOURCE_NAME,
					new SpringConfigurationPropertySources(sources)));
		}
	}
listeners.environmentPrepared(environment)方法:
 	// EventPublishingRunListener发布了一个ApplicationEnvironmentPreparedEvent事件
	@Override
	public void environmentPrepared(ConfigurableEnvironment environment) {
		this.initialMulticaster
				.multicastEvent(new ApplicationEnvironmentPreparedEvent(this.application, this.args, environment));
	}
bindToSpringApplication(environment)方法:
 	protected void bindToSpringApplication(ConfigurableEnvironment environment) {
		try {
			Binder.get(environment).bind("spring.main", Bindable.ofInstance(this));
		}
		catch (Exception ex) {
			throw new IllegalStateException("Cannot bind to SpringApplication", ex);
		}
	}
Binder.get(environment)方法,从环境中创建出一个新的Binder实例:
public static Binder get(Environment environment, BindHandler defaultBindHandler) {
		//  获取之前ConfigurationPropertySource.attach()方法关联的属性源迭代器
		Iterable<ConfigurationPropertySource> sources = ConfigurationPropertySources.get(environment);
		// 获得一个属性源占位符解析器,Binder可以用它来解析属性占位符(如“--
		// spring.profiles.active”中的“--”)
		PropertySourcesPlaceholdersResolver placeholdersResolver = new PropertySourcesPlaceholdersResolver(environment);
		// 构造一个新的Binder
		return new Binder(sources, placeholdersResolver, null, null, defaultBindHandler);
	}
Bindable.ofInstance(this)方法,使用一个和this对象相等的对象,创建出一个现有this对象类型的Bindable,也就是Bindable的应用类型(ResolvableType)是this,在本例中这个类型是:org.springframework.boot.SpringApplication。
public static <T> Bindable<T> ofInstance(T instance) {
		Assert.notNull(instance, "Instance must not be null");
		Class<T> type = (Class<T>) instance.getClass();
		// 重点在这里
		return of(type).withExistingValue(instance);
	}
先进入of(type)方法:
public static <T> Bindable<T> of(Class<T> type) {
		Assert.notNull(type, "Type must not be null");
		// of里面的作用是获得type的泛型类型,type的实际类型是SpringApplication.class
		return of(ResolvableType.forClass(type));
	}
这里先讲一下ResolvableType :
ResolvableType 是Spring4新特性,是更好的Java泛型操作API。ResolvableType在Type的基础上,封装了我们常用的一些操作,使得我们对Java类型的操作变得更加简单。所以ResolvableType.forClass(type)只是得到了一个封装了SpringApplication.class的ResolvableType对象,便于of方法对其进行操作。
public static <T> Bindable<T> of(ResolvableType type) {
		Assert.notNull(type, "Type must not be null");
		ResolvableType boxedType = box(type);
		// 构造Bindable对象,参数依次为:
		// 原始类型,装箱类型,值为null,没有注解
		return new Bindable<>(type, boxedType, null, NO_ANNOTATIONS);
	}
进入box()方法,此方法实际上是对基本类型进行处理,使其成为装箱类型:
private static ResolvableType box(ResolvableType type) {
		Class<?> resolved = type.resolve();
		// 如果是基本类型,创建一个数组,拿到数组第一个元素的的包装类型
		if (resolved != null && resolved.isPrimitive()) {
			Object array = Array.newInstance(resolved, 1);
			Class<?> wrapperType = Array.get(array, 0).getClass();
			return ResolvableType.forClass(wrapperType);
		}
			// 如果是数组,拿到数组第一个元素的的包装类型
		if (resolved != null && resolved.isArray()) {
			return ResolvableType.forArrayComponent(box(type.getComponentType()));
		}
		// 都不是,直接返回类型
		return type;
	}
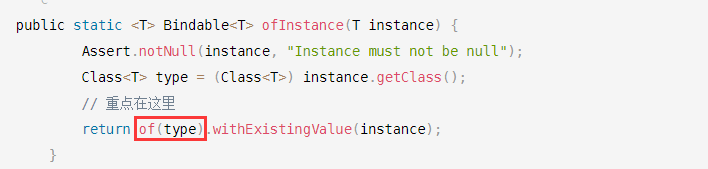
至此,上图矩形框位置跟踪完成。进入withExistingValue(instance)方法:
public Bindable<T> withExistingValue(T existingValue) {
		Assert.isTrue(
				existingValue == null || this.type.isArray() || this.boxedType.resolve().isInstance(existingValue),
				() -> "ExistingValue must be an instance of " + this.type);
		Supplier<T> value = (existingValue != null) ? () -> existingValue : null;
		return new Bindable<>(this.type, this.boxedType, value, this.annotations);
	}
可以看出,是根据前面得到的ResolvableType对象值是否合法进行过滤。这里面需要注意函数式接口Supplier的使用。不赘述,加一个例子代码,便于对比理解:
public class DemoNumberMax {
    public static void main(String[] args) {
        arrayMax();
    }
    /**
     * 获取一个泛型参数指定类型的对象数据
     * @return 指定类型的对象数据
     */
    public static int arrayMax() {
        int[] numbers = {100, 200, 300, 400, 500, -600, -700, -800, -900, -1000};
        Supplier<Integer> numberMax =
                (() -> {
                    int max = numbers[0];
                    for (int number : numbers) {
                        if (max < number) {
                            max = number;
                        }
                    }
                    return max;
                });
        System.out.println("数组中的最大值为:" + numberMax);
        return numberMax.get();
    }
}
经过一大段,返回到这个代码位置:

现在可以好好解释这个bind方法的含义了:
(1)左边部分的Binder.get(environment):从环境中创建出一个新的Binder实例。具体来说,是根据环境对象中的可配置的属性源以及与其对应的属性源占位符解析器、属性转换器、属性编辑器初始化器、默认绑定处理器、绑定构造器提供器来构造这个新的Binder实例。
(2)右边部分的"spring.main", Bindable.ofInstance(this):name是要绑定的配置属性名称,Bindable.ofInstance(this)则根据org.springframework.boot.SpringApplication类型得到相应的Bindable对象。
这样大费周章是为了解耦。
所以就有了方法注释上那句话:把environment对象同SpringApplication对象绑定(在比较靠上的代码注释里面)。
进入bind,跟踪到这里:
private <T> T bind(ConfigurationPropertyName name, Bindable<T> target, BindHandler handler, boolean create) {
   	Assert.notNull(name, "Name must not be null");
   	Assert.notNull(target, "Target must not be null");
   	handler = (handler != null) ? handler : this.defaultBindHandler;
   	Context context = new Context();
   	// 允许递归绑定属性值设为false
   	return bind(name, target, handler, context, false, create);
   }
需要解释一下上面的Context 对象,它是Binder类的内部类,Binder上下文。含有如下属性:
final class Context implements BindContext {
		// 绑定转化器
		private final BindConverter converter;
		// 深度
		private int depth;
		// 属性源集合
		private final List<ConfigurationPropertySource> source = Arrays.asList((ConfigurationPropertySource) null);
		// 推入队列的资源数
		private int sourcePushCount;
		// 数据对象绑定集合
		private final Deque<Class<?>> dataObjectBindings = new ArrayDeque<>();
		// 构造器绑定集合
		private final Deque<Class<?>> constructorBindings = new ArrayDeque<>();
		// 配置属性对象
		private ConfigurationProperty configurationProperty;
需要讲一下ArrayDeque:
ArrayDeque是双端队列,通过循环数组实现队列功能。主要特点如下:
(1)底层通过循环数组实现,有两个重要属性 head (头)和tail(尾);
(2)不能添加null值,否则会报空指针;
(3)每次扩容都是2的n次方;
(4)可以实现普通队列先进先出排序,这时候比LinkedList快;也可以实现栈先进后出的排序,这时候比Stack快。
(5)特别留意,它里面通过二进制方式判断数组是否已满(tail = (tail + 1) & (elements.length - 1)) == head
(6) 非线程安全。
回到主线继续跟踪Binder类的bind()方法:
private <T> T bind(ConfigurationPropertyName name, Bindable<T> target, BindHandler handler, Context context,
			boolean allowRecursiveBinding, boolean create) {
			// 清除配置属性
		context.clearConfigurationProperty();
		try {
			// replacementTarget是org.springframework.boot.SpringApplication类型的Bindable对象
			Bindable<T> replacementTarget = handler.onStart(name, target, context);
			if (replacementTarget == null) {
				return handleBindResult(name, target, handler, context, null, create);
			}
			target = replacementTarget;
			Object bound = bindObject(name, target, handler, context, allowRecursiveBinding);
			// 处理绑定结果
			return handleBindResult(name, target, handler, context, bound, create);
		}
		catch (Exception ex) {
			return handleBindError(name, target, handler, context, ex);
		}
	}
bindObject()方法:
private <T> Object bindObject(ConfigurationPropertyName name, Bindable<T> target, BindHandler handler,
			Context context, boolean allowRecursiveBinding) {
		// 根据name在context中寻找属性,就是在下图中寻找属性。
		ConfigurationProperty property = findProperty(name, context);
		// 如果属性未找到且没有子节点且深度不为0,就直接返回null,不要再找了。
		if (property == null && containsNoDescendantOf(context.getSources(), name) && context.depth != 0) {
			return null;
		}
		// 判断目标类是不是集合类型(Maps, Lists, Arrays),如果是,各有确定的绑定器
		AggregateBinder<?> aggregateBinder = getAggregateBinder(target, context);
		if (aggregateBinder != null) {
			return bindAggregate(name, target, handler, context, aggregateBinder);
		}
		// 先简单绑定一波,不行再绑定对象
		if (property != null) {
			try {
				return bindProperty(target, context, property);
			}
			catch (ConverterNotFoundException ex) {
				// We might still be able to bind it using the recursive binders
				Object instance = bindDataObject(name, target, handler, context, allowRecursiveBinding);
				if (instance != null) {
					return instance;
				}
				throw ex;
			}
		}
		// 下面看这个方法
		return bindDataObject(name, target, handler, context, allowRecursiveBinding);
	}
这是执行SpringApplication类中的ConfigurationPropertySources.attach(environment);语句时候的属性列表:

这是执行BInder类中的ConfigurationProperty property = findProperty(name, context);方法时的属性列表。可见注入的属性在逐渐增多。

private Object bindDataObject(ConfigurationPropertyName name, Bindable<?> target, BindHandler handler,
			Context context, boolean allowRecursiveBinding) {
		/**
		* 如果是不可绑定类型,就算了。
		* 不可绑定的类型有如下情形:
		*  1.基本类型;
		*  2. Object.class和Class.class
		*  3. 类名以“java.”开始的
		*/
		if (isUnbindableBean(name, target, context)) {
			return null;
		}
		// 拿回目标类型
		Class<?> type = target.getType().resolve(Object.class);
		// 如果不允许递归绑定且对象已经绑定过了,也算了。
		if (!allowRecursiveBinding && context.isBindingDataObject(type)) {
			return null;
		}
		DataObjectPropertyBinder propertyBinder = (propertyName, propertyTarget) -> bind(name.append(propertyName),
				propertyTarget, handler, context, false, false);
				// 向双端队列中加入绑定对象(type)。
				// 如果已有的dataObjectBinder 能够根据添加type绑定,则返回其类对象,否则返回null
		return context.withDataObject(type, () -> {
			for (DataObjectBinder dataObjectBinder : this.dataObjectBinders) {
				Object instance = dataObjectBinder.bind(name, target, context, propertyBinder);
				if (instance != null) {
					return instance;
				}
			}
			return null;
		});
	}
private <T> T withDataObject(Class<?> type, Supplier<T> supplier) {
			this.dataObjectBindings.push(type);
			try {
				return withIncreasedDepth(supplier);
			}
			finally {
			// 深度减一后把对象去掉
				this.dataObjectBindings.pop();
			}
		}

		private <T> T withIncreasedDepth(Supplier<T> supplier) {
			// 深度加一
			increaseDepth();
			try {
				return supplier.get();
			}
			finally {
			// 深度减一
				decreaseDepth();
			}
		}
下面看这个方法:

	private <T> T handleBindResult(ConfigurationPropertyName name, Bindable<T> target, BindHandler handler,
			Context context, Object result, boolean create) throws Exception {
		if (result != null) {
			result = handler.onSuccess(name, target, context, result);
			result = context.getConverter().convert(result, target);
		}
		if (result == null && create) {
			result = create(target, context);
			result = handler.onCreate(name, target, context, result);
			result = context.getConverter().convert(result, target);
			Assert.state(result != null, () -> "Unable to create instance for " + target.getType());
		}
		// 这里运行的是default方法,没有方法体
		handler.onFinish(name, target, context, result);
		// 进行转换
		return context.getConverter().convert(result, target);
	}
现在我们回到最开始的代码,下面进入这个矩形框:


 8871
8871


 被折叠的 条评论
为什么被折叠?
被折叠的 条评论
为什么被折叠?
 到【灌水乐园】发言


