


20190912
react design pro 设置构建路径
时间戳
import moment from 'moment';


const now = moment().format('YYYYMMDDHHmmss');
const dir = `web_${now}`;

export default {
  outputPath: dir,
  publicPath: `/static/${dir}/`,
20190904
react native 官方文档 https://reactnative.cn/docs/getting-started/
安装cli
npm install -g yarn react-native-cli
查看java 版本
javac -version
1.8
 安装 Android Studio
下载 android
https://developer.android.com/studio/index.html

配置 ANDROID_HOME 环境变量
vi ~/.bash_profile
# 如果你不是通过Android Studio安装的sdk,则其路径可能不同,请自行确定清楚。
export ANDROID_HOME=$HOME/Library/Android/sdk
export PATH=$PATH:$ANDROID_HOME/tools
export PATH=$PATH:$ANDROID_HOME/tools/bin
export PATH=$PATH:$ANDROID_HOME/platform-tools
export PATH=$PATH:$ANDROID_HOME/emulator
source $HOME/.bash_profile
echo $ANDROID_HOME
创建项目
react-native init video
npm config get registry  // 查看npm当前镜像源

npm config set registry https://registry.npm.taobao.org/  // 设置npm镜像源为淘宝镜像

yarn config get registry  // 查看yarn当前镜像源

yarn config set registry https://registry.npm.taobao.org/  // 设置yarn镜像源为淘宝镜像
20190827
http://ggeditor.com/README.zh-CN.html
图谱编辑器
20190730
react 组件属性取值
<Button data-rule={`rule${window.ruleNum}`}  onClick={this.showModal} />
showModal = e => {
	e.currentTarget.getAttribute("data-rule")
}
20190624
react 代码比对 文件比对
不要使用react-diff-code 存在样式污染问题 底层都是 html2diff
     sudo cnpm install react-gh-like-diff --save


import { ReactGhLikeDiff } from 'react-gh-like-diff';
import 'react-gh-like-diff/lib/diff2html.min.css';
        <ReactGhLikeDiff
        options={{
          originalFileName: fileName,
          updatedFileName:fileName
        }}
        past={fileBodyOld}
        current={fileBody}
      />
20190619
react 展示json
          sudo cnpm install --save react-json-view
          import ReactJson from 'react-json-view'
          <ReactJson src={jsonData} />

          参考 https://www.cnblogs.com/soyxiaobi/p/9713814.html
20190606
点击onclick 传参方法
可以用箭头函数:
...
onClick{(e) => this.itemClick(88)}
...
还可以把参数写在标签的属性上:

itemClick(e) {
	console.log(e.target.getAttribute('data-i'));
}
...
<div data-i="88" onClick={this.itemClick}>
...
20190605
react 跨域请求问题
npm install --save fetch-jsonp
import fetchJsonp from 'fetch-jsonp';
已读
     let url = 'http://xxxxx'
      fetchJsonp(url)
      .then(function(response) {
        return response.json()
      }).then(function(json) {
        console.log('parsed json', json)
      }).catch(function(ex) {
        console.log('parsing failed', ex)
      })
20190429
列表去除索引数据
let index = newData.findIndex(item => key === item.key)
 newData[index];
20190416
npm 淘宝镜像
npm  install  -g   cnpm --registry=https://registry.npm.taobao.org

npm install yarn -g
/home/tianyan/node-v10.15.1-linux-x64/bin/yarn -> /home/tianyan/node-v10.15.1-linux-x64/lib/node_modules/yarn/bin/yarn.js
/home/tianyan/node-v10.15.1-linux-x64/bin/yarnpkg -> /home/tianyan/node-v10.15.1-linux-x64/lib/node_modules/yarn/bin/yarn.js
+ yarn@1.15.2

创建链接
 sudo ln -s /home/tianyan/node-v10.15.1-linux-x64/bin/yarn /usr/local/bin/yarn
20190411
map 变量非空时遍历组件
{this.state.data.map(item => (
	<div>{item.name}</div>
                                       ))
20190409
react echarts
https://segmentfault.com/a/1190000015650277
高德地图
REACT-AMAP
npm install --save react-amap
github地址
https://github.com/ElemeFE/react-amap
组件文档
https://elemefe.github.io/react-amap/components/map
自定义组件
https://elemefe.github.io/react-amap/articles/extend
高德官方文档  中国地图
https://lbs.amap.com/api/loca-api/demos/loca/loca_create
js 调用引入文件
document.write("<script type='text/javascript' src='b.js'></script>");


var newscript = document.createElement('script');
newscript.setAttribute('type','text/javascript');
newscript.setAttribute('src','b.js');
var head = document.getElementsByTagName('head')[0];
head.appendChild(newscript);
function a(){
	b();
}
react 引用外部js文件
<script src="https://cdn.bootcss.com/echarts/4.1.0/echarts.min.js"></script>
<script src="http://gallery.echartsjs.com/dep/echarts/map/js/china.js"></script>

先在webpack的配置文件webpackrc里添加一行配置
externals: {
    AMap: 'AMap',
    AMapUI: 'AMapUI',
    ECharts: 'echarts',
  },

import ECharts from 'ECharts';

react 代码
<div style={{ width: '400px', height: '400px' }} ref={this.setMapElement} />
setMapElement = n => {
    this.mapNode = n;
  };
`
componentDidMount() {
    this.createMap(this.mapNode);
  }
createMap = element => {
    const myChart = ECharts.init(element);
    const option = {
      tooltip: {
        trigger: 'item',
      },
      dataRange: {
        orient: 'horizontal',
        min: 0,
        max: 55000,
        text: ['高', '低'], // 文本,默认为数值文本
        splitNumber: 0,
        color: ['#2d70d6', '#80b5e9', '#e6feff'],
      },
      series: [
        {
          name: '2011全国GDP分布',
          type: 'map',
          mapType: 'china',
          mapLocation: {
            x: 'left',
          },
          // selectedMode: 'multiple',
          itemStyle: {
            normal: { label: { show: true, color: '#333' }, borderWidth: 0 },
            // emphasis: { label: { show: true } },
            // borderWidth: 0,
            // borderColor: '#eee',
          },
          data: [
            { name: '西藏', value: 605.83 },
            { name: '青海', value: 1670.44 },
            { name: '宁夏', value: 2102.21 },
            { name: '海南', value: 2522.66 },
            { name: '甘肃', value: 5020.37 },
            { name: '贵州', value: 5701.84 },
            { name: '新疆', value: 6610.05 },
            { name: '云南', value: 8893.12 },
            { name: '重庆', value: 10011.37 },
            { name: '吉林', value: 10568.83 },
            { name: '山西', value: 11237.55 },
            { name: '天津', value: 11307.28 },
            { name: '江西', value: 11702.82 },
            { name: '广西', value: 11720.87 },
            { name: '陕西', value: 12512.3 },
            { name: '黑龙江', value: 12582 },
            { name: '内蒙古', value: 14359.88 },
            { name: '安徽', value: 15300.65 },
            { name: '北京', value: 16251.93, selected: true },
            { name: '福建', value: 17560.18 },
            { name: '上海', value: 19195.69, selected: true },
            { name: '湖北', value: 19632.26 },
            { name: '湖南', value: 19669.56 },
            { name: '四川', value: 21026.68 },
            { name: '辽宁', value: 22226.7 },
            { name: '河北', value: 24515.76 },
            { name: '河南', value: 26931.03 },
            { name: '浙江', value: 32318.85 },
            { name: '山东', value: 45361.85 },
            { name: '江苏', value: 49110.27 },
            { name: '广东', value: 53210.28, selected: true },
          ],
        },
      ],
      animation: false,
    };
    myChart.setOption(option, true);
  };

``

### 20190303
表格 鼠标经过显示趋势图
http://www.voidcn.com/article/p-xqdvkdvd-bqt.html
#-------------20190219------------
时间排序
sorter: (a, b) => Date.parse(a.eventtime.replace(’-’,’/’).replace(’-’,’/’)) - Date.parse(b.eventtime.replace(’-’,’/’).replace(’-’,’/’))
#-------------20190212------------
render引用外部函数
const checkProjectId = this.checkProjectId
表格 行号设置key rowkey
####2019-01-31
异步数据调用promise
  getData = (url) => {
      let promise = new Promise((resolve,reject) => {
        try{
            fetch(url).then(response => response.json())
                .then(res => {
                   resolve(res)
                })
          }catch(e){
                      Modal.warning(
                        {
                          title:'获取数据异常',
                          content:`${e}`
                        }
                      )
          }
      })
    return promise
}
####2019-01-27
父组件向子组件异步传值,第一次初始化会数据为空
子组件重新渲染只会执行render部门
解决办法,在render部分,做判断,当返回数据后,setstate 组件值
报错
Warning: Each record in dataSource of table should have a unique `key` prop, or set `rowKey` of Table to an unique primary key, see
解决办法: react table元素组件为设置keyz字段
####2019-01-20
导入组件报错
Element type is invalid: expected a string (for built-in components) or a class/function (for composite components) but got: undefined. You likely forgot to export your component from the file it's defined in, or you might have mixed up default and named imports.
解决办法
// import {ShowDrawerReport} from './components/ShowDrawerReport';
//导入引用修改如下 去掉{}   原因该组件return包含div
import ShowDrawerReport from './components/ShowDrawerReport';
2019-01-11
设置react 元素属性应使用小写
Warning: React does not recognize the `NameId` prop on a DOM element. If you intentionally want it to appear in the DOM as a custom attribute, spell it as lowercase `nameid` instead. If you accidentally passed it from a parent component, remove it from the DOM element.
2019-01-08
config/config.js 配置代理
export default {
  // add for transfer to umi
  publicPath:"/static/ant/",
  proxy:{
    "/api": {
      "target": "http://10.218.130.64:8000" ,
      "changeOrigin": true ,
    } ,
  } ,
ant design pro build之后部署后报错
TypeError: n.load is not a function
https://github.com/ant-design/ant-design-pro/issues/2317 使用 react-loadable 替代dva/dynamic
2018-12-29
查看包的版本
npm view d3 version
2018-12-28
生成随机数
“div_”+parseInt(Math.random()*100000)
react 调用d3
cnpm install d3 --save
import React, { PureComponent, Fragment } from 'react';
import * as d3 from 'd3';


export class D3UpgradeGuide extends React.Component {
  constructor(props) {
    super(props)
    this.state = {
      // d3Id:"div_"+parseInt(Math.random()*100000)
    }
    this.initCanvas = this.initCanvas.bind(this)
  }
  initCanvas() {
    console.log(this.state.d3Id)
    var width = 500;
		var height = 300;
    var dataset = d3.range(8);		//返回[0,1,2,3,4,5]
    var svg = d3.select('#D3UpgradeGuide').append("svg")
								.attr("width",width)
                .attr("height",height);
	var dataset = [ 250 , 210 , 170 , 130 , 90 ];

	var rectHeight = 50;	//每个矩形所占的像素高度(包括空白)

	svg.selectAll("rect")
		  .data(dataset)
		  .enter()
		  .append("rect")
		  .attr("x",50)//每个矩形的起始x坐标
		  .attr("y",function(d,i){//每个矩形的起始y坐标
				return i * rectHeight+20;
		  })
		  .attr("width",function(d){//每个矩形的宽度
		   		return d;
		  })
		  .attr("height",rectHeight-2)//每个矩形的高度
		  // .attr("fill","steelblue");//填充颜色
		  .attr("fill","#6666ff")//填充颜色 none
		  .attr("rx","10")//圆角
		  .attr("ry","10")//圆角
      .attr("style","stroke: #000000; stroke-width: 3")//边框色
      .attr("stroke-dasharray","10 5") //虚线
      .attr("fill-opacity","0.5") //透明度
  }

  // <rect xmlns="http://www.w3.org/2000/svg" x="115" y="10" width="50" height="40"
  // rx="10"
  // ry="10" style="stroke: #000000; stroke-width: 3;
  // fill: #6666ff;"/>


  componentDidMount() {
    this.initCanvas()
  }
  componentDidUpdate() {
    this.initCanvas()
  }
 render() {
    return (
      <div>
        {/* <div id={this.state.d3Id}></div> */}
        <div id="D3UpgradeGuide"></div>
      </div>
    )
  }
}
react 调用canvas
import React, { PureComponent } from 'react';
import { connect } from 'dva';
import { formatMessage, FormattedMessage } from 'umi/locale';
import {
  Form,
  Input,
  DatePicker,
  Select,
  Button,
  Card,
  InputNumber,
  Radio,
  Icon,
  Tooltip,
} from 'antd';
import PageHeaderWrapper from '@/components/PageHeaderWrapper';
import styles from './style.less';
import { runInThisContext } from 'vm';

export class ReactCanvas extends React.Component {
  constructor(props) {
    super(props)
    this.initCanvas = this.initCanvas.bind(this)
  }
  initCanvas() {
    const {
      x0,//原点坐标
      y0,
      r,// 半径
      lineWidth, // 画笔宽度
      strokeStyle, //画笔颜色
      LinearGradientColor1, //起始渐变颜色
      LinearGradientColor2, //结束渐变颜色
      Percentage,// 进度百分比
    } = this.props
    let ele = document.getElementById("time_graph_canvas")
    let circle = ele.getContext("2d");
    //创建背景圆
    circle.lineWidth = lineWidth;
    circle.strokeStyle = strokeStyle;
    circle.lineCap = 'round';
    circle.beginPath();//开始一个新的路径
    circle.arc(x0, y0, r, 0, 2 * Math.PI, false);///用于绘制圆弧context.arc(x坐标,y坐标,半径,起始角度,终止角度,顺时针/逆时针)
    circle.stroke();//对当前路径进行描边
    //创建渐变圆环
    // let g = circle.createLinearGradient(x0, 0, x0 + r * Math.cos(Percentage * (Math.PI * 2)), y0 + r * Math.sin(this.props.Percentage * (Math.PI * 2)));  //创建渐变对象  渐变开始点和渐变结束点
    // g.addColorStop(0, LinearGradientColor1); //添加颜色点
    // g.addColorStop(1, LinearGradientColor2);
    circle.lineWidth = lineWidth //设置线条宽度
    circle.lineCap = 'round';
    // circle.strokeStyle = g;
    circle.strokeStyle = 'red';
    circle.beginPath();//开始一个新的路径
    circle.arc(x0, y0, r, -Math.PI / 2, -Math.PI / 2 - Percentage * (Math.PI * 2), true);
    circle.stroke();//对当前路径进行描边
  }

  componentDidMount() {
    this.initCanvas()
  }
  componentDidUpdate() {
    this.initCanvas()
  }
  static defaultProps = {
    canvaswidth: 160,// 画布宽度
    canvasheight: 160,// 画布高度
    x0: 80,
    y0: 80,
    r: 72,
    lineWidth: 16,
    strokeStyle: 'rgba(248, 248, 248, 1)',
    LinearGradientColor1: '#3EECED',
    LinearGradientColor2: '#499BE6'
  }
  render() {
    const { width, height, canvaswidth, canvasheight } = this.props
    return (
      <div style={{ width: width, height: height, padding: 10 }}>
        <canvas id="time_graph_canvas" width={canvaswidth} height={canvasheight}></canvas>
      </div>
    )
  }
}
2018-12-27
d3结合
cnpm install --save d3
mac react 开发环境
/Users/chenhaohao/web/ant/ant-design-pro-master
ant
umijs 打包配置
export default {
// add for transfer to umi
publicPath:"/static/ant/", //修改静态文件路径
plugins: [
npm run build
新菜单,加一个新的点
搜索框下拉 丰富选项 AutoComplete自动完成
右侧弹出框 drawer
时间轴timeline
弹出层 对话框 modal 1、点击提交按钮 加载中。。。 后关闭2、确认对话框 不点确认窗口无法关闭
右侧提醒框 Notification通知提醒框 全局提醒
Progress进度条
点击按钮需要进一步确认 Popconfirm气泡确认框 比如删除
区块的加载 Spin加载中
网页预加载站位图 Skeleton骨架屏
页面右侧导航菜单 Anchor锚点
Divider分割线
Badge徽标数 
报告目录树
2018-12-26
父组件向子组件传值
)
子组件render(){
this.props.select
constructor(props) {
super(props);
this.state = {
beforProduct: props.beforProduct,
};
}
箭头函数
const showFun = e => this.setState({productShow:e})
子组件向父组件传值
react中state改变了,组件才会update。父写好state和处理该state的函数,同时将函数名通过props属性值的形式传入子,子调用父的函数,同时引起state变化。子组件要写在父组件之前
//class BasicForms extends PureComponent {
  constructor(props){
  super(props);
  this.state = {
    isToggleOn:true,
    display:"block"
  };
  this.displayFun = this.displayFun.bind(this)
  }
displayFun(){
  console.log(11111111)
  console.log(this.state)
  let displayStatus = ''
  this.state.isToggleOn ? displayStatus="block":displayStatus="none"

  this.setState(e => ({
    isToggleOn: !e.isToggleOn,
    display:displayStatus
  }));

 }

render(

          <Button onClick={this.displayFun}>显示隐藏{this.state.isToggleOn ? 'ON' : 'OFF'}</Button>
          <h1 style={{display:this.state.display}}>显示或隐藏 </h1>

)
constructor(props){
super(props);
this.state = {isToggleOn:true};
this.displayFun = this.displayFun.bind(this)
}
displayFun(){
console.log(11111111)
console.log(this.state)
this.setState(prevState => ({
isToggleOn: !prevState.isToggleOn
}));
// console.log(this.state)
// if(this.state.display == ‘none’){
// this.setState({
// display:‘block’,
// })}else if(this.state.display == ‘block’){
// this.setState({
// display:‘none’,
// })
// }
}
{this.state.isToggleOn ? ‘ON’ : ‘OFF’}
fetch(’/api/customer’)
.then(response => response.json())
.then(data => {
console.log(data)
});
2018-12-11
创建空数据 Array(9).fill(null)
react 设置变量
this.setState({squares: squares});
react 传递数据
constructor(props) {
super(props);
this.state = {
squares: Array(9).fill(null),
};
}
数组浅拷贝 非引用地址
a = Arrary(10).fill(0)
b = a.slice()
对象浅拷贝 :
a={1:1111111,2:22222222}
b={…a,1:22222111}
react 函数定义组件
function Square(props) {
return (
{props.value}
);
}
class Square extends React.Component {
render() {
return (
<button className=“square” onClick={() => this.props.onClick()}>
{this.props.value}
);
}
}
时间处理函数的写法
onClick={() => props.onClick()} 直接修改为 onClick={props.onClick}
三元表达式
constructor() {
super();
this.state = {
squares: Array(9).fill(null),
xIsNext: true,
};
}
squares[i] = this.state.xIsNext ? ‘X’ : ‘O’;
react 列表中的每一项添加一个 key 作为唯一的标识符
2018-12-10
npm install -g json-server
C:\Users\c\AppData\Roaming\npm\json-server -> C:\Users\c\AppData\Roaming\npm\node_modules\json-server\bin\index.js
- json-server@0.14.0
added 223 packages in 55.164s
json-server --watch db.json --port 3304
get 请求
fetch(“http://127.0.0.1:3304/records”).then(function(res){return res.json();}).then(function(json){console.log(json)})
spread operator …arg es6写法
组件声明周期
组件挂载后发起一个请求
axios 异步请求
yarn add axios
import axios from ‘axios’;
2018-12-09
Npm 清除缓存
sudo npm cache clean -f
sudo npm install -g n
Jest 是Facebook的一个专门进行Javascript单元测试的工具,适合React全家桶使用,
2018-12-08
reactstrap bootstrap的react封装
ant design 优点 1、快速高效2、简洁 3、依赖基础库 4、star3万
学习方法 1、看官方文档 2、练习
ant design pro 后台管理系统
ant design 脚手架市场
http://scaffold.ant.design/#/
问答ant
segmentfault.com/t/antd
ant design依赖组件
react-component.github.io/badgeboard
ant design 知乎专栏
使用 高级组件如何使用
sudo npm install antd-init -g
/usr/local/bin/antd-init -> /usr/local/lib/node_modules/antd-init/bin/antd-init
spawn-sync@1.0.15 postinstall /usr/local/lib/node_modules/antd-init/node_modules/spawn-sync
node postinstall
- antd-init@2.0.7
added 140 packages in 8.615s
cd /Users/chenhaohao/web/ant/ant-demo
antd-init
Write ./gitignore
Write ./index.css
Write ./index.html
Write ./index.js
Write ./package.json
Write ./webpack.config.js
use npm: cnpm
✔ Installed 20 packages
✔ Linked 827 latest versions
[fsevents] Success: “/Users/chenhaohao/web/ant/ant-demo/node_modules/_fsevents@1.2.4@fsevents/lib/binding/Release/node-v57-darwin-x64/fse.node” already installed
Pass --update-binary to reinstall or --build-from-source to recompile
✔ Run 3 scripts
peerDependencies link ajv@4.11.8 in /Users/chenhaohao/web/ant/ant-demo/node_modules/_ajv-keywords@1.5.1@ajv-keywords unmet with /Users/chenhaohao/web/ant/ant-demo/node_modules/ajv(6.6.1)
peerDependencies WARNING eslint-config-airbnb@12.0.0 › eslint-config-airbnb-base@^8.0.0 requires a peer of eslint-plugin-import@^1.16.0 but eslint-plugin-import@2.14.0 was installed
peerDependencies WARNING eslint-config-airbnb@^12.0.0 requires a peer of eslint-plugin-import@^1.16.0 but eslint-plugin-import@2.14.0 was installed
deprecate dora-plugin-webpack@0.8.1 › npm-install-webpack-plugin-cn@2.0.4 › cross-spawn@2.2.3 › cross-spawn-async@^2.2.2 cross-spawn no longer requires a build toolchain, use it instead
deprecate atool-build@0.9.3 › autoprefixer@6.7.7 › browserslist@^1.7.6 Browserslist 2 could fail on reading Browserslist >3.0 config used in other tools.
deprecate atool-test-mocha@0.1.8 › babel-preset-es2015@~6.3.13 ??? Thanks for using Babel: we recommend using babel-preset-env now: please read babeljs.io/env to update!
deprecate atool-test-mocha@0.1.8 › sinon@1.17.7 › formatio@1.1.1 This package is unmaintained. Use @sinonjs/formatio instead
deprecate eslint@3.19.0 › file-entry-cache@2.0.0 › flat-cache@1.3.4 › circular-json@^0.3.1 CircularJSON is in maintenance only, flatted is its successor.
Recently updated (since 2018-12-01): 15 packages (detail see file /Users/chenhaohao/web/ant/ant-demo/node_modules/.recently_updates.txt)
✔ All packages installed (960 packages installed from npm registry, used 26s(network 25s), speed 1.54MB/s, json 847(2.03MB), tarball 36.8MB)
cnpm install end
antd-init@2 仅适用于学习和体验 antd,如果你要开发项目,推荐使用 create-umi 进行项目初始化。umi 是一个可插拔的企业级 React 前端应用框架,已在生产环境广泛应用。
antd-init@2 is only for experience antd. If you want to create projects, it’s better to init with create-umi. umi is a pluggable enterprise-level react application framework.
Usage:
mkdir myapp && cd myapp
yarn create umi
Visit https://github.com/umijs/create-umi/ to learn more.
vi package.json
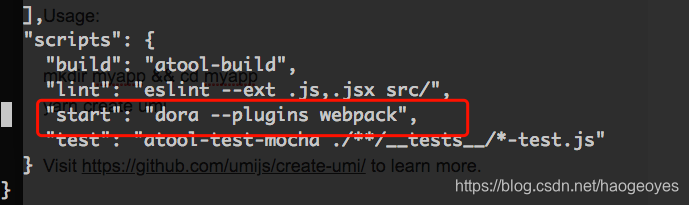
dora 为插件式服务器 用于开发环境
sudo npm start
Password:
@ start /Users/chenhaohao/web/ant/ant-demo
dora --plugins webpack
dora: listened on 8000
? 253/253 build modules
webpack: bundle build is now finished.
http://127.0.0.1:8000/
安装
$ git clone https://github.com/ant-design/ant-design-pro.git --depth=1
$ cd ant-design-pro
$ npm install
$ npm start # 访问 http://localhost:8000
2018-11-29
下载react 样例
git clone git@github.com:ruanyf/react-demos.git
本地链接
file:///Users/chenhaohao/web/react/react_demo/react-demos/
<!DOCTYPE html>
<html>
  <head>
    <script src="../build/react.js"></script>
    <script src="../build/react-dom.js"></script>
    <script src="../build/browser.min.js"></script>
  </head>
  <body>
    <div id="example"></div>
    <script type="text/babel">
      // ** Our code goes here! **
    </script>
  </body>
</html>
JSX 语法
var names = ['Alice', 'Emily', 'Kate'];

ReactDOM.render(
  <div>
  {
    names.map(function (name) {
      return <div>Hello, {name}!</div>
    })
  }
  </div>,
  document.getElementById('example')
);
var arr = [
  <h1>Hello world!</h1>,
  <h2>React is awesome</h2>,
];
ReactDOM.render(
  <div>{arr}</div>,
  document.getElementById('example')
);
组件component 封装代码
var HelloMessage = React.createClass({
  render: function() {
    return <h1>Hello {this.props.name}</h1>;
  }
});

ReactDOM.render(
  <HelloMessage name="John" />,
  document.getElementById('example')
);
this.props.name 获取属性值 ,class 属性需要写成 className
this.props.children 如果当前组件没有子节点,它就是 undefined ;如果有一个子节点,数据类型是 object ;如果有多个子节点,数据类型就是 array
      var NotesList = React.createClass({
        render: function() {
          console.log(this.props.children[0].props.children)
          return (
            <ol>
              {
                React.Children.map(this.props.children, function (child) {
                  return <li>{child}</li>;
                })
              }
            </ol>
          );
        }
      });

      ReactDOM.render(
        <NotesList>
          <span>hello</span>
          <span>world</span>
        </NotesList>,
        document.getElementById('example')
      );
验证输入参数ProTypes React.ProTypes.string
官网类型http://facebook.github.io/react/docs/reusable-components.html
      var data = 123;

      var MyTitle = React.createClass({
        propTypes: {
          title: React.PropTypes.string.isRequired,
        },

        render: function() {
          return <h1> {this.props.title} </h1>;
        }
      });

      ReactDOM.render(
        <MyTitle title={data} />,
        document.getElementById('example')
      );
var MyTitle = React.createClass({
  getDefaultProps : function () {
    return {
      title : 'Hello World'
    };
  },
 设置默认值
 <MyTitle />
虚拟Dom
组件为内存中的数据结构叫虚拟Dom ,插入文档时才会是真实的Dom。
React原理先在虚拟Dom中改变,再映射到到真实Dom通过算法DOM diff
极大提高了网页性能
获取网页真实属性ref
学些帖http://www.ruanyifeng.com/blog/2015/03/react.html


 516
516


 被折叠的 条评论
为什么被折叠?
被折叠的 条评论
为什么被折叠?
 到【灌水乐园】发言


