


一、JNI开发
为了使Java代码能够直接与Native 交互,Android提供了JNI技术。
关于概念性的东东直接百度了解一下好了。
二、在Android中开始JNI开发
首先Android Studio中新建一个JNI项目
在gradle文件下添加:
sourceSets {
        main {
            jni {
                srcDirs 'src\\main\\jni'
            }
        }
    }
构建一个jni文件夹,用于 存放自己的cpp文件

然后建立一个CMakeLists.txt文件,用来编译生成lib
# Sets the minimum version of CMake required to build your native library.
# This ensures that a certain set of CMake features is available to
# your build.

cmake_minimum_required(VERSION 3.4.1)

# Specifies a library name, specifies whether the library is STATIC or
# SHARED, and provides relative paths to the source code. You can
# define multiple libraries by adding multiple add_library() commands,
# and CMake builds them for you. When you build your app, Gradle
# automatically packages shared libraries with your APK.

add_library( # Specifies the name of the library.
             native-lib

             # Sets the library as a shared library.
             SHARED

             # Provides a relative path to your source file(s).
             src/main/jni/{替换成自己的cpp文件名}.cpp)
find_library( # Defines the name of the path variable that stores the
        # location of the NDK library.
        log-lib

        # Specifies the name of the NDK library that
        # CMake needs to locate.
        log )
# Links your native library against one or more other native libraries.
target_link_libraries( # Specifies the target library.
        native-lib

        # Links the log library to the target library.
        ${log-lib} )
然后在java文件 下建立自己要调用的方法接口文件
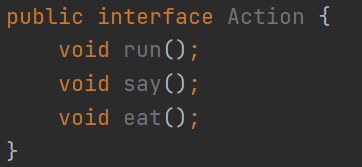
然后实现这个接口即可。
public class PeopleAction implements Action {

    static {
        System.loadLibrary("native-lib");
    }
    public native void run();
    public native void say();
    public native void eat();
}
这样就可以啦,整挺好。


 1568
1568


 被折叠的 条评论
为什么被折叠?
被折叠的 条评论
为什么被折叠?
 到【灌水乐园】发言


