


虚拟机安装
1.图形界面安装
超级用户输入virt-manager进入虚拟的控制面板根据文字指引进行虚拟机的安装以及初始化配置
管理
virt-manager ##开启图形管理工具
virt-viewer vmname ##显示虚拟机,vmname表示虚拟机名称
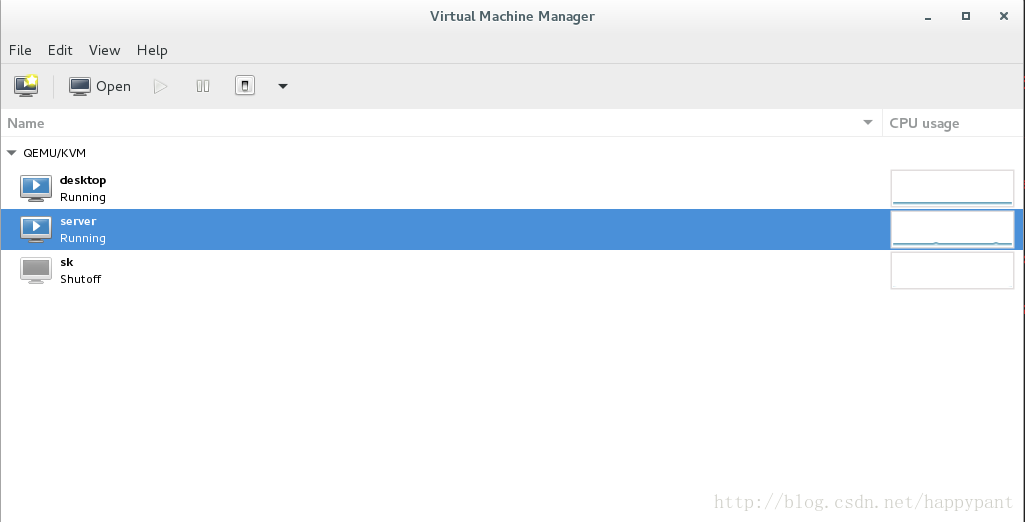
virsh list ##列出正在运行的vm
virsh list --all ##列出所有vm
virsh start vmname ##运行指定vm
virsh shutdown vmname ##正常关闭指定vm
virsh destroy vmname ##强行结束指定vm
virsh create vmname.xml ##临时恢复指定vm,vmname表示前端管理文件
virsh define vmname.xml ##永久恢复vm
virsh undefine vmname ##删除vm的前端管理,不会删除存储直间进入安装界面脚本
#!/bin/bash ##命令运行环境的指定
virt-install \ ##安装虚拟机
--name $1 \ ##虚拟机名称指定,$1表示脚本后的第一串字符
--ram 1000 \ ##内存
--file /var/lib/libvirt/images/$1.img \ ##硬盘文件
--file-size 8 \ ##硬盘文件大小
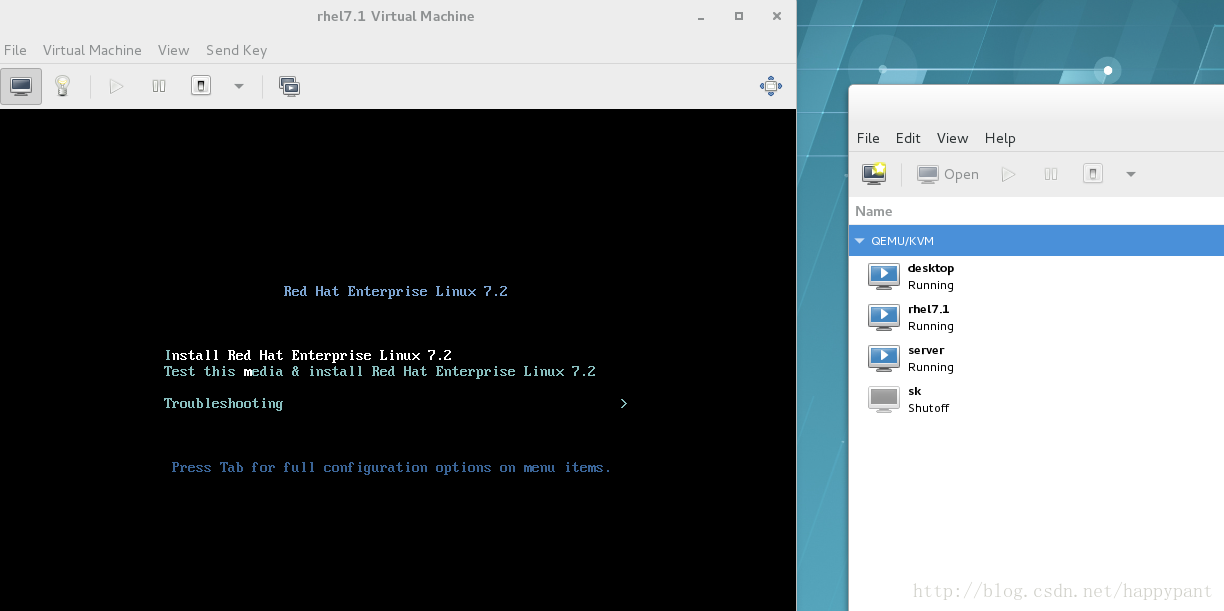
--cdrom /rhel-server-7.1-x86_64-dvd.iso & ##安装源指定可以发现虚拟机rhel7.1在在安装,虚拟机控制面板已经出现rhel7.1,表明已经使用内存
2.一键安装虚拟机
所需要的服务
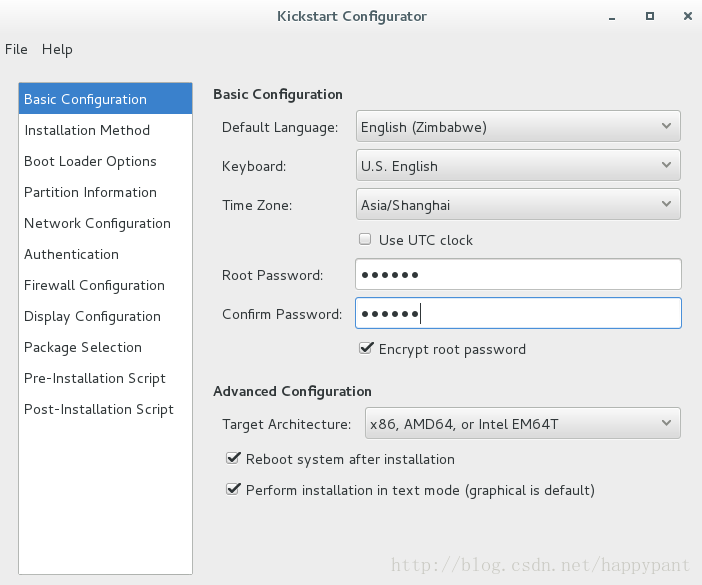
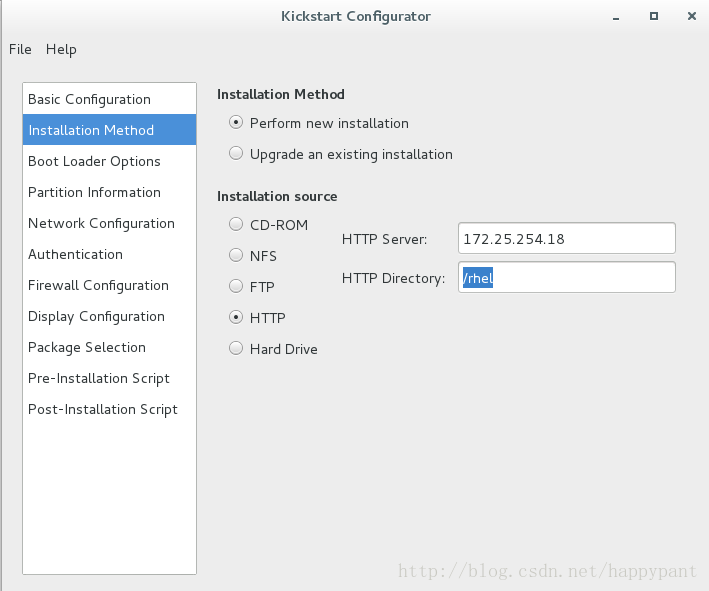
system-config-kickstart
httpd
开启httpd服务:
systemctl stop firewalld    #关闭防火墙
systemctl start httpd       #开启httpd
systemctl status httpd      #查看httpd的状态
开启httpd后,主页在本机/var/www/html/下,因此要将所要安装的镜像移进主页以下
mkdir /var/www/html/rhel ; mount /rhel-server-7.2-x86_64-dvd.iso /var/www/html/rhel #把镜像挂载带主页下的rhel中配置自动安装
system-config-kickstart
把配置完的信息保存为ks.cfg文件,并且放到可以被访问到的服务或者目录下
##ks.cfg文件
#platform=x86, AMD64, or Intel EM64T
#version=DEVEL
# Install OS instead of upgrade
install #安装操作系统
# Keyboard layouts
keyboard 'us' #美式键盘布局
# Root password
rootpw --iscrypted $1$A3vhYrc8$mISo4Or6RZkMkWOusdEkE.
# System timezone
timezone Africa/Abidjan #时区
# Use network installation
url --url="http://172.25.254.36/rhel" #使用172.25.254.18下的安装源
# System language
lang en_US #系统语言为英文
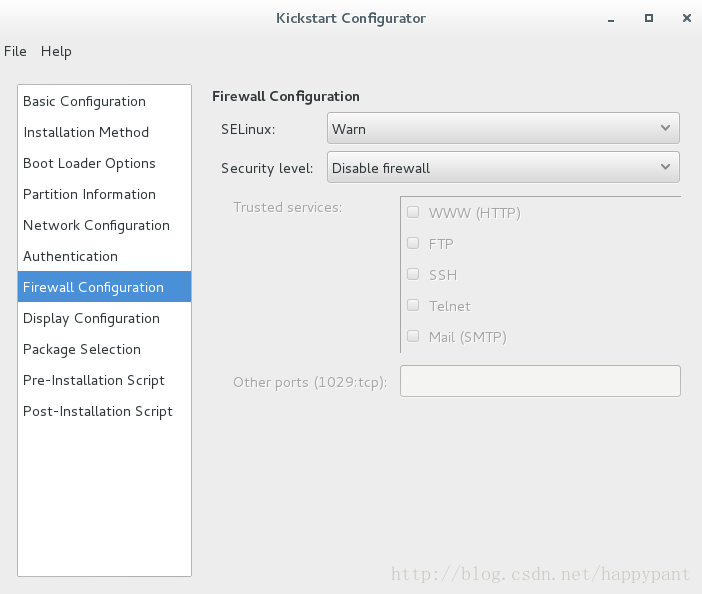
# Firewall configuration
firewall --disabled #默认关闭防火墙
# System authorization information #授权信息
auth --useshadow --passalgo=sha512
# Use text mode install
text
# SELinux configuration
selinux --disabled #关闭selinux配置
# Do not configure the X Window System
skipx #
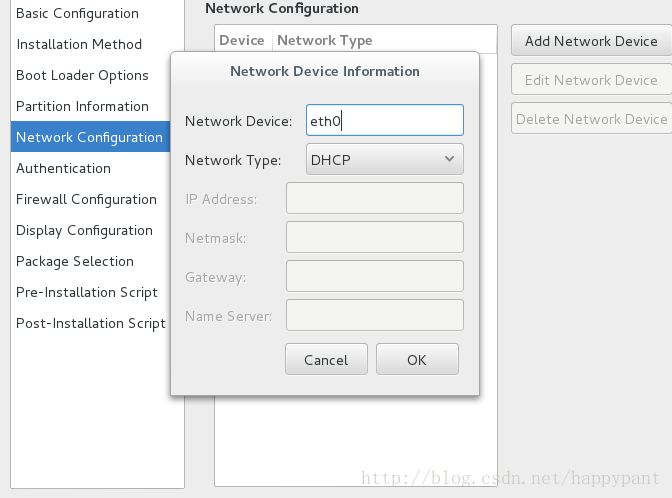
# Network information
network --bootproto=dhcp --device=eth0 #使用的网卡信息
# Reboot after installation
reboot #安装后重启
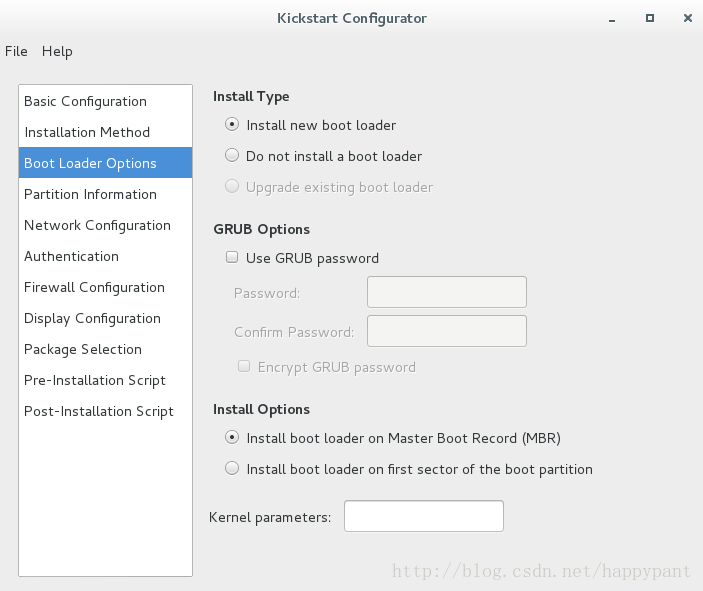
# System bootloader configuration
bootloader --location=mbr
# Clear the Master Boot Record
zerombr #清除引导记录
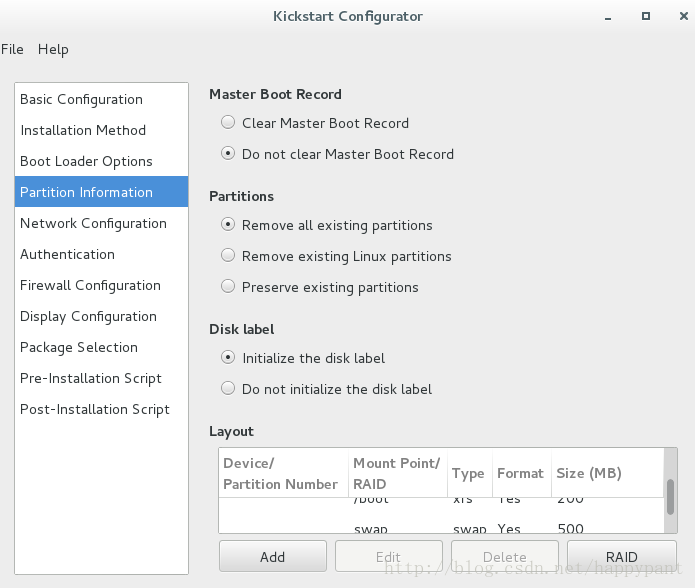
# Partition clearing information
clearpart --all --initlabel
# Disk partitioning information
part /boot --fstype="xfs" --size=200
part swap --fstype="swap" --size=500
part / --fstype="xfs" --grow --size=1
目前为止,httpd所需要的自动安装配置及安装文件已经配置完毕,最后结合自动应答脚本写一个虚拟机自动安装程序即可
 #!/bin/bash
 virt-install \
 --name $* \
 --vcpus 1 \
 --ram 1024 \
 --file /var/lib/libvirt/images/$*.qcow2 \
 --file-size 8 \
 --location http://172.25.254.18/rhel \
 --extra-args "ks=http://172.25.254.18/ks.cfg" &

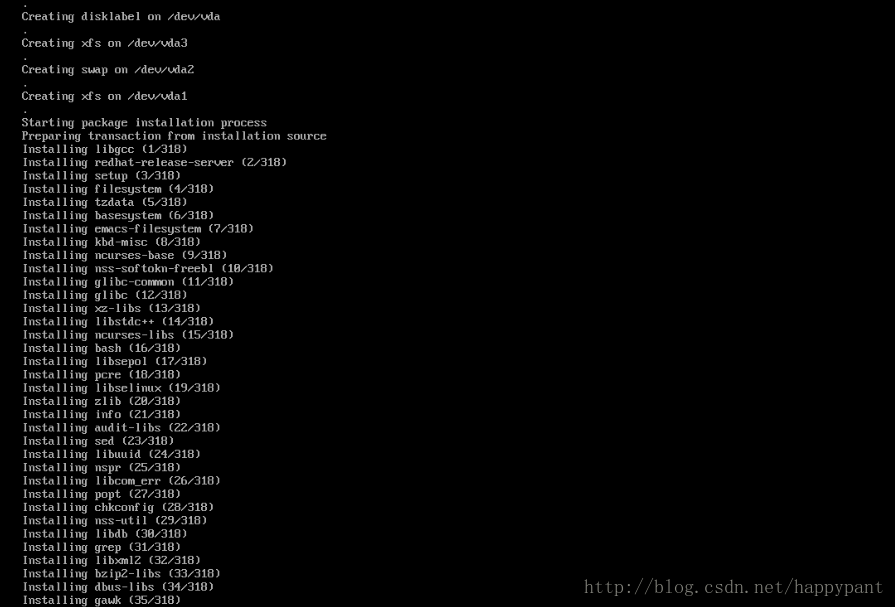
正在安装


 3680
3680


 被折叠的 条评论
为什么被折叠?
被折叠的 条评论
为什么被折叠?
 到【灌水乐园】发言


