


一、UIImageView和UIImage
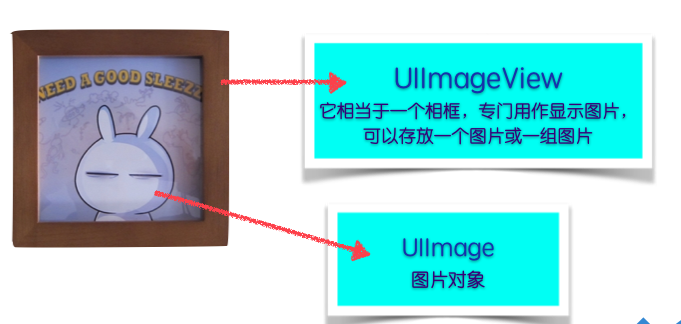
UIImageView是iOS中用于显示图片的类,UIImage是用于存储图片数据的类;iOS中几乎所有看到的图片数据都存储在UIImage中,同时所要的图片都是用UIImageView来显示;UIImageView和UIImage关系如下图:
二. 创建UIImageView的两种方式
1.自己设置图片位置和尺寸
“`
UIImageView *iv = [[UIImageView alloc] init]; //创建的图片, 没有默认的宽高
iv.backgroundColor = [UIColor redColor];
UIImage *image = [UIImage imageNamed:@”meinv.jpg”];
iv.image = image;
//自己设置图片位置和尺寸
iv.frame =  CGRectMake(100, 100, image.size.width, image.size.height);
[self.view addSubview:iv];
“`
2、使用默认图片尺寸和位置
    //默认宽高,为图片宽高,位置为0,0
    UIImageView *iv = [[UIImageView alloc]initWithImage:[UIImage imageNamed:@"meinv.jpg"]];

    //推荐设置iv的frame,以便于设置图片的摆放位置
    //iv = CGRectMake(100, 100, image.size.width, image.size.height);

    iv.backgroundColor = [UIColor redColor];
    [self.view addSubview:iv];
    NSLog(@"%@",NSStringFromCGRect(iv.frame));
三. ContentMode属性
typedef NS_ENUM(NSInteger, UIViewContentMode) {
    UIViewContentModeScaleToFill,
    UIViewContentModeScaleAspectFit,      // contents scaled to fit with fixed aspect. remainder is transparent
    UIViewContentModeScaleAspectFill,     // contents scaled to fill with fixed aspect. some portion of content may be clipped.
    UIViewContentModeRedraw,              // redraw on bounds change (calls -setNeedsDisplay)
    UIViewContentModeCenter,              // contents remain same size. positioned adjusted.
    UIViewContentModeTop,
    UIViewContentModeBottom,
    UIViewContentModeLeft,
    UIViewContentModeRight,
    UIViewContentModeTopLeft,
    UIViewContentModeTopRight,
    UIViewContentModeBottomLeft,
    UIViewContentModeBottomRight,
};

规律:
     但凡取值中包含Scale单词的, 都会对图片进行拉伸(缩放)
     但凡取值中没有出现Scale单词的, 都不会对图片进行拉伸
     UIViewContentModeScaleToFill,
     > 会按照UIImageView的宽高比来拉伸图片
     > 直到让整个图片都填充UIImageView为止
     > 因为是按照UIImageView的宽高比来拉伸, 所以图片会变形

规律:
     但凡取值中包含Aspect单词的, 都会按照图片的宽高比来拉伸
     > 因为是按照图片的宽高比来拉伸, 所以图片不会变形
     UIViewContentModeScaleAspectFit,
     > 会按照图片的宽高比来拉伸
     > 要求整张图片都必须在UIImageView的范围内
     > 并且宽度和高度其中一个必须和UIImageView一样
     > 居中显示

     UIViewContentModeScaleAspectFill,
     > 会按照图片的宽高比来拉伸
     > 要求整张图片必须填充UIImageView
     > 并且图片的宽度或者高度其中一个必须和UIImageView一样
四. 剪裁超出部分属性
    观察下面运行效果,理解clipsToBounds属性
    // 1.创建一个UIImageView
    UIImageView *iv = [[UIImageView alloc] init];
    // 2.设置相关属性
    iv.backgroundColor = [UIColor redColor];
    iv.image = [UIImage imageNamed:@"meinv.jpg"];
    iv.contentMode = UIViewContentModeLeft;
    // 3.设置frame
    iv.frame = CGRectMake(100, 100, 200, 200);

    // 剪切超出的部分
    iv.clipsToBounds = YES;
    [self.view addSubview:iv];
五. UIImageView动画
- (IBAction)run:(UIButton *)sender
{
    NSMutableArray *arrM = [NSMutableArray array];
    // 1.创建多张图片
    for (int i = 1; i <= 6; i++) {
        NSString *imageNmae = [NSString stringWithFormat:@"run_%i", i];
        UIImage *image = [UIImage imageNamed:imageNmae];
        // 2.将所有的图片放到数组中
        [arrM addObject:image];
    }
    // 3.将保存了所有图片的数组赋值给UIImageView
    self.containerView.animationImages = arrM;

    // 设置重复次数,0,代表无线
    self.containerView.animationRepeatCount = 1;

    //设置一次动画所需时间
    self.containerView.animationDuration = 1;

    // 开始动画
    [self.containerView startAnimating];
}

- (IBAction)stop:(id)sender {

     //判断是否正在动画
    if([self.containerView isAnimating])
    {
        //停止动画
        [self.containerView stopAnimating];
    }
}
六. UIImageView性能优化问题
问题描述: 如果直接用 UIImage *image = [UIImage imageNamed:imageNmae];加载图片,图片会自动到内存中缓存起来. 这时,当加载多张图片后,假如执行动画,就会导致,内存暴增,而且当动画执行完毕之后,也不会释放。
解决方案:
//使用initWithContentOfFile:方法直接从mainBundle,app根目录中加载图片,
//这样如果遇到上述问题,在执行完动画之后,图片会自动释放..

NSString *imageNmae = [NSString stringWithFormat:@"%@_%i", prefix, i];
imageNmae = [[NSBundle mainBundle] pathForResource:imageNmae ofType:@"png"];
UIImage *image = [[UIImage alloc] initWithContentOfFile:imageName];

代替UIImage *image = [UIImage imageNamed:imageNmae];
七. 图片拉伸
为什么要让图片拉伸?
如果我们要设置背景图片,如按钮,当我们直接实用图片时(有时美工也会给我们一张可拉伸小图片),可能图片会被系统拉伸变形,变得很丑,严重影响美观!
图片拉伸就是为了解决如上问题而存在的,让图片在拉伸时,保证图片不变形
图片拉伸历史过程:
- (void)viewDidLoad {
    [super viewDidLoad];

    UIButton *btn = [[UIButton alloc]init];
    btn.frame = CGRectMake(100, 100, 200, 100);
    //旧图片
    UIImage *image = [UIImage imageNamed:@"common_button_blue_highlighted"];

    //可以指定平铺还是拉伸,得到一张新图片
    //指定受保护的区域
    UIEdgeInsets insets = UIEdgeInsetsMake(5, 5, 5, 5);
    UIImage *newImage =  [image resizableImageWithCapInsets:insets resizingMode:UIImageResizingModeStretch];

    //按钮设置背景
    [btn setBackgroundImage:newImage forState:UIControlStateNormal];


    [self.view addSubview:btn];

}
对于图片的处理还有很多,大家可以上网搜索,这里给大家推荐一篇:
http://blog.csdn.net/hastar521/article/details/49122607


 218
218

 被折叠的 条评论
为什么被折叠?
被折叠的 条评论
为什么被折叠?
 到【灌水乐园】发言


