


Application Event介绍
Application Event是Spring提供的基于观察者模式的事件,该事件为Bean与Bean之间的消息通信提供了支持,是业务解耦的一种实现。当一个Bean处理完一个任务之后,可以通过Spring的ApplicationContext容器对事件进行发布,另一个Bean通过ApplicationListener来监听该事件进行业务逻辑处理。
HelloEvent同步示例
基于Application Event我们实现一个HelloEvent进行消息的发送和接收示例。
整体目录结构如下:

这是一个简单的Spring Boot项目工程,定义一个HelloEvent事件,定义一个HelloListener监听处理,定义一个HelloService进行消息事件的发送,再通过一个EventTest来调用HelloService进行消息的发送。另外一个ListenerAsncConfigurer后面揭晓,暂时跟它没关系。
代码实现如下:
package com.yrz.event;

import org.springframework.context.ApplicationEvent;

public class HelloEvent extends ApplicationEvent {

    private String str;

    public String getStr() {
        return str;
    }

    public HelloEvent(Object source, String str){
        super(source);
        this.str = str;
    }
}
package com.yrz.event;

import org.springframework.context.ApplicationListener;
import org.springframework.scheduling.annotation.Async;
import org.springframework.stereotype.Component;

@Component
public class HelloListener implements ApplicationListener<HelloEvent> {

    @Override
    public void onApplicationEvent(HelloEvent helloEvent) {
        System.out.println("开始处理事件消息...");
        try {
            Thread.sleep(5000);
            System.out.println(helloEvent.getStr());
        } catch (InterruptedException e) {
            e.printStackTrace();
        }
        System.out.println("消息处理结束...");
    }
}
package com.yrz.event;

import org.springframework.beans.factory.annotation.Autowired;
import org.springframework.context.ApplicationContext;
import org.springframework.stereotype.Service;

@Service
public class HelloService {

    @Autowired
    ApplicationContext applicationContext;

    public void publishEvent(String str){
        applicationContext.publishEvent(new HelloEvent(this, str));
    }

}
@SpringBootTest(classes= EventApplication.class)
public class EventTest {

    @Autowired
    private HelloService helloService;

    @Test
    public void test() throws IOException, InterruptedException {
        System.out.println("事件发送开始");
        helloService.publishEvent("event hello world");
        System.out.println("事件发送结束");

    }
}
运行结果如下:
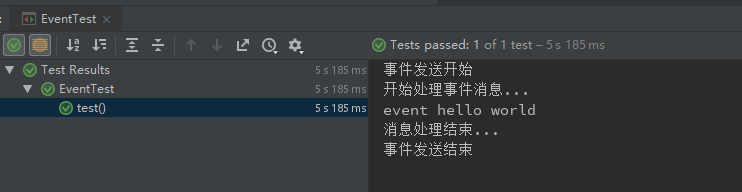
分析介绍,当helloService基于applicationContext发布了HelloEvent事件之后,HelloListener会接收到该事件消息,默认通过onApplicationEvent方法处理,该方法打印‘开始处理事件消息’,通过睡眠5s来模拟业务逻辑的处理,处理完毕后打印‘消息处理结束’,最终监听器处理完消息后,发布事件者才打印‘事件发送结束’,结束完流程。由此可以看到这整一个发布、订阅的过程是一个同步的过程,从代码解耦来看确实变的清晰了,发送方处理发送方逻辑,完了后发送一个事件消息,接收方接收到消息进行处理,各司其职。但如果我们想要异步处理呢?
HelloEvent异步示例
基于上面同步示例,咱们揭开ListenerAsyncConfigurer文件的面纱,看代码实现如下:
@Configuration
@EnableAsync
public class ListenerAsyncConfigurer implements AsyncConfigurer {

    @Override
    public Executor getAsyncExecutor() {
        ThreadPoolTaskExecutor executor = new ThreadPoolTaskExecutor();
        executor.setCorePoolSize(5);
        executor.setMaxPoolSize(10);
        executor.setQueueCapacity(25);
        executor.initialize();
        return executor;
    }
}
通过实现AsyncConfigurer 重写getAsyncExecutor来实现返回一个线程池,并配置支持异步。对,这个配置文件就是如此简单。然后在监听器的onApplicationEvent方法上配置一个注解@Async,完整代码如下:
@Component
public class HelloListener implements ApplicationListener<HelloEvent> {

    @Override
    @Async
    public void onApplicationEvent(HelloEvent helloEvent) {
        System.out.println("开始处理事件消息...");
        try {
            Thread.sleep(5000);
            System.out.println(helloEvent.getStr());
        } catch (InterruptedException e) {
            e.printStackTrace();
        }
        System.out.println("消息处理结束...");
    }
}
修改单元测试代码,添加主线程等待锁来看执行情况,完整代码如下:
@SpringBootTest(classes= EventApplication.class)
public class EventTest {

    static Object lock = new Object();

    @Autowired
    private HelloService helloService;

    @Test
    public void test() throws IOException, InterruptedException {
        System.out.println("事件发送开始");
        helloService.publishEvent("event hello world");
        System.out.println("事件发送结束");

        // 一直等待输入,控制线程不结束
        // System.in.read();

        // 锁的方式来使线程不结束
        synchronized (lock){
            lock.wait();
        }
    }
}
运行结果如下:

会发现我们的结果现实发布事件者在发布完事件后继续处理自己的业务逻辑,而HelloListener则在收到消息后异步进行处理打印消息。
总结
HelloEvent使用介绍完毕,可以满足我们的基本使用了。但说的只是基本,不妨多思考些问题,如果在订阅者需要处理海量数据的情况下,也就意味着消息发送者速率可能会远远快于订阅者,且需要订阅者保证消息顺序处理的情况下,该如何解决呢?我们再探索看有没有其它解决方案。


 1万+
1万+


 被折叠的 条评论
为什么被折叠?
被折叠的 条评论
为什么被折叠?
 到【灌水乐园】发言


