


目录
环境:
host Ubuntu16
guest Android avd
python 2.7
tips:
host 并不是特定的16 也可以是其他版本的
cuckoodroid 有三种不同的android emulator的设置 本文只介绍本人实际安装的一种
强烈建议在虚拟机上搞,用好snapshot功能,因为有些错误出现的莫名其妙
一、git升级
sudo add-apt-repository ppa:git-core/ppa
sudo apt-get update
sudo apt-get install git
纯净的虚拟机环境这一步是成功的 不需要换国内镜像源
二、依赖包的安装
感觉这里可以按照Ubuntu20.04系统Cuckoo sandbox所需环境搭建及安装(超详细图文)_ubuntu sandbox arm_RDrug的博客-CSDN博客
这里的包安装过程(只是安装包)
不需要创建cuckoo用户和分组,也不需要下载cuckoo
说明:SQLAlchemy这个包一定要0.9.9版本的 不然运行的时候会出错
这里也不需要设置iptables(我不知道咋设 过程中也没用上 所以暂时认为它是无用的)
三、android studio下载安装
cuckoodroid文档中写只要求下载android sdk工具,但这里与外网的安装视频有点小区别 单独安装sdk tools时 也出错了 索性就装了android studio
我用的是
android-studio-ide-173.4670197-linux.zip
如果要用新的android studio 也可以
这里需要注意的是一定要下载
sudo apt-get install openjdk-8-jre libstdc++6:i386 libgcc1:i386 zlib1g:i386 libncurses5:i386
下面就和文档要求差不多了
aosx的设置
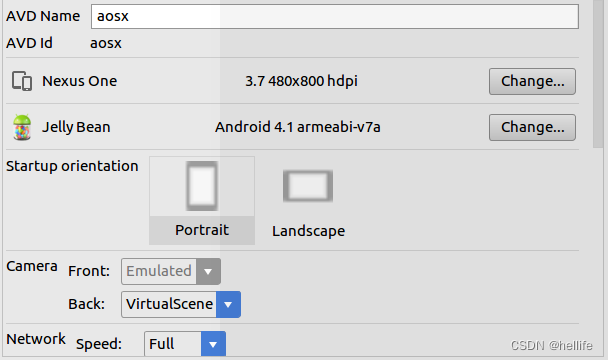
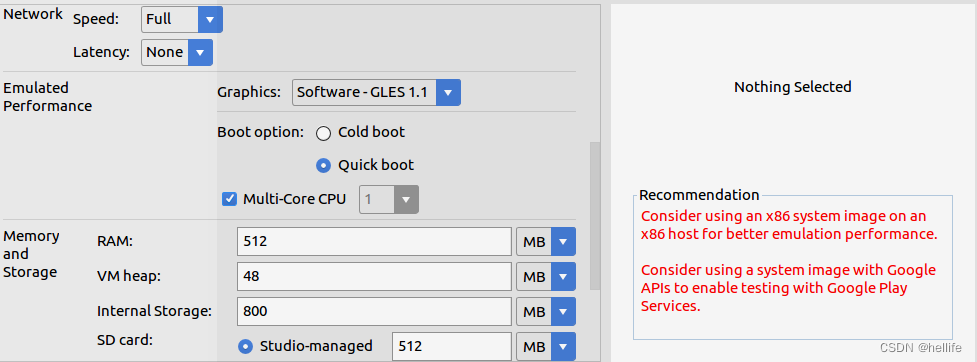

这里的graphics就是设置gpu选项 我这里只能选software 选hardware会出错
环境变量设置
sudo gedit ~/.bashrc
export PATH=$PATH:/home/zt/Android/Sdk/emulator:/home/zt/Android/Sdk/platform-tools:/home/zt/Android/Sdk/build-tools/27.0.3/:/home/zt/Android/Sdk/tools
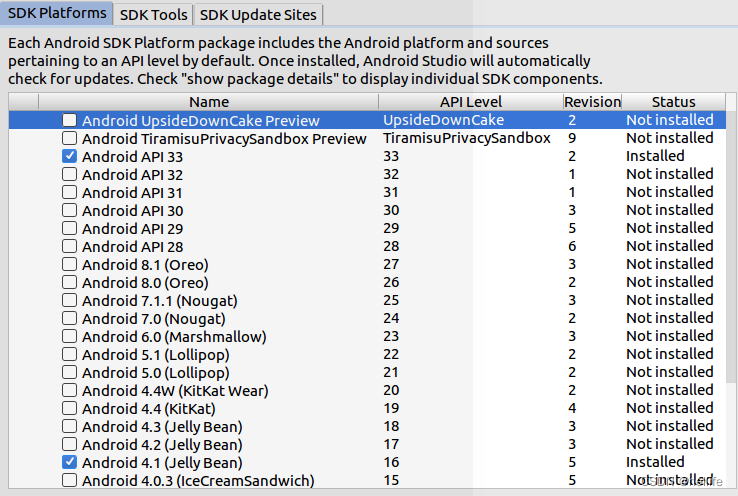
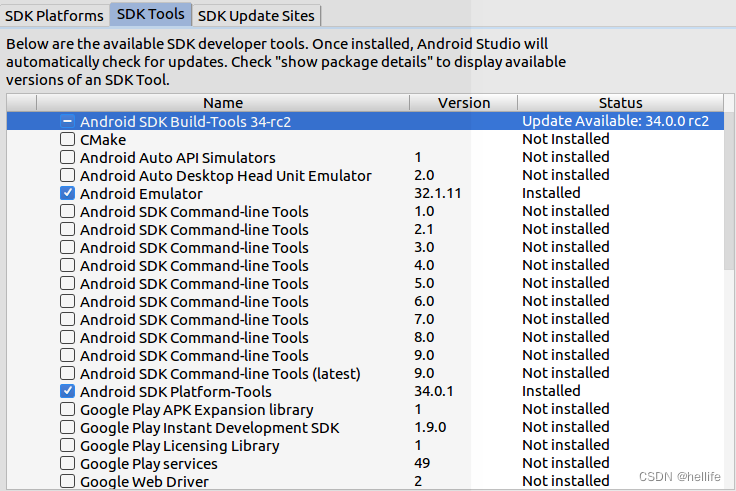
这里的build-tools不一定限定27.0.3,要根据下载的版本更改 至于其他版本会不会出错 就不知道了
如果要下这个版本 在sdk tools->show package details 选择这个版本下载
source ~/.bashrc
emulator @aosx -writable-system -system /home/zt/Android/Sdk/system-images/android-16/default/armeabi-v7a/system.img& -qemu
根据自己的路径更改上面的命令
打开emulator之后 打开 utils/android_emulator_creator/create_guest_avd.sh
更改

第二行的/python_agent/之后增加.
而后退出 运行create_guest_avd.sh
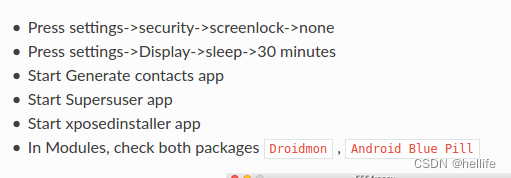
然后就和官网一样的设置
四、cuckoodroid下载
github 上直接搜cuckoodroid 取用点赞数最多的
git config --global user.email "you@example.com"
git config --global user.name "Your Name"
git clone --depth=1 https://github.com/cuckoobox/cuckoo.git cuckoo -b 1.2
cd cuckoo
git remote add droid https://github.com/idanr1986/cuckoo-droid
git pull --allow-unrelated-histories --no-edit -s recursive -X theirs droid master
cat conf-extra/processing.conf >> conf/processing.conf
cat conf-extra/reporting.conf >> conf/reporting.conf
rm -r conf-extra
echo "protobuf" >> requirements.txt
tips:
1.最上面的个人信息需要填写一下 不然下载不了
2.按照它的命令来 自己下载组装 有的东西会不一样 网慢的话 多尝试几次就会成功了
3.它的cuckoo sandbox版本是1.2并不是最新的2.0.7 尝试过升级 但没成功(如果有哪位成功了 可以传授一下)
4.这里有一个git 融合需要解决一下 错误名称不太记得了
五、conf 文件的配置
cuckoo.conf
[cuckoo]
# Enable or disable startup version check. When enabled, Cuckoo will connect
# to a remote location to verify whether the running version is the latest
# one available.
version_check = on# If turned on, Cuckoo will delete the original file after its analysis
# has been completed.
delete_original = off# If turned on, Cuckoo will delete the copy of the original file in the
# local binaries repository after the analysis has finished. (On *nix this
# will also invalidate the file called "binary" in each analysis directory,
# as this is a symlink.)
delete_bin_copy = off# Specify the name of the machinery module to use, this module will
# define the interaction between Cuckoo and your virtualization software
# of choice.
machinery = avd# Enable creation of memory dump of the analysis machine before shutting
# down. Even if turned off, this functionality can also be enabled at
# submission. Currently available for: VirtualBox and libvirt modules (KVM).
memory_dump = off# When the timeout of an analysis is hit, the VM is just killed by default.
# For some long-running setups it might be interesting to terminate the
# moinitored processes before killing the VM so that connections are closed.
terminate_processes = off# Enable automatically re-schedule of "broken" tasks each startup.
# Each task found in status "processing" is re-queued for analysis.
reschedule = off# Enable processing of results within the main cuckoo process.
# This is the default behavior but can be switched off for setups that
# require high stability and process the results in a separate task.
process_results = on# Limit the amount of analysis jobs a Cuckoo process goes through.
# This can be used together with a watchdog to mitigate risk of memory leaks.
max_analysis_count = 0# Limit the number of concurrently executing analysis machines.
# This may be useful on systems with limited resources.
# Set to 0 to disable any limits.
max_machines_count = 0# Minimum amount of free space (in MB) available before starting a new task.
# This tries to avoid failing an analysis because the reports can't be written
# due out-of-diskspace errors. Setting this value to 0 disables the check.
# (Note: this feature is currently not supported under Windows.)
freespace = 64# Temporary directory containing the files uploaded through Cuckoo interfaces
# (web.py, api.py, Django web interface).
tmppath = /tmp[resultserver]
# The Result Server is used to receive in real time the behavioral logs
# produced by the analyzer.
# Specify the IP address of the host. The analysis machines should be able
# to contact the host through such address, so make sure it's valid.
# NOTE: if you set resultserver IP to 0.0.0.0 you have to set the option
# `resultserver_ip` for all your virtual machines in machinery configuration.
ip = 127.0.0.1# Specify a port number to bind the result server on.
port = 2042# Should the server write the legacy CSV format?
# (if you have any custom processing on those, switch this on)
store_csvs = off# Maximum size of uploaded files from VM (screenshots, dropped files, log)
# The value is expressed in bytes, by default 10Mb.
upload_max_size = 10485760
[processing]
# Set the maximum size of analyses generated files to process. This is used
# to avoid the processing of big files which may take a lot of processing
# time. The value is expressed in bytes, by default 100Mb.
analysis_size_limit = 104857600# Enable or disable DNS lookups.
resolve_dns = on# Enable PCAP sorting, needed for the connection content view in the web interface.
sort_pcap = on[database]
# Specify the database connection string.
# Examples, see documentation for more:
# sqlite:///foo.db
# postgresql://foo:bar@localhost:5432/mydatabase
# mysql://foo:bar@localhost/mydatabase
# If empty, default is a SQLite in db/cuckoo.db.
connection =# Database connection timeout in seconds.
# If empty, default is set to 60 seconds.
timeout =[timeouts]
# Set the default analysis timeout expressed in seconds. This value will be
# used to define after how many seconds the analysis will terminate unless
# otherwise specified at submission.
default = 120# Set the critical timeout expressed in seconds. After this timeout is hit
# Cuckoo will consider the analysis failed and it will shutdown the machine
# no matter what. When this happens the analysis results will most likely
# be lost. Make sure to have a critical timeout greater than the
# default timeout.
critical = 600# Maximum time to wait for virtual machine status change. For example when
# shutting down a vm. Default is 300 seconds.
vm_state = 300
auxiliary.conf
[sniffer]
# Enable or disable the use of an external sniffer (tcpdump) [yes/no].
enabled = no# Specify the path to your local installation of tcpdump. Make sure this
# path is correct.
tcpdump = /usr/sbin/tcpdump# Specify the network interface name on which tcpdump should monitor the
# traffic. Make sure the interface is active.
interface = vboxnet0# Specify a Berkeley packet filter to pass to tcpdump.
# bpf = not arp
avd.conf
[avd]
#Path to the local installation of the android emulator
emulator_path = /home/zt/Android/Sdk/emulator/emulator#Path to the local installation of the adb - android debug bridge utility.
adb_path = /home/zt/Android/Sdk/platform-tools/adb#Path to the emulator machine files is located
avd_path = /home/zt/.android/avd#name of the reference machine that is used to duplicate
reference_machine = aosx# Specify a comma-separated list of available machines to be used. For each
# specified ID you have to define a dedicated section containing the details
# on the respective machine. (E.g. aosx_1,aosx_2,aosx_3)
#currently supports only 1 machine for network limitations
machines =aosx_1[aosx_1]
# Specify the label name of the current machine as specified in your
# aosx_1 configuration.
label = aosx_1# Specify the operating system platform used by current machine
platform = android# Specify the IP address of the current virtual machine. Make sure that the
# IP address is valid and that the host machine is able to reach it. If not,
# the analysis will fail.
# its always 127.0.0.1 because android emulator networking configurations this the loopback of the host machine
ip = 127.0.0.1#Specify the port for the emulator as your adb sees it.
emulator_port=5554# (Optional) Specify the IP of the Result Server, as your virtual machine sees it.
# The Result Server will always bind to the address and port specified in cuckoo.conf,
# however you could set up your virtual network to use NAT/PAT, so you can specify here
# the IP address for the Result Server as your machine sees it. If you don't specify an
# address here, the machine will use the default value from cuckoo.conf.
# NOTE: if you set this option you have to set result server IP to 0.0.0.0 in cuckoo.conf.
# Example:
resultserver_ip = 10.0.2.2# (Optional) Specify the port for the Result Server, as your virtual machine sees it.
# The Result Server will always bind to the address and port specified in cuckoo.conf,
# however you could set up your virtual network to use NAT/PAT, so you can specify here
# the port for the Result Server as your machine sees it. If you don't specify a port
# here, the machine will use the default value from cuckoo.conf.
# Example:
resultserver_port = 2042
reporting.conf
[jsondump]
enabled = yes
indent = 4
encoding = latin-1[reporthtml]
enabled = no[mmdef]
enabled = no[maec40]
enabled = no
mode = overview
processtree = true
output_handles = false
static = true
strings = true
virustotal = true[mongodb]
enabled = no
host = 127.0.0.1
port = 27017
db = cuckoo
store_memdump = yes[reportandroidhtml]
enabled = yes
processing.conf
[analysisinfo]
enabled = yes[behavior]
enabled = yes[debug]
enabled = yes[dropped]
enabled = yes[memory]
enabled = no[network]
enabled = yes[procmemory]
enabled = yes[static]
enabled = yes[strings]
enabled = yes[targetinfo]
enabled = yes[virustotal]
enabled = yes
timeout = 60
# Add your VirusTotal API key here. The default API key, kindly provided
# by the VirusTotal team, should enable you with a sufficient throughput
# and while being shared with all our users, it shouldn't affect your use.
key =这里是要自己去virustotal.com注册得到 用原始的key 反正我是连不通的
[apkinfo]
enabled = yes
#Decompiling dex with androguard in a heavy operation and for a big dex's
#he can really consume performance from the cuckoo host ,so it's recommended to limit the size of dex that you will decompile
#decompilation_threshold=2000000[droidmon]
enabled = yes[googleplay]
enabled = no
android_id =
google_login =
google_password =
六、填坑阶段
这里的cuckoodroid 是有文件缺失的 下载androidguard-1.9版本 将解压后的
将解压后的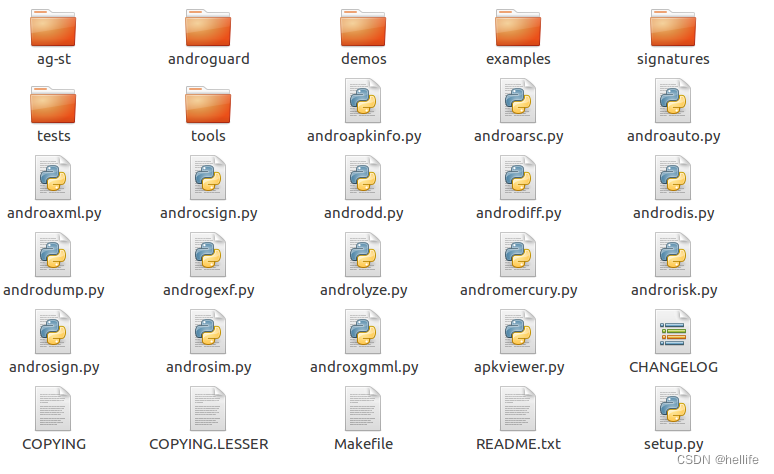
androguard文件拖入到cuckoo文件夹中
还需要以下的包
dpkt
python-pil
androguard
requests
下载 进行安装
进行安装
./analyzer / android / lib / api / adb.py中的

将原来的proc变成下面的proc
proc=subprocess.Popen("/system/bin/am start -n"+package+"/"+activity,stdout=subprocess.PIPE,stderr=subprocess.PIPE,shell=True,executable="/system/bin/sh")
modules / machinery / avd.py
增加一行 -writable-system

lib / cuckoo / core / guest.py
platform="android"
这里是windows也能运行 具体原因不知
droidmon面向CuckooDroid的Dalvik監控框架_yunshouhu的博客-CSDN博客
这个操作需要做一下


 5291
5291


 被折叠的 条评论
为什么被折叠?
被折叠的 条评论
为什么被折叠?
 到【灌水乐园】发言


